Table of Contents
Advertisement
Quick Links
Advertisement
Table of Contents

Related Manuals for finder 1C Series


Summary of Contents for finder 1C Series
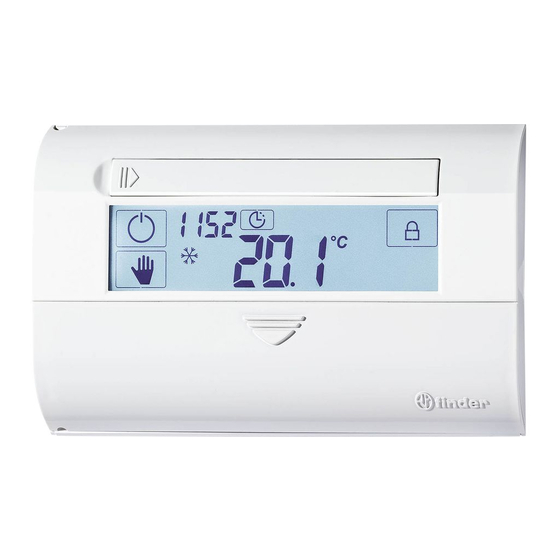
- Page 1 1C.61 SLIDER CHRONOTHERMOSTAT...
-
Page 2: Table Of Contents
INDEX TECHNICAL DATA page 34 DIMENSIONS page 34 INSTALLATION AND CONNECTIONS page 36 BATTERY page 38 START UP page 39 KEYS page 40 SYMBOLS page 41 TIME / DATE SETTING page 42 MANUAL MODE page 44 DISPLAY LOCK page 44 FULL THERMOSTAT LOCK (with PIN) page 45 PROGRAMMING TEMPERATURE WITH SLIDERS... -
Page 3: Technical Data
TECHNICAL DATA 2 Alkaline batteries 1.5 V AAA Power supply: (+6…+24)°C Winter temperature range: (+18…+30)°C Summer temperature range: Manual temperature range: (+5…+37)°C Frost protection temperature range: (+2…+8)°C ON/OFF hysteresis: (0.1…0.9)°C +/– 0.5°C Internal sensor accuracy: 1 hour (15 min with delayed startup Minimum programming interval: activated) Degree protection:... -
Page 5: Installation And Connections
INSTALLATION AND CONNECTIONS SAFETY REQUIREMENTS Before connecting to this programmable thermostat, make sure that the load (heater, pump, etc.) is not connected to the supply and that the load is within the ratings shown inside the thermostat. POSITIONING Install the programmable thermostat away from sources of heat (heaters, direct sunlight, kitchens) and from doors/windows, and at a height of about 1.5 m above the floor. - Page 6 fig.1 fig.2...
-
Page 7: Battery
BATTERY To insert or change the batteries, see the picture below. ATTENTION - Incorrect placement of the batteries (reverse polarity) may damage the thermostat. - To increase battery life, always keep the slider cover of the thermostat closed. - If the battery charge falls below the minimum level, the thermostat is placed in the OFF state and the output relay releases. -
Page 8: Start Up
START UP Insert the batteries, the display will show the software version. And, after a few seconds, the thermostat will automatically turn on, showing the main screen: SWITCH ON / OFF TIME TIME / DATE SETTING MANUAL TEMPERATURE LOCK WINTER MODE... -
Page 9: Keys
KEYS WITH THERMOSTAT OFF Switch on the thermostat Pressed for 3 seconds, it is possible to access at the advanced menu WITH THERMOSTAT ON Switch off the thermostat Activates the MANUAL mode. Pressed for 3 seconds it is possible to program the TIMED MANUAL mode (HOLIDAY function) Allows the time and date to be set Activates or de-activates the LOCK mode... -
Page 10: Symbols
SYMBOLS The display is back-lit. Each time that the display is touched, a key pressed, the protective door opened or the sliders moved, the display will activate the backlight for about 5 seconds. The symbols showed on the display are: Summer setting (cooling) Winter setting (heating) Heating ON... -
Page 11: Time / Date Setting
TIME / DATE SETTING To set time and date press the button Data to be set appears in the following order: HOURS/MINUTES/DAY/MONTH/YEAR Figures that are flashing, can be changed using the keys Confirm with and advance to the next parameter. To go back or exit from the menu, press EXAMPLE Press... - Page 12 Press confirm the day and proceed to set the MONTH Press to confirm the month and proceed to set the YEAR Press to confirm and exit the Time/Date setting menu. The display will then show the main screen.
-
Page 13: Manual Mode
MANUAL MODE From the main screen press the manual temperature previously set will flash. To change it, use to increase or to decrease the value. To confirm and exit, press NOTE If you do not touch the display for 3 seconds, the screen will revert to the measured (current) temperature. -
Page 14: Full Thermostat Lock (With Pin)
FULL THERMOSTAT LOCK (with PIN) This advanced feature, serves to completely block the thermostat (both the display and sliders). To enable it, you must set a 3-digit PIN that will be required every time you want to lock or unlock the thermostat. To set and register the PIN: - Turn off the thermostat with the key - Press... - Page 15 With the keys enter the PIN previously set in the advanced settings and press 3 beeps will confirm that the lock is active and the display will show the following screen The temperatures set by the position of the sliders before the block, will be stored.
-
Page 16: Programming Temperature With Sliders
PROGRAMMING TEMPERATURE WITH SLIDERS On the chronothermostat there are 24 sliders, each one identifies a one hour time segment in the day. Each slider can adjust the temperature from 6°C to 24°C in the WINTER mode and from 18°C to 30°C in the SUMMER mode. 9 10 11 12 13 14 15 16 17 18 19 20 21 22 23 For every movement of the slider, the display will show for a few seconds, the hour in the day and the temperature being set, related to that slider. -
Page 17: Delayed Start To Time Segments
DELAYED START TO TIME SEGMENTS This feature allows you to delay the start of any of the 24 time “segments” by 15, 30 or 45 minutes. This has the effect of being able to time the start of a temperature change to the nearest 15 minutes, rather than 60 minutes. - Page 18 After a few seconds, the value will be stored and the display will return to show the main screen. NOTE When the delay program is running and the segment time is reached, the display will show the set delay i.e. +15, +30, +45.
-
Page 19: Timed Manual (Holiday Function)
TIMED MANUAL (HOLIDAY FUNCTION) This function serves to maintain a specified temperature for a specific time, set by the user. After the timeout, the device will return to normal conditions of use, showing the main screen again. Starting from the main display press for 2 seconds. - Page 20 and the year Confirming with it is then possible to set the desired temperature, using the keys Confirm the temperature with , and the thermostat starts the function (as indicated on the right side, by a sequence of hands which run from top to bottom).
-
Page 21: Advanced Settings
ADVANCED SETTINGS The advanced settings are useful for customizing the thermostat. The settings are: SUMMER-WINTER mode FROST PROTECTION Function ON/OFF HYSTERESIS Function ANTI-SEIZE PUMP Function DAYLIGHT SAVING Function FULL THERMOSTAT LOCK mode (with PIN) DAY Mode DELAYED SEGMENT START EXTERNAL TEMPERATURE SENSOR RESET To enter advanced settings start from the main screen, press to turn off... - Page 22 FROST PROTECTION function After setting the Summer or Winter mode, pressing the display will show the following screen. With the keys it is possible to set the desired value, between 2°C and 8°C. Press to confirm and proceed to the next menu. To exit, press the key for 3 seconds or press repeatedly until the...
- Page 23 The anti-seize pump function is a function that will configure the thermostat as an asymmetrical timer. By setting a value between 1 and 999 HOURS, the thermostat will close the output contact for 30 seconds, every time the set time value has elapsed. Example: By setting with keys the value 120 (120 hours = 5 days) and confirming...
- Page 24 Using to set the value to 2 enables the choice of either Monday or Sunday to be day “1”. (The choice itself will be made after exiting the Advanced Settings menu). Press to confirm. It is now necessary to exit the Advanced setting menu and proceed to make the choice for day “1”, as follows.
- Page 25 Use keys to set a personal PIN selecting a number between 001 and 999. Confirm the PIN number with , and advancing to the next stage of the menu. Now, everytime you wish to lock the thermostat, it will be necessary press the on the main screen.
- Page 26 Leaving the advanced settings (Press for 3 seconds then press the main screen will show the key. Pressing the key will activate the DAY function and the display shows the modes pre-programmed for each day of the week. NOTE When the function is activated “day” flashes and to the right is shown the bar of the week, with the mode set for each day (OFF, Automatic, Manual).
- Page 27 NOTE If mode OFF ( ) is set, you can reactivate the thermostat and gain access to the full main screen by pressing If the mode AUTO ( ) is operative, it is possible to change the temperature by the sliders. If mode MANUAL ( ) is operative, it is possible to change the temperature by pressing and using the keys...
- Page 28 EXTERNAL TEMPERATURE SENSOR By connecting an external sensor (01C.61 not supplied) between terminals A and B (see page 62), the thermostat can display, or be controlled by, the external temperature - according to the option selected. Using keys select the required option. : with this setting the external sensor has no effect.
- Page 29 RESET This will restore all factory settings. Using , you can enable the RESET function by selecting the ON state. Confirming with the thermostat will turn off completely and then turn back on showing first the version of the software and then the main screen.
-
Page 30: Remote Control
REMOTE CONTROL The thermostat is equipped with two input terminals, A and B, dedicated to remote control (see page 37, figure 2). You can connect a contact to force the thermostat into the AUTO-ON condition. The display will show the message It is possible to program two modes of operation: 1) With the LOCK mode enabled without PIN (PIN = 000), it will be possible to adjust the temperature of the thermostat with the sliders. -
Page 31: Calibration
CALIBRATION The thermostat comes pre-calibrated from the factory. If it is required to recalibrate, precede as follows. In the main display press the key for 6 seconds. The following screen appears Using keys to set the desired value and then press key to exit calibration. - Page 32 IB1C61002 - 07/19 Finder S.p.A. con unico socio - 10040 ALMESE (TO) - ITALY...
Need help?
Do you have a question about the 1C Series and is the answer not in the manual?
Questions and answers