
Related Manuals for Parker Compumotor TQ10


Summary of Contents for Parker Compumotor TQ10
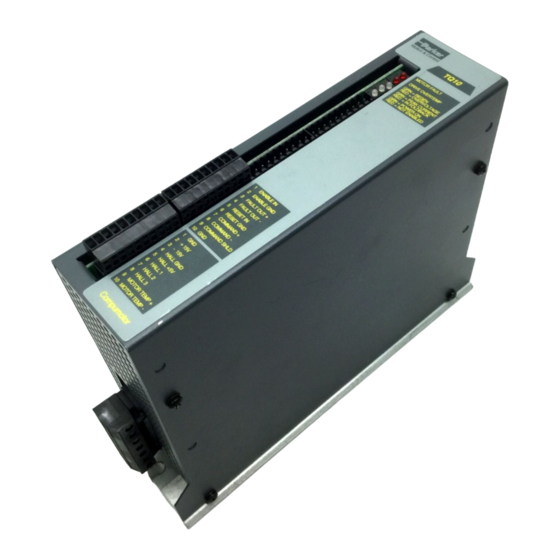
- Page 1 (217) 352-9330 | Click HERE Find the Parker / Compumotor TQ10X at our website:...
- Page 2 N IT T IO D IR A IN D -G A IN I- G T IO D IR Compumotor Division Parker Hannifin Corporation p/n 88-015115-02 A October 1997 Artisan Technology Group - Quality Instrumentation ... Guaranteed | (888) 88-SOURCE | www.artisantg.com...
- Page 3 The information in this User Guide, including any apparatus, methods, techniques, and concepts described herein, are the proprietary property of Parker Compumotor or its licensors, and may not be copied, disclosed, or used for any purpose not expressly authorized by the owner thereof.
- Page 4 This allows improved current-loop performance with a wider range of motor electrical pole frequencies, including all Parker Neometric 70mm and some of the 92mm motors. If the new switch, SW3-3 is placed in the OFF (up) position, settings are backward-compatible with earlier product.
- Page 5 Compumotor NeoMetric Series Motors Added (pages 44-45) Addition – Specifications, speed/torque curves, and dimensions for three new Compumotor NeoMetric Series motors have been added to this User Guide. Speed/Torque Curves Revised for SM Motors (pages 46-47) Change – The speed/torque curves for Compumotor SM Series motors have been redrawn. The new curves show the peak torque that will be produced from the revised peak current (discussed in the paragraph above).
- Page 6 Product Type: TQ10 and TQ10SD Servo Drives The above products are in compliance with the requirements of directives • 72/23/EEC Low Voltage Directive • 93/68/EEC CE Marking Directive TQ10 Drives, when installed according to the procedures in the main body of this User Guide, may not necessarily comply with the Low Voltage Directive (LVD) of the European Community.
- Page 7 TQ10 User Guide Artisan Technology Group - Quality Instrumentation ... Guaranteed | (888) 88-SOURCE | www.artisantg.com...
-
Page 8: Table Of Contents
Table of Contents Chapter One—Introduction ................1 TQ10 Torque Drive – Description & Block Diagram ................2 TQ10 Step & Direction Drive – Description & Block Diagram ............. 3 Compumotor SM and NeoMetric Series Brushless Servo Motors ............4 Chapter Two—Installation ................5 What You Should Have (ship kit) ...................... - Page 9 Chapter Three ....................41 Specifications ..............................41 Drive Specifications – TQ10 & TQ10SD ................... 42 Motor Specifications—Compumotor SM Series Servo Motors ............43 Motor Specifications—Compumotor NeoMetric Series Servo Motors (70mm) ........44 Motor Specifications—Compumotor NeoMetric Series Servo Motors (92mm) ........45 Speed/Torque Curves ......................... 46, 47 Motor Dimensions—Compumotor SM Series, Size 16 ..............48 Motor Dimensions—Compumotor SM Series, Size 23 ..............48 Motor Dimensions—Compumotor NeoMetric Series, Size 70 ............49...
-
Page 10: Chapter One-Introduction
C H A P T E R O N E Introduction IN THIS CHAPTER • TQ10 Torque Drive – Description & Block Diagram • TQ10SD Step & Direction Drive – Description & Block Diagram ➀ Introduction Artisan Technology Group - Quality Instrumentation ... Guaranteed | (888) 88-SOURCE | www.artisantg.com... -
Page 11: Tq10 Torque Drive - Description & Block Diagram
Introduction This User Guide describes two products. – Accepts a ±10V analog command input signal from a controller, • TQ10 Torque Servo Drive and produces a corresponding amount of motor current. • TQ10SD Step & Direction Servo Drive – Accepts step and direction signals from industry standard indexers, and produces a corresponding amount of motor rotation. -
Page 12: Tq10 Step & Direction Drive - Description & Block Diagram
TQ10 Step & Direction Drive – Description & Block Diagram The TQ10SD Step & Direction Drive is a servo drive designed to run three phase brushless DC servo motors equipped with Hall effect sensors. It can also operate brushed DC servo motors. -
Page 13: Compumotor Sm And Neometric Series Brushless Servo Motors
Cooling Options The drive has a heatplate design. If you mount the drive to a surface that provides sufficient heatsinking capabilities, you may not need a separate heatsink. An external heatsink/fan unit is available from Compumotor as an option. The drive is open on the top and bottom. You can purchase optional covers from Compumotor. -
Page 14: Chapter Two-Installation
C H A P T E R T W O Installation IN THIS CHAPTER • Product Ship Kit List • Installation Procedure • Tuning ➁ Installation Artisan Technology Group - Quality Instrumentation ... Guaranteed | (888) 88-SOURCE | www.artisantg.com... -
Page 15: What You Should Have (Ship Kit)
What You Should Have (ship kit) If you ordered a TQ10 or TQ10SD, you should have Part Part Number TQ10 Drive TQ10 or TQ10SD includes 10-pin plug (two with TQ10, four with TQ10SD) 43-013891-01 includes 7-pin plug (one included) 43-013575-01 Power Cable –... -
Page 16: Installation Overview
Installation Overview The order of topics in the installation procedure is: • Quick Test • Connecting a Controller • DIP Switch Configuration • Connecting AC Power • Drive Mounting & Heatsinking • Testing the System Installation • Motor Mounting • Connecting the Motor to the Load •... -
Page 17: Quick Test
Quick Test The following installation procedure leads you through steps to permanently install your drive. However, if you wish to familiarize yourself with the drive before you install it, you can perform a bench top quick test. To do so, complete the following sections, in the order given below: Set configuration DIP switches (on top of drive). - Page 18 TQ10 DIP SWITCH SETTINGS SW 1 SW 2 1 2 3 4 5 6 1 2 3 4 5 6 Shown Configured for SM161A Motor* LOOP GAIN PEAK CURRENT setting number (amps) Less Gain (use with lower inductance motors) More Gain (use with higher inductance motors) 10.0...
-
Page 19: Set Dip Switches (Bottom Of Drive)
Foldback Threshold DIP switch SW2-2 sets the current threshold for the foldback circuit. This switch should be ON (low threshold) for “A” winding SM motors. It should be OFF (high threshold) for “B” winding motors, NeoMetric (70mm and 92mm) motors, and for most motors with continuous current ratings above 4 amps. - Page 20 Set it to control the drive’s motor pole compensation, based upon your motor’s electrical time constant. The following table shows switch settings for Compumotor SM and NeoMetric Series servo motors. TQ10 DIP SWITCH #3* *Located on Bottom of Drive 1 2 3 MOTOR POLE COMPENSATION SM161A, SM162A Reserved...
-
Page 21: Mount The Drive
3. Mount the Drive TQ10 and TQ10SD drives have “open frame” enclosures—sheet metal encloses the front and sides, but the top and bottom are open. TQ10-EHS and TQ10SD-EHS drives have top and bottom covers, and an attached heatsink and fan. You can also purchase the heatsink or covers separately, and install them on your TQ10 or TQ10SD drive. - Page 22 Environmental Considerations Temperature Specifications Maximum Ambient Temperature: 50°C (122°F) Minimum Ambient Temperature: 0°C (32°F) Maximum Temperature of Mounting Surface: 45°C (113°F) (for non -EHS version) Humidity Keep the relative humidity below 95%, non-condensing. Liquids Do not allow liquids or fluids to come into contact with the TQ10 Drive or its cables.
- Page 23 Panel Layout High power applications may require a heatsink. A heatsink/fan unit for the TQ10 drive is available from Compumotor (part number TQ-HS3). If you purchased a TQ10-EHS or TQ10SD-EHS Drive, the heatsink/fan unit was installed at the factory. The next drawing shows minimum spacing and clearance requirements you should follow when you mount TQ10 Drives.
- Page 24 Attaching Heatsink/Fan Unit and Enclosure Covers The next drawing shows how to attach Compumotor’s optional TQ-HS3 Heatsink/Fan Unit to your TQ10 Drive. TQ-HS3 TQ-ENCL Heatsink/Fan Unit Enclosure Covers Thermally Conductive Strip TQ-ENCL Enclosure Covers Heatsink/Fan Unit and Covers – Attaching to Drive Perforated sheet metal covers that enclose the top and bottom of the drive are available from Compumotor (part number TQ-ENCL).
- Page 25 The heatsink/fan unit has a cable with connector attached. Plug the connector into the TQ10’s fan power connector, shown below. Connector provides power for fan Fan Power Connector Mounting Options with Heatsink/Fan Unit If your drive has a TQ-HS3 Heatsink/Fan Unit attached, you have several options for mounting the drive, as the next drawing shows.
-
Page 26: Mount The Motor
4. Mount the Motor The following guidelines present important points about motor mounting and its effect on performance. For mechanical drawings of SM and NeoMetric Series servo motors, see Chapter 3— Specifications. WARNING Improper motor mounting can limit system performance and jeopardize safety of personnel. Servo motors should be mounted by bolting the motor’s face flange to a suitable support. -
Page 27: Connect The Motor To The Drive
5. Connect the Motor to the Drive The TQ10 Drive works with three-phase brushless motors equipped with Hall effect sensors. The typical motor has a permanent-magnet rotor with four poles (two pole pairs). Higher pole-count motors may also be used. In the following installation procedure, we assume you are using a Compumotor SM or NeoMetric Series Motor with your TQ10 Drive. - Page 28 This circuit may not protect the motor in every possible application. It works best in cases where the temperature rise occurs slowly over a long period of time. In this situation, the thermal sensor and motor windings will be at the same temperature. When the sensor and windings reach the sensor’s threshold temperature, the sensor can trigger the overtempera- ture circuit.
- Page 29 Connecting Compumotor SM or NeoMetric Series Motors To connect a Compumotor SM or NeoMetric Series servo motor to the TQ10, follow the color code shown in the next drawing. "Thin" Wires (Hall 1, 2, 3, +5V, Gnd): 24 AWG (0.25 mm 2 ) Encoder Hall Gnd White/Green...
- Page 30 The next drawing shows the internal regeneration resistor, terminals for an external regeneration resistor, and the DC power bus. AC Input Motor TQ10 Connector Internal Connections Connector V Bus + Line Internal External Regen Regeneration Resistor Resistor 170VDC 100Ω, 20W (100Ω...
- Page 31 Optional – Sharing the Power Bus In some applications with multiple drives, one or more drives may continuously receive regenerated power from their loads. For example, in a tensioning application, two TQ10s apply tension (opposite torques) to a single moving load. In this situation, one TQ10 could receive substantial regenerated power from its motor.
-
Page 32: Connect A Controller Or Indexer (Tq10 And Tq10Sd)
Under these conditions ( connected to ground; unconnected), HALL 1 HALL 2 HALL 3 the drive’s internal logic determines that a brushed motor is connected. The drive will send DC current out of Phase A, through the motor, and back into the drive through Phase C. The amount and polarity of the current will be determined by the command input signal. - Page 33 The TQ10 Torque drive and the TQ10SD Step & Direction drive have ENABLE IN terminals on their front panels. Connect your controller to these terminals on FAULT OUT the TQ10 Torque drive; or, connect your indexer to these terminals on the TQ10SD Step & Direction drive.
- Page 34 Fault Output (Optional) When the TQ10 is operating normally, its fault output’s internal transistor is in the “on” state, and conducts current. If the TQ10 detects a fault, it turns off the transistor, and current stops flowing. TQ10 Internal Connections 681Ω...
-
Page 35: Tq10 Torque Drive Only - Connect Command & Reset Inputs
6B. TQ10 Torque Drive Only – Connect Command & Reset Inputs The TQ10 Torque Drive monitors an analog voltage signal, called command input, at its input terminals ( ). It sends an output current to the motor that COMMAND+ COMMAND- is proportional to the command input voltage. - Page 36 Controller with Differential Output If your controller has a differential output, then it has two command signals. One is a signal that ranges from -5VDC to +5VDC. The other signal ranges from +5VDC to -5VDC. The two signals mirror each other—their magnitudes are equal, but they have opposite signs. Your controller should also have a ground terminal to use as a reference for the positive and negative command outputs.
-
Page 37: Tq10Sd Only - Connect Inputs & Outputs
Reset Input (Optional) You can use the reset input to reset the drive. The effect of a reset is identical to cycling power. The reset input is internally pulled up to +5V. If your equipment requires, you can connect the input to an external voltage as high as +24V. You can also connect it to a dry contact closure to ground. - Page 38 Specifications for the step and direction inputs are as follows: Step+/Step– Specifications Dir+/Dir– Applied Voltage 5 V maximum Input Current 12 mA maximum 6.3 mA minimum Step Pulse 500 nsec minimum pulse width Setup Time Direction input may change polarity coincident with the last step pulse.
- Page 39 Shutdown Input (Optional) Use the shutdown input if you need to temporarily disable the drive during normal operations. You may wish to do this, for example, to manually move the load to a desired position. Make connections according to the following diagram. The inputs are designed for 5V operation.
- Page 40 Number of Revolutions Position Error Settings 500 Line 1000 Line CPE1 CPE2 Error* Encoder Encoder 2047 1.024 0.512 high 4095 2.048 1.024 high 8191 4.096 2.048 high high 16383 (default) 8.196 4.096 high = not connected low = connected to ground *error is measured in post-quadrature encoder counts When the TQ10SD ships from the factory, neither is connected to ground.
-
Page 41: Connect Ac Power
Derivative Gain Reduction—Input (Optional) This input, labeled , can reduce the derivative gain in the TQ10SD’s internal D-GAIN RED feedback loop. If no connections are made to the input, the gain does not change. If the input is connected to ground, the drive gradually reduces derivative gain to a low value whenever motion stops. -
Page 42: Test Your System
WARNING The motor case and drive are grounded through the AC power connector ground pin. You must provide a proper AC power ground for safety purposes. Peak Power Ratings The amount of power the TQ10 draws from your AC power source depends upon the motor you use and upon your specific application. - Page 43 Misalignment & Couplers Align the motor shaft and load as accurately as possible. In most applications, some misalignment is unavoidable, due to tolerance variations in components. However, exces- sive misalignment may degrade your system’s performance. The three misalignment conditions, which can exist in any combination, are illustrated and described below. Aligned Angular Misalignment End Float...
-
Page 44: Tuning - Tq10 Torque Drive
Resonance Issues A coupler that is too flexible may cause a motor to overshoot its commanded position. When the encoder sends a position feedback signal, the controller will command a correction move in the opposite direction. If the resonant frequency of the system is too low (too flexible), the motor may overshoot again and again. -
Page 45: Tuning - Tq10Sd Step & Direction Drive
Tuning Procedure with SM and NeoMetric Motors: ➀ Heatsink Your Motor: This is especially important in temporary “bench top” procedures. SM and NeoMetric Motors dissipate excess heat through their faceplate; to ensure proper motor cooling, the faceplate must be mounted to a heatsink. ➁... - Page 46 Integral Gain Proportional Integral Disable Gain Adjust Gain Adjust (6 I-GAIN OFF) Torque Command Σ Error Loop Gain (fixed) Signal from DAC Derivative Gain Reduction Gain Control Circuit Derivative Reduction Gain Adjust (5 D-GAIN RED) PID Control Loop – Block Diagram You can adjust three potentiometers to tune the PID loop.
- Page 47 Integral Gain Integral gain provides a torque that is directly proportional to the sum, over time, of the error signal—the integral of the error. If the error persists, integral gain provides a restoring force that grows larger with time. Integral gain can remove steady state errors that are due to gravity or a constant static torque.
- Page 48 CAUTION For initial tuning with an SM or NeoMetric motor, set peak current DIP switches at twice the motor’s continuous rated current, or less. Otherwise, high peak currents during instabil- ity may cause motor overheating and damage. To avoid damage, we recommend a tuning procedure that may differ from methods you have used before.
- Page 49 Tuning the System You will test your system’s response as you vary the tuning gains in the procedure below. Because you will start with reduced peak current, the motor may not be able to make the move called for in your application. The best way to test the system’s response under this reduced current condition is to command a short test move, and observe the results.
-
Page 50: Chapter Three
C H A P T E R T H R E E Specifications IN THIS CHAPTER • Drive Specifications • SM and NeoMetric Motor Specifications • SM and NeoMetric Motor Speed/Torque Curves • SM and NeoMetric Motor Dimensions • SM and NeoMetric Encoder Specifications •... -
Page 51: Drive Specifications - Tq10 & Tq10Sd
Drive Specifications – TQ10 & TQ10SD Parameter Value Performance ±2 arc minute, encoder dependent Accuracy Resolution 2000 or 4000 post-quadrature counts Drive Input Power Voltage 95–132 VAC Frequency 50/60 Hz Recommended Service 20 Amp RMS dedicated Drive Output Power Voltage 170VDC Switching Frequency 20 kHz... -
Page 52: Motor Specifications-Compumotor Sm Series Servo Motors
Motor Specifications—Compumotor SM Series Servo Motors Symbol Units SM161A SM162A SM231A SM232A SM232B SM233A SM233B Continuous Stall Torque oz-in 0.17 0.31 0.32 0.65 0.65 0.99 0.99 Continuous Stall Current amps-rms ω Rated Speed 7,500 7,500 7,500 4,500 7,500 2,800 7,500 Peak Torque oz-in 0.51... -
Page 53: Motor Specifications-Compumotor Neometric Series Servo Motors (70Mm)
Motor Specifications— Compumotor NeoMetric Series Servo Motors (70mm) N0701D N0701F N0702E N0702F N0703F N0703G N0704F N0704G Parameter Symbol Units N0341D N0341F N0342E N0342F N0343F N0343G N0343F N0344G Stall Torque Continuous lb-in 10.6 10.6 16.2 16.2 20.0 20.0 0.65 0.65 1.19 1.19 1.83 1.83... -
Page 54: Motor Specifications-Compumotor Neometric Series Servo Motors (92Mm)
Motor Specifications— Compumotor NeoMetric Series Servo Motors (92mm) Parameter Symbol Units N0921F N0921G N0922G Stall Torque Continuous lb-in 1.81 1.81 3.50 Stall Current Continuous amps-rms 4.16 5.76 6.17 ω Rated Speed 2500 3575 1975 41.7 59.6 32.9 Peak Torque lb-in 5.42 5.42 10.51... -
Page 55: Speed/Torque Curves
Speed/Torque Curves Note: Curves are based on 120VAC line, nominal motor K , and K . Actual values may vary ±10%. Line voltage directly limits maximum speed. oz-in oz-in TQ10 with SM161A TQ10 with SM162A (N-m) (N-m) (1.03) (2.47) (0.88) (2.12) (0.71) (1.77) - Page 56 Speed/Torque Curves . Actual values may vary ±10%. Line Note: Curves are based on 120VAC line, nominal motor K , and K voltage directly limits maximum speed. TQ10 with lb-in N0701D, N0341D (N-m) (2.24) (1.68) (1.12) (.560) 1000 2000 3000 4000 5000 6000 7000 8000 (17) (33) (50)
-
Page 57: Motor Dimensions-Compumotor Sm Series, Size 16
Motor Dimensions—Compumotor SM Series, Size 16 Cable Option Flying Leads 0.98 (24.89) 0.2500 + - 0.0000 0.0005 0.92 (23.37) (6.35 + - 0.0000) 0.0127) Ø0.788 0.001 (20.02 0.025) 0.37 (9.4) 1.30 Motor Length (33.02) Sq. (4x) Ø.125 thru holes equally spaced 1.60 on a Ø1.838 bolt circle (40.64) Sq. -
Page 58: Motor Dimensions-Compumotor Neometric Series, Size 70
Motor Dimensions—Compumotor NeoMetric Series, Size 70 Brake Option -B MS Connectors Cable Flying Leads Shaft Options -MS, -TQ -10, -25 0.197 Ø0.43 (11) 0.409 (10.4) - N (None) - F (Flat) 0.500 Feedback Conn 2.05 Motor Conn (12.7) MS 14 - 18 0.158 (52.1) MS 14 - 12... -
Page 59: Motor Dimensions-Compumotor Neometric Series, Size 92
Motor Dimensions—Compumotor NeoMetric Series, Size 92 Brake Option -B MS Connectors Shaft Options -MS, -TQ 0.25 (6.4) Ø0.5512 (14) 0.521 (13.23) - N (None) - F (Flat) 0.63 (16) 0.197 Feedback Conn 0.63 Motor Conn 2.350 MS 14 - 18 (16) MS 18 - 5 (59.7) -
Page 60: Motor Part Numbering System-Compumotor Sm Servo Motor
Motor Part Numbering System— Compumotor SM Servo Motor The diagram below illustrates the part numbering system for Compumotor SM Series servo motors. Frame, Magnet Winding Feedback Shafting Options Connections Series Length N – normal N – none F – flat V –... - Page 61 TQ10 User Guide Artisan Technology Group - Quality Instrumentation ... Guaranteed | (888) 88-SOURCE | www.artisantg.com...
-
Page 62: Chapter Four-Troubleshooting
C H A P T E R F O U R Troubleshooting IN THIS CHAPTER • Troubleshooting Basics • Diagnostic LEDs • Non-Drive Related Problems • Protective Circuits • Product Return Procedure Troubleshooting Artisan Technology Group - Quality Instrumentation ... Guaranteed | (888) 88-SOURCE | www.artisantg.com... -
Page 63: Troubleshooting Basics
Troubleshooting Basics When your system does not function properly (or as you expect it to operate), the first thing that you must do is identify and isolate the problem. When you have accomplished this, you can effectively begin to resolve the problem. The first step is to isolate each system component and ensure that each component functions properly when it is run independently. -
Page 64: Non-Drive Related Problems
Non-Drive Related Problems When the drive is powered up, enabled, and operating properly: • POWER ON LED is illuminated green • No LEDs are illuminated red • The fault output is LOW These conditions indicate that the TQ10 is probably not the source of the problem. The next table summarizes other possible sources of problems. -
Page 65: Protective Circuits
Mechanical Problems Check for binds, jams, increased friction, or other problems in the mechanical system. If a system was working properly, but then suddenly develops new problems, check for changes in the mechanical system that could be causing the problems—increased friction, lack of grease, worn bearings, etc. -
Page 66: Overvoltage
Overvoltage The TQ10 Drive monitors the voltage on the motor output terminals. If the voltage rises above a threshold level, the drive will shut down power output to the motor, and will illuminate red the bicolor LED labeled . Excessive regeneration is RED = OVERVOLTAGE the primary cause of an overvoltage fault. - Page 67 The default settings cause the timer to start when the current is approximately twice the motor’s continuous rating (2 times Ics). The thermal switches in Parker servo motors will protect a properly mounted motor in its specified ambient temperature, up to at least twice Ics, at which point foldback takes over.
-
Page 68: Hall Miswiring
Hall Miswiring The drive will produce a motor fault and illuminate the red LED if it MOTOR FAULT detects an improper Hall state on its Hall effect inputs (all HIGH or all LOW), or if no motor is connected to the drive. A damaged Hall sensor can also activate the motor fault protection circuit. -
Page 69: Technical Support
In Europe, call Parker Digiplan for a GRA (Goods Returned Authorization) number. Returned products cannot be accepted without a GRA number. The phone number for Parker Digiplan Repair Department is 0202-690911. The phone number for Parker Digiplan Service/Applica- tions Department is 0202-699000. -
Page 70: Appendix A-Using Non-Compumotor Motors
Α A P P E N D I X Using Non-Compumotor Motors IN THIS APPENDIX • Configuring DIP Switches • Connecting Motor Phase Wires and Hall Effect Wires Appendix A Artisan Technology Group - Quality Instrumentation ... Guaranteed | (888) 88-SOURCE | www.artisantg.com... -
Page 71: Using Motors Other Than Compumotor Sm Or Neometric Series Motors
Using Motors other than Compumotor SM or NeoMetric Series Motors Test all motors carefully. Verify that the motor temperature in your application is within the system limitations. The motor manufacturer’s maximum allowable motor case temperature must not be exceeded. You should test the motor over a 2-to-3 hour period. Motors tend to have a long thermal time constant, but can still overheat, which results in motor damage. -
Page 72: Connecting Motor Phase Wires And Hall Effect Wires
If you are unsure of which settings to use for your motor, start with the setting shown above for the OEM3401 motor. If the motor gets hot when it is stopped, reduce the loop gain setting (DIP SW2 — #4, #5, #6). The DIP switch settings shown above will enable foldback—after approximately three seconds at full current, the drive will fault due to foldback. - Page 73 ➄ If the motor does not turn, exchange two of the phase wires. The motor should now turn. Go to Step {, compare the three wiring configurations that make the motor turn, and use the proper one. ‘ If your motor turns in the opposite direction than you want, you can reverse it using one of several methods.
-
Page 74: Appendix B-Lvd Installation Instructions
A P P E N D I X Installation Instructions IN THIS APPENDIX • LVD Installation Instructions Appendix B Artisan Technology Group - Quality Instrumentation ... Guaranteed | (888) 88-SOURCE | www.artisantg.com... -
Page 75: Lvd Installation Instructions
LVD Installation Instructions For more information about LVD, see 73/23/EEC and 93/68/EEC, published by the European Economic Community (EEC). Environmental Conditions Pollution Degree TQ10 Drives are designed for pollution degree 2. Installation Category TQ10 Drives are designed for installation category II. Electrical Connecting and Disconnecting Power Mains The TQ10 Drive’s protective earth connection is provided through its make first/... -
Page 76: Mechanical
Make connections according to the following instructions and diagram: Servo Motor Safety Earth Cable (green/yellow) Providing Protective Earth Connection for Motor ➀ Use a spade lug in combination with a star washer and mounting bolt to make good contact with the bare metal surface of the motor’s mounting flange. ➁... -
Page 77: Thermal Safety
Thermal Safety The Motor May Be Hot The motor may reach high temperatures during normal operations, and may remain hot after power is removed. Table of Graphic Symbols and Warnings The following symbols may appear in this User Guide, and may be affixed to the products discussed in this user guide. -
Page 78: Index
Index Symbols Covers 15 CPE1 and CPE2 30, 31 15VDC Power 27 Cable Current Foldback 57 6250 Controller Connections 23 encoder 23, 29 Current Foldback Ratio 10 800-358-9070 Compumotor Application Hall effect 20 Support 60 motor 20 Clockwise – Definition 26 Derivative Gain 37 Color Code Derivative Gain Reduction 32, 37... - Page 79 Electrical Noise 56 Manual Disable 24 Regeneration 56 Enable Input 24 Maximum Ambient Temperature 13 Regeneration Resistor 20 Enclosure Covers 15 Mechanical Problems 56 Reset Input 28 Encoder Minimum Area Mounting 16 Resistor – Regeneration 20 cable color code 23, 29 Minimum Depth Mounting 16 Resonance Issues 35 input 29...
- Page 80 T Q 1 0 D r i v e DIP Switch Settings for Compumotor SM & NeoMetric Motors* (with foldback enabled) *Switches shown configured for initial tuning, SW 1 SW 2 SW 3 w/peak current approx. twice motor's continous N0701D current rating.
Need help?
Do you have a question about the Compumotor TQ10 and is the answer not in the manual?
Questions and answers