Advertisement
Quick Links
Model:R311W
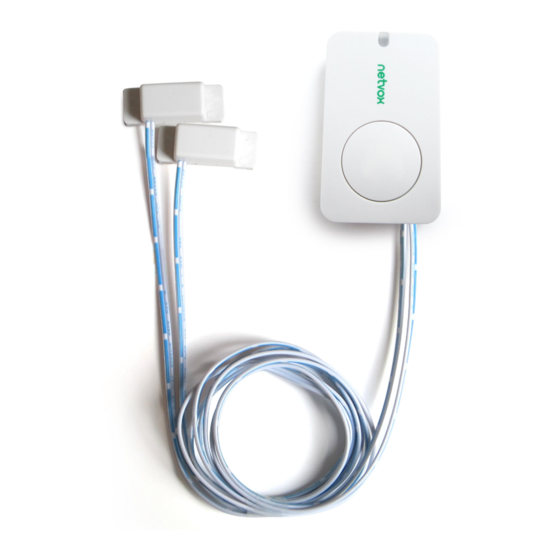
Wireless 2-Gang Water Leak Detector
Wireless 2-Gang Water Leak Detector
R311W
User Manual
Copyright©Netvox Technology Co., Ltd.
This document contains proprietary technical information which is the property of NETVOX Technology. It shall
be maintained in strict confidence and shall not be disclosed to other parties, in whole or in part, without written
permission of NETVOX Technology. The specifications are subject to change without prior notice.
Advertisement

Summary of Contents for netvox R311W
- Page 1 User Manual Copyright©Netvox Technology Co., Ltd. This document contains proprietary technical information which is the property of NETVOX Technology. It shall be maintained in strict confidence and shall not be disclosed to other parties, in whole or in part, without written...
-
Page 2: Table Of Contents
Table of Content 1. Introduction ................................2 2. Appearance ................................3 3. Main Features ................................3 4. Set up Instruction ..............................4 5. Data Report ................................5 6. Installation ................................9 7. Important Maintenance Instruction ........................10... -
Page 3: Introduction
Wireless 2-Gang Water Leak Detector (R311W) is a LoRaWAN device compatible with LoRaWAN protocol (ClassA). When the R311W sensor detects a leak, it will send an alarm message to the gateway. When the sensor detects no leaks, it will send a message that shows no leak to the gateway. -
Page 4: Appearance
2. Appearance Indicator Water Leak Sensor Function Key 3. Main Features Compatible with LoRaWAN 2 sections of 3V CR2450 button battery power supply Detectable voltage and water leak status Simple operation and setting Compatible with LoRaWAN Class A ... -
Page 5: Set Up Instruction
4.Set up Instruction On/Off Insert batteries. (users may need a screwdriver to open); Power on Insert two sections of 3V CR2450 button batteries and close the battery cover.) Turn on Press any function key till green and red indicator flashes once. Turn off (Restore to factory setting) Press and hold both function keys for 5 seconds till green indicator flashes for 20 times. -
Page 6: Data Report
When the R311W status changes, it will send warning report. No water leak:0 Water leak:1 Note: The reported data is decoded by the Netvox LoRaWAN Application Command document and http://loraresolver.netvoxcloud.com:8888/page/index Data report configuration and sending period are as following: Current Change<... - Page 7 MaxTime BatteryChange 0x82 (4Bytes,Fixed ReportRsp (2bytes Unit:s) (2bytes Unit:s) (1byte Unit:0.1v) 0x00) (1)Configure R311W device parameters: MinTime = 1min、MaxTime = 1min、BatteryChange = 0.1v Downlink: 0106003C003C0100000000 003C(H = 60(D Device returns: 8106000000000000000000(Configuration success) 8106010000000000000000(Configuration failed) (2)Read R311W device parameters: Downlink: 0206000000000000000000 Device returns:...
- Page 8 Example for MinTime/MaxTime logic Example#1 based on MinTime = 1 Hour, MaxTime= 1 Hour, Reportable Change i.e. BatteryVoltageChange=0.1V Max Time Max Time leeping (Min Time) leeping (Min Time) Wakes up and Wakes up and Wake up and collects data collects data collects data REPORTS 2.8V REPORTS 2.8V...
- Page 9 1) The device only wakes up and performs data sampling according to MinTime Interval. When it is sleeping, it does not collect data. 2) The data collected is compared with the last data reported. If the data change value is greater than the ReportableChange value, the device reports according to MinTime interval.
-
Page 10: Installation
This product does not have a waterproof function. After the screening is completed, please place it indoors. 1. Remove the 3M glue on the back of the magnet body The figure shows that the water immersion sensor (R311W) is and attach the body to the door frame (please do not stick... -
Page 11: Important Maintenance Instruction
(2) The battery installation method is shown in the figure below (battery with "+" facing outward). Note: To install the battery, use a screwdriver or similar tool to assist in opening the battery cover. 7. Important Maintenance Instruction Kindly pay attention to the following in order to achieve the best maintenance of the product: •...


Need help?
Do you have a question about the R311W and is the answer not in the manual?
Questions and answers