Table of Contents
Advertisement
Advertisement
Table of Contents

Subscribe to Our Youtube Channel
Related Manuals for Ammann AV 70 X


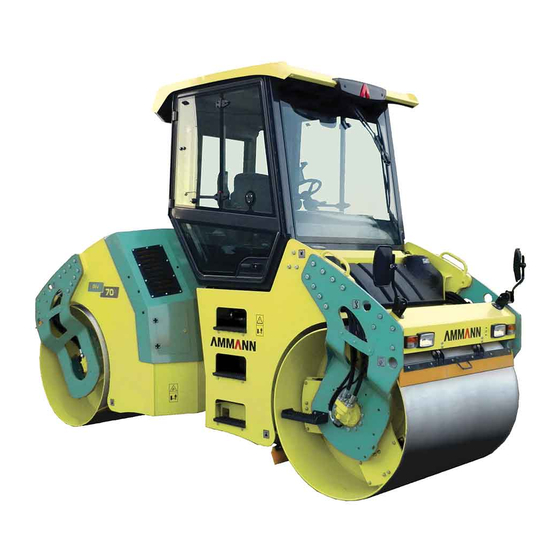
Summary of Contents for Ammann AV 70 X
- Page 1 Operating manual AV 70 X Cummins Book ID: 4-P06406CU...
- Page 3 AV 70 X Articulated tandem roller Cummins Tier 3 Operating manual Edition 06/2011 From Serial No. 4062005 Translation of Original Operating Manual...
- Page 5 Místo a datum vydání / Place and date of issue / Ort und Datum der Ausgabe:...
- Page 7 Congratulations on your purchase of an AMMANN road roller. This modern compaction device is characterised by simple operation and maintenance and is the product of many years of AMMANN experience in the field of road roller engineering. In order to avoid faults due to improper operation and maintenance we request that you read this operating manual with great care and keep it for later reference.
- Page 8 All dimensions and weights are approximate and, therefore, not binding. Ammann Czech Republic a.s. reserves the right to perform modifications without obligation to inform the machine user. If you identify any differences between the machine operated by you and the information contained in this publication, contact your local dealer.
- Page 9 The notice warns of the necessity of environmental protection. ! WARNING ! As used in this operating manual, the terms „right“, „left“, „front“ and „rear“ indicate the sides of the machine moving forward. FRONT LEFT RIGHT REAR 400101en AV 70 X...
-
Page 10: Table Of Contents
Driving properties .........................................14 1.3.3. Drive ............................................14 1.3.4. Engine ............................................14 1.3.5. Brakes ............................................15 1.3.6. The vibrations ..........................................15 1.3.7. Sprinkling ..........................................15 1.3.8. Fluid capacities ........................................15 1.3.9. Electrical installation ......................................15 1.3.10. Noise and vibration emissions ..................................16 1.3.11. Optional equipment ......................................16 AV 70 X... - Page 11 Operating the Machine at low temperatures ..............................84 2.9.4. Machine operation at high temperatures and humidity .........................84 2.9.5. Machine operation at high altitudes ................................84 2.9.6. Machine operation within very dusty environment ..........................84 2.9.7. Driving with vibrations on compacted and hard materials........................84 AV 70 X...
- Page 12 3.6.12. Inspect engine induction manifold ................................110 3.6.13. Inspect engine cooling circuit ..................................110 3.6.14. Inspect the battery ......................................112 3.6.15. Air filter sensor check ......................................114 3.6.16. Watering filter cleaning ....................................115 3.6.17. Machine lubrication ......................................117 AV 70 X...
- Page 13 3.6.34. Drain water from sprinkling circuit before winter season ........................139 3.6.34. Adjust the scrapers ......................................141 3.6.36. Machine cleaning ....................................... 143 3.6.37. Check the tightening of bolted connections ............................143 3.7. Defects ..............................147 3.8. Attachments ............................148 Wiring Diagram ............................................ 148 Hydraulic Diagram ..........................................152 AV 70 X...
- Page 14 AV 70 X...
-
Page 15: Specification Manual
SPECIFICATION MANUAL 1. SPECIFICATION MANUAL AV 70 X (Cummins Tier 3) AV 70 X... -
Page 16: Basic Specification
(crabbing). Type of machine Machine application ........................ The AV 70 X vibratory rollers are intended for medium and large- sized compaction works in transport construction (roads and ICV/PIN (Serial number of the machine) motorways and airfields) and building construction (industrial zones, etc.). - Page 17 SPECIFICATION MANUAL Placing of the production label 1 - Production label 2 - Machine’s production number 3 - Label of the ROPS cabin 400102 Cummins engine serial number 400103 AV 70 X...
-
Page 18: Machine Dimension Scheme
1.2. Machine dimension scheme 406002 3260 1150 3005 2300 128,4 45,3 118,3 90,6 4410 1450 1550 173,6 57,1 AV 70 X... - Page 19 SPECIFICATION MANUAL 406003 AV 70 X...
-
Page 20: Technical Data
304 (224) Fuel consumption during common operation/hour* l (gal US) max. 10 (2,6) Engine fulfills requirements of Directive 97/68/EU, STAGE III A EPA/CARB NON ROAD 40 CFR, PART 89 TIER 3 * - according to ACZ methodology AV 70 X... -
Page 21: Brakes
Drum vibrator l (gal US) 2x10 (2x2,64) Watering tank l (gal US) 600 (158,5) Sprinkling tank l (gal US) 2,75 (0,72) Drum drive gearbox l (gal US) 2x1,4 (0,37) 1.3.9. Electrical installation Electric set voltage Accumulator – capacity AV 70 X... -
Page 22: Noise And Vibration Emissions
Additional working headlights Adjustable scrapers Cutter/final compaction device Fire extinguisher Ammann set of tools Biologically degradable oil Different colour design (Ammann scheme), max. 2 different colours Special colour design Filters for the first 500 Mh Additional documentation AV 70 X... - Page 23 SPECIFICATION MANUAL Notes AV 70 X...
- Page 24 AV 70 X...
-
Page 25: Operation Manual
OPERATION MANUAL 2. OPERATION MANUAL AV 70 X (Cummins Tier 3) AV 70 X... - Page 26 AV 70 X...
-
Page 27: Major Safety Precautions
He must make Machine driver evidently familiar with the Code of Practice. AV 70 X... -
Page 28: Ensurance Of Safety Measures By The Owner
He must secure the removal of hazardous materials (fuel, oil, cooling liquid, brake fluid, etc.) from where these are spilled depending on their nature so as to avoid their adverse im- pact against environment, operation safety and persons’ health. AV 70 X... -
Page 29: Reguirements On Driver's Qualification
Machine. • Indicate each Machine startup via an acoustic or light signal and this always before igniting the Machine engine. • Confirm brake function and steering function before star- ting to run the Machine. AV 70 X... - Page 30 Machine a hazardous zone do not leave driver’s stand give warning to others to keep off and not touch the Machine. • To keep the machine free of oil contaminants and inflam- mable materials. AV 70 X...
-
Page 31: Banned Operations
• To leave driver’s cockpit of the machine when the machine is running. • Boarding or or getting off while on the run, jumping off the machine. AV 70 X... -
Page 32: Safety Inscriptions And Signs Used On The Machine
2.1. Major Safety Precautions 2.1.5. Safety inscriptions and signs used on the Machine 406004 AV 70 X... - Page 33 Keep a safe distance! (Symbol located on the rear rail, on the left and on the right on the front frame) 2939 2942bz Adjust while at rest Adjust and maintain with the engine stopped. (symbol located on the left, on the rear frame ) 2939 2584bz AV 70 X...
- Page 34 Lock the bonnet. (symbol located on the left, on the rear frame) 2939 3326bz Danger of explosion Read the Operation Manual before any maintenance of the battery, or before starting via the jump cables. (Sym- bol located on the inner side of the battery door) 3017bz AV 70 X...
- Page 35 Caution when passing locations with height limit. (sym- bol located on the left beneath the cabin, on the Machine 10ft/3,05m frame) 3207 3191 Noise emitted Machine’s external noise. (symbol located on the LH side of the front frame) 3191bz AV 70 X...
- Page 36 – optional equipment) 2939 3352bz Machine repair Do NOT start the engine! Hang the sign onto steering 2775 wheel. The sign is supplied together with machine acces- sories and should be kept in documentation locker. 2775bz AV 70 X...
-
Page 37: Hand Signals
– arms bending across and back. Sig. 3 SIGNALS FOR DRIVE Departure with the Machine One arm erected – bent with open palm, long motion of an- tebrachium in the direction of required motion, second arm akimbo. Sig. 4 AV 70 X... - Page 38 - short swinging movements of antebrachium away from the body and back. Sig. 6 Driving to the right Left arm sideways raised, right arm akimbo. Sig. 7 Driving to the left Right arm sideways raised, left arm akimbo. Sig. 8 AV 70 X...
- Page 39 Sig. 9 Engine start Circular motion of right hand’s antebrachium, with the fist closed. Sig. 10 Engine cut off Oscillating motion of right hand sideways raised in front of the body to the sides. Sig. 11 AV 70 X...
- Page 40 AV 70 X...
-
Page 41: Ecological & Hygienic Principles
Upon accidental use of these products get prompt medical attention. • When operating the Machine with no cabin provided, or with cabin windows opened, always use ear defenders (muffs) of proper type and version. AV 70 X... -
Page 42: Preservation And Storing Of Machines
Instructions for Use along with ecologi- cal principles. Carry out the dewaxing (deconservation) and washing of the Machine at places equipped with intercepting sumps to trap the rinsing water as well as dewax- ing agents. AV 70 X... -
Page 43: Dewaxing And Inspection Of The Supplied Machine
Remove conservation and wash the ma- chine in places with catch basins availa- ble to collect rinse water and chemicals. AV 70 X... -
Page 44: Machine Disposal Following Its Life Termination
Machine manufacturer or manufacturer-appointed accredited contracting service organizations put in charge by manufacturer. In no event shall Manufacturer be liable for damage to User health or environ- mental damage that arises from non-ob- servance of the abovementioned note. AV 70 X... -
Page 45: Machine Description
7 - Drum vibration hydroelectric generator 18 - Air filter 8 - Travel hydraulic motor 19 - Exhaust pipe 9 - Vibration hydraulic motor 20 - Sprinkling jets 10 - Steering joint 21 - Drum scrapers 11 - Hydraulics tank AV 70 X... -
Page 46: Controls & Dashboard Instruments
2.6. Controls & Dashboard Instruments 400272 AV 70 X... - Page 47 * If the Machine is equipped with cutter and final compactor then pushbuttons (5) and (6) on the travel control (1) are used to control it, and this on the same side where it has been mounted (optional). AV 70 X...
- Page 48 2.6. Machine basic functions control 400272A AV 70 X...
- Page 49 Attention, in this mode the Machine stopping distance is longer! Switch for CRAB mode resetting (4) 3319 Press this switch to adjust front drum in CRAB mode. CRAB mode resetting is signalled by indicator lamp on cluster (26) going OFF. AV 70 X...
- Page 50 2.6. Machine basic functions control 400272B AV 70 X...
- Page 51 It is used to adjust combustion engine rpm ranging from idle to max speed. Move the accelerator control towards operator seat to increase the rpm and vice versa. Accelerator control is connected with the engine injection pump control lever via a cable. AV 70 X...
- Page 52 2.6. Machine basic functions control 400272C AV 70 X...
- Page 53 (25) and (26) will flicker to signal this function. Switch + indicator lamp for cabin’s additional lights (21) - (optional) 596473 It is used to switch ON/OFF additional lights, indicator lamp in the switch signals this function. AV 70 X...
- Page 54 Seat switch indicator lamp Engine can be started once its defect has AMN2 been repaired! Indicator lamp will light ON when operator is not sitting on the seat or when emergency brake has been enabled. AV 70 X...
- Page 55 ON. Neutral indicator lamp AMN9 Indicator lamp ON will signal the position of travel controls is in neutral (N). Before starting the engine the travel controls (1) shall be in neu- tral position (N)! AV 70 X...
- Page 56 2.6. Machine basic functions control 400501A AV 70 X...
- Page 57 Machine travel system. Shut down the Machine and call service Alarm lights indicator lamp organization in respect of failure repair on the Machine travel system!!! AMN24 This indicator lamp signals alarm lights are ON. AV 70 X...
- Page 58 416013 Under the cabin lighting cover F11 - 15 A wipers + window washers F12 - 15 A fans F13 - 5 A fan control + air conditioner control F14 - 10 A air conditioner 400118 400119 AV 70 X...
- Page 59 It is used to facilitate boarding and leaving the Machine by its operator. Release lever (A) to position the steering wheel in the direction away from the column axis towards a dashboard. 400125 The lever (A), when shifted out, can be arrested in any position. 400126 AV 70 X...
- Page 60 8 seconds. Machine starting to move: Its operator must sit down on the seat and shift the travel con- trols (1) to neutral (N) and then select direction of running. Do NOT load seat switch with other objects! AV 70 X...
- Page 61 Ceiling lamp incl. selector switch is located overhead the dash- board. Ventilation nozzles (38) Adjustable nozzles are located on cabin ceiling, please adjust and swivel the dampers to alter the amount and direction of flowing air. 416001A AV 70 X...
- Page 62 Location in case of the machine with a ROPS cab 416002B Location in case of the machine with a ROPS platform and rail 416036 First-aid box stowage place (41) The Machine shall be equipped with first-aid box! 416002C AV 70 X...
- Page 63 Anti-dazzle (sun) screen (44) Adjust the anti-dazzle screen through securing it to the fixing on the glass. 400242 Window washer tank (45) Fill with standardly available media. Fill with antifreeze or drain before winter season starts! 400127 AV 70 X...
- Page 64 External back mirrors enable to view poorly visible areas. Maintain these mirrors clean and prop- erly adjusted! 416031A Cabin ventilation air filter (49) It includes replaceable filter element to catch the impurities drawn in from air. 416004 AV 70 X...
- Page 65 It is used to disconnect the battery from the Machine frame. Position „0“ – Machine wiring disconnected. Position „I“ – Machine wiring connected. 401678 Hand pump (52) It is used to lift or let down the bonnet. Located on LH side of rear frame. 400602 AV 70 X...
-
Page 66: How To Control And Use The Machine
2.7. How to Control and Use the Machine 400272D AV 70 X... -
Page 67: Start-Up Of The Engine
Do NOT let the engine idle for over 10 minutes – any idling longer then that may cause fouling of injec- tors, piston rings, or valves to get seized! Unless oil temperature reaches min. 60 °C, then the engine will not be lubricated sufficiently – do not load the engine fully! AV 70 X... - Page 68 2.7. Machine basic functions control 406005 AV 70 X...
- Page 69 Machine – danger of short circuit! Do NOT lean over the battery – risk of electrolyte burn! Rule out any presence of flammable sources (open flame, burning cigarettes, etc.) Do NOT confirm voltage presence in a wire through sparking via Machine frame! AV 70 X...
- Page 70 2.7. Machine basic functions control 400272E AV 70 X...
-
Page 71: Travel And Reversing
Following the travel controls (1) moved to neutral (N) the function will be OFF! Shift travel controls (1) to neutral (N) position, press pushbutton (3) – the function will become enabled again. Note You may switch ON the function during Machine travel. AV 70 X... - Page 72 2.7. Machine basic functions control 400272F AV 70 X...
- Page 73 Shift the travel controls (1) to opposite position via (0) and then return to (0) position within the interval of 1 second to stop the Ma- chine – the engine will continue to run. By deflecting the travel controllers (1) from the position (0), the machine drives off. When having overcome a difficult terrain, please turn OFF the switch! AV 70 X...
- Page 74 2.7. Machine basic functions control 400272G AV 70 X...
- Page 75 Then pushbuttons (5) and (6) on the second travel control (1)) are used to control the Ma- chine in CRAB mode. Take special care when Machine travels in CRAB mode near constructed facilities so to avoid their dam- age due to any collision (hitting)! If necessary, fold the external mirrors! AV 70 X...
- Page 76 2.7. Machine basic functions control 400272H AV 70 X...
- Page 77 (1) to neutral (N) position. For the maximum permissible slope gra- dient when driving uphill and across the 416038 slope gradient, see figures. The values given are lower depending on adhesive conditions and the machine instantaneous weight! 416039 AV 70 X...
- Page 78 2.7. Machine basic functions control 400272I AV 70 X...
-
Page 79: Emergency Stop Of The Machine
Make overall inspection of the Machine and repair any defects that have occurred during operation. Lock the Machine covers and its cabin. Do NOT stop hot engine instantly, but instead let it idle for 3 minutes. The engine and turbocharger will cool down slowly and evenly! AV 70 X... -
Page 80: Bonnet Raising And Lowering
Turn the bonnet raising lever to the horizontal position; see the figure. Pump to lift the bonnet. 400605 Once lifted, secure the bonnet with strut. 400140 Let down the bonnet Set the foot step to the original position! 400606 AV 70 X... - Page 81 Turn the bonnet raising lever to the vertical position, see the fig- ure, and the bonnet will start to drop. Confirm safe touch-down of the bonnet. Remove control lever (39) and put it inside Machine cabin. 400602A AV 70 X...
- Page 82 2.7. Machine basic functions control 400272J AV 70 X...
-
Page 83: Sprinkling
Using the watering button (9), it is possible to switch on the additional watering of drums, e.g. before driving on a compacted bitumen surface. Check water level in the tank during Machine operation. We recommend to alter the pumps following 100 motohours in order to ensure their uniform wear. AV 70 X... -
Page 84: Machine Transport
3. The machine on the vehicle must be properly tied and mechanically secured against longitudinal and lateral dis- placement as well as against tipping 1. The drums must be secured using scotch blocks 2. AV 70 X... -
Page 85: How To Load The Machine
The Machine must be tied to the lifting lugs on the Machine! Only a trained person (slinger) may carry out the tying of the Machine! 400144 Keep off the area beneath the hanging load! AV 70 X... -
Page 86: Special Conditions Of The Machine Use
Do NOT touch hot parts of the Machine, burn hazard! Turn off the battery disconnector (51) Raise the bonnet and secure it with a support. 400140 Travel pump short-circuiting: Unscrew two multi-purpose relieve valves by three threads in CCW direction (hexagon 22 mm). 416027 AV 70 X... - Page 87 Turn the bonnet raising lever to the vertical position, see the figure. 400602A Remove hose (3) away from the clip. Disconnect hose (1) in quick-coupler (2). Connect hose (3) into quick-coupler (2). 400607 Connect battery disconnector (51). „0“ „I“ 401678 AV 70 X...
- Page 88 Machine and start pumping until the in- dicator lamp goes OFF! When towing is completed, secure the Machine with scotch blocks against its driving away, and carry out the applica- tion of its brakes! AV 70 X...
- Page 89 Thus it is possible to prevent an uncontrolled movement of the damaged machine. Note These are general requirements for safe towing of a damaged machine under normal conditions. Please consult with your dealer any and all different situations that may occur while tow- ing the Machine. AV 70 X...
-
Page 90: How To Operate The Machine During Its Running-In
10 % of RH increase means power drop by up to 2 % (at constant temperature). At ambient temperatures when hydraulic oil temperature is constantly round 90 °C (194 °F), we recommend to exchange oil for the one with cinematic viscosity of 100 mm AV 70 X... - Page 91 OPERATION MANUAL Notes AV 70 X...
- Page 92 AV 70 X...
-
Page 93: Maintenance Manual
MAINTENANCE MANUAL 3. MAINTENANCE MANUAL AV 70 X (Cummins Tier 3) AV 70 X... - Page 94 AV 70 X...
-
Page 95: Safety And Other Measures For Machine Maintenance
• with the operation media heated – beware of burns – use recommended media, only. Upon completion of the adjustment or maintenance, please examine the func- tion of all safeguard equipment! AV 70 X... -
Page 96: Ecological And Hygienic Principles
• When working with the Machine in cases where the Machine has platform fitted, cabin windows are left opened, always use ear protectors of adequate type and version. AV 70 X... -
Page 97: Media Specification
SAE 10W-30 oil. Exceeding upper temperature limit, with regard to oil’s reduced capabilities, must not last for some long period. When using oil under API CG-4/SH the exchange interval must be reduced to half, i.e. 125 hours. AV 70 X... -
Page 98: Fuel
Check the portion of antifreeze cooling agent in cooling liquid with refractom- eter always before winter season starts. When mixing antifreeze cooling agent based on nitrides with the agent based on amines the health hazardous ni- troamines will form. AV 70 X... -
Page 99: Hydraulic Oil
Please, always consult with the producer or dealer any switching to another type of oil or blending with other types of oils. AV 70 X... -
Page 100: Glass Washer Fluid
Viscosity SAE 80W-90H for an ambient temperature of -10 °C÷ +30 °C (14 °F ÷ 86 °F). Replace water with antifreeze agent at the temperatures below 0 °C (32 °F). The operation temperature of oil must not exceed 85 °C – 90 °C (185°F – 194°F). AV 70 X... -
Page 101: Media
Engine oil under Section 3.2.1. 2x10 (2x2,64) 2412 Drum drive gearbox Gear oil under section 3.2.7. 2x1,4 (0,37) 2186 Baterry Distilled water As required 2587 Glass washer tank Liquid under Section 3.2.6. 2,75 (0,72) 2260 Sprinkling tank Water 600 (158,5) 2567 AV 70 X... -
Page 102: Lubrication And Maintenance Chart
Engine cooling liquid level check Following 1000 hours of operation (after 1 year) 3.6.20. Inspect engine belt 3.6.21. Inspect the exhaust system 3.6.22. Inspect the silencing system 3.6.23. Clean the water tank 3.6.24. Oil change in the gearboxes * AV 70 X... - Page 103 How to clean cab ventilation filter 3.6.34. Drain water from sprinkling circuit before winter season 3.6.35. Adjust the scrapers 3.6.36. Machine cleaning 3.6.37. Check the tightening of bolted connections First after 200 hours ** First after 250 hours AV 70 X...
-
Page 104: Lubrication Chart
LUBRICATION PLAN INSPECTION LUBRICATE EXCHANGE 2000 1000 SAE 15W - 40 API CH-4/SJ; CI-4/SK Engine oil: ISO VG 68 ISO 6743/HV Hydraulic oil: ISO 6743/9 CCEB 2 Grease: SAE 80W - 90H API GL-5 Gear oil: 406009en AV 70 X... -
Page 105: Lubrication And Maintenance Operations
Following the first 200 hours of new Machine operation or after the major overhaul, please carry out the operations under this Section: 3.6.24. Oil change in the gearboxes Following the first 250 hours of new Machine operation or after the major overhaul, please carry out the operations under this Section: 3.6.25. Valve adjustment AV 70 X... -
Page 106: After 20 Hours Of Operation (Daily)
Do NOT run the engine unless there is correct oil level in the engine. Maintain the level between the division lines stamped on the dipstick. Refill the oil of identical type as stated in 400157 Section 3.2.1. AV 70 X... -
Page 107: Engine Cooling Liquid Level Check
Do NOT refill cold coolant in hot engine! Danger of engine castings damaged. Top up only with the coolant consisting of antifreeze agents of identical base un- der the Section 3.2.3. 400159 AV 70 X... -
Page 108: Inspect The Engine Belt
Check crankcase breather pipe so it is not clogged due to any deposits, fragments, chips, or in winter frozen with ice. 400609C When running the Machine during low temperature period or under low tem- perature conditions, make the inspec- tions in shorter intervals. 400162 AV 70 X... -
Page 109: Inspect Air Filter Vacuum Valve
If air filter vacuum valve is damaged, re- place it with new one of identical type! 400610 3.6.6. Inspect fan condition • Inspect visually the fan. If damaged (e.g. missing parts of material, cracks, shape changes, etc.), replace the fan. 400611 AV 70 X... -
Page 110: Fuel Level Check
Use solely a clean recommended fuel per Section 3.2.2. NEVER replenish fuel in confined space. Fuel must NOT be spilled. 400166 AV 70 X... -
Page 111: Hydraulic Tank Oil Level Check
Perform the following before engine is started. 400112A Open the cap (1) and refill with clean water via the strainer (2). Before winter period, drain water from the water tank and sprinkling system! Proceed according to Section 3.6.34. 400148 AV 70 X... -
Page 112: Inspect Alarm And Control Devices
Note If the engine is not started within 10 sec. after ignition key has bee turned ON into position I, then acoustic signal will be ena- bled (to warn operator of the battery possibly discharged). 478320 400111C AV 70 X... - Page 113 Machine (space beneath the Machine) in time! Make sure the area in front and behind the Machine is free, with no persons present within thereof! During operation, check continuously the instruments and indicator lamps. Promptly repair any failures! 478320 400111 AV 70 X...
-
Page 114: Following 250 Hours Of Operation (3 Months)
Reinstall the plug. Torque is 50 Nm (37 ft lb). When draining the oil temperature shall 400613 not be over 60°C (140°F) – risk of burn. • Clean the surface round oil filter head. Remove the filter. 400614 • Clean seating face for filter gasket. 400173 AV 70 X... - Page 115 400174 • Mount the filter and tighten it by hand. Do not overtighten the filter, the thread and gasket may get impaired! 388N134 • Use filler neck (2) to fill the engine with clean motor oil. 400609A AV 70 X...
-
Page 116: Inspect Engine Induction Manifold
Check the pipes and clamps. Do not operate the Machine if pipes and clamps are damaged! 400611A 3.6.13. Inspect engine cooling circuit • Check the cooling circuit tightness. Confirm no pipes are damaged and no clamps are missing. 400615 AV 70 X... - Page 117 • Check that oil cooling gills and radiator fins are not fouled. If fins are fouled then clean them, for instance purging the coolers with pressure air (steam or hot water) according to Section 3.6.32. 400181 400618 AV 70 X...
-
Page 118: Inspect The Battery
Refill with distilled water those cells having electrolyte less than 5 mm (0.2 in) above the plates. 416033 • Measure the electrolyte density in individual cells with the refractometer or density meter. 400183 AV 70 X... - Page 119 Get prompt medical attention. Do not eat, drink, smoke, while at work! Having finished the work, please wash your hands and your face thoroughly with water and soap! Do not try whether wires are energized through contacting Machine frame. AV 70 X...
-
Page 120: Air Filter Sensor Check
Inspect always when cleaning the induc- tion air pre-filter! 400618A • Once covered, the indicator lamp for air filter clogged shall light up. 478320 400185 • Unless indicator lamp goes ON, check the vacuum switch, contacts and feeder cables. 400186 AV 70 X... -
Page 121: Watering Filter Cleaning
MAINTENANCE MANUAL 3.6.16. Watering filter cleaning • Close water supply through the valve (1, 2). 400288 • Remove sprinkler filter vessel, replace the strainer and clean 400635 400262A AV 70 X... - Page 122 3.6. Lubrication and Maintenance Operations • Remove and clean sprinkler strainers (3). 400289 400190 AV 70 X...
-
Page 123: Machine Lubrication
• Step by step, put on the greasing nipple of high-pressure press and lubricate till the old grease starts pouring out. • Reinstall the greasing nipple caps. Use only the recommended lube greases, refer to Section 3.2.5. Steering joint Upper bearings 2 x Lower bearings 2 x 400191 Main bearing 4x 400192 Linear hydraulic motors for steering Pins 6x 400193 AV 70 X... - Page 124 3.6. Lubrication and Maintenance Operations Linear hydraulic motors to lift off the bonnet Upper pins 2 x Lower pins 2 x 400194 Cabin door hinge pins pins 8 x 400195 AV 70 X...
-
Page 125: After 500 Hours Of Operation (After 6 Months)
Clean the sealing face of filter holder. 400173 • Fill new filter with clean fuel and lubricate sealing “O” ring (2) with oil. 400198 • Screw the filter with hand until the gasket gets seated, and then tighten by another half-turn. 388N134 AV 70 X... -
Page 126: Engine Cooling Liquid Level Check
Check the concentration via refractometer. Inspect always before winter season. Unless concentration for -36 °C (-33 °F) has been measured, you must adjust it through adding antifreeze into the cool- ing system. Add antifreeze according to Section 3.2.3. 400183 AV 70 X... -
Page 127: After 1,000 Hours Of Operation (After 1 Year)
3.6.21. Inspect the exhaust system • Check the leak tightness of exhaust manifold in the direc- tion towards the engine. • Check the exhaust manifold leading to the exhaust muffler. • Torque of the exhaust-header (collector) pipe - 21 Nm. 400626 AV 70 X... -
Page 128: Inspect The Silencing System
Replace the damaged ones. Check the bolts and nuts of the following are tightened: Rubber-metal of drums – LH side and RH side 2x 10. 400290 400621 Rubber-metal of driver’s compartment 4x. 400291 AV 70 X... - Page 129 MAINTENANCE MANUAL Rubber-metal for the engine 3x. 400622 Rubber-metal for battery holder 4x. 400620B Cooler metal rubber parts, 4 pieces. 416018 AV 70 X...
-
Page 130: Clean The Water Tank
Open tank drain hole. • Flush the tank with stream of water. 400206 • Clean the strainer inside the filler neck. Drain water from water tank before win- ter season! Proceed in line with the Section 3.6.34. 400148B AV 70 X... -
Page 131: Oil Change In The Gearboxes
Remount the plugs; if the plug seals are damaged, remove 400628 them. Change the oil after the first 200 engine hours. Do not touch the gearbox and adjacent parts if hot. Catch the drained oil. Dispose according legal regulations. AV 70 X... -
Page 132: After 2,000 Hours Of Operation (After 2 Years)
50 °C (122 °F). If you open overpressure plug the liquid may splash out causing scald. 400159 Stop the engine. • Open the cooling system by removing the overpressure plug (1) on the expansion tank. 400158A AV 70 X... - Page 133 Start the engine and let it run for 5 minutes for liquid tem- perature to reach 82°C (180°F). 400613A Inspect cooling circuit tightness and liq- uid level on water gauge. Stop the engine, drain the cooling circuit and reinstall the drain plug. 400217 AV 70 X...
- Page 134 10 l/min (2,6 gal US/min). Close the expansion tank with overpressure plug. Start the engine and wait until the tem- perature reaches 82 °C (180 °F). Check during your waiting for any leakage of cooling liquid and check the level on the indicator. 400218 AV 70 X...
- Page 135 Do not open the overpressure plug be- fore coolant temperature drops below 50 °C (122 °F). If you open overpressure plug the liquid may splash out causing scald! Hand over the used liquid for its safe dis- posal under the regulations! 400159 AV 70 X...
-
Page 136: How To Exchange Oil In The Vibrators
• Dismount the drain plug. • Let oil pour down into the vessel set up – total amount of oil flowing out is 40 l (10,56 gal US). 400624 • Dismount the suction hose. 400629 AV 70 X... - Page 137 Remove the sensor on the hydraulic tank cube and clean the contact. 400629A • Dip the sensor in water of 100°C (212°F) temperature, check its function correctness on the LH cluster – hydraulic oil level indicator lamp will light up, refer to the Fig. 478320 400111E AV 70 X...
- Page 138 Replace filter element. Never use chemical cleaning agents to clean the tank. To clean, please use cleaners with no fibre let-off. Refill oil according to the Section 3.2.4. AV 70 X...
- Page 139 – tighten with 40 +10 Nm (30 +7 ft lb) torque. 400226 Use the original filter elements accord- ing to the Spare Parts Catalogue, only. Used filter elements are ecologically haz- ardous waste – hand them over for pro- fessional disposal. 400227 AV 70 X...
-
Page 140: Maintenance As Required
Low-pressure piping blow-off and filter deaeration: Use the pump on fuel filter head to blow off the low-pressure piping. 400616B Follow safety regulations! No smoking or use of open flame while at work on fuel system! Avoid fuel escape into soil! AV 70 X... -
Page 141: How To Replace Air Filter Elements
• When the indicator lamp goes on you must replace the main filter element. 400111H • Remove filter cap (1) and replace the main filter element (2) from the filter shell. 400610A AV 70 X... - Page 142 NEVER use compressed air to clean the inner space. 400633 • Take off the air filter vacuum valve, clean it and reinstall. Replace instantly a damaged vacuum valve! 400610 AV 70 X...
-
Page 143: How To Clean Water Separator Of Fuel Filter
Let the deposits flow out and screw it. Do not drain separator when the engine is running. Follow the fire precautions. No smoking allowed at work on fuel system. 416021 Collect escaped fuel in the vessel set up. 400233 AV 70 X... -
Page 144: Cleaning Of Coolers
If filter element will become damaged or unable to be made rid of the impurities, please replace it with new one. Clean regularly 1 x per month. Should it be you work in a very dusty environment then the cleaning intervals should be cut short. 416004A AV 70 X... -
Page 145: Drain Water From Sprinkling Circuit Before Winter Season
Remove and clean the vessel (1) incl. sprinkling filter (2). Store the vessel complete with filter at a safe place. 400262 • Keep the valve for water supply from the tank opened. 400295 • Dismount the drain plugs. 400635A AV 70 X... - Page 146 By draining the water from the sprin- kling circuit in time you will avoid any 400289 potential damage that the manufacturer shall bear no responsibility for! AV 70 X...
-
Page 147: Adjust The Scrapers
Follow the above-mentioned steps in reverse order when mounting a new blade. Correct setting of scrapers ensures per- fect cleaning of the drum during the ma- chine operation! Set up the correct function of the scraper upon the replacement of the blade! 416040A AV 70 X... - Page 148 At the same time always check the proper function of the gas struts (4). Only when the gas struts work properly and the worn scraper blades are replaced in time, this will provide you with perfect drum cleaning! 416034A AV 70 X...
-
Page 149: Machine Cleaning
826,0 1350 995,7 1900 1401,3 M30x2 1080 796,5 1520 1121,0 The figures given in the chart are torques at dry thread (with coefficient of friction = 0,14). These figures do not apply to a lu- bricated thread. AV 70 X... - Page 150 Chart showing the torques for cap nuts with sealing “O” ring – hoses Tightening moments for the sliding nuts with the tightening circle „O“ - hoses lb ft Size Worm Hose Nominal Nominal spanner 12x1,5 14x1,5 16x1,5 18x1,5 20x1,5 22x1,5 24x1,5 26x1,5 30x2 36x2 42x2 45x2 52x2 AV 70 X...
- Page 151 20 x 1,5 22 x 1,5 22 x 1,5 26 x1,5 26 x1,5 27 x 1,5 27 x 1,5 33 x 1,5 33 x 1,5 42 x 1,5 42 x 1,5 48 x 1,5 48 x 1,5 400239 400240 AV 70 X...
- Page 152 AV 70 X...
-
Page 153: Defects
Help Desk (service assistance). The troubleshooting of hydraulics and wiring requires expertise in the field of hydraulics and wiring, so we strongly recommend to hand over the troubleshooting process to the Help Desk of an authorized dealer or manufacturer. AV 70 X... -
Page 154: Attachments
– CRAB left M9,10,11 Fans S29 RH (yellow) pushbutton on LH travel lever – CRAB right Q1 Battery disconnector S30 LH (yellow) pushbutton on RH R1 Sprinkling interval potentiome- travel lever – CRAB left or edge cutter upward AV 70 X... - Page 155 RS2323 RxD X5:6 RS2323 Grd X5:29 X11:6 X16:1 (12V) Travel X5:30 (12V) X33:1 X5:42 X11:7 X16:2 Drum speed sensor Engine speed Sprinkling Vibration 100R 100R X11:8 X14:3 Sprinkling Speed 100R 100R X11:9 X14:5 X33:2 X5:46 X11:10 X16:4 107641_1en AV 70 X...
- Page 156 – CRAB left M9,10,11 Fans S29 RH (yellow) pushbutton on LH travel lever – CRAB right Q1 Battery disconnector S30 LH (yellow) pushbutton on RH R1 Sprinkling interval potentiome- travel lever – CRAB left or edge cutter upward AV 70 X...
- Page 157 X20 in socket X21. The buttons S30, S31 on the left control lever are used Edge cutter downward to lifting cutter. Reserve Cabin lighting Front wiper Windscreen washer Fan 1 Fan 2 Fan 3 Air conditioner 107641_2en AV 70 X...
-
Page 158: Hydraulic Diagram
25. Level indicator 26. Oil gauge 27. Check valve 28. Check valve 29. Temperature switch 85±3°C 30. Ball valve 31. Ball valve 32. Quick-coupler filling-type 33. Quick-coupler for brake off 34. Quick-coupler for brake off 35. Quick-coupler measuring-type AV 70 X... - Page 159 MAINTENANCE MANUAL 211391en AV 70 X...
- Page 160 Notes AV 70 X...
- Page 162 Ammann Unternehmungen Eisenbahnstrasse 25 CH-4901 Langenthal Phone +41 62 916 61 61 www.ammann-group.com...
Need help?
Do you have a question about the AV 70 X and is the answer not in the manual?
Questions and answers