
Related Manuals for Ammann ATR 60 P


Summary of Contents for Ammann ATR 60 P
- Page 1 Trans la ti on of the Ori gi nal ope ra ting in struc tions (EN) ATR 60 P ATR 68 P Serial Nr. ########- Honda GXR120RT Serial Nr. ########- Book ID: 2-00013021...
- Page 3 Also ob serve the cor re spond ing rules and reg u la tions valid in your coun try. Ammann Verdichtung GmbH is not li a ble for the func tion of the ma chine when used in an im proper man ner and for other than the in tended pur pose.
-
Page 4: Safety Regulations
Ammann Verdichtung GmbH are not ap proved by Guide the ma chine so that the op er a tor can not be crushed be tween Ammann Verdichtung GmbH. The in stal la tion and/or the use of such the ma chine and hard ob jects. - Page 5 1. Sa fe ty re gu la tions Re fu el ling Dis po sal of the ma chi ne af ter fi nish of its ser vi ce life Only re fuel the ma chine with the en gine switched off. At dis posal of the ma chine af ter fin ish of its ser vice life, the owner is obliged to com ply with na tional reg u la tions and laws on wastes and Do not re fuel the ma chine in en closed ar eas.
-
Page 6: Technical Data
2. Tech nical data ATR 60 P ATR 68 P 1. Di men sions 340 mm / 13.386 in 280 mm / 11.024 in 710 mm / 27.953 in 1020 – 1120 mm / 40.157 – 44.094 in 355 mm / 13.976 in 2. - Page 7 2. Tech ni cal da ta ATR 60 P ATR 68 P 5. Op tional equip ment Air fil ter main te nance dis play / Pre-sep a ra tor Op ti on (Cy clone) Tamp ing place short ener...
-
Page 8: Operation
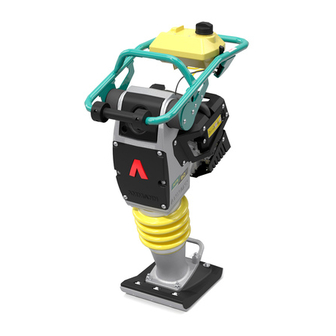
3. Op er a tion 3.1 De scrip tion The ACR 60 P / 68 P vi brat ing tam per is a re li able com pact ing de vice thanks to its sta ble, ro bust de sign. The mo tor drives the crank mech a nism by a cen trif u gal clutch and a trans mis sion. -
Page 9: Before Using
3. Ope ra ti on 3.2 Be fore us ing Use per sonal pro tec tive equip ment (es pe cially noise pro tec tion de vices and safety shoes). Fol low the safety in struc tions. Fol low the op er a tion and main te nance man ual. Read the mo tor op er at ing man ual.Com ply with its in struc tions for safety, op er a tion and main te - nance. - Page 10 3. Ope ra ti on 3.3.2 1.Ac cel er a tor ca ble 3.3 Mo tor op er a tion 3.3.1 Low oil pro tec tion The mo tor is equipped with low oil pro tec tion: • If the mo tor oil is too low, the mo tor won't start. STOP B6899554 The ac ce ler ator ca ble has mo re than three en ga ging po si tions:...
-
Page 11: Start The Mo Tor
3. Ope ra ti on 3.3.3 Start the mo tor Do not use the choke (4) if the mo tor is hot or the out - door tem per a ture is high. If the mo tor does n't start at op er at ing tem per a ture, close the choke be fore start - ing. - Page 12 3. Ope ra ti on 3.3.4 Af ter the mo tor starts 3.3.5 Shut ting off the mo tor In emer gency sit u a tions, turn the mo tor switch to «OFF» to shut off the mo tor. 1 – 2 min. B6899559 •...
-
Page 13: Setting The Working Height
3. Ope ra ti on 3.4.2 Ra te of ad van ce 3.4 Work ing with the tam per 3.4.1 Set ting the work ing height Set ting the guide bar out of the op ti mal po si tion can in crease hand/arm vi bra tion.This must be con sid ered when de ter min ing the ex po sure pe riod. - Page 14 3. Ope ra ti on 3.4.3 Op er a tion Guide the ma chine only with the guide bar, and don't lift it dur ing op er a tion. Al ways keep an eye on the ma chine when its mo - tor is run ning.
- Page 15 3. Ope ra ti on 3.4.4 Operating hour in di ca tor B6899564 An mo tor hour in di ca tor (1) is avail able as an op tion. It can re - trieve three types of in for ma tion. •...
- Page 16 4. Transport 4.1.2 Trans port over short dis tances 4.1 Trans port ing and load ing 4.1.1 Gen eral in struc tions Dan ger to life through sus pended loads • Per sons may not. go near hang ing loads or stand un der hang ing loads.
- Page 17 4. Trans port 4.1.4 Ty ing the ma chine down B6899520 • Af ter load ing the tam per on the ve hi cle, tie it down through the guide bar and han dle.
-
Page 18: General Information
5. Main te nance 5.1 Gen eral in for ma tion • Park the ma chine on a level sur face and se cure to pre vent roll ing and slip ping. Care ful main te nance: ð • En sure that fu els, lu bri cants and re place ment parts are Ex tended life ex pec tancy. -
Page 19: Lubrication Schedule
5. Main ten an ce 5.3 Lu bri ca ti on sche du le Chan ging in ter vals Lu bri ca ting point Quan ti ty Lu bri cant Or der No. [ope ra ting hours] 1. Mo tor Hon da GXR120RT 0.28 l First time af ter 20 h;... -
Page 20: Fuel System
6. Main te nance Motor 6.1.1 Fuel qual ity 6.1 Fuel sys tem The mo tor is cer ti fied to ope ra te on un lea ded ga so li ne with a re - • Pe trol is ex tre me ly li ke ly to catch fire and is ex - search oc ta ne ra ting of 91 or hig her (pump oc ta ne ra ting of 86 or plo si ve;... -
Page 21: Clean Ing The Fuel Fil Ter
6. Main te nance Mo tor 6.1.2 Re fill with fuel 6.1.3 Clean ing the fuel fil ter No open flame. No smok ing. Do not in hale fuel fumes. Do not spill fuel. Clean up leak ing fuel. Do not let it seep into the soil. - Page 22 6. Main te nance Mo tor 6.1.4 Fuel fil ter B6899571 • Chan ge the fu el fil ter.
-
Page 23: Che Cking The Mo Tor Oil Le Vel
6. Main te nance Mo tor 6.2 Che cking the mo tor oil le vel En vi ron men tal haz ard through op er at ing ma te ri - als! • Col lect used oil and dis pose of it in an en vi ron - men tally sound way. -
Page 24: Air Filter
6. Main te nance Mo tor 6.3 Air fil ter Risk of fire and ex plo sion caused by in flam ma ble sub stances. For clean ing the fil ter el e ment, do not use any flam ma ble or ag gres sive ma te ri als. •... - Page 25 6. Main ten an ce Mo tor max. 5 bar / 72.5 psi B6899528 B6899526 • • Clean the fil ter hous ing (5), es pe cially at the back. Blow dry com pressed air (max. 5 bar / 72.5 psi) through the fil - ter car tridge (4) from the in side out.
- Page 26 6. Main te nance Mo tor 6.3.1 Safety air fil ter Risk of fire and ex plo sion caused by in flam ma ble sub stances. For clean ing the fil ter el e ment, do not use any flam ma ble or ag gres sive ma te ri als. •...
- Page 27 6. Main ten an ce Mo tor 6.3.2 Pre-sep a ra tor (cy clone) - op tion The vi sual main te nance dis play (3) al lows the ac tual dirt level in the air fil ter to be read even when the mo tor is off. The yel low in di - ca tor bar has 12 stages.
-
Page 28: Main Te Nance Machine
7. Main te nance Machine 7.1.2 Tight en ing torque 7.1 Main tain ing the ma chine 10.9 12.9 7.1.1 Clean ing ø ft lb ft lb ft lb Risk of fire and ex plo sion caused by in flam ma ble sub stances. -
Page 29: Screw Con Nec Tions
7. Main te nance Ma chine 7.1.3 Screw con nec tions 7.1.4 Check ing the rub ber buff ers B6899576 Check the rub ber buff ers (1) for tears and out breaks, as well as for se cure fit. If they are dam aged, re place them im me di ately. 7.1.5 Check ing the bel lows B6899533.cdr With vi brat ing de vices, it is im por tant to check in ter mit tently the... - Page 30 7. Main ten an ce Ma chi ne 7.1.6 Padfoot:Check ing the oil level 7.1.7 Padfoot:Chang ing the oil • Set the vi brat ing tam per aside hor i zon tally. Use warm oil when chang ing the oil. •...
- Page 31 7. Main te nance Ma chine B6899541 B6899544 • • Stand the tam per back up, and screw in the oil sight glass (1) Pour fresh oil di rectly into the guide tube. with its seal (2). • Clean the seal ing sur faces be tween the cover (3) and the hous ing;...
- Page 32 8. Retrofit 8.1 Padfoot 8.1.1 In stall ing the short ener and ex ten sions For chang ing the work ing height, a tamp ing place short ener and two ex ten sions are avail able. For this the adap tor be tween the padfoot and the sus pen sion strut must be re placed.
-
Page 33: Troubleshooting
- nance. • If the fault can not be lo cated, re fer re pairs to an Ammann ser vice cen tre. • Al ways first check items that are eas ily ac ces si ble (fuses, LED’s, etc.). - Page 34 10. Sto ra ge 10.0.1 Pre pa ra ti on for sto ra ge If the ma chine is to be shut down for an ex tended time (lon ger than 6 weeks), it should be placed stably on a pal let on a firm, even sur face.
Need help?
Do you have a question about the ATR 60 P and is the answer not in the manual?
Questions and answers
what is the warranty duration
The warranty duration for the Ammann ATR 60 P is 3 years.
This answer is automatically generated