Table of Contents
Advertisement
Advertisement
Table of Contents

Subscribe to Our Youtube Channel
Related Manuals for Ammann ASC 200 Series


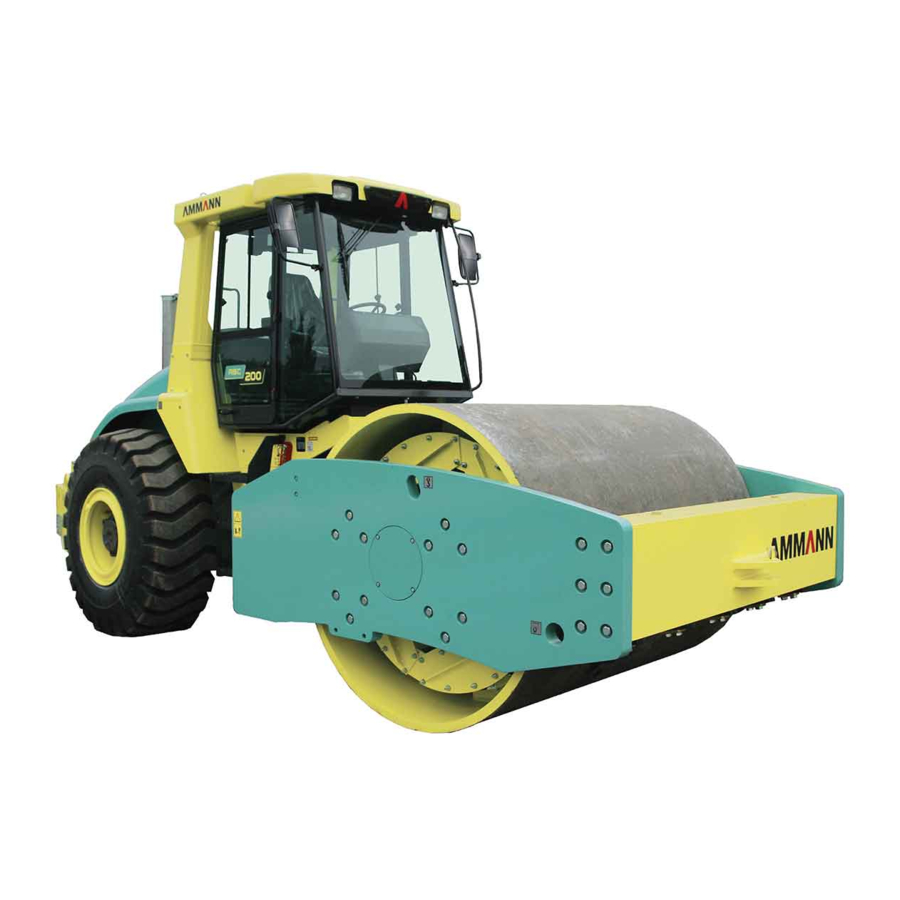
Summary of Contents for Ammann ASC 200 Series
- Page 1 Operating manual ASC 200 and ASC 250 © 1 / 2008 CUMMINS TIER III...
- Page 2 If you identify any differences between the machine operated by you and the information contained in this publication, contact your local dealer. Reproduction or copying of any kind is prohibited without the written permission of Ammann Czech Republic a.s.
- Page 3 AMMANN experience in the field of road roller engineering. In order to avoid faults due to improper operation and maintenance we request that you read this operating manual with great care and keep it for later reference.
- Page 4 ASC200/ASC250...
- Page 5 ! NOTICE ! As used in this operating manual, the terms „right“, „left“, „front“ and „rear“ indicate the sides of the machine moving forward. ASC200/ASC250...
-
Page 6: Table Of Contents
Content Content ..............................6 SPECIFICATION MANUAL ........................11 1.1. Basic Data ............................... 12 1.2. Dimension Chart ............................. 14 1.3. Technical Data ............................22 1.3.1. Weights ................................22 1.3.2. Travel Parameters .............................. 25 1.3.3. Vibration ................................27 1.3.4. Engine ................................28 1.3.5. - Page 7 SPECIFICATION MANUAL OPERATING INSTRUCTIONS ......................... 39 2.1. Safety Regulations ..........................41 2.1.1. Safety Regulations and Instruction for Operation of the Machine ..............41 2.1.1.1. Beginning of Compaction Works ........................41 2.1.1.2. Operation in an imperiled area ......................... 41 2.1.1.3. Work safety precepts on behalf of the operator ....................42 2.1.2.
- Page 8 Content MAINTENANCE MANUAL ........................123 3.1. Safety Standards at Lubrication and Maintenance ................125 3.1.1. Safety during maintenance ..........................125 3.1.2. Fire safety during changing contents ......................125 3.1.3. Environmental and health regulations ......................126 3.1.3.1. Health regulations ............................126 3.1.3.2.
- Page 9 SPECIFICATION MANUAL Every 1000 Hours or Once a Year ......................163 3.6.23. How to check tightening pulley and belt of the engine .................. 163 3.6.24. Exchanging oil in gearboxes .......................... 164 3.6.25. Checking the damping system ........................166 3.6.26. Cleaning the fuel tank ............................167 Every 2000 Hours or Every 2 Years .......................
- Page 10 ASC200/ASC250...
-
Page 11: Specification Manual
1. SPECIFICATION MANUAL ASC 200 and ASC 250 (Cummins tier 3) ASC200/ASC250... -
Page 12: Basic Data
1.1. Basic Data Introduction Vibratory roller ASC200/250 HD with increased traction force - smooth drum Vibratory roller ASC200/250 HDPD with increased trac- Single drum vibratory rollers of line ASC 200, ASC 250 are tion force – padded drum outstanding by their up-to-date design, adopted techno- logies, as well as modern styling. - Page 13 SPECIFICATION MANUAL Location of the Decal at the Machine Please refer to the data in the table below always when approaching the dealer or the manufacturer. Please fill in the following data: (see Pin label, Label of the CUMMINS engine) Type of machine ................
-
Page 14: Dimension Chart
1.2. Dimension Chart Dimension Chart of the Machine ASC 200 (with cab and protective frame) ) - ( ) - ( ) - ( ASC200/ASC250... - Page 15 SPECIFICATION MANUAL Dimension Chart of the Machine ASC 200 (with cab and protective frame) ) - ( ) - ( ) - ( ) - ( ) - ( ASC200/ASC250...
- Page 16 1.2. Dimension Chart Dimension Chart of the Machine ASC 200 (with platform, protective frame and canopy) ) - ( ) - ( ) - ( ASC200/ASC250...
- Page 17 SPECIFICATION MANUAL Dimension Chart of the Machine ASC 200 (with platform, protective frame and canopy) ) - ( ) - ( ) - ( ) - ( ) - ( ASC200/ASC250...
- Page 18 1.2. Dimension Chart Dimension Chart of the Machine ASC 250 (with cab and protective frame) ) - ( ) - ( ) - ( ASC200/ASC250...
- Page 19 SPECIFICATION MANUAL Dimension Chart of the Machine ASC 250 (with cab and protective frame) ) - ( ) - ( ) - ( ) - ( ASC200/ASC250...
- Page 20 1.2. Dimension Chart Dimension Chart of the Machine ASC 250 (with platform, protective frame and canopy) ) - ( ) - ( ) - ( ASC200/ASC250...
- Page 21 SPECIFICATION MANUAL Dimension Chart of the Machine ASC 250 (with platform, protective frame and canopy) ) - ( ) - ( ) - ( ) - ( ASC200/ASC250...
-
Page 22: Technical Data
1.3. Technical Data 1.3.1. Weights ASC 200 D ASC 200 PD Operation weight with cab EN500-1 kg (lb) 20405 (44985) 20475 (45139) Operation weight EN500-1 to drum kg (lb) 14080 (31041) 14150 (31195) to axle kg (lb) 6325 (13944) 6325 (13944) Static linear load kg/cm (lb/in) 62,9 (352) Operation weight EN500-1 with cab... - Page 23 SPECIFICATION MANUAL ASC 200 HD ASC 200 HDPD ASC 200 HT ASC 200 HTPD Operation weight with cab EN500-1 kg (lb) 21605 (47631) 21675 (47785) Operation weight EN500-1 to drum kg (lb) 14080 (31041) 14150 (31195) to axle kg (lb) 7525 (16590) 7525 (16590) Static linear load...
- Page 24 1.3. Technical Data ASC 250 D ASC 250 PD ASC 250 HD ASC 250 HDPD ASC 250 HT ASC 250 HTPD Operation weight with cab EN500-1 kg (lb) 25030 (55180) 25215 (55588) Operation weight EN500-1 to drum kg (lb) 17510 (38602) 17695 (39010) to axle kg (lb)
-
Page 25: Travel Parameters
SPECIFICATION MANUAL 1.3.2. Travel Parameters ASC 200 D ASC 200 PD Travel speed - infinitely adjustable in both directions 1st speed range (work) km/h 0 - 2,5 0 - 2,5 (MPH) (0 - 1,55) (0 - 1,55) 0 - 3,1 0 - 3,1 (0 - 1,92) (0 - 1,92) - Page 26 1.3. Technical Data ASC 200 D; HD; HT ASC 200 PD; HDPD; HTPD Approach angle - front (°) - rear (°) Transversal stability with cabin and ROPS frame - straight frame (static) (°) - full turn (static) (°) Max. allowed transversal inclination - without vibration (°) - with vibration...
-
Page 27: Vibration
SPECIFICATION MANUAL ASC 250 HT ASC 250 HTPD Travel speed - infinitely adjustable in both directions 1st speed range (work) km/h 0 - 1,8 0 - 1,8 (MPH) (0 - 1,12) (0 - 1,12) 0 - 2,3 0 - 2,3 (0 - 1,43) (0 - 1,43) 0 - 2,8... -
Page 28: Engine
1.3. Technical Data 1.3.4. Engine Make Cummins Diesel Type QSB6.7-C220 Serial number ....Number of cylinders Total displacement (cu in) 6700 (409) Output according to ISO 3046/1 (DIN 6271) kW (HP) 164 (220) Rated speed (RPM) 2200 Maximal torque Nm (ft lb) 949 (700) /1500 min (RPM) Specific fuel consumption at rated speed... -
Page 29: Axle
SPECIFICATION MANUAL 1.3.5. Axle The front axle consists of the drum, the rear axle of the axle housing with two drive gearboxes with the wheels. Tire size 23,5x25“ thread NB57(EM-30) (16PR) MITAS Average contact pressure on soil kPa (PSI) 235 (32,9) ASC 200 Tire inflation kPa (PSI) 150 (22) ASC 200... -
Page 30: Steering
1.3. Technical Data 1.3.7. Steering Hydraulic power steering with two hydraulic cylinders Hydraulic pump of steering Jihostroj Q 43R Power steering unit DANFFOS OSPB 1000 ON Safety pressure MPa (PSI) 14 (2030) Hydraulic cylinders 2x HV 110/55/400 Steering angle max. ±... -
Page 31: Hydrostatic Drive Of Travel
SPECIFICATION MANUAL 1.3.9. Hydrostatic Drive of Travel ASC 200 Hydraulic pump of travel variable output with skew plate, electrohydraulically controlled Sauer 90 R 100 Delivery per revolution (cu in/rev) 100 (6,08) Safety pressure MPa (PSI) 42 (6090) Kontroller Sauer MCH Drum drive gear-box Trasmital 715C3B 108 H6 (D;... -
Page 32: Hydraulic Oil Tank
1.3. Technical Data 1.3.11. Hydraulic Oil Tank Suction basket Argo AS 080-1 1.3.12. Lifting and lowering of the Hood and the Cabin Hydraulic set Hytos SMA 03 731-0433 Filter SF 56/48 Block of lifting Hytos 729-0030 Hydraulic cylinders of hood lifting 2x HM 25/18-320 Hydraulic cylinder of cab lifting HM 40/22-320... -
Page 33: Fluids
SPECIFICATION MANUAL 1.3.14. Fluids Engine oil l (gal US) 19,7 (5,2) Cooling system l (gal US) 30 (7,9) Fuel l (gal US) 405 (107) Hydraulic system l (gal US) 100 (26,4) Drum drive gear-box l (gal US) 7,7 (2,0) Wheel gears l (gal US) 2x4,4 (2x1,2) Vibratory drum... -
Page 34: Hygienical Data
1.3. Technical Data 1.3.17. Hygienical Data The machine with cab and closed windows: Noise: The acoustic pressure level affecting the driver: (measured according the EN 11 204 and prEN 500-4:2001 on the elastic material, stopped machine with vibration) = 82 dB (A) Guaranteed sound power level - according toCE (measured due to the Directive 2000/14/EC, EN ISO 3744 on the elastic material, stopped machine with vibration) -
Page 35: Accessories
SPECIFICATION MANUAL 1.3.19. Accessories A) Rolling Over Protective Structure (ROPS) Compliant with international standards EN 500-4:1995; SAE J 1040:APR88; AS 2294:1990; ISO 3471:1994 for maximum machine weight 30 500 kg (67240 lb). Weight of the ROPS frame kg (lb) 300 (661) Fastened to the machine flame with 20 bolts M 24 x 90 ČSN 02 1143.55 (8G) Tightening torque... - Page 36 1.3. Technical Data D) FOPS roof cover The cover complies with international standards ISO 3449:1992; SAE J 231:JAN81; AS 2294:1990 and approval level II. It is mounted on the ROPS protective frame. Cover weight kg (lb) 140 (309) Attached to ROPS by 4 bolts M16x30(8G) Tightening torque Nm (in lb)
- Page 37 SPECIFICATION MANUAL ASC200/ASC250...
- Page 38 ASC200/ASC250...
-
Page 39: Operating Instructions
2. OPERATING INSTRUCTIONS ASC 110, ASC 130, ASC 150 ASC 200 and ASC 250 (Cummins tier 3) ASC110/ASC130/ASC150/ASC200/ASC250... - Page 40 ASC110/ASC130/ASC150/ASC200/ASC250...
-
Page 41: Safety Regulations
2.1. Safety Regulations OPERATING INSTRUCTIONS 2.1.1. Safety Regulations and 2.1.1.2.Operation in an imperiled area Instruction for Operation of the Whatever damage to service networks must be reported Machine immediately to the operating company, simultaneously, access by unauthorized persons to the imperiled area The safety regulations stated in the individual chapters of must be limited. -
Page 42: Work Safety Precepts On Behalf Of The Operator
2.1. Safety Regulations 2.1.1.3. Work safety precepts on behalf When using ROPS frame of the operator • the machine frame in the spot of connection must not The operator be damaged (broken bent, etc.) • must make sure that the machine is operated only •... -
Page 43: Requirements For The Competence Of The Driver
OPERATING INSTRUCTIONS 2.1.2. Requirements for the 2.1.3. The driver’s duties competence of the driver • Before the start of operations, the driver must become • acquainted with instructions published in the ma- The roller may be operated by a driver, who has been chine documentation, particularly with safety rules, trained to ISO 7130 and other local and national and adhere to them. - Page 44 2.1. Safety Regulations • To follow safety messages Following the warning signal the operator may start under all circumstances to the machine first after all personnel have left the avoid risk of serious injury or vicinity of the machine. On a difficult to oversee site the machine may be started after a certain time allowed death.
-
Page 45: Forbidden Actions
OPERATING INSTRUCTIONS 2.1.4. Forbidden actions • operate the machine in deteriorated visibility and at night, unless the site and the machine are sufficiently illuminated, It is not permitted to • leave the seat with the machine running • operate the machine under the influence of alcohol or •... -
Page 46: Safety Signs And Symbols Marked On The Machine
2.1. Safety Regulations 2.1.5. Safety signs and symbols marked on the machine Risk of grasp Dangerous space with risk of grasp. (Symbols lo- cated on the left and right side of the rear crossbar of the front frame) Risk of burn Risk of burn. - Page 47 OPERATING INSTRUCTIONS Safety belt Fasten your safety belt before machine start. (Symbol located on the left side of the control board) Machine maximum height Attention to be paid when driving through places with a height limit. (Symbol located on the left side, on the frame under the cab) Battery disconnector Switch the battery disconnector into „O“...
- Page 48 2.1. Safety Regulations 15. Ear protection If there is no cab at the machine or if working with the windows open, be sure to wear an ear protection. (Symbol located on the central post of the control) 16. Noise emission Symbol located on the right side of frame under cabine.
- Page 49 OPERATING INSTRUCTIONS 21. Emergency exit (symbol placed on the right window of the cabin) 22. Sling Points The machine is to be rigged in these points. (Symbols located on the both sides of the frames) ASC110/ASC130/ASC150/ASC200/ASC250...
-
Page 50: Hand Signals
2.1. Safety Regulations 2.1.6. Hand Signals Signals given by Machine assistant operator unless driver visually contains the rolling space or working space or working equipment, tool. Signals for general commands Stop One arm erected with open palm in the direction of the driver, second arm akimbo. - Page 51 OPERATING INSTRUCTIONS Low-speed cruising forward – towards me Both arms erected abreast bending across, with palms towards the body – short swinging movements of ante- brachium towards the body and backward. Low-speed cruising backward – away from me Both arms erected abreast bending across, with palms away from the body - short swinging movements of ante- brachium away from the body and back.
- Page 52 2.1. Safety Regulations Short motion Both arms lifted forward bending across. Mark the „X“ distance between palms, then the motion signal follows. Engine start Circular motion of right hand’s antebrachium, with the fist closed. Engine cut off Oscillating motion of right hand sideways raised in front of the body to the sides.
-
Page 53: Environmental And Hygienical Principle
2.2. Environmental and Hygienical Principle OPERATING INSTRUCTIONS 2.2.2. Ecological rules The user must observe general rules of health and environment protec- • The fills of specific systems and some components tion, and all applicable laws, notices become waste with risk factors to the environment and regulations in the country of use, when discharged. -
Page 54: Conservation And Storing
2.3. Conservation and Storing 2.3.1. Short-term storage of 1 to 2 2.3.2. Conservation and storage for months more than 2 months Wash and clean the machine thoroughly. Warm up the Same rules for short-term storage apply here as well, engine to operating temperature before starting conser- moreover, vation for storage. -
Page 55: Conservation And Inspection Of Brand New Machines
OPERATING INSTRUCTIONS 2.3.3. De-conservation and inspection of brand new machines Check the machine against delivery documentation. Check whether any parts were damaged during transport or are missing. Inform the shipper of any discrepancies. Before starting operations again, wash off conservation with high- pressured hot water with ordinary degreasing means added as direct- ed, while observing environmental... -
Page 56: Liquidation Of The Machine After Termination Of Its Service Life
2.4. Liquidation of the Machine After Termination of Its Service Life In disposing of the machine at the end of its life, the user must observe national regulations and laws on waste disposal and protection of environment. We recommend that you refer always to •... -
Page 57: Description Of The Machine
2.5. Description of the machine OPERATING INSTRUCTIONS Main Components of the Machine 1 - Drum frame 13 - Engine 2 - Vibratory drum 14 - Hydraulic oil cooler 3 - Scraper 15 - Liquid radiator 4 - Articulated joint 17 - Driver’s workplace 5 - Tractor frame 18 - Pump of travel 6 - Axle... -
Page 58: Controls And Control Devices
2.6. Controls and control devices Controls and control devices ASC110/ASC130/ASC150/ASC200/ASC250... - Page 59 OPERATING INSTRUCTIONS 1 - Travel control 2 - Transport gear selector 3 - Working gear pre-selector 4 - Parking brake switch 5 - Emergency brake push-button 6 - Vibration switch 7 - Steering wheel 8 - Engine speed selector 9 - Switchbox 10 - Hydraulic oil thermometer 11 - Fuel gauge 12 - Revolution counter...
- Page 60 2.6. Controls and control devices Layout of controls and cabin accessories 44 - Windshield washer switch 45 - Fan switch 46 - Rear wiper switch 47 - Front wiper switch 48 - Cabin illumination 49 - Vent jets 50 - Sun shield 51 - Glove box 52 - Rear mirrors ASC110/ASC130/ASC150/ASC200/ASC250...
- Page 61 OPERATING INSTRUCTIONS Cabin 53 - Battery disconnector 64 - Fire extinguisher 54 - Cabin lifting and lowering switch 65 - Washer tank 55 - Bonnet lifting and lowering switch 66 - Bottle holder 56 - Manual hydro-generator for lifting and lower- 67 - Storage compartment ing of driver’s stand and bonnet 68 - Cabin ventilation filter...
- Page 62 2.6. Controls and control devices Travel control 1 Use this control to adjust the travel direction and speed. The travel speed depends on ! NOTE ! degree of the control movement from the neu- The engine can only be started when in tral position.
- Page 63 OPERATING INSTRUCTIONS Transport gear selector 2 Parking brake push-button 4 When the gear selector is on, the transport gear is en- Use the brake of the machine when the engine is running. The brake pilot lamp is shining. Then the operator can gaged (”rabbit”...
- Page 64 2.6. Controls and control devices ASC110/ASC130/ASC150/ASC200/ASC250...
- Page 65 OPERATING INSTRUCTIONS Steering wheel 7 Use the steering wheel to steer the machine. Fuel gauge 11 ! NOTE ! Indicates the level of fuel in fuel tank. When driving without vibration, set optimum speed (e.g. 1800 rpm) to ensure ! NOTE ! safe steering.
- Page 66 2.6. Controls and control devices ASC110/ASC130/ASC150/ASC200/ASC250...
- Page 67 OPERATING INSTRUCTIONS Troubleshooting switch 17 (idle speed op- tion) Engine idling switch 15 The switch is in the middle position. Turn it continuously any direction (+ forward or Use the switch to turn on engine idling with an engine - backward) to find defects according to flash- start.
- Page 68 2.6. Controls and control devices ASC110/ASC130/ASC150/ASC200/ASC250...
- Page 69 OPERATING INSTRUCTIONS Stop engine - signal lamp 18 Battery charging - signal lamp 22 Stop the engine as soon as possible if this red lamp goes Indicates proper function of battery charging. The lamp must go on at turning the ignition key 7 to ”I” position and go off after the engine has been started.
- Page 70 2.6. Controls and control devices ASC110/ASC130/ASC150/ASC200/ASC250...
- Page 71 OPERATING INSTRUCTIONS Clogged air cleaner - signal lamp 25 Vibration on - signal lamp 28 This lamp (on) indicates excessively clogged air filter. This lamp (on) indicates vibration is on. ! NOTE ! Clogging of the pressure filter of hydraulic Replace filters immediately! oil - signal lamp 29 At oil temperature of 50 - 60°C, this lamp (on) indicates...
- Page 72 2.6. Controls and control devices ASC110/ASC130/ASC150/ASC200/ASC250...
- Page 73 OPERATING INSTRUCTIONS Horn push-button 31 Beacon switch 36 Press the button to horn. Use the switch to turn on warning beacon. The lamp in the switch indicates beacon on. ! NOTE ! Rear lights switch 32 The beacon must be connected to con- nector 70.
- Page 74 2.6. Controls and control devices Drum traction slip control switch 38 Heating fan switch 39 Located on the control panel if the machine is not equipped position - off with ATC function. position - high speed of fan motor The lamp in the switch indicates the function on. position - low speed of fan motor Fan ensures air circulation inside the cabin only.
- Page 75 OPERATING INSTRUCTIONS ATC connector 41 Fuse (F9) - 50 A Use this connector to connect a service device (notebook) Secures protection of electric pump used for lifting and in order to communicate with the control module (sus- lowering of bonnet and driver’s stand. mic) and to troubleshoot.
- Page 76 2.6. Controls and control devices Roof light 48 Windshield washer switch 44 Use the switch to turn on front and rear washers at the same time. Roof fan switch 45 Use this switch to turn on the roof fan. NOTE The fan draws outside air, through a filter.
- Page 77 OPERATING INSTRUCTIONS Glove box 51 Use this box to store first aid kit. Battery disconnector 53 Use the disconnector 1 to disconnect battery. O position - electric system of the machine is disconnected I position - electric system of the machine is connected Rear mirrors 52 When working in congested environment or when trans- porting the machine, rear mirrors can be folded 90 de-...
- Page 78 2.6. Controls and control devices Driver’s seat 58 Lifting and lowering driver’s stand switch Adjustable, sprung, equipped with two-point retractor belt Lifting and lowering bonnet switch 55 Press buttons 54 or 55 to turn on lifting or lowering. Driver must fasten the seat- belt during drive! Manual hydro-generator 56 Use this device to manually lift or lower bonnet or driver’s...
- Page 79 OPERATING INSTRUCTIONS SEAT ADJUSTING ELEMENTS: Horizontal seat squab adjustment - raise the lever to move the seat single handedly forward or backward. Backrest inclination adjustment - raise the lever to tilt the backrest infinitely as necessary. Horizontal seat adjustment - raise the handle to move the seat with control panel forward or backward.
- Page 80 2.6. Controls and control devices Vertical seat adjustment - grasp the seat at the bottom Arm rest adjustment - raise and turn the screw to cast and lift it to gradually adjust height of the seat. The seat down a raise the rest. must click into the position.
- Page 81 OPERATING INSTRUCTIONS Box 59 Heating control 61 Fold out the back wall of the seat to use the box to store operation manual. Amount of liquid flowing to the heating radiator can be infinitely controlled from fully closed (valve closed) to fully open valve.
- Page 82 2.6. Controls and control devices Heating vents 62 Front and rear windshields are blown with hot air to avoid dewing. Tilt the vents to adjust amount of fresh air, swivel to adjust direction. ! NOTE ! Ensure proper ventilation while heating! ASC110/ASC130/ASC150/ASC200/ASC250...
- Page 83 OPERATING INSTRUCTIONS Hydro-generator control lever 63 Fire extinguisher 64 Use the lever to control manual hydro-generator of lifting For instructions how to use the fire extinguisher, see the and lowering the cabin and bonnet. label. Get familiar with using the fire extinguisher! Inspect the fire extinguisher regularly!
- Page 84 2.6. Controls and control devices Washer tank 65 Bottle holder 66 The tank is used for supplying solution to two pumps of Fold out the holder to keep standard bottle. windshield washers - for front and rear washer jets. ! NOTE ! Fill the tank with anti-freeze solution before winter! ASC110/ASC130/ASC150/ASC200/ASC250...
- Page 85 OPERATING INSTRUCTIONS Connector 70 Storage compartment 67 Use this connector for warning beacon. Compartment for driver’s personal belongings. ASC110/ASC130/ASC150/ASC200/ASC250...
-
Page 86: Controlling And Operation Of The Machine
2.7. Controlling and operation of the machine 2.7.1. Starting the engine WARNING! Do not start longer than 30 seconds. Wait for 2 minutes before next starting. Blow horn before starting the Repeat starting procedure 3 times at engine to check that nobody most;... - Page 87 OPERATING INSTRUCTIONS ASC110/ASC130/ASC150/ASC200/ASC250...
- Page 88 2.7. Controlling and operation of the machine • After starting up, disconnect starting cables in reverse ! NOTE ! order. Starting voltage of the external starting • If using a starting power unit without connected batte- source must be 24 V. ries, do not disconnect the power unit before a battery will be connected in the machine.
-
Page 89: Travel And Reversing Without Vibrations
OPERATING INSTRUCTIONS • 2.7.2. Travel and reversing without Turn off gear selector 2 to set the working gear mode. vibrations • Select appropriate range of working gear on the work- ing gear pre-selector 3. • Switch off the switch 15 IDLE. Using the selector 8, set Give the acoustic signal before –1 the required engine speed (e.g. - Page 90 2.7. Controlling and operation of the machine Selecting driving direction and speed Do not drive across (traverse) • Move the travel control 1 from neutral to the required slopes with high inclination! direction - little movement = low speed and vice versa. Drive directly up the slope! Upon moving the travel control 1, the neutral 24 signal lamp will go off.
-
Page 91: Travel With Vibration
OPERATING INSTRUCTIONS 2.7.3. Travel with vibration • • Start moving and use switch 6 to turn on vibration. Turn off gear selector 2 to set the working gear mode. Signal lamp 28 will light up; the drum will start vibrat- •... -
Page 92: Stopping The Machine And Engine
2.7. Controlling and operation of the machine 2.7.4. Stopping the machine and engine ! NOTE ! • Use switch 6 to deactivate vibration - signal lamp 28 will go off. Do not stop the engine immediately; let it idle for 3 minutes to cool it down and •... -
Page 93: Emergency Stopping
OPERATING INSTRUCTIONS 2.7.5. Emergency stopping Use this way of stopping in ! NOTE ! Before restarting the engine, turn case of defect, when the the button 5 in the direction of the arrow, machine cannot be stopped move the travel lever 1 in to ”N” position. by moving travel control 1 to Brake the machine with switch 4 and turn neutral position, or is it im-... -
Page 94: Dead Parking Of The Machine
2.7. Controlling and operation of the machine 2.7.6. Dead parking of the machine • Stop the machine - see chapter 2.7.4. Stop the machine on even • Turn off the battery disconnector. and firm surface. • Clean the machine from dirt (scraper and tyres). Check the place of parking •... -
Page 95: Troubleshooting According To Flashing Codes
OPERATING INSTRUCTIONS 2.7.7. Troubleshooting according to NOTE: If only one defect is identified, its error code will be signalled repeatedly even if you press switch 17 in either flashing codes direction. • In case of engine fault, either stop engine red signal lamp 18 or engine warning yellow lamp 19 will light up. -
Page 96: Atc Function
NOTE In case of ATC defect, transport gear cannot be engaged • ATC (Ammann Traction Control) - interaxle differential or, if adhesion limit is exceeded, drum or one of wheels - prevents slipping of wheels and drum in case of will start slipping. -
Page 97: Blade
OPERATING INSTRUCTIONS 2.7.9. Blade • Unlock the blade on both sides. • • For unlocked blade. For locked (secured) blade. ASC110/ASC130/ASC150/ASC200/ASC250... - Page 98 2.7. Controlling and operation of the machine • Start the engine. Switch off the ”Idle” switch 15, set maximum RPM 8 (or those proportional to the subse- quent output). Switch off the gear selector 2 and choose a suitable range of speed of operation on the appropriate preselector 3.
- Page 99 OPERATING INSTRUCTIONS • • Lower the blade down to the earth by shifting the blade Return the controller (pedal) to ”0” position and start controller forwards from ”0” position to ”III” (floating driving. position). • The blade then starts digging after shifting the control- or pedal.
- Page 100 2.7. Controlling and operation of the machine • • Floating position can be used for shovelling the ma- After finishing work with the blade secure it in the terial. The blade slides over removable skids 96. It upper position using both safety pull rods 1 and pins can be also used for the regressive spreading and evening of the material.
-
Page 101: Lifting Driver's Stand And Bonnet
OPERATING INSTRUCTIONS • 2.7.10. Lifting driver’s stand and Move the lever to A position (lifting). bonnet ! NOTE ! Fold the seat and rest before lifting drivers stand. Just the machine with integrated roof in ROPS. • Insert the lever to the pump and lift the driver’s stand. Lifting driver’s stand •... - Page 102 2.7. Controlling and operation of the machine Lifting bonnet Lifting and lowering using electric-hydraulic pump (op- tional) • Move the lever to A position - (lifting). • Remove nuts of the driver’s stand. • Insert the lever to the pump and lift the driver’s stand. •...
- Page 103 OPERATING INSTRUCTIONS Manual lifting and lowering Driver’s stand • • In case of el-hydraulic unit or flat battery, use the Remove nuts of the driver’s stand. manual hydro-generator to perform lifting and lower- ing. • Open the cover 1 on the left side under the driver’s stand.
- Page 104 2.7. Controlling and operation of the machine • Bonnet Unlock the safety pin of lifting before starting lowering. • • Push the sliding valve 3 on the switchboard 2 and Push the sliding valve 3 on the other side of the secure it in the position with safety pin 4.
-
Page 105: Shifting The Machine (Transport)
2.8. Shifting the machine (transport) OPERATING INSTRUCTIONS 2.8.1. Transporting the machine on its The machine may drive on its own between worksites if not using public roads. ! NOTE ! Safety rules of the site must When transporting the machine on fin- be followed. -
Page 106: Transporting The Machine On Public Roads
2.8. Shifting the machine (transport) 2.8.2. Transporting the machine on public roads ! NOTE ! The machine must be at- tached to the transporting The standard version of the machine is vehicle by tying ropes (1) on not equipped with facilities to travel on tying spots. -
Page 107: Loading The Machine
OPERATING INSTRUCTIONS 2.8.3. Loading the machine Joint locking: • Unlock and pull pin 1. • Use drive-up ramps or crane to load the machine to a transporting vehicle. • The roller is equipped with lifting eyes for loading by crane: •... - Page 108 2.8. Shifting the machine (transport) • Unlock and pull pins 1 of two blocks 2 on both sides from the joint. (options) Do not step under the hang- ing load! Return the safety arm and blocks to default positions after loading is complete. Observe appropriate regula- tions while loading and unloading the machine.
-
Page 109: Dismantling Cabin And Rops Frame
OPERATING INSTRUCTIONS 2.8.4. Dismantling cabin and ROPS frame • If the machine height on the transporting vehicle is higher than allowed for transport, dismantle cabin and ROPS frame. Dismantling ROPS • Hang the frame by lifting eyes. • Disconnect electric system by disconnecting connec- tor between steering column and front windshield. -
Page 110: Using The Machine Under Special Conditions
2.9. Using the machine under special conditions 2.9.1. Towing Options: • Pin is also used for front towing lug on the crossbar • In case of failure the Machine can be towed to a of the front frame. distance necessarily needed. For this reason the Machine has been fitted with two eyes on the frame of drum. - Page 111 OPERATING INSTRUCTIONS • Releasing drum and wheels for ASC 110 - ASC 130 - ASC Connect hose 1 of the manual hydro-generator with 150: hose 3 of pressure filter. • Release all multi-plate brakes to avoid slipping of drum and wheels. •...
- Page 112 2.9. Using the machine under special conditions • Releasing brakes of the drum and the wheels for ASC Unscrew central parts 1 (haxagonal 27 mm (11/16”)) 200÷250 by three turns anti-clockwise on two multi-purpose safety valves of the hydro-generator of travel. •...
- Page 113 OPERATING INSTRUCTIONS • To put the machine into the original condition for ASC Turn the ignition key to I position and check signal 110 - ASC 130 - ASC 150: lamp of brake 23 switched off. • Disconnect hose 1 from hose 3 in the quick coupling •...
- Page 114 2.9. Using the machine under special conditions • To put the machine into the original condition for ASC Screw back multi-purpose valves on the hydro- 200÷250 generator. • Disconnect hoses 4. • Put the manual hydro-generator lever 63 to the holder under the driver’s stand.
-
Page 115: Driving With Vibrations On Compacted And Hard Material
OPERATING INSTRUCTIONS 2.9.2. Driving with vibrations on After releasing brakes and compacted and hard material short-circuiting the travel hydraulic circuit, all brakes When driving with vibration on more compacted sub- are out of operation! grade material, so called vibro-strike may occur. Use unimpaired towing ca- The same applies when driving with vibration on hard bles or towing bars of suffi-... -
Page 116: Using The Machine Under Heavy Weather Conditions
2.9. Using the machine under special conditions 2.9.3. Using the machine under heavy weather conditions 2.9.3.1. Operating the machine under low temperature Compacting in winter depends on content of fine particles and water in compacted soil. The lower temperature ! NOTE ! below zero, the firmer soil and more difficult compacting. -
Page 117: Operating The Machine At Higher Temperature And Humidity
OPERATING INSTRUCTIONS 2.9.3.2. Operating the machine at higher temperature and humidity Engine power output decreases with increasing temper- ature and air humidity. With regards to the fact that the two ! NOTE ! factors are independent of each other, their influence can When working under extreme condi- be described as follows: tions, when cooling liquid or hydraulic... -
Page 118: Operating The Machine In Higher Altitude
2.9. Using the machine under special conditions 2.9.3.3. Operating the machine in 2.9.3.4. Operating the machine in higher altitude extremely dusty conditions In higher altitude, engine power output decreases as a result of lower atmospheric pressure and specific densi- ! NOTE ! ty of incoming air. -
Page 119: Filling Tyres With Water
OPERATING INSTRUCTIONS 2.9.4. Filling tyres with water This is useful to increase weight allocated to axle and to lower gravity center when working in extreme conditions. Fill the inside of tyres with a solution of water, hydrated lime (calcium hydroxide) and anhydrous calcium chloride (CaCl or magnesium chloride (MgCl ). -
Page 120: Installing Air Conditioner
2.9. Using the machine under special conditions Draining: 2.9.5. Installing air conditioner • Secure the drum by scotch blocks from both sides, lift When retrofitting air condition unit, it is necessary to keep the rear part of the roller and release brake of wheel sufficient distance between the oil cooler and air condi- hydromotors, see chapter 2.9.1. - Page 121 OPERATING INSTRUCTIONS ASC110/ASC130/ASC150/ASC200/ASC250...
- Page 122 ASC110/ASC130/ASC150/ASC200/ASC250...
-
Page 123: Maintenance Manual
3. MAINTENANCE MANUAL ASC 200 and ASC 250 (Cummins tier 3) ASC200/ASC250... - Page 124 ASC200/ASC250...
-
Page 125: Safety Standards At Lubrication And Maintenance
3.1. Safety Standards at Lubrication and Maintenance 3.1.1. Safety during maintenance 3.1.2. Fire safety during changing contents Lubrication, maintenance and adjustment process: • • From fire safety point of view, inflammable liquids use qualified personnel. used in the machine are classified into following •... -
Page 126: Environmental And Health Regulations
3.1. Safety Standards at Lubrication and Maintenance 3.1.3. Environmental and health 3.1.3.2.Environmental principles regulations Contents of specific machine systems During operation and maintenance of the machines the and some of its parts are wastes user must follow general principles of health and environ- dangerous to the environment after ment protection, and laws, notices and regulations relat- when discarded (disassembly, chang-... -
Page 127: Specification Of Fluids
3.2. Specification of fluids MAINTENANCE MANUAL 3.2.1. Engine oil Engine oil is specified by its performance and viscosity classifications. Performance classification according to API (AMERICAN PETROLEUM INSTITUTE) CCMC (COMMITE of COMMON MARKET AUTOMOBILE CONSTRUCTORS). ACEA (ASSOTIATION DES CONSTRUCTEURS EU- ROPÉENS DE AUTOMOBILE) Viscosity classification To determine SAE (Society of Automotive Engineers) viscosity class, the ambient temperature and type of... -
Page 128: Fuel
3.2. Fills specification 3.2.2. Fuel 3.2.3. Coolant Diesel is used as fuel: Use coolant consisting of 50% of frost-resistant ethyl glycol agent and water according to Table all year-round • CEN EN 590 or DIN/EN 590 (draft) for the cooling system of the engine. Use the coolant with •... -
Page 129: Hydraulic Oil
MAINTENANCE MANUAL 3.2.4. Hydraulic oil ! WARNING ! At high ambient temperatures, when the oil temperature reaches continual 90 °C For use in the hydraulic system of the machine, only high- (194 °F), we recommend replacing the oil quality hydraulic oils of output class according to ISO with one of kinetic viscosity 100 mm /s - 6743/HV (equal to DIN 51524 part 3 HVLP;... -
Page 130: Gearbox Oil
3.2. Fills specification 3.2.5. Gearbox oil 3.2.6. Lubricating grease Use high quality oils complying with API GL-5 or EP or MIL- Plastic grease containing lithium in compliance with L-2105 C for lubricating the drum gearbox and axle (wheels) NLGI-2 regulation (Mobilplex EP-1, Retinax A, Alvania, drive gearboxes. -
Page 131: Fills
3.3. Fills MAINTENANCE MANUAL s l l . . . l l i f t i t l i o c i t c i l l i o l i o l i o t n i t n i c i t n i l f - i... -
Page 132: Lubrication And Maintenance Chart
3.4. Lubrication and Maintenance Chart ASC200/ASC250... - Page 133 MAINTENANCE MANUAL ASC200/ASC250...
-
Page 134: Lubrication Chart
3.5. Lubrication Chart ASC200/ASC250... -
Page 135: Individual Operations Of Maintenance
3.6. Individual Operations of Maintenance MAINTENANCE MANUAL Ensure regular and repetitive lubrication and maintenance at intervals according to daily reading of the working hours counter. This manual includes only basic information on the engine; the rest is provided in the operation and maintenance manual of the engine, which is a part of documentation supplied with the machine. -
Page 136: Every 20 Hours Or Daily
3.6. Individual Operations of Maintenance Every 20 Hours or Daily Every 20 Hours or Daily 3.6.1. Checking the amount of oil in • Refill oil after removing the filler plug through the oil filler. Wait approx. 1 min until the level is stable and the engine check again. -
Page 137: Checking Cooling Liquid Of The Engine
MAINTENANCE MANUAL Every 20 Hours or Daily Every 20 Hours or Daily 3.6.2. Checking cooling liquid of the ! WARNING ! engine The level must not fall below the level • Check visually the level 1. indicator eyesight. • Refill coolant through the filler 2. Refill only cooling liquids containing the frost-resistant agents on the identical basis, according to chapter 3.2.3. -
Page 138: Checking Oil In The Hydraulic Tank
3.6. Individual Operations of Maintenance Every 20 Hours or Daily Every 20 Hours or Daily • 3.6.3. Checking oil in the hydraulic Refill oil using filling device by means of filling quick coupling according to chapter 3.6.28. tank • Check the oil level. (oil gauge). ! WARNING ! If the oil level falls below the lower edge of the ”MIN”... -
Page 139: Crankcase Breather Tube
MAINTENANCE MANUAL Every 20 Hours or Daily Every 20 Hours or Daily 3.6.4. Crankcase breather tube • Inspect the breather tube for sluge, debris, or ice the tube. Note: Inspect the tube more frequently in icy conditions. ASC200/ASC250... -
Page 140: Checking Of The Condition Ventilator And Belt
3.6. Individual Operations of Maintenance Every 20 Hours or Daily Every 20 Hours or Daily • 3.6.5. Checking of the condition Traverse (across the belt width) cracks are accept- able. Longitudinal (direction of belt length) cracks that ventilator and belt intersect with traverse cracks are not acceptable. -
Page 141: Checking The Vacuum Valve Of The Air Cleaner
MAINTENANCE MANUAL Every 20 Hours or Daily Every 20 Hours or Daily 3.6.6. Checking the vacuum valve of the air cleaner • Clean the exit slit and remove the trapped dust by NOTE pushing. • Collected dust is stored in the dust valve and automa- tically emptied during the machine operation. -
Page 142: Checking Fuel Level
3.6. Individual Operations of Maintenance Every 20 Hours or Daily Every 20 Hours or Daily • 3.6.7. Checking fuel level Refill the fuel tank up to the lower edge of the tank filler through the strainer. • Check the amount of fuel on fuel gauge; in case of insufficient amount refill fuel. -
Page 143: Cleaning The Water Separator
MAINTENANCE MANUAL Every 20 Hours or Daily Every 20 Hours or Daily 3.6.8. Cleaning the water separator • Prepare a vessel for draining the settling. • Use your hand to open the drain valve 1. Turn the valve counterclockwise approximately 31/2 turns until the valve drops down 25 mm (1 in) and draining occurs and let fuel drain until clean fuel starts to drain. -
Page 144: Checking Warning And Control Devices
3.6. Individual Operations of Maintenance Every 20 Hours or Daily Every 20 Hours or Daily 3.6.9. Checking warning and control devices • Turn on switches 31, 32, 33, 34, 35, 36, 37, test the Continuously check devices horn, beacon and lights. and signal lights during opera- tion Repair any indicated defects... -
Page 145: Every 100 Hours
MAINTENANCE MANUAL Every 100 Hours Every 100 Hours 3.6.10. Checking the tyre pressure ! WARNING ! Rotate tyres so that valves are at top positions. • Check the pressure in cold tyres, by air pressure meter. • Keep the tyre pressure at 150 kPa (22 PSI). ASC200/ASC250... -
Page 146: Every 250 Hours Or Once In 3 Months
3.6. Individual Operations of Maintenance Every 250 Hours or Once in 3 Months Every 250 Hours or Once in 3 Months • 3.6.11. Checking the engine inlet piping Check again tightness between the bonnet 2 and the air cleaner 3. •... -
Page 147: Checking Of The Condition Ventilator And Belt
MAINTENANCE MANUAL Every 250 Hours or Once in 3 Months Every 250 Hours or Once in 3 Months • 3.6.12. Checking of the condition Check visually the belt, for intersecting crakcks. Traverse (across the belt width) cracks are accept- ventilator and belt able. -
Page 148: Checking The Cooling Circuit Of The Engine
3.6. Individual Operations of Maintenance Every 250 Hours or Once in 3 Months Every 250 Hours or Once in 3 Months • 3.6.13. Checking the cooling circuit of Check whether the oil cooler gills and the engine radiator gills are not clogged. In case of clogged gills the engine clean them for instance by blowing the radiators throu- gh with pressure air (steam or warm water) according... -
Page 149: Checking Batteries
MAINTENANCE MANUAL Every 250 Hours or Once in 3 Months Every 250 Hours or Once in 3 Months 3.6.14. Checking batteries or hydrometer. • Place the roller onto flat, firm surface. • Stop the engine and disconnect the electric system using the isolating master switch. - Page 150 3.6. Individual Operations of Maintenance Every 250 Hours or Once in 3 Months Every 250 Hours or Once in 3 Months Do not turn batteries upside down to Always follow the instructions avoid draining of electrolyte from of the manufacturer, when venting of the battery.
-
Page 151: Checking The Function Of Vacuum Switch Of The Air Cleaner
MAINTENANCE MANUAL Every 250 Hours or Once in 3 Months Every 250 Hours or Once in 3 Months • 3.6.15. Checking the function of After such covering the signal lamp 25 of the air cleaner clogging must light up. vacuum switch of the air cleaner •... -
Page 152: Lubrication Of The Machine
3.6. Individual Operations of Maintenance Every 250 Hours or Once in 3 Months Every 250 Hours or Once in 3 Months 3.6.16. Lubrication of the machine bearing 4x • Place the roller onto flat, firm surface. • Stop the engine and disconnect electric system using the isolating master switch. - Page 153 MAINTENANCE MANUAL Every 250 Hours or Once in 3 Months Every 250 Hours or Once in 3 Months Hydraulic cylinders of bonnet lifting Hydraulic cylinder of driver’s post lifting upper pins 2x lower pins 2x lower pins 2x Door hinges pins pins 6 x ASC200/ASC250...
- Page 154 3.6. Individual Operations of Maintenance Every 250 Hours or Once in 3 Months Every 250 Hours or Once in 3 Months Bonnet hinges pins Front pins of cabin attachment pins 2 x pins 2 x ! NOTE ! Use only recommended lubricating greases, see chapter 3.2.6.
-
Page 155: Checking Oil In The Vibrator
MAINTENANCE MANUAL Every 250 Hours or Once in 3 Months Every 250 Hours or Once in 3 Months 3.6.17. Checking oil in the vibrator • Stop the machine in order that the plugs on the left side of the drum are in the position according to fig. ! NOTE ! NOTE: Refill the identical type of oil. -
Page 156: Checking Oil In Gearboxes
3.6. Individual Operations of Maintenance Every 250 Hours or Once in 3 Months Every 250 Hours or Once in 3 Months 3.6.18. Checking oil in gearboxes Drum gearbox • Disassembly the cover on the right side of the frame. Wheel gearbox •... - Page 157 MAINTENANCE MANUAL Every 250 Hours or Once in 3 Months Every 250 Hours or Once in 3 Months • • Dismantle cover and refill oil through the filling plug 2, Clean the plugs and mount again. if necessary. • Check tightness of the gearboxes. Do not touch the gearbox and adjacent parts if they are hot.
-
Page 158: Every 500 Hours Or Once In 6 Month
3.6. Individual Operations of Maintenance Every 500 Hours or Once in 6 Month Every 500 Hours or Once in 6 Month 3.6.19. Engine oil and the filter exchange ! NOTE ! Drain the oil after stopping the operation immediately, when is temperature of cooling liquid 60 °C (140 °F). - Page 159 MAINTENANCE MANUAL Every 500 Hours or Once in 6 Month Every 500 Hours or Once in 6 Month • • Tighten 3/4 to 1 turn after gasket makes contact with Refill oil to the upper oil level mark (H). Oil charge is the filter head.
-
Page 160: Engine Fuel Filter Exchange
3.6. Individual Operations of Maintenance Every 500 Hours or Once in 6 Month Every 500 Hours or Once in 6 Month • Tighten 3/4 turn after gasket rmakes contact with the 3.6.20. Engine fuel filter exchange filter head. Fuel filter •... - Page 161 MAINTENANCE MANUAL Every 500 Hours or Once in 6 Month Every 500 Hours or Once in 6 Month • • Clean the area around the fuel filtr head, remove filtr. Refuel with hand pump in fuel pre-filter. • Lubricate o ring seal with of new filter clean lubricating oil.
-
Page 162: Checking Cooling Liquid
3.6. Individual Operations of Maintenance Every 500 Hours or Once in 6 Month Every 500 Hours or Once in 6 Month 3.6.21. Checking cooling liquid 3.6.22. Checking tightening of wheel bolts • Check the concentration of anti-freeze agent in coo- ling liquid using a refractometer. -
Page 163: Every 1000 Hours Or Once A Year
MAINTENANCE MANUAL Every 1000 Hours or Once a Year Every 1000 Hours or Once a Year • 3.6.23. How to check tightening pulley Lift the belt tightening pulley using a lever with a square end of 10 mm (3/8 in) and remove the belt. and belt of the engine •... -
Page 164: Exchanging Oil In Gearboxes
3.6. Individual Operations of Maintenance Every 1000 Hours or Once a Year Every 1000 Hours or Once a Year • Check the pulley (arm) does not deflects from the 3.6.24. Exchanging oil in gearboxes vertical axis. Maximal deflection allowed is 3 mm (0.12 in). - Page 165 MAINTENANCE MANUAL Every 1000 Hours or Once a Year Every 1000 Hours or Once a Year • Drum gearbox - right side Mount the drain plug 3 after draining is finished. • • Unscrew covers. Refill recommended oil through the filling plug 2. •...
-
Page 166: Checking The Damping System
3.6. Individual Operations of Maintenance Every 1000 Hours or Once a Year Every 1000 Hours or Once a Year 3.6.25. Checking the damping system Rear metal-rubber mountings - driver’s post • Check the condition of metal-rubber mountings and bonding of metal with rubber. Drum damping system - left side;... -
Page 167: Cleaning The Fuel Tank
MAINTENANCE MANUAL Every 1000 Hours or Once a Year Every 1000 Hours or Once a Year 3.6.26. Cleaning the fuel tank NOTE Clean the tank when minimum of fuel is inside. • Unscrew the drain plug 1 and let fuel drain into a Approximately 45 l (12 US gal) of fuel remains in the tank vessel. -
Page 168: Every 2000 Hours Or Every 2 Years
3.6. Individual Operations of Maintenance Every 2000 Hours or Every 2 Years Every 2000 Hours or Every 2 Years 3.6.27. Oil exchange in the vibrator 3.6.28. Exchanging hydraulic oil and filter • Place the roller onto a flat, firm surface so that the drain plug on the left side of the drum 3 is in the lowest position and the opposite filling plug 1 in the highest ! NOTE ! - Page 169 MAINTENANCE MANUAL Every 2000 Hours or Every 2 Years Every 2000 Hours or Every 2 Years • • Dismantle suction hose. Dismantle the suction strainer from the suction pipe. Wash the suction strainer and blow the strainer with pressure air from inside. •...
- Page 170 3.6. Individual Operations of Maintenance Every 2000 Hours or Every 2 Years Every 2000 Hours or Every 2 Years • Checking the oil thermometer sensor Mount the quick coupling of the filling device to the quick coupling. • Dismantle the sensor and clean the contact. •...
- Page 171 MAINTENANCE MANUAL Every 2000 Hours or Every 2 Years Every 2000 Hours or Every 2 Years ALTERNATIVE FILLING THROUGH THE TANK FILLER ! NOTE ! After filling the circuit, check whether ! NOTE ! signal lamp doesn‘t shine. The alternative way of filling the hydrau- lic circuit is only emergency solution! When filling through the tank filler, large amount of old dirty oil remains in the...
- Page 172 3.6. Individual Operations of Maintenance Every 2000 Hours or Every 2 Years Every 2000 Hours or Every 2 Years • Exchanging the filter element of pressure filter Take out the filter element. • Carefully clean the filter container. Exchange the filter element always in •...
-
Page 173: Cleaning Of The Suction Strainer Of Lifting And Lowering Of The Bonnet And The Driver's Post
MAINTENANCE MANUAL Every 2000 Hours or Every 2 Years Every 2000 Hours or Every 2 Years • 3.6.29. Cleaning of the suction strainer Remove the suction strainer 4. Wash the suction strainer in petrol and blow through the strainer with of lifting and lowering of the pressure air. -
Page 174: Exchanging The Engine Cooling Liquid
3.6. Individual Operations of Maintenance Every 2000 Hours or Every 2 Years Every 2000 Hours or Every 2 Years • 3.6.30. Exchanging the engine cooling Open the drain cock in the cooler lower chamber. Let liquid drain into prepared vessels. The quantity drai- liquid ned is approximately 30 l (7.9 gal US). - Page 175 MAINTENANCE MANUAL Every 2000 Hours or Every 2 Years Every 2000 Hours or Every 2 Years • After closing the drain cock, fill cooling system with Do not dismantle the pressure new cooling liquid with ratio of 50% of water + 50% of plug before the temperature of anti-freeze agent.
-
Page 176: Checking Torsion Vibration Damper Of The Engine
3.6. Individual Operations of Maintenance Every 2000 Hours or Every 2 Years Every 2000 Hours or Every 2 Years • 3.6.31. Checking torsion vibration Check visually whether the torsion vibration damper is not moving forward. Check th vibration damper for damper of the engine evidence of fluids loss, dents and wobble. -
Page 177: Checking Coolant In The Drum
MAINTENANCE MANUAL Every 2000 Hours or Every 2 Years Every 2000 Hours or Every 2 Years 3.6.32. Checking coolant in the drum Wash off spilled liquid with • clean water. Stop the machine on a firm, flat, and horizontal surface, and lace the plugs as illustrated. -
Page 178: Maintenance - As Needed
3.6. Individual Operations of Maintenance Maintenance - As Needed Maintenance - As Needed • 3.6.33. Exchanging cleaner elements of Carefully remove the main element. air cleaner NOTE The air cleaner contains the main and safety elements. ! NOTE ! If signal lamp 25 lights up, the both elements must be exchanged. - Page 179 MAINTENANCE MANUAL Maintenance - As Needed Maintenance - As Needed • Clean the inside of the cleaner and contact surface in ! NOTE ! order that the engine inlet pipe does not get blocked. Check connections and piping for any untightness Do not clean the inside of the cleaner by and clogging of the engine inlet opening on the bonnet pressure air;...
-
Page 180: Cleaning The Engine Radiator And Hydraulic Oil Radiator
3.6. Individual Operations of Maintenance Maintenance - As Needed Maintenance - As Needed 3.6.34. Cleaning the engine radiator ! NOTE ! and hydraulic oil radiator Do not use cleaner with too high pres- • Due to variable working conditions it is not possible sure so as not to damage radiator honey- to determine any fixed interval of cleaning. -
Page 181: Cleaning The Air Cleaner Of Cabin Ventilation
MAINTENANCE MANUAL Maintenance - As Needed Maintenance - As Needed 3.6.35. Cleaning the air cleaner of cabin 3.6.36. Cleaning the machine ventilation • Clean the machine from major impurities after finis- hing your work. • Dismantle the cover grill 1. •... -
Page 182: Adjusting Scrapers
3.6. Individual Operations of Maintenance Maintenance - As Needed Maintenance - As Needed 3.6.37. Adjusting scrapers Scrapers for the taper foot drum • Loosen bolts 1 and move individual scrapers 2 to- Scrapers for the smooth drum wards the drum to the distance of 25 mm (1 in). •... -
Page 183: Checking And Tightening Bolted Joints
MAINTENANCE MANUAL Maintenance - As Needed Maintenance - As Needed 3.6.38. Checking and tightening bolted joints • Check regularly for loosened bolted joints. • Use torque wrenches to tighten them. t f - t f - The values given in the chart are torques used for dry threads (friction factor 0.14). - Page 184 3.6. Individual Operations of Maintenance Maintenance - As Needed Table of insert nuts tightening moments of the hoses with sealing “O” ring h t i n i l " r " t f - ASC200/ASC250...
- Page 185 MAINTENANCE MANUAL Maintenance - As Needed Table of tightening moments for necks with tightening Table of tightening moments for plugs with flat packing edge, or with flat packing t f - t f - " 8 " 8 " 4 "...
- Page 186 3.6. Individual Operations of Maintenance ASC200/ASC250...
-
Page 187: Defects
3.7. Defects MAINTENANCE MANUAL ! NOTE ! Usually, defects are caused by incorrect operation of the machine. Therefore, in case of any troubles read again properly through the instructions given in the operation and mainte- nance manual for the machine and engine. If you cannot identify the cause, contact a ser- vice department of an authorised dealer or the manufacturer. -
Page 188: Appendixes
3.8. Appendixes Wiring scheme Wiring scheme - seat switch - with engine QSB according to TIER 3 (Ammann Traction Control) Legend: (the schematic reflects machine version that includes all controlling elements and accessories) A1 - Interrupter of direction lights S5 - Switch of rear headlights... - Page 189 MAINTENANCE MANUAL ASC200/ASC250...
- Page 190 3.8. Appendixes ASC200/ASC250...
- Page 191 MAINTENANCE MANUAL MAINTENANCE MANUAL ASC200/ASC250...
-
Page 192: Hydraulic Circuit - Asc 200/250 - Inter - Wheel Differential Lock
3.8. Appendixes Hydraulic circuit - ASC 200/250 - Inter - wheel differential lock Diagram: 1 - Travel pump SAUER 2 - Vibration pump SAUER 3 - Drive drum hydromotor SAUER 4 - Vibration hydromotor SAUER 5 - Wheel hydromotors SAUER 8 - Steering pump JIHOSTROJ 9 - Power steering unit... - Page 193 MAINTENANCE MANUAL MAINTENANCE MANUAL ASC200/ASC250...
-
Page 194: Hydraulic Circuit - Asc 200/250 - Interaxle Differential Lock Atc
3.8. Appendixes Hydraulic circuit - ASC 200/250 - Interaxle differential lock ATC Diagram: 1 - Travel pump SAUER 2 - Vibration pump SAUER 3 - Drive drum hydromotor SAUER 4 - Vibration hydromotor SAUER 5 - Wheel hydromotors SAUER 8 - Steering pump JIHOSTROJ 9 - Power steering unit DANFOS... - Page 195 MAINTENANCE MANUAL MAINTENANCE MANUAL ASC200/ASC250...
- Page 196 ASC200/ASC250...
- Page 197 MAINTENANCE MANUAL ASC200/ASC250...
Need help?
Do you have a question about the ASC 200 Series and is the answer not in the manual?
Questions and answers
Park brake solenoid faulty
какой размер ремня привода агрегатов