Table of Contents
Advertisement
Advertisement
Table of Contents

Related Manuals for Ammann ARR 1575 Yanmar


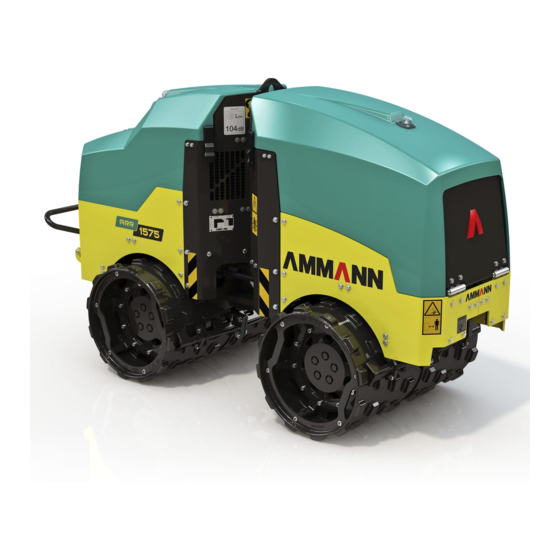
Summary of Contents for Ammann ARR 1575 Yanmar
- Page 1 Operating manual ARR 1575 Yanmar Book ID: 4-P06557YA...
- Page 3 ARR 1575 Trench roller Yanmar Tier 4 final Operating manual Edition 09/2017 From Serial No. 5570553 Translation of Original Operating Manual...
- Page 5 The original EC/EU Declaration of Conformity is supplied with documents during expedition of machine. / Das Original der EG-/EU-Konformitätserklärung wird mit den Unterlagen während des Versands der Maschine mitgeliefert. Manufacturer / Hersteller: Ammann Czech Republic a.s. Výrobce / Adresa / Address / Adresse: Náchodská...
- Page 7 Adherence to maintenance instructions increases the reliability and lifetime of the machinery. It reduces repair costs and down time. AMMANN accepts no liability for continued safe functioning of the road roller if it is incorrectly operated and / or operating modes are employed which represent improper use.
- Page 8 All dimensions and weights are approximate and, therefore, not binding. Ammann Czech Republic a.s. reserves the right to perform modifications without obligation to inform the machine user. If you identify any differences between the machine operated by you and the information contained in this publication, contact your local dealer.
- Page 9 SYMBOLS OF THE SAFETY NOTICES: The notice warns of a serious risk of personal injury or other personal hazards. The notice warns of possible damages to the machine or its parts. The notice warns of the necessity of environmental protection. ! NOTICE ! As used in this operating manual, the terms „right“, „left“, „front“...
-
Page 10: Table Of Contents
Content Content ................................4 SPECIFICATION MANUAL ........................9 1.1. Basic Data ..............................10 1.2. Dimension Chart ...........................12 1.3. Technical Data ............................13 OPERATION MANUAL ..........................17 2.1. Major Safety Precautions ........................19 2.1.1. Safety Measures during Machine Operation ..............................19 2.1.1.1. Compaction Work Commencement ................................19 2.1.1.2. Work Safety Secured by User .....................................19 2.1.1.3. - Page 11 OPERATING MANUAL 2.4. Disposal of the machine at the end of its service life ................35 2.5. Machine description ..........................36 2.6. Actuators and dashboard instruments ....................40 2.6.1. Display unit ..........................................41 2.6.2. Infrared remote control .......................................45 2.6.3. Light indication........................................58 2.7. Machine control and use ........................59 2.7.1.
- Page 12 Content MAINTENANCE MANUAL ........................87 3.1. Safety and other measures for machine maintenance ..............89 3.1.1. Safety of machine maintenance ..................................89 3.1.2. Fire protection measures during exchanges of operating fluids ......................89 3.1.3. Ecological and hygienic principles ..................................90 3.2. Specification of fluids ...........................91 3.2.1.
- Page 13 OPERATING MANUAL Every 500 hours of operation (6 months) ..................115 3.6.16. Replacement of fuel filters ....................................115 3.6.17. Air filter cartridge replacement ..................................117 Every 1000 hours of operation (1 year).....................119 3.6.18. Exchanging hydraulic oil and filter ................................119 3.6.19. Engine cooling liquid change..................................121 3.6.20.
- Page 14 ARR 1575...
-
Page 15: Specification Manual
SPECIFICATION MANUAL 1. SPECIFICATION MANUAL ARR 1575 (Yanmar Tier 4 Final) ARR 1575... -
Page 16: Basic Data
1.1. Basic Data Machine description Please fill in the following data: The ARR 1575 trench roller is a roller specially designed for (see Pin label, Label of the Yanmar engine) trench compacting. The unlimited side clearance of the roller drums allows compacting in very narrow, tight trenches right up to the trench walls. - Page 17 SPECIFICATION MANUAL The machine that complies with the requirements as to health protection and safety is identified with a name plate with CE marking. 1 - Name – always mentioned only in the English version 2 - Type 3 - Serial number 4 - Operating weight 5 - Maximum weight 6 - Rated power...
-
Page 18: Dimension Chart
1.2. Dimension Chart 555003 (in) 2227 1980 1000 1282 1317 (23,7) (11,9) (1,4) (25,2) (87,7) (78,0) (39,4) (20,7) (50,5) (51,9) ARR 1575 T4 final 2227 1980 1000 1282 1317 (23,7) (16,0) (1,4) (33,5) (87,7) (78,0) (39,4) (20,7) (50,5) (51,9) ARR 1575... -
Page 19: Technical Data
1.3. Technical Data ARR 1575 Tier 4 final Dimension Drum width (mm) Weight Operating weight of EN 500-1+A1 (CECE) kg (lb) 1340 (2950) 1440 (3170) Operating load of EN 500-1+A1 (CECE) on front axis kg (lb) 730 (1610) 780 (1720) Operating load of EN 500-1+A1 (CECE) on rear axis kg (lb) 610 (1340) 660 (1460) - Page 20 1.3. Technical Data ARR 1575 Tier 4 final Vibration Frequency I Hz (VPM) 40 (2400) Amplitude I mm (in) 0,6 (0,024) Amplitude II mm (in) 1,1 (0,043) Fluid capacities Fuel l (gal US) 28 (7,4) Engine (oil filling) l (gal US) 3,4 (0,9) Cooling system l (gal US)
- Page 21 OPERATING MANUAL Notes ARR 1575...
- Page 22 Notes ARR 1575...
-
Page 23: Operation Manual
OPERATION MANUAL 2. OPERATION MANUAL ARR 1575 (Yanmar Tier 4 Final) ARR 1575... - Page 24 ARR 1575...
-
Page 25: Major Safety Precautions
2.1. Major Safety Precautions OPERATION MANUAL 2.1.1. Safety Measures during Machine Opera- 2.1.1.2. Work Safety Secured by User tion • User shall promptly communicate any damage to the utility lines to their operator, and at same time he make measures Safety measures given in the individual chapters of Enginering to prevent unauthorized persons from entering endangered Documentation supplied with the Machine shall be added with... -
Page 26: Assurance Of Safety Measures By The Operator
2.1. Major Safety Precautions 2.1.1.3. Assurance of safety measures by the op- 2.1.2. Requirements on qualification of operat- erator ing personnel • The operator must ensure that the machine is operated • The machine can only be driven by a person who has been only under conditions and only for purposes it is technically trained according to ISO 7130 and other local and national capable of according to the conditions set by the manufac-... -
Page 27: Driver's Obligations
OPERATION MANUAL 2.1.3. Driver’s obligations • The driver must signal every machine start with the acoustic or light signal, always before the engine is started. • Prior to start of the machine operation, the driver is obliged • After issuing the warning alarm, the driver may only start to study instructions stated in the documentation supplied the machine when all workers have left the endangered together with the machine, especially with safety precau-... -
Page 28: Forbidden Activities - Safety And Guarantee
2.1. Major Safety Precautions 2.1.4. Forbidden activities – safety and guaran- • To operate the machine in a protected zone of electric lines or substations. • Do not cross electric cables if they are not properly protect- ed against mechanical damage. It is prohibited: •... -
Page 29: Safety Notices And Signs Applied On The Machine
OPERATION MANUAL 2.1.5. Safety notices and signs applied on the machine 555086B ARR 1575... - Page 30 2.1. Major Safety Precautions 555087B ARR 1575...
- Page 31 OPERATION MANUAL Runover hazard Keep clear of machine, runover hazard. 6,6 ft. 3842 2939 3842 Injury hazard Risk of injury: There is a risk of injury! Do not touch ro- tating parts of the machine while the engine is running. There is a risk of burns.
- Page 32 2.1. Major Safety Precautions Ignition Get perfectly familiar with the machine operation accor- ding to the operation manual. 1233394 Sets of filters 3815 3527 lb 1600 kg Lifting diagram To lift the machine, use binding means of sufficient load- β ing capacity according to the Machine loading chapter.
- Page 33 OPERATION MANUAL 3874 Hydraulic oil level HLP46 3874 Hydraulic oil draining plug 3960 3960 2151 Fuel tank 2151bz Fuel draining plug 3213 3213 Diagram of the protected and the safe zone Get perfectly familiar with the machine operation accor- ding to the operation manual. 3876 Coolant Use the coolant of required specification according to...
-
Page 34: Safety Notices And Signs Applied On The Infrared Remote Control
2.1. Major Safety Precautions 2.1.6. Safety notices and signs applied on the infrared remote control 557027 Sensor cleanliness Thoroughly familiarize yourself with the use of the infrared re- mote control according to the operating manual! The side and front diodes of the infrared remote control must not be covered (e.g. -
Page 35: Hand Signals
OPERATION MANUAL 2.1.7. Hand signals • Signals given by an assistant operator if the driver cannot see the travelling or working area or machine work devices. • The following principles must be observed: Only a limited number of signals must be used for com- munication purposes. - Page 36 2.1. Major Safety Precautions Watch out Sig. 2 Watch out, danger Sig. 3 Driving Sig. 4 Slow driving forward - towards me Sig. 5 ARR 1575...
- Page 37 OPERATION MANUAL Slow driving backward - away from me Sig. 6 Driving to the right Sig. 7 Driving to the left Sig. 8 Short-distance driving Sig. 9 ARR 1575...
-
Page 38: Environmental And Hygienic Principles
2.2. Environmental and hygienic principles 2.2.1. Hygienic principles 2.2.2. Ecological principles • The fillings of individual systems of the machine and some of its parts become hazardous waste for the environment when discarded. This category of waste products includes in particular: When operating and storing the machines, the user is Organic as well as synthetic lubricating materials, oil or obliged to observe general principles of health and envi-... -
Page 39: Machine Preservation And Storage
2.3. Machine preservation and storage 2.3.1 Short-term preservation and storage for a period of 1–2 months • Wash and clean the entire machine carefully. Before park- After 6 months we recommend you to inspect the condi- ing the machine for preservation and storage, please warm tion of preservation and renew if required. -
Page 40: Putting The Machine Into Operation After Storage
2.3. Machine preservation and storage 2.3.3. Putting the machine into operation af- ter storage • Check that some parts of the machine have not been dam- aged during storage and are not missing. Remove preservation agents before putting the machine into operation: Wash off the preservation agents using high pressure stream of hot water with common degreasers while observing the operation manual and the ecological... -
Page 41: Disposal Of The Machine At The End Of Its Service Life
The manufacturer Ammann shall not be liable for dam- age to the health of users or environmental damage caused by non-compliance with the above mentioned rules. -
Page 42: Machine Description
2.5. Machine description 555007B 555008B View from the right View from left 1 - 1-point lifting eye 7 - Articulated joint protection 2 - Identification plate 8 - Shutdown bar (optional) 3 - Drum scraper 9 - Cockpit cover 4 - Rear bonnet closure 10 - Rear infrared sensor 5 - Front bonnet closure 11 - Light indication... - Page 43 OPERATION MANUAL 555010A 12 - Oil cooler 13 - Fuel tank 14 - Hydraulic tank 15 - Battery 16 - Controller (machine controller) ARR 1575...
- Page 44 2.1. Major Safety Precautions 555011B 17 - Engine cooler 18 - Coolant expansion tank 19 - Water separator ARR 1575...
- Page 45 OPERATION MANUAL 557012B 20 - Oil filter 21 - Oil gauge 22 - Oil filling port 23 - Fuel filter 24 - Coolant filling port 25 - Engine fuses 26 - Air filter ARR 1575...
-
Page 46: Actuators And Dashboard Instruments
2.6. Actuators and dashboard instruments 557018 555009B 1 - Infrared remote control 2 - Storage area for spiral cable 3 - Display unit 4 - Ignition box 5 - Fuses ARR 1575... -
Page 47: Display Unit
• Check the engine for defective or loose V-belt. If the battery charging lamp is still on after you have carried out this check, contact Ammann authorized service. Control lamp functions (3) RAM01 The Error control lamp lights as soon as the controller recogni- zes an error. - Page 48 555012 • Check the engine for oil loss and correct oil level. • If the level of oil is correct, contact Ammann authorized service. Note: The machine is equipped with an automatic shutdown system. If the oil pressure falls below the limit value, the oil pressure warning lamp lights up.
- Page 49 OPERATION MANUAL Control lamp for shutdown bar (6) RAM06 The shutdown bar indicator lamp remains lit as long as the shu- tdown bar is actuated (OPTION). The safety bar indicator also lights up during the activation of the near and remote halt. hours Control lamp for pre-heating (7) RAM05...
- Page 50 2.6. Actuators and dashboard instruments Cockpit fuses The fuses are located under the cowling in the cockpit 10 A Controller, power supply 25 A Controller, outputs 10 A Display unit, shutdown bar 25 A Hydraulic oil cooler 555059 Engine compartment fuses The fuses are located above the diesel engine.
-
Page 51: Infrared Remote Control
OPERATION MANUAL 2.6.2. Infrared remote control 1 - Operating speed (turtle) / travelling speed (rabbit). 2 - Forward drive / reverse drive 3 - High / low amplitude of vibrations Do not use the vibration feature on steep slopes or under high angle of inclination. - Page 52 2.6. Actuators and dashboard instruments Replace any damaged rubbers protecting the control ele- ments of the infrared remote control to prevent damage of the internal electronics caused by dirt or humidity. When the protective valve is damaged, contact your dealer immediately to prevent damage of the internal electronics due to dirt or humidity.
- Page 53 OPERATION MANUAL 2.6.2.1. LED signals • There are two LED signals on the transmitter: green and red. 555014 There are two LEDs on the cover: a green one and a red one. Standard display (green) Display Cause The green LED is blinking slowly. The machine is controlled by the infrared remote control and cable The green LED is flashing.
- Page 54 2.6. Actuators and dashboard instruments Charging the accumulator of the infrared remote control: The infrared remote control can be recharged using solar cells. When the infrared remote control is charged through a cable, turn the key in the ignition box to the “I” position. If the infrared remote control is without light for a long time, it is necessary to charge it up fully every two months at least.
- Page 55 OPERATION MANUAL 2.6.2.2. Cable connection Spiral cable connector 1 - Spiral cable connector / protective cover fastener 2 - Solar cells / Transmission elements 555199A Automatic pairing function • If you wish to control the machine via the infrared remote control, you must first perform a mutual assignment of addresses. This is only necessary when registering a new infrared remote control to the machine.
- Page 56 2.6. Actuators and dashboard instruments 2.6.2.3. Handling The infrared remote control is located under the control panel cover. It includes the following transmission features: The solar cells The infrared diodes for data transmission and measuring the safety distance. Before startup, clean the transmission elements. Keep the solar cells clean during operation.
- Page 57 OPERATION MANUAL Proper use of the infrared remote control 40° 555116 40° 555118 555120 40° 555119 555131 ARR 1575...
- Page 58 2.6. Actuators and dashboard instruments Improper use of the infrared remote control 40° During the operation of the machine, it is forbidden to use the infrared remote control without direct visual contact between the infrared remote control and the in- frared sensor on the machine.
- Page 59 OPERATION MANUAL 555122 40° 555125 40° 555129 ARR 1575...
- Page 60 2.6. Actuators and dashboard instruments During operation, aim the infrared remote control in the direction of the machine only. The cable connector (1) must face forward. • The infrared remote control can lean on the operator‘s body. 555192 555193 The side and front diodes of the infrared remote control must not be covered (e.g.
- Page 61 OPERATION MANUAL Do not aim the transmitter at reflective objects (large surfaces, light objects, other machinery, etc.). Do not use the infrared remote control in the protected 2m zone or if there is insufficient visual contact between the machine and the operator or the infrared remote control, unless stated otherwise.
- Page 62 2.6. Actuators and dashboard instruments Protected zone and safe zone when using the infrared remote control 555151 Protected, safe and operating zone during the operation of the infrared remote control and cable 555152 ARR 1575...
- Page 63 OPERATION MANUAL 2.6.2.4. Near and remote machine halt The near and remote machine halt function is an electronic safety feature designed to prevent the loss of visual contact between the operator and the machine and excessive proximity of the operator to the machine. A machine equipped with infrared remote control contains sensors determining the safe distance of the operator from the working machine.
-
Page 64: Light Indication
2.6. Actuators and dashboard instruments 2.6.3. Light indication The warning light beacon is on the top side of the rear machine bonnet. The light indication of the machine is enabled when it is controlled with the infrared remote control. It displays three various situations by flashing with a certain fre- quency. -
Page 65: Machine Control And Use
2.7. Machine control and use 2.7.1. Commissioning Before putting the machine into operation, always read the operating manual and inspect the machine according to the instructions below. Inspection of the machine before putting into operation: • check, if the arm securing the joint during machine transport or loading is unlocked •... -
Page 66: Protective Cover
2.7. Machine control and use 2.7.2. Protective cover The protective cover protects the display unit and the infrared remote control from: • weather conditions, • vandalism, • third-party actions. Unauthorized access of third parties to the display unit and the infrared remote control can be prevented by the use of a pad- lock (not included in the machine equipment). -
Page 67: Start-Up Of The Engine
OPERATION MANUAL 2.7.3. Start-up of the engine Starting the engine using the ignition switch 0 Off All electrical loads are off. Ignition on All electrical consumers can be switched on. II Pre-heating III Start Pre-heating 555077 If the outside temperature is below 0°C: Turn the ignition key to position II. - Page 68 2.7. Machine control and use When using auxiliary starting source this power supply shall have starting voltage of 12 V. How to start via starting cables from different machine 1. Connect one end (+) of cable pole to (+) pole of dis- charged battery.
-
Page 69: Driving And Braking
OPERATION MANUAL 2.7.4. Driving and braking Overview of functions Infrared remote control and cable Infrared remote control Near halt approx. 2 m approx. 2 m Remote halt approx. 4.5 m approx. 20 m Automatic pairing Forward / backward drive function Function Left / right steering function Working speed / transport speed function... - Page 70 2.7. Machine control and use Steering left / right Move the switch: Toward the left: the compactor turns left Toward the right: the compactor turns right Work gear / Transport gear The machine is equipped with two gears. Move the switch: Toward the top (rabbit): the hydraulic system switches to the “transport gear”...
- Page 71 OPERATION MANUAL Horn switch 557025 MAX 25 % Only travel directly up or down slopes. Do not drive across slopes. MAX 30 % Keep your distance to embankments and edges! Do not drive at an angle into or out of the trench. Park the machine on slopes only in such a way that it can- not overturn.
-
Page 72: Turning Off The Engine
2.7. Machine control and use 2.7.5. Turning off the engine • Move the switch on the infrared remote control to the Stop position. 555097 • Turn the ignition key to the “0” position. As long as the “Start-Stop” rocker switch is placed in the “neutral”... -
Page 73: Opening The Front And Rear Bonnets
OPERATION MANUAL 2.7.7. Opening the front and rear bonnets Danger of severe injury through loose clothing being caught and drawn in! Only open the bonnet when the engine is off. If trouble shooting makes working on moving parts of engine unavoidable, never wear: Necklaces, bracelets, rings, scarves, ties or other loose items of clothing. -
Page 74: Roller Overturning
2.7. Machine control and use 2.7.8. Roller overturning In the event that the machine overturns, use a crane to put the machine back on its drums as soon as possible. Turn the key to the 0 position, turn it off. 555133 555134 Under no circumstances should you try to restart the en-... - Page 75 OPERATION MANUAL Damage check Open the front and rear bonnet. Disconnect the cable from the (-) terminal of the machine‘s ba- ttery. Check the machine for any visible damage of individual parts of the machine. Focus especially on fluid leaks. Empty all damaged containers.
- Page 76 2.7. Machine control and use Clean the air filter inside if it is soiled with oil. 557015 Remove the air filter hose and clean it if it is soiled with oil. 555137 Remove the fuel filter. 555138 ARR 1575...
- Page 77 OPERATION MANUAL Remove the wiring holder screws. Do not damage the cable harnesses. 555139 555140 Remove the engine valve cover. 555141 ARR 1575...
- Page 78 2.7. Machine control and use Disconnect the cables and contact connectors on the glow plugs. Remove all three glow plugs. 555145 555146 Turning of the crankshaft Make sure that any accumulated oil was removed from the com- bustion chamber. Rotate the engine twice using the centre screw on the crankshaft, use a ratchet spanner (1).
- Page 79 OPERATION MANUAL Reattach the wiring holder using two screws. Reconnect the cable to the (-) terminal of the machine‘s battery. Risk of burns from splashing oil! Eye injuries, burns: Wear safety goggles. 555149 555135 Rotating the engine using the starter Rotate the engine using the starter, about 1–2 minutes.
- Page 80 2.7. Machine control and use Rotating the engine using the ignition switch Turn the key in the ignition switch clockwise to the III position. The engine must rotate. Risk of burns from splashing oil! Eye injuries, burns: Wear safety goggles. If the engine does not rotate, stop the procedure and contact an authorized dealer.
- Page 81 OPERATION MANUAL Starting of the engine First attempt to start: Turn the key in the ignition switch clockwise to the III position. The starting attempt was successful, the engine is running: Refer to section „The engine is running“. The starting attempt was unsuccessful, the engine is not ru- nning: There might be air in the fuel system.
-
Page 82: How To Transport The Machine
2.8. How to transport the Machine • The machine can move on its own between working sites. When moving on the working site, observe the safety measures applicable to the working site. When driving for long distances, 1-hour cooling breaks after 3 hours of driving should be taken. -
Page 83: Machine Loading
OPERATION MANUAL 2.8.1. Machine loading • Use a loading ramp or crane to load the machine onto the transport vehicle. 2.8.1.1. Loading the machine using a ramp • When loading the machine using a ramp, all safety regula- tions related to loading of the machine valid in the place of loading must be adhered to. -
Page 84: Loading The Machine Using A Crane
2.8. How to transport the Machine 2.8.1.2. Loading the machine using a crane 3527 lb 1600 kg • When loading with crane the Machine is fitted with lifting lugs - refer to the Fig. showing the lifting method. β • The 1-point lifting eye is designed for a WLL of 1.6 tons (Working Load Limit). - Page 85 OPERATION MANUAL How to secure the joint: • Release the lower part of the joint protection (1). • First, remove the compression spring (2) and then the lock bolt (3). • Carefully turn the machine steering until the joint protecti- on comes in line with the opposite loop.
-
Page 86: Special Conditions Of The Machine Use
2.9. Special conditions of the Machine use 2.9.1. Machine operation during running-in 2.9.2. Machine operation at low temperatures When putting a new machine into operation, the machine Compacting in winter season depends on the content of fine should not be run at full power for the first 50 hours (driving particles and water in the soil being compacted. -
Page 87: Machine Operation Under High Temperatures And Humidity
OPERATION MANUAL 2.9.3. Machine operation under high tempera- 2.9.5. Machine operation in very dusty envi- tures and humidity ronment • Engine power output decreases with increasing tempera- • When working in very dusty environment, please shorten ture and air humidity. Both power reducing factors are inde- the intervals of cleaning and replacing of the air filter ele- pendent on each other: ments and shorten the intervals of cleaning of the coolers. -
Page 88: Optional Equipment
2.10. Optional equipment 2.10.1. Shutdown bar • The shutdown bar is located on the rear of the machine un- der the operating unit. A proximity switch is located on the rear section of the machine above the attachment point of the shutdown bar. -
Page 89: Filter Set 500 Operating Hours
OPERATION MANUAL 2.10.3. Filter set 500 operating hours • The filter set contains filters for regular maintenance after 500 operating hours. Filter set 500 operating hours Order number: 4-760099 555106 2.10.4. Cover tarpaulin • The covering tarpauline of rigid and waterproof material protects the machine against adverse climatic conditions, dust, dirt and vandalism. - Page 90 Notes ARR 1575...
- Page 91 OPERATION MANUAL Notes ARR 1575...
- Page 92 ARR 1575...
-
Page 93: Maintenance Manual
MAINTENANCE MANUAL 3. MAINTENANCE MANUAL ARR 1575 (Yanmar Tier 4 Final) ARR 1575... - Page 94 ARR 1575...
-
Page 95: Safety And Other Measures For Machine Maintenance
3.1. Safety and other measures for machine maintenance 3.1.1. Safety of machine maintenance 3.1.2. Fire protection measures during ex- changes of operating fluids Lubrication, maintenance and adjustment must be carried out: • From the point of fire hazard, the flammable liquids used on the machine are divided into the following hazard classes: •... -
Page 96: Ecological And Hygienic Principles
3.1. Safety and other measures for machine maintenance 3.1.3. Ecological and hygienic principles Ecological principles When operating or maintaining the Machines the user shall be liable to follow the general principles of health and environ- ment protection according to the laws, ordinances and regula- tions in individual territories of the Machine use. -
Page 97: Specification Of Fluids
3.2. Specification of fluids MAINTENANCE MANUAL 3.2.1. Engine oil 2412 °F °C Engine oil is specified by its performance and viscosity classifica- tions. Performance classification according to API (AMERICAN PETROLEUM INSTITUTE) ACEA (ASSOTIATION DES CONSTRUCTEURS EUROPÉENS DE AU- TOMOBILE) Viscosity classification To determine SAE (Society of Automotive Engineers) viscosity class, the ambient temperature and type of operation in place of usage of the machine are decisive. -
Page 98: Fuel
3.2. Specification of fluids 3686 3.2.2. Fuel Use of biofuel (Diesel fuel) < 15 ppm S Using the fuel mixture under the trade name of Bionafta is in < 15 mg/kg S 3686 principle approved by the engine manufacturer for the engine on the machine if it conforms to the specifications under EN Diesel is used as fuel: 14214 or ASTM D6751. -
Page 99: Coolant
MAINTENANCE MANUAL 3.2.3. Coolant Water quality Do not use hard water with a higher content of calcium and 2152 magnesium, which brings calculus formation, and with a higher content of chlorides and sulphates, which causes corrosion. Yanmar engines: The maximum content of compounds of calcium and magnesi- um is 170 milligrams –... -
Page 100: Hydraulic Oil
3.2. Specification of fluids 3.2.4. Hydraulic oil 3.2.5. Lubricating grease 2158 0787 For use in the hydraulic system of the machine, only high-qual- For lubrication of the machine, lubricants must be used accor- ity hydraulic oils of output class according to ISO VG 46 HVLP ding to: (equal to DIN 51524 part 3 HVLP). -
Page 101: Fills
3.3. Fills Quantity Fills of... Type of fill Brand l (gal US) Engine Engine oil according to chapter 3.2.1. 3,4 (0,9) 2412 Fuel tank Diesel according to chapter 3.2.2. 28 (7,4) Hydrostatic system Hydraulic oil according to chapter 3.2.4. 16 (4,23) 2158 All year round - anti-freeze liquid according to Engine cooling system - coolant... -
Page 102: Lubrication And Maintenance Chart
3.4. Lubrication and Maintenance Chart Every 10 hours of operation (daily) 3.6.1. Checking fuel level 3.6.2. Engine oil level check 3.6.3. Engine cooling liquid level check 3.6.4. Hydraulic tank oil level check 3.6.5. Cleaning the hydraulic oil cooler 3.6.6. Air filter check 3.6.7. - Page 103 MAINTENANCE MANUAL Every 1000 hours of operation (1 year) 3.6.18. Exchanging hydraulic oil and filter 3.6.19. Engine cooling liquid change 3.6.20. Cleaning the fuel tank 3.6.21. Valve clearance adjustment 3.6.22. Check of swing support 3.6.23. Check of articulation joint 3.6.24. Checking the damping system Maintenance - As Needed 3.6.25.
-
Page 104: Lubrication And Service Plan
3.5. Lubrication and service plan LUBRICATION AND SERVICE PLAN CONTROL LUBRICATE EXCHANGE 1000 SAE 15W/40 API CF, ACEA E3-E5 Engine oil: ISO VG 46 HVLP Hydraulic oil: ISO 2137 DIN 51 502 Grease: 555084en ARR 1575... -
Page 105: Individual Operations Of Maintenance
3.6. Individual Operations of Maintenance Carry out lubrication and maintenance on regular basis and re- peatedly in the intervals as per daily reading on the counter of hours actually worked. hours 555012 This Manual states only the basic information about the engine, other data are given in the Engine Operation and Maintenance Manual which is part of the Documentation supplied with the Machine. -
Page 106: Every 10 Hours Of Operation (Daily)
3.6. Individual Operations of Maintenance Every 10 hours of operation (daily) 3.6.1. Checking fuel level • Open the hood. • Check the level in the plastic tank. • If needed, fill the fuel tank with diesel fuel up to the lower edge of the filler neck. -
Page 107: Engine Oil Level Check
MAINTENANCE MANUAL 3.6.2. Engine oil level check • Wait approx. 5 min. until oil runs down to the engine sump. • Take out the oil dipstick (1), wipe it, insert fully back and take it out again to read out the oil level. 555079 •... -
Page 108: Engine Cooling Liquid Level Check
3.6. Individual Operations of Maintenance 3.6.3. Engine cooling liquid level check • Let cooling liquid cool down to less than 50 °C (120 °F). • You can read off the level of coolant on the expansion tank display. The water level must be between the top (FULL) and bottom (LOW) marks. -
Page 109: Hydraulic Tank Oil Level Check
MAINTENANCE MANUAL 3.6.4. Hydraulic tank oil level check • Always check the hydraulic oil level at operating tempera- ture with the engine running. • Place the machine on level ground. • Let the machine continue to idle. • Check the oil level in the inspection window. •... -
Page 110: Cleaning The Hydraulic Oil Cooler
3.6. Individual Operations of Maintenance 3.6.5. Cleaning the hydraulic oil cooler • Check the cooling ribs of the hydraulic oil cooler for dirt and clogging. • Clean the ribs with water or blow them out with compressed air. • In case of work in very dusty conditions clean the radiator daily. -
Page 111: Air Filter Check
MAINTENANCE MANUAL 3.6.6. Air filter check • If a red ring appears on the soiling display (1) during opera- tion of the machine, you must: replace the air filter insert according to chap. 3.6.17. 555045 Check the air intake for: Soiling: clean the intake opening. 555047 •... -
Page 112: Cleaning Of The Water Separator
3.6. Individual Operations of Maintenance 3.6.7. Cleaning of the water separator • If the red ring leaves the bottom, pour out water from the separator. • Close stop cock (3). • Unscrew the filter housing (2). • Clean filter element (1). •... -
Page 113: Check Of The Near And Remote Halt Function
MAINTENANCE MANUAL 3.6.9. Check of the near and remote halt function • Turn the key to the II position (preheating). The engine must not be started. The III position (start) must not be activated. 555077A • Gradually move closer with the infrared remote control to a distance of less than 2 metres to the rear part, front part and side part of the machine from the infrared sensor and each time move the control stick of the left/right steering angle... -
Page 114: Check Of The Safety Bar Function (Optional Equipment)
3.6. Individual Operations of Maintenance 3.6.10. Check of the safety bar function (optional equipment) • Turn the key to the II position (preheating). The engine must not be started. The III position (start) must not be activated. 555077A • Pushing the safety bar upwards activates and closes the near halt switch. -
Page 115: Every 50 Hours Of Operation
MAINTENANCE MANUAL Every 50 hours of operation 3.6.11. Inspection of brakes • The function of the brakes must be checked periodically. • The cable / connector Y9, which must be disconnected for the brake test, is located at the front under the hood. 555051 •... -
Page 116: Battery Check
3.6. Individual Operations of Maintenance 3.6.12. Battery check • Stop the engine. • Clean the surface of batteries. • Check the condition of poles and terminals (1) and clean them. Slightly wipe terminals with grease. MAINTENANCE-FREE BATTERY • In case of a maintenance-free battery (the battery has no fre- ely accessible plugs), only the no-load voltage on terminals is checked. -
Page 117: Every 100 Hours Of Operation (Weekly)
MAINTENANCE MANUAL Every 100 hours of operation (weekly) 3.6.13. Lubricating steering cylinder, bearing • Rotate the hydraulic cylinder steering fully to the stop in or- der to grease the cylinder. • Steer the machine briefly to the right and the left. This caus- es the bearing to be unloaded. -
Page 118: Every 250 Operating Hours (3 Months)
3.6. Individual Operations of Maintenance Every 250 operating hours (3 months) 3.6.14. Check of the fan and engine belt condition First carry out after 50 hours. • Check the ventilator visually. In case of any damage (e.g. missing parts of the material, cracks, changes in shape etc.) replace the ventilator. -
Page 119: Replacement Of Engine Oil And Filter
MAINTENANCE MANUAL 3.6.15. Replacement of engine oil and filter First carry out after 50 hours. Draining engine oil • The engine oil drain (1) is located under the chassis at the front left. 557016 • Place a container under the drain. •... - Page 120 3.6. Individual Operations of Maintenance • Refill engine oil through one of two filling ports. Oil filling port on the left engine side (1) Oil filling port on the engine (2) • Keep the level within the range of gauge marks pressed in the dipstick.
-
Page 121: Every 500 Hours Of Operation (6 Months)
MAINTENANCE MANUAL Every 500 hours of operation (6 months) The set of filters after 500 operating hours can be or- dered under the order number 4-760099. For the list of all spare parts, see the table in the end of this publication. 3.6.16. - Page 122 3.6. Individual Operations of Maintenance • Close the stop valve (3). • Unscrew the filter housing (2). • Vyměňte kroužek O. • Replace the filter cartridge (1). Fuel filter element Order number: 1-954195 O-ring Order number: 76-10210355520 555029 • Reinstall the filter housing (2). •...
-
Page 123: Air Filter Cartridge Replacement
MAINTENANCE MANUAL 3.6.17. Air filter cartridge replacement • If a red ring appears on the soiling display (1) during opera- tion of the machine, you must replace the cartridge, how- ever at the latest after 500 engine hours. In case of work in a very dusty environment, shorten the filter element replace- ment intervals. - Page 124 3.6. Individual Operations of Maintenance • Unscrew the nut and replace the filter cartridge. Filter element Order number: 1300309 557015 • Install a new main cartridge. Tighten the winged nut. Air filter element Order number: 1300308 Note: If the machine is used on very dusty surfaces, the air filter must be checked for clogging once per week.
-
Page 125: Every 1000 Hours Of Operation (1 Year)
MAINTENANCE MANUAL Every 1000 hours of operation (1 year) 3.6.18. Exchanging hydraulic oil and filter First carry out after 500 hours. Replacing the hydraulic oil filter • Remove the filter lid. 555037 • Unlock the filter element. • Lift the filter element out of the filter housing. •... - Page 126 3.6. Individual Operations of Maintenance • Remove the plug (2) from hydraulic tank. • Allow the oil to drain into the container. • Install the screw plug (2). • Tighten the screw connection hand tight. • Tighten the screw connections in the hydraulic tank hand tight.
-
Page 127: Engine Cooling Liquid Change
MAINTENANCE MANUAL 3.6.19. Engine cooling liquid change • Remove the drain plug and drain the coolant. Note: • The total volume of the engine coolant is 1.2 litres (0.32 US gal). 555108 • Open the cooling system by removing the overpressure plug on the expansion tank. -
Page 128: Cleaning The Fuel Tank
3.6. Individual Operations of Maintenance 3.6.20. Cleaning the fuel tank • Over time, condensation water gathers in the fuel tank. It must be drained once a year. • Remove the plug (1) from fuel tank. • Place a container under the drain tap. •... -
Page 129: Valve Clearance Adjustment
MAINTENANCE MANUAL 3.6.21. Valve clearance adjustment • Call YANMAR service department to adjust the engine valves. For contact points, please refer to Engine Operation and Maintenance Manual. Note: Further regular maintenance (check of injection and venting of the crankcase after 1500 engine hours, emission check after 3000 engine hours) should be consulted with Yanmar service. -
Page 130: Check Of Articulation Joint
3.6. Individual Operations of Maintenance 3.6.23. Check of articulation joint • Check the articulation joint once a year for excessive play. • Lift the machine with a crane for 1-point lifting eye. • Visually check the clearance of the articulated joint by ap- plying pressure on the machine alternatively upwards and downwards. -
Page 131: Maintenance - As Needed
MAINTENANCE MANUAL Maintenance - As Needed 3.6.25. Replacement of engine cover gas struts • Gas struts are maintenance-free! They require no mainte- nance such as lubrication. They are designed for the respec- tive requirements and work trouble-free for many years. When the gas springs fail to fulfil their function, replace them for new ones. -
Page 132: Cleaning The Machine
3.6. Individual Operations of Maintenance 3.6.26. Cleaning the machine • Clean the machine from major impurities after finishing your work. • Perform overall cleaning regularly at least once in a week. Blind all openings into which the cleaning agent might penetrate (e.g. engine inlet opening) prior to pressure water washing. -
Page 133: Check Of The Screw Connection Tightening
MAINTENANCE MANUAL 3.6.27. Check of the screw connection tightening • Check regularly that no bolted connections have been slackened. Use torque spanners to tighten. Torque Torque For 8,8 Bolts (8G) For 10,9 Bolts (10K) For 8,8 Bolts (8G) For 10,9 Bolts (10K) Thread lb ft lb ft... - Page 134 3.6. Individual Operations of Maintenance Chart for torques of necks with sealing edge or with flat Chart for torques of plugs with flat gasket gasket Neck Torques Plug Torques G -M lb ft G -M lb ft G 1/8 G 1/8 G 1/4 G 1/4 G 3/8...
-
Page 135: Defects
3.7. Defects MAINTENANCE MANUAL Usually, defects are caused by incorrect operation of the machine. Therefore, in case of any troubles read again properly through the instructions given in the operation and maintenance manual for the machine and engine. If you cannot identify the cause, contact a service department of an authorised dealer or the manufacturer. -
Page 136: Annexes
3.8. Annexes 3.8.1. Wiring diagram Legend: Fuse, controller, supply Fuse, controller, outputs Fuse, display unit, shutdown bar Fuse, hydraulic oil cooler Fuse, pull-in solenoid Fuse, diesel pump, alternator Fuse, operating speed Fuse, pre-heating coil Fuse, “2nd solenoid” Alternator Battery Relay, ignition Relay, starting interlock Timer relay Relay, pull-in solenoid... - Page 137 MAINTENANCE MANUAL +12V Starter 30 180 Fuel pump pull ws 207 0.5A hold pull Ignition (H1) (V1) (E1) Voltage Supply Logic 0.5A hold Engine coil Voltage Supply Outputs (E2) Oil temperature switch Hydraulic oil cooler Ground Bus Control D+ Ground (SB+) Bus Control D- Forwards...
-
Page 138: Hydraulic System Diagram
3.8. Annexes 3.8.2. Hydraulic system diagram Legend: 1 Drive pump 2 Vibro-steering pump 3 Drive motor, rear left 4 Drive motor, rear right 5 Front left drive motor 6 Front right drive motor 7 Left steering cylinder 8 Right steering cylinder 9 Vibro steering/brake valve 10 Vibro motor, front 11 Vibro motor, rear... - Page 139 MAINTENANCE MANUAL Front right travel motor 408 ccm Front left Rear travel motor vibration 408 ccm motor 8ccm Nozzle block Front vibration motor 8ccm Rear left travel motor 408 ccm Rear right travel motor 408 ccm Flow divider Valve Block for Vibration, Steering and Brake Diesel engine...
-
Page 140: Table Of Spare Parts
3.8. Annexes 3.8.3. Table of spare parts Chapter Spare part Order No. Every 10 hours of operation (daily) 3.6.6. Dust valve 1227914 Every 250 operating hours (3 months) 3.6.14. 1-952338 3.6.14. Belt 1183743 Every 500 hours of operation (6 months) 3.6.15. - Page 141 MAINTENANCE MANUAL Content of the set of filters after 500 operating hours (4-760099) Chapter Spare part Number of parts Order No. 3.6.15. Engine oil filter 1-954075 3.6.16. Fuel filter element 1-954195 3.6.16. O-ring 76-10210355520 3.6.16. Fuel filter element 1-954197 3.6.17. Air filter element 1300308 3.6.17.
- Page 142 3.8. Annexes Notes ARR 1575...
- Page 143 MAINTENANCE MANUAL Notes ARR 1575...
- Page 144 Notes ARR 1575...
- Page 146 Ammann Unternehmungen Eisenbahnstrasse 25 CH-4901 Langenthal Phone +41 62 916 61 61 www.ammann-group.com...
Need help?
Do you have a question about the ARR 1575 Yanmar and is the answer not in the manual?
Questions and answers