Advertisement
Quick Links
Advertisement

Related Manuals for Kreepy krauly VTX-7


Summary of Contents for Kreepy krauly VTX-7
- Page 1 VTX-7 OWNER’S MANUAL SOC33548 VTX-7 instructions_Art4.indd 1 29/09/2015 2:56 pm...
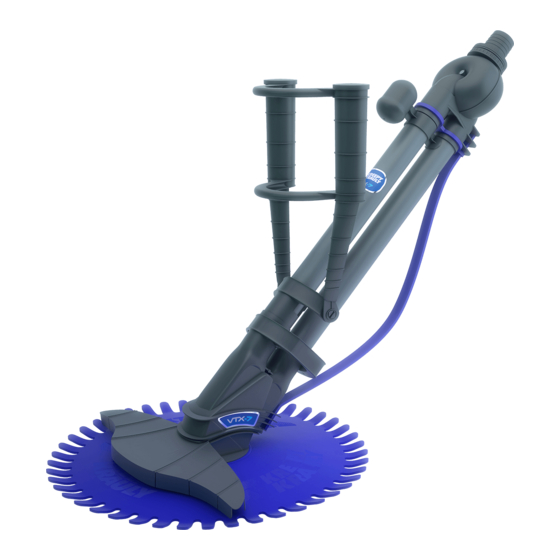
- Page 2 Congratulations Your new Kreepy Krauly VTX-7 is designed to give you years of reliable performance. As soon as you complete the final assembly steps, it’s ready to use. Don’t worry, it doesn’t take long and this guide will walk you through assembly and installation step-by-step.
-
Page 3: Table Of Contents
Contents Components checklist Assembling your VTX-7 Installing the VTX-7 in your pool Fine-tuning your VTX-7 Authorised Kreepy Krauly Accessories Troubleshooting Looking after your VTX-7 What should I expect from my VTX-7? Warranty information SOC33548 VTX-7 instructions_Art4.indd 1 29/09/2015 2:56 pm... -
Page 4: Components Checklist
Smart-Skim adaptors used with most vacuum plates used with Polyplastics 190 & 210 standard used with Polyplastics SK10 (rectangular) Auto Skim Upgrade (to replace Smart-Skim) Anti-vortex washer Auto Skim valves Vent valve Vacuum plate SOC33548 VTX-7 instructions_Art4.indd 2 29/09/2015 2:56 pm... - Page 5 Steering adjuster float bar Swivel head assembly Dive float assembly VTX-7 cleaner unit Pilot weight assembly Main body Serial number Bumper strap Scoop Silicon seal Sole SOC33548 VTX-7 instructions_Art4.indd 3 29/09/2015 2:56 pm...
-
Page 6: Assembling Your Vtx-7
When the tabs are secured correctly at the back of the main body, the straps should overlap. STEP Attach the Silicon Seal Slide the seal onto the groove at the bottom of the main assembly body so it’s able to rotate freely. SOC33548 VTX-7 instructions_Art4.indd 4 29/09/2015 2:56 pm... - Page 7 Fit the sole to the base of the main body. Ensure it is fitted all the way around. Install the Steering Adjuster Float Bar STEP Fit the steering adjuster float bar into the top bridge of the dive float assembly. For adjustment hints, see page 12. SOC33548 VTX-7 instructions_Art4.indd 5 29/09/2015 2:56 pm...
-
Page 8: Installing The Vtx-7 In Your Pool
(near the scoop attachment), and the other end into the swivel head assembly. bent section down Installing the VTX-7 in your pool Prepare your pool STEP If your pool is clean, balanced and algae-free, you’re ready to get started. - Page 9 Anti-Vortex Washer over the valve inlet. Place the entire unit in the skimmer box. NOTE: A Vacuum Plate Clamp can stop your vacuum plate moving. TIP: The Anti-Vortex Washer stops the slurping sound. SOC33548 VTX-7 instructions_Art4.indd 7 29/09/2015 2:56 pm...
- Page 10 Start with the male-male hose and twist on a female length. Keep going until the hose is long enough to reach from your skimmer box to the far corner of your pool plus around 1.5 metres extra – this will optimise the coverage of your VTX-7. male male...
- Page 11 STEP Connect the Hose to the VTX-7 Submerge the VTX-7 in your pool to expel all air (rotate to help remove trapped air). Now connect the weighted end of the submerged hose to the swivel head assembly of the VTX-7.
- Page 12 Turn on the pump. Your VTX-7 should now be up and running. You should hear a gentle ticking – that’s your cue to relax while the VTX-7 gets to work cleaning your pool.
-
Page 13: Fine-Tuning Your Vtx-7
VTX-7. How to achieve the right incline VTX-7 works best when the main body sits at a 45° incline to the pool surface. If your cleaner is lifting (greater than 45°), move the second hose weight towards the swivel head assembly. - Page 14 1 (standard) option 3 rotate option 2 option 4 • Extended Float Bar (optional) – fits to either the top or bottom bridge to adjust the VTX-7’s turning circle. option 1 option 2 SOC33548 VTX-7 instructions_Art4.indd 12 29/09/2015 2:56 pm...
-
Page 15: Authorised Kreepy Krauly Accessories
For pools with rough surfaces that place excessive wear on a standard bumper strap. Main Drain Cover Place over main drain grille to ensure the VTX-7 can move smoothly. (No screws required.) Vacuum Plate Clamp Holds down the vacuum plate when the pool pump is off. -
Page 16: Troubleshooting
– opening and closing until it moves freely. • Check large debris isn’t blocking • Check Smart-Skim spring is your VTX-7 or hose (see page 19). correctly attached. • Check the combined Auto Skim • Check for a blockage in the main valve or Smart-Skim valve and body of your VTX-7 (see page 19). - Page 17 • Your pool pump and filter system water through the hose – either may be too small to effectively manually or by attaching one end run your VTX-7. Ask your pool pro to the pump. to advise. • Check that the pool outlets aren’t •...
- Page 18 Or, alignment. Adjust accordingly. shorten the pool hose slightly so the VTX-7 can’t reach the steps and clean the missed area manually. VTX-7 sticks on the • Check silicon seal and sole for underwater light: damage.
- Page 19 You notice bubbles at return VTX-7 is always coming to pool outlets: to the surface of the pool, possibly drawing in air: • Check if the hose is damaged by lifting it near the surface and • Check that the Auto Skim valve listening for a hissing sound.
-
Page 20: Looking After Your Vtx-7
IMPORTANT If you are giving the water a shock treatment with chlorine or other chemicals, remove your VTX-7 from the pool for at least 24 hours. If the chemicals are too strong for people to swim in, they’re too strong for the VTX-7. - Page 21 Pool blankets prevent chlorine evaporating. If you’re using one, carefully monitor your chlorine or salt water setting to avoid over chlorinating your pool, which can harm your VTX-7 and void your warranty. If you have any questions please call our Customer Service department on 1800 777 255 or talk to your pool shop pro.
-
Page 22: What Should I Expect From My Vtx-7
What should I expect from my VTX-7? How it moves How it Cleans Your Kreepy Krauly VTX-7 will move Your VTX-7 will clean your pool daily backwards in direction, with the with your normal filter cycle by gently water flowing through the base of... - Page 23 UV, salt and chemical resistant. Being an Australian company, we offer local after sales service, maintenance and parts. For any troubleshooting with your VTX-7, simply contact your local pool shop for assistance. You will extend the life of your VTX-7 by using genuine VTX-7 parts and chlorinating your pool correctly.
- Page 24 We reserve the right to revise, change, or modify VTX-7 without incurring any obligations to make like changes on VTX-7 models previously sold. This publication remains the sole copyright of Sherwood Overseas Co Pty. Ltd SOC33548 VTX-7 instructions_Art4.indd 22...
Need help?
Do you have a question about the VTX-7 and is the answer not in the manual?
Questions and answers