Advertisement
Advertisement
Table of Contents

Subscribe to Our Youtube Channel
Related Manuals for Kreepy krauly Super Sweepy


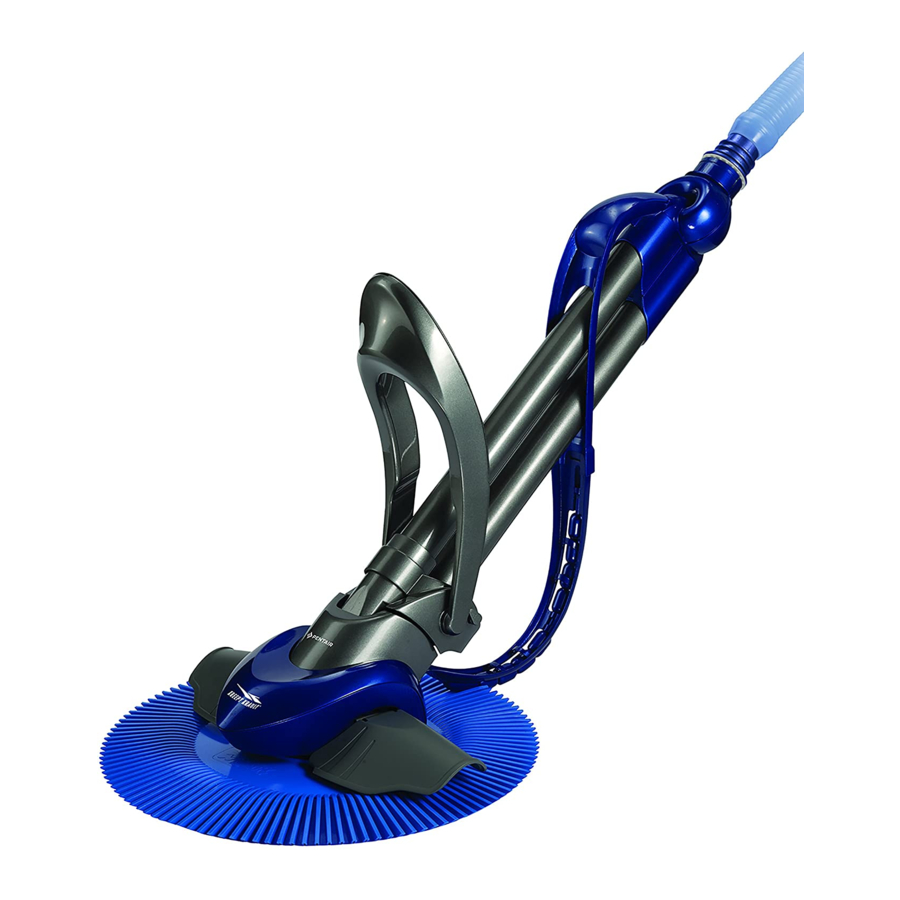
Summary of Contents for Kreepy krauly Super Sweepy
- Page 2 The Super Sweepy automatic swimming pool cleaner is a hydraulically operated machine. Throughout its life in the pool the Super Sweepy will give you excellent service, cleaning and removing dirt and deposits thereby reducing chemical demand. If you wish to take the machine out of the water while swimming, detach the Super Sweepy from the hose and place in the shade - never leave the machine or the hoses in the sun.
-
Page 3: Component Checklist
Component Checklist 1..Cleaner assembly 2..Footpad 3..Suction seal 4..Bumper assembly 5..Hose adaptor 6..Hose weight (2) 7..Adaptor cuff 8..Regulator valve 9..Scoop 10..Float assembly 11..6 x 1.2m hoses (kombi pack) - Page 4 Please note that the footpad and seal are wearing items and are not covered by the warranty. In order to prevent damage to the Super Sweepy main body they must be replaced when worn. Note: Damage to the main body due to foot pad wear invalidates the warranty.
- Page 5 Fitting the Skirt Position the skirt so the straps wrap into the grooves on the sides of the main body and away from you. Pull the left T-shaped end of the strap so it slides into the last slot on the back of the main body. Repeat these steps for the right strap.
- Page 6 Fitting the Dive Float Super Sweepy’s float fits into the slots on the top of the main housing. Start off by sliding the tip of each triangular end into the opening of each respective slot. Keep pushing the triangular ends into the slots until the notches on the bottom of the triangular ends slip into place.
-
Page 7: Hose Assembly
Hose Assembly The Super Sweepy hose comes in sections which Correct length: must be assembled. Each section has a male The length of your hose is vital for all over cleaning of and a female end. Shove the male end of a hose the pool. -
Page 8: Installation
Installation B: Clean skim- A: Switch the mer and leaf pump off strainer. Put it Thoroughly clean and back. backwash the filter to ensure it is free from dirt and debris other- wise your New Super Sweepy will not work. C: Place valve D: Place Auto- adaptor cuff... - Page 9 Installation continued E: Slide hose protector over hose. F. Place hose adaptor into hose. G: Place the New Super Sweepy into the pool and allow it to sink to the floor. Feed the hose down into the pool until it is completely filled with water.
-
Page 10: Balancing The Hose
The balance between the first and second weights regulate the move- ment around the pool. If your hose is too light, your Super Sweepy will float. All weights should be adjusted slightly closer to your machine. If your hose is too heavy, your Super Sweepy will sit on its bumper strap. - Page 11 • Is auto-skim valve free of debris? Clean valve If Super Sweepy slows or stops and air bubbles enter the pool at the return line: • Find and correct the air leak that is causing the pump to lose its prime (pressure): •...
- Page 12 • Check the automatic regulator valve to make sure it is correctly installed and not filled with debris. Accessory If the problem continues, it is advisable to install the Super Sweepy Guidewheel as it will push the machine away from the steps and allow it to continue cleaning.
- Page 13 Troubleshooting 3 of 5 If Super Sweepy tracks in a repetitive pattern: • Check the swivel on the top of the cleaner. It should turn freely. • Check the return line water flow and re-direct as necessary downwards. • Check the hose to ensure it has not become bent or kinked. It only takes one bent or kinked hose section to hinder the cleaning coverage.
- Page 14 Troubleshooting 4 of 5 HOW TO REMOVE DEBRIS FROM THE FLAPPER. IMPORTANT: The pool pump must be turned off before removing the cleaner from the pool. • Sometimes debris may clog the bottom of the cleaner and prevent flapper movement or restrict water flow. The flapper is located inside the main body and must move freely at all times.
- Page 15 Troubleshooting 5 of 5 • If debris is still lodged inside, you must remove the flapper. First lift up the lip of the foot pad and insert a flat- headed screwdriver along side one of the two tabs found on either side of the baffle plate. (See Figure b) Push the tab inward with the screwdriver until the baffle plate releases.Place a finger into the centre opening of the baffle plate and pops out.
-
Page 16: Warranty
Standard Conditions of Sale. The WARRANTY excludes: • Defects in the hose. (Genuine Super Sweepy hoses are warranteed for three years against manufactured defects.) • Super Sweepy warranty terms and conditions apply. • Normal wear and tear of the Footpad and Suction seal. These must be checked monthly and replaced when worn.
Need help?
Do you have a question about the Super Sweepy and is the answer not in the manual?
Questions and answers