Table of Contents
Advertisement
Quick Links
Advertisement
Table of Contents

Related Manuals for ekwb EK-QuantumX Delta TEC


Summary of Contents for ekwb EK-QuantumX Delta TEC
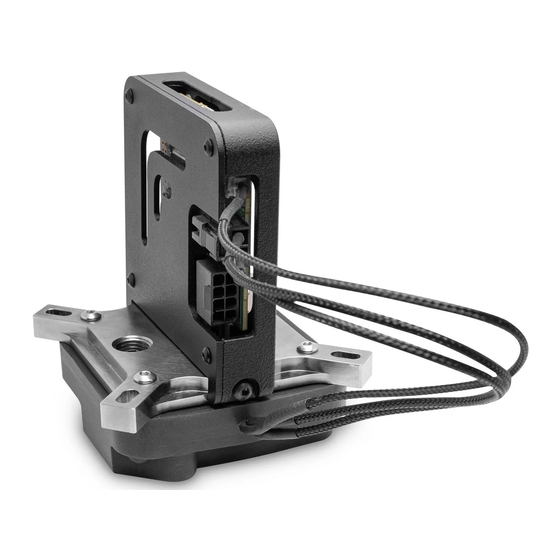
- Page 1 EK-QuantumX Delta TEC CPU WATER BLOCK USER GUIDE...
- Page 2 The following instructions are subject to change without notice. Please visit our website at www.ekwb.com for updates. Before installing this product, please read important notice, disclosure, and warranty stipulation printed on the back of the box.
- Page 3 SYSTEM REQUIREMENTS Vendor Model ASRock ASRock Z490 Taichi CPU Requirements ASRock ASRock Z490 Phantom Velocita The liquid cooling subsystem requires a 10th generation Intel K series CPU from the following list ASRock ASRock Z490 Steel Leged • Intel® Core™ i9-10900K Power Requirements •...
-
Page 4: Table Of Contents
TABLE OF CONTENTS BOX CONTENTS WATER BLOCK DIMENSIONS PREPARING THE MOTHERBOARD APPLYING THERMAL COMPOUND INSTALLATION OF THE CONTROLLER BOX TO THE WATER BLOCK (OPTIONAL) ELECTRICAL CONNECTIONS CABLING AND ELECTRICAL CONNECTIONS INSTALLATION OF COOLING SOLUTION TO THE MOTHERBOARD TESTING OF THE LOOP RECOMMENDED FILLING AND LEAK-TESTING PROCEDURE CONNECTING THE TEC PLATE ELECTRONICS ESTABLISHING CONNECTION BETWEEN WATER BLOCK AND MOTHERBOARD... -
Page 5: Box Contents
BOX CONTENTS EK-QuantumX Delta TEC Water Block EK-QuantumX Delta TEC Controller M4 PVC Washers (4 pcs) Screw (4 pcs) Big Backplate Sticker (1pcs) Allen Key 2.5 mm (1 pcs) Coiled Spring (4 pcs) Backplate (1 pcs) Sticker (1 pcs) EK-Cable 5-Pin Motherboard (F) -
Page 6: Water Block Dimensions
WATER BLOCK DIMENSIONS 94,73 mm 46 mm - 6 -... -
Page 7: Preparing The Motherboard
Sticker STEP 1a STEP 1b - optional In unregulated mode of the EK-QuantumX Delta TEC, the backplate of the CPU can reach temperatures below ambient, which can lead to condensation on the backplate. Therefore, this insulation is highly recommended when the system works in unregulated mode. -
Page 8: Applying Thermal Compound
STEP 3 Install the four (4) supplied LGA-115x specific thumb screws into LGA-115x four (4) M4 threaded holes of the already-installed backplate. It’s Screw mandatory to place an M4 PVC washer underneath each M4 thumb screw. Tighten the screws to the backplate until you reach the end of the thread. -
Page 9: Installation Of The Controller Box To The Water Block (Optional)
INSTALLATION OF THE CONTROLLER BOX TO THE WATER BLOCK (OPTIONAL) You can install the controller box somewhere else in the chassis. Please make sure that the cables for TEC plate and temperature sensor are long enough to allow to do so. EK recommends you secure the Controller box to the water block, as shown in the following Steps. -
Page 10: Electrical Connections
ELECTRICAL CONNECTIONS STEP 1 To enable the functioning of the cooling solution, please take the two Thermal sensor cables from the water block and connect them to connectors on the Controller box: - Thermal sensor - 2-pin smaller white connector - TEC plate power supply - 2-pin black connector The connectors can be inserted in one orientation only! TEC Plate connector... -
Page 11: Installation Of Cooling Solution To The Motherboard
INSTALLATION OF COOLING SOLUTION TO THE MOTHERBOARD STEP 1 Carefully align your EK-QuantumX Delta TEC water block over pre-installed mounting mechanism with the already installed CPU. Be careful not to remove the pre-installed rubber inserts from the water block mounting holes. - Page 12 STEP 2 Thumb Screw Place the enclosed compression springs and thumb nuts over each M4 thumb screw. Start fastening two thumb nuts at a time, preferably in a cross pattern, and do not tighten them fully until all of them are partially screwed in.
-
Page 13: Testing Of The Loop
TESTING OF THE LOOP To make sure the installation of EK components was successful, we recommend you perform a 24-hour leak test. When your loop is complete and filled with coolant, connect the pump to a PSU outside Power supply ATX Cable of your system. -
Page 14: Connecting The Tec Plate Electronics
CONNECTING THE TEC PLATE ELECTRONICS Plug the 8-pin PCIe connector from the power supply to the connector of the EK-QuantumX Delta TEC CPU water block controller unit. The installation of the CPU water block is now complete. -
Page 15: Establishing Connection Between Water Block And Motherboard
ESTABLISHING CONNECTION BETWEEN WATER BLOCK AND MOTHERBOARD When the water block with the controller is installed on your motherboard, the communication connection also must be established. Use the USB-A to micro USB cable, which is included in the package. Connect the micro USB to the top of the water block, as shown in the picture. -
Page 16: Software Installation
SOFTWARE INSTALLATION Boot the system with the cooler connected – you should see a red solid LED light coming from the cooler. After booting the system, you will see that Windows will recognize a new USB device. Please check the device manager to check that you have the following device installed. -
Page 17: Functional Testing And Verification
LED slow blinking on the cooler. WARNING! Given that the CPU is cooled by the EK-QuantumX Delta TEC directly to achieve low temperatures, the rest of your liquid cooling loop will be under stress from the TEC plate. Do not... -
Page 18: Support And Service
SUPPORT AND SERVICE In case you need assistance, please contact: http://support.ekwb.com/ EKWB d.o.o. Pod lipami 18 1218 Komenda Slovenia - EU SOCIAL MEDIA EKWaterBlocks @EKWaterBlocks ekwaterblocks EKWBofficial ekwaterblocks...
Need help?
Do you have a question about the EK-QuantumX Delta TEC and is the answer not in the manual?
Questions and answers