Table of Contents
Advertisement
Quick Links
Advertisement
Table of Contents

Related Manuals for IONODES ION-E100-HD


Summary of Contents for IONODES ION-E100-HD
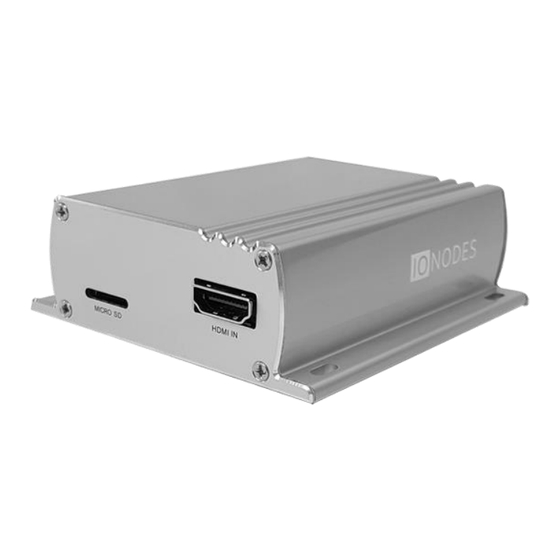
- Page 1 ION-E100-HD User Manual HDMI to H.264 IP Video Encoder Document Version 1.1...
-
Page 2: Table Of Contents
Normal Operation: ............................7 Special Operations: ............................7 Initial System Configuration .......................... 8 Network Configuration ........................... 8 Using the ION-E100-HD Web Application ................... 12 Setting up the NTP server ..........................12 Configuring Video Parameters ........................14 Performing a Firmware Update ........................15 Batch Firmware Update........................ -
Page 3: Before You Begin
Note: When unpacking, inspect the shipment box and appliance to identify any possible damages due to shipping. Make sure all items have been delivered and that no items are missing. Contact your Ionodes representative should you find any damages or defects. -
Page 4: Hardware Installation
2 Hardware Installation 2.1 Equipment Installation The ION-E100-HD can be placed on a flat surface, such as a desktop, or mounted via the available mount- ing holes. When installing the ION-E100-HD, position the unit to allow for cable clearance at the front and rear of the unit. - Page 5 Terminal Bloc Header • This header connector is used to connect the supplied Terminal Bloc Socket which provides the in- terface to serial port, I/O and power connections. Below is a detailed view of this Terminal Bloc Socket: Relay Output Digital Input Pins #1 &...
-
Page 6: Serial Port Connectivity
The system status LED is a bi-color (Yellow - Orange) LED providing detailed information on the current state of the device. ETHERNET / PoE • This is the ION-E100-HD network port. Please use a straight RJ45 (cat. 5 or 6) network cable. The ION-E100-HD accepts a Power-Over-Ethernet (PoE) compliant power source if needed. RESET •... -
Page 7: Understanding Led Status
To connect serial equipment to an ION-E100-HD using RS-485 2-wire configuration, use the following steps: 1. To create the negative data signal, please connect Rx- and Tx- pins together on the Terminal Bloc Socket. 2. To create the positive data signal, please connect Rx+ and Tx+ pins together on the Terminal Bloc Socket. -
Page 8: Initial System Configuration
6.1 Network Configuration By factory default, the ION-E100-HD is configured in DHCP. If you are not using a DHCP server it will au- tomatically allocate itself an APIPA (Automatic Private IP Addressing) address in the range 169.254.0.1 to 169.254.255.254 with subnet mask 255.255.0.0. - Page 9 The ICT supports 2 ways to discover a device. The first way doesn’t need any configuration and uses the Bonjour discovery protocol. In order to be able to discover a device via Bonjour, the network must sup- port multicast delivery. If it is not the case, you can use the second way, which is the Unicast Discovery.
- Page 10 The ICT will display as many devices as it discovers on the network. If no DHCP server was able to assign an IP address to an ION-E100-HD, it will appear in the ICT device list with an APIPA address (169.254.*.*). If an ION-E100-HD displays an APIPA address it must be configured with a valid IP address before it can be remotely configured by selecting the ‘’Assign IP address’’...
- Page 11 Once the IP information is set, the Silverlight web application served by the ION-E100-HD can be launched from the ICT or directly in your web browser by typing the device’s IP address in the address bar. You can start to use your networked video management system for final system configuration or...
-
Page 12: Using The Ion-E100-Hd Web Application
6.2 Using the ION-E100-HD Web Application When entering the Web Application, you will be asked a username and password. The default user name and password is ‘admin’. The following window will be displayed: The following parameters may need to be programmed before using the unit:... -
Page 14: Configuring Video Parameters
Configuring Video Parameters You may disable any of the three (3) video encoder streams (H.264-1, H.264-2 and JPEG). All other video parameters should be configured within your NVM system. Note: We recommend disabling the MJPEG codec if you do not intend on using this codec within your appli- cation. -
Page 15: Performing A Firmware Update
7 Performing a Firmware Update This section describes how to update your ION-E100-HD to newer firmware versions from the web appli- cation. 1. Navigate to your device’s web application using your favorite web browser. 2. Click on the Maintenance tab. -
Page 16: Batch Firmware Update
7.1 Batch Firmware Update This section describes how to perform a batch update of multiple ION-E100-HD devices to newer firm- ware versions from the ICT. The batch firmware update works by starting a firmware update session. Only one session at time is al- lowed and only 20 devices can be selected by session. - Page 17 To start a firmware update session, choose the “.iof” file corresponding to the new firmware by clicking to the “Select File …” button. Once selected, click to the “Start” button. Once started, the “Firmware Update Session” window shows the progress of the firmware update. This window can be closed at any moment without losing the current session.
-
Page 18: Point To Point Connections
In the ION-E100-HD’s web application, in the Configuration section, go to the Video In tab and select «video input 1». Scroll down all the way to the bottom of the configuration page. The last 3 sections are named Point to Point 1, 2 and 3. -
Page 19: Annex A - Configuration Parameter Reference
Annex A – Configuration Parameter Reference 1. Video Input Configuration Audio Association – This parameter allows you to associate a specific audio input with this • video input. Enabled – This parameter allows you to enable or disable a video input. •... - Page 20 The visual difference is much greater between baseline and main then between main and • high. Also, the differences appear only when the visual quality begins to degrade (ex: when the quality begins to degrade on baseline profile, switching to main profile will restore some of the image quality).
-
Page 21: Annex B - Troubleshooting Guide
Make sure the GREEN LED on the RJ45 connector is lit. If it is not lit, verify the network connectivity with the network switch. o Dynamic discovery of the ION-E100-HD requires multicast networking to be supported by your network and switch equipment. (Bonjour protocol) -
Page 22: Annex C - Statement Limited Warranty
Ionodes ION-E100-HD, you can alternatively ask for a partial refund as far as justified by the reduced value of the unrepaired ION-E100-HD or ask for a can- cellation of the respective agreement for such ION-E100-HD and get your money refunded. - Page 23 Ionodes does not warrant uninterrupted or error–free operation of an ION-E100-HD. Any tech- nical or other support provided for an ION-E100-HD under warranty, such as assistance via tele- phone with "how–to" questions and those regarding ION-E100-HD set–up and installation, will...
Need help?
Do you have a question about the ION-E100-HD and is the answer not in the manual?
Questions and answers