
Related Manuals for Vega PT30E.SV


Summary of Contents for Vega PT30E.SV
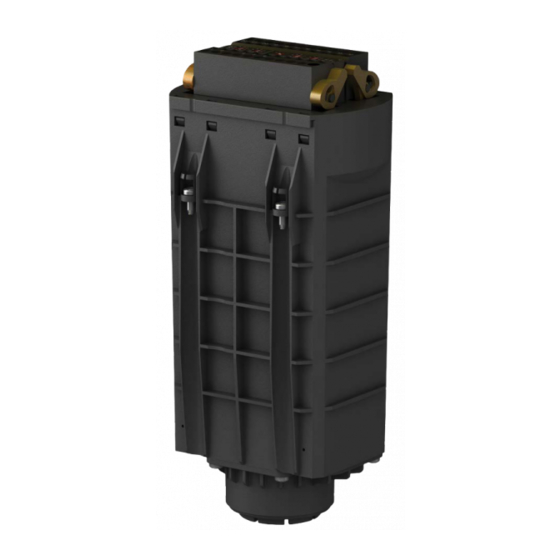
- Page 1 Operating Instructions Electronics module SOLITRAC, MINITRAC, POINTRAC, WEIGHTRAC Document ID: 40104...
-
Page 2: Table Of Contents
Contents Contents About this document ....................... 3 Function ........................... 3 Target group ........................3 Symbols used........................3 For your safety ......................... 4 Authorised personnel ....................... 4 Appropriate use ........................ 4 Approvals ......................... 4 Environmental instructions ....................4 Product description ......................... 5 3.1 Configuration ........................ -
Page 3: About This Document
Symbols used Document ID This symbol on the front page of this instruction refers to the Docu- ment ID. By entering the Document ID on www.vega.com you will reach the document download. Information, note, tip: This symbol indicates helpful additional infor- mation and tips for successful work. -
Page 4: For Your Safety
If the instrument comes with approvals, the associated approval documents of the sensor must always be noted. They are included with the delivery but can also be downloaded under www.vega.com via " VEGA Tools" and " Search" as well as via " Downloads" and " Approvals". Environmental instructions Protection of the environment is one of our most important duties. -
Page 5: Product Description
3 Product description Product description 3.1 Configuration Scope of this operating This operating instructions manual applies to the electronics modules instructions of the following sensors from the PROTRAC series. • SOLITRAC • MINITRAC • POINTRAC • WEIGHTRAC Scope of delivery The scope of delivery encompasses: •... - Page 6 3 Product description • Avoiding mechanical shock and vibration • Storage and transport temperature see chapter " Supplement - Storage and transport temperature Technical data - Ambient conditions" • Relative humidity 20 … 85 % Lifting and carrying With instrument weights of more than 18 kg (39.68 lbs) suitable and approved equipment must be used for lifting and carrying.
-
Page 7: Mounting
First of all, check by means of the following lists if you are using a suitable electronics module. SOLITRAC, POINTRAC, WEIGHTRAC • PT30E.SV for version four-wire 4 … 20 mA/HART • PT30E.SS for version 4 … 20 mA/HART with SIL qualification • PT30E.SP for version Foundation Fieldbus and Profibus PA MINITRAC •... - Page 8 4 Mounting Check if this sensor serial number is also displayed when switch- ing on the instrument. The sensor serial number can be displayed in the display and adjustment module or in the adjustment software PACTware. The electronics module is also provided with its own electronics serial number.
- Page 9 4 Mounting Fig. 2: Profibus PA - Remove the cover foil above the address selection switches Coding To prevent accidental use of a non-permissible electronics module, the terminal blocks are coded. On the opposite side, you must code the electronics module accord- ing to your sensor.
-
Page 10: Installation Procedure
4 Mounting You must code your sensor according to the new electronics module of your sensor. • Terminal 3 - Sensors with Ex approval intrinsically safe (ia) • Terminal 4 - Non-intrinsically safe sensors or sensors without approval Fig. 4: Coding A Coding pin for non-intrinsically safe sensors and sensors without approval (terminal 4) B Coding pin for intrinsically safe (ia) instruments (terminal 3) C Coding pin - avoids an interchanging of the two terminal blocks (terminal 2) - Page 11 4 Mounting Keep in mind that the following work must only be carried out after an appropriate training from VEGA. Proceed as follows: 1. Switch off the source reliably - Set the source container to "Off" Secure radiation source from being switched on again. Warning: Always switch off the radiation source when working on the sensor and secure it against unauthorized or unintentional switching on.
- Page 12 4 Mounting Fig. 6: Electronics module in the housing A Locking of the terminal blocks Terminal blocks 7. Loosen the four holding screws (7) of the electronics module with a screwdriver (Torx size T 10 ) 8. Slowly pull out the old electronics module (2) so that the optical pad (4) can peel away from the glass window (9).
- Page 13 4 Mounting Fig. 7: Loosen the holding screws Housing lid Electronics module Optical pad Instrument housing Photomultiplier 9. The optical pad (4) can stick to the round glass window at the bottom in the housing. In this case, use a small screwdriver to remove the optical pad (4) carefully.
- Page 14 4 Mounting Fig. 8: Clean the glass window in the instrument housing Instrument housing Glass window 12. Check if all parts are dry, clean and dust-free. 13. Open the attached tube of special grease (10). 14. Apply special grease (10) to one side of the new optical pad (4). See the following illustration.
- Page 15 4 Mounting Fig. 10: Skim the surface of the the optical pad with the plastic spatula 11 Plastic spatula 16. Detach the protective cap with the foam rubber pad (3) from the photomultiplier (8) of the new electronics module. Avoid exposing the photomultiplier to direct light. Detacht the protective cap (3) only as the final step.
- Page 16 4 Mounting Fig. 12: Check the photomultiplier Optical pad Holding screws Photomultiplier 18. Place the optical pad (4) with the greased side centered to the photomultiplier (8). Do not press with your fingers or sharp objects. 19. Apply special grease to the second side of the optical pad. See following illustration.
- Page 17 4 Mounting Fig. 14: Skim the second side of the optical pad with the plastic spatula 11 Plastic spatula 21. Insert the new electronics module (2) carefully into the instrument housing (5) Take note of the correct direction when inserting the electronics module.
- Page 18 4 Mounting Fig. 15: Insert the electronics module carefully into the instrument housing. Housing lid Electronics module Instrument housing Note: If the optical pad (4) drops out when inserting the electronics module, you have to clean the optical pad (4) carefully, grease it again, remove the grease (only a thin film should remain) and place it again onto the photomultiplier (8).
- Page 19 4 Mounting If the electronics module is correct, check the coding. See chapter " Mounting preparations". 25. Screw the housing cover onto the housing up to the stop and pro- tect it against unintentional opening by screwing out the hexagon screw. Note: If the photomultiplier was exposed to strong light, this can temporarily cause measurement deviations. Therefore, as a rule, wait two hours before you put the instrument into operation.
-
Page 20: Setup
The instrument data also include the TAG no., information on the process fitting and seal as well as activation data for a supplementary electronics. Enter the serial number of your device into the search field on our homepage " www.vega.com". After entering the serial number, the order data of the device are displayed. Under " Related documentation" you will find " Sensor for electronics exchange" as an XML file. Save this DTM configuration file with " Save as"... -
Page 21: Maintenance
6 Maintenance Maintenance How to proceed if a repair is necessary You can find an instrument return form as well as detailed information about the procedure in the download area of our homepage. By doing this you help us carry out the repair quickly and without having to call back for needed information. In case of repair, proceed as follows: •... -
Page 22: Dismount
7 Dismount Dismount Dismounting steps Warning: Before dismounting, be aware of dangerous process conditions such as e.g. pressure in the vessel or pipeline, high temperatures, cor- rosive or toxic media etc. Take note of chapters " Mounting" and " Connecting to voltage sup- ply" and carry out the listed steps in reverse order. Disposal The instrument consists of materials which can be recycled by spe- cialised recycling companies. -
Page 23: Supplement
8 Supplement Supplement Technical data Technical data The technical data are listed in the operating instructions manual of the respective device. Electronics module • SOLITRAC, MINITRAC, POINTRAC, WEIGHTRAC... -
Page 24: Industrial Property Rights
Les lignes de produits VEGA sont globalement protégées par des droits de propriété intellec- tuelle. Pour plus d'informations, on pourra se référer au site www.vega.com. VEGA lineas de productos están protegidas por los derechos en el campo de la propiedad indus- trial. Para mayor información revise la pagina web www.vega.com. - Page 25 Notes Electronics module • SOLITRAC, MINITRAC, POINTRAC, WEIGHTRAC...
- Page 26 Notes Electronics module • SOLITRAC, MINITRAC, POINTRAC, WEIGHTRAC...
- Page 27 Notes Electronics module • SOLITRAC, MINITRAC, POINTRAC, WEIGHTRAC...
- Page 28 Subject to change without prior notice © VEGA Grieshaber KG, Schiltach/Germany 2021 VEGA Grieshaber KG Phone +49 7836 50-0 Am Hohenstein 113...
Need help?
Do you have a question about the PT30E.SV and is the answer not in the manual?
Questions and answers