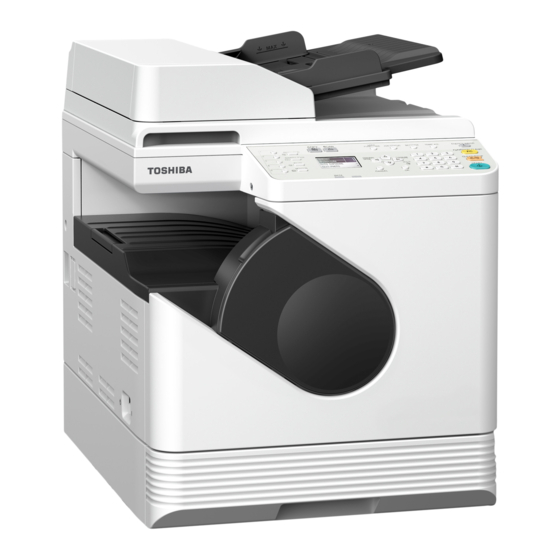
Toshiba e-studio 2822AM User Manual

Toshiba e-studio 2822AM User Manual

Multifunctional digital systems
Hide thumbs Also See for e-studio 2822AM:
Table of Contents

Advertisement

Quick Links

MULTIFUNCTIONAL DIGITAL SYSTEMS
User's Guide

Advertisement

Table of Contents
loading

Summary of Contents for Toshiba e-studio 2822AM

  • Page 1 MULTIFUNCTIONAL DIGITAL SYSTEMS User’s Guide...
  • Page 2 © 2019, 2020 Toshiba Tec Corporation All rights reserved Under the copyright laws, this manual cannot be reproduced in any form without prior written permission of Toshiba Tec Corporation.
  • Page 3 Preface Thank you for purchasing the Toshiba multifunctional digital systems. This manual describes how to use, perform maintenance, and fix problems for this equipment. Be sure to read this manual before using this equipment. Keep this manual handy and retain it for future reference.
  • Page 4 Adobe Systems.  Recommended toner cartridges For optimal printing performance, we recommend that you use genuine Toshiba toner cartridges. If you use a Toshiba-recommended toner cartridge, the following functions are available.
  • Page 5: Table Of Contents

    CONTENTS Preface..............................3 Chapter 1 PREPARATION Components ............................10 Front/Right/Inner side ............................... 10 Left side ..................................11 Configuration of options ............................12 Control panel ................................13 Main screen (Copy) ..............................16 Preparation 1 - Turning Power ON ......................17 Turning on .................................. 17 Saving energy when not in use - Energy saving mode - ...................
  • Page 6 How to print ................................71 Status Monitor ............................ 73 Monitoring the print status and reporting print errors.................... 73 Setting up Print Options ........................74 How to set up ................................74 Print options................................77 Printing With Best Functions for Your Needs..................94 Layout and finishing options in [Basic] tab menu....................
  • Page 7 Adjusting the exposure ............................153 Continuing the scanning ............................154 Specifying E-mail Addresses ........................... 154 Character entry ................................ 157 Scan speed ................................158 Using Templates (Scan) ........................160 Registering the templates ............................160 Recalling a template ..............................161 Chapter 6 VARIOUS FUNCTIONS Copy Menu List...........................164 Copy menu items ..............................
  • Page 8 Chapter 9 APPENDIX e-STUDIO2822AM/2822AF Specifications ....................210 Continuous copying speed............................212 Specifications of Options ........................213 Packing List ............................214 Copying Function Combination Matrix ....................215 Combination matrix..............................215 INDEX .................................217 8 CONTENTS...
  • Page 9: Preparation

    PREPARATION Components ........................10 Front/Right/Inner side ............................10 Left side ................................11 Configuration of options .............................12 Control panel ...............................13 Main screen (Copy) ..............................16 Preparation 1 - Turning Power ON ..................17 Turning on ................................17 Saving energy when not in use - Energy saving mode - ..................18 Preparation 2 - Loading Paper ...................19 Acceptable paper types ............................19 Recommended paper ............................20...
  • Page 10: Components

    Components  Front/Right/Inner side Reversing Automatic Document Feeder (RADF) Load up to 50 originals (80 g/m or 20 lb. Bond) to scan one sheet after another. (The maximum number you can load may vary depending on the type of original.) ...
  • Page 11: Left Side

    1.PREPARATION  Left side Original glass Place the book-type originals and special paper such as overhead transparencies or tracing paper, as well as plain paper. Control panel Make settings to use the various functions on this equipment.  P.13 “Control panel” Receiving tray Paper exit stopper Stops large paper from sliding out of the receiving tray.
  • Page 12: Configuration Of Options

    1.PREPARATION USB terminal (4-pin) Connect to your PC using a commercially available USB cable.  Use a USB2.0 Hi-Speed certified cable: USB cable supporting the USB2.0 Hi-Speed mode (480 Mbps of transfer speed) certified by the USB Implementers Forum.  Connect the equipment with a PC directly by the USB cable. When it is connected with a PC via a USB hub, the equipment may not be recognized.
  • Page 13: Control Panel

    1.PREPARATION  Control panel The functions and indications of the button vary depending on the region. The illustrations show the control panel for Europe and the Americas unless they are specified. For Europe and the Americas For regions other than Europe and the Americas One Touch button (Only for e-STUDIO2822AF) Speed button for sending a fax.
  • Page 14 1.PREPARATION [FAX] button (Only for e-STUDIO2822AF) Press this button to use the Fax functions. Available only when the Fax Unit is installed. For details on how to use the Fax functions, see the following manual. Fax Guide [USER FUNCTIONS] button Changes the equipment’s default settings.
  • Page 15 1.PREPARATION button Press this button on the menu screen to move to the item below. If you press this button when the bottom menu item is highlighted, you will move to the top menu item. 22. [CANCEL] button Cancels the current settings and returns to the previous item. button Press this button once on the main screen (Copy) to show the “ORIGINAL MODE”...
  • Page 16: Main Screen (Copy)

    1.PREPARATION  Main screen (Copy) Appears after the power of the equipment is turned ON and the warm-up is finished. This screen is called “main screen (Copy)”. This screen also appears when the AUTO CLEAR function has worked. READY 100% AUTO EXPOSURE TEXT/PHOTO Message...
  • Page 17: Preparation 1 - Turning Power On

    Preparation 1 - Turning Power ON  Turning on Press the power switch to “ ” (on). Starts warming up. When the warm-up has finished, the equipment is ready. READY 100% AUTO EXPOSURE TEXT/PHOTO If you press [START] during the warm-up, copying automatically starts after it has finished. When the job is reserved, “COPYING”...
  • Page 18: Saving Energy When Not In Use - Energy Saving Mode

    1.PREPARATION  Saving energy when not in use - Energy saving mode - To reduce power consumption, the equipment automatically enters into the energy saving mode when a specified period of time has passed since its last use.  Types of energy saving mode Low power mode: “SAVING ENERGY”...
  • Page 19: Preparation 2 - Loading Paper

    Preparation 2 - Loading Paper Load an appropriate type of paper.  Acceptable paper types Acceptable paper types differ depending on its paper source. See the table below for more details. Maximum sheet Paper Paper type Paper size source capacity Drawer Plain paper A/B format: A4...
  • Page 20: Recommended Paper

    1.PREPARATION  Recommended paper To ensure the best copy performance, the paper types listed below are recommended. If you want to use paper other than that we recommend, contact your service technician. Paper type Product name Plain paper A/B format: TGIS Paper/Mondi 80 g/m , 20 lb.
  • Page 21 1.PREPARATION  Paper types not acceptable Do not use the types of paper listed below since they may cause paper misfeeds or an equipment malfunction. If you use these types of paper, paper misfeeding may occur frequently, a paper misfeeding in which you cannot easily remove paper from this equipment may occur, or images may continually become dirty.
  • Page 22: Loading Paper In The Drawer

    1.PREPARATION  Loading paper in the drawer For the acceptable paper, see the following page:  P.19 “Acceptable paper types” Turn the power of the equipment ON. Pull out the drawer carefully, and then press down the paper plate. Press it down until you hear a click sound and it is no longer lifted up. Remove the side guides.
  • Page 23 1.PREPARATION  Up to 250 sheets (80 g/m or 20 lb. Bond) can be loaded. Be sure that the height of the stacked paper does not exceed the line indicated inside of the side guides.  P.19 “Acceptable paper types” ...
  • Page 24: Loading Paper On The Bypass Tray

    1.PREPARATION  Loading paper on the bypass tray The contents of the original(s) are rotated when copied on paper of the following sizes fed from the bypass tray. A/B format: A3, A4-R, A5-R, B4, B5-R, FOLIO LT format: LD, LG, LT-R, ST-R, COMP, 13"LG, 8.5"SQ K format: 8K, 16K-R For example, to copy an A5-size original, place the original on the original glass in A5 portrait orientation and paper on the bypass tray in A5 landscape orientation (A5-R).
  • Page 25 1.PREPARATION Align the side guides with the edges of the paper, and then push back the lever.  Up to 50 sheets of plain paper (80 g/m or 20 lb. Bond) can be loaded. Be sure that the height of the stacked paper does not exceed the indicators of the side guides.
  • Page 26: Loading An Envelope On The Bypass Tray

    1.PREPARATION  Loading an envelope on the bypass tray For the acceptable envelope sizes, see the following page:  P.19 “Acceptable paper types” Notes for using envelopes Do not use the following envelopes, otherwise they may cause a paper misfeed or damage to the equipment. Badly curled, wrinkled or folded envelopes Extremely thick or thin envelopes Wet or damp envelopes...
  • Page 27 1.PREPARATION Place an envelope on a flat clean surface and press it with your hands in the arrow directions as shown below to expel air from the inside. Press it well to prevent the flap from rolling upward. Correct bent corners of the envelope. Open the bypass tray.
  • Page 28 1.PREPARATION Align the side guides to the edges of the envelope, and then push back the lever. 28 Preparation 2 - Loading Paper...
  • Page 29: Preparation 3 - Registering Paper Size And Type

    Preparation 3 - Registering Paper Size and Type When you load or change paper, a pop-up window appears. Follow the instructions to register the items below in the equipment.  For the drawer: the paper size  For the bypass tray: the paper size and type ...
  • Page 30 1.PREPARATION 30 Preparation 3 - Registering Paper Size and Type...
  • Page 31 COPY FUNCTIONS Basic Copy Procedure .......................32 Acceptable originals ............................32 Copying originals ..............................33 Copy Settings........................39 Adjusting the exposure ............................39 Selecting the original mode ..........................40 Selecting the paper..............................41 Enlarging or reducing the copy size........................43 Sorting pages ...............................48 Copying two or four pages on each sheet ......................50 Copying both sides of a card on a sheet ......................52 Erasing the shadow on edges..........................54 Shifting the pages to the right or left ........................55...
  • Page 32: Basic Copy Procedure

    Basic Copy Procedure Learn the basic copy procedure in this section. For the other various functions, see the following page:  P.39 “Copy Settings” Make sure that the equipment is ready to copy.  P.17 “Preparation 1 - Turning Power ON” ...
  • Page 33: Copying Originals

    2.COPY FUNCTIONS  Copying originals Follow the common basic instructions below to make a copy. Place the original(s). Placing originals on the original glass 1. Raise the Reversing Automatic Document Feeder. 2. Place the original face down on the original glass. 3.
  • Page 34 2.COPY FUNCTIONS Placing originals on the Reversing Automatic Document Feeder 1. Align all the originals. 2. Place them face up and align the side guides to the original length.  The top sheet of the originals will be scanned first. ...
  • Page 35 2.COPY FUNCTIONS Press [COPY]. Enter the number of copies with the digital keys. Make the copy settings as required.  P.39 “Copy Settings” You may not be able to use some combinations of functions.  P.215 “Copying Function Combination Matrix” Basic Copy Procedure 35...
  • Page 36 2.COPY FUNCTIONS Press [START] to start copying. To stop or resume copying, press [CLEAR/STOP] during copying. Press [OK] or [CANCEL] according to the message displayed on the LCD screen. When you copy loading originals from the Reversing Automatic Document Feeder (RADF): If there are more originals, place the next ones, select “SCAN NEXT”...
  • Page 37 2.COPY FUNCTIONS  Shortcut keys You can access some functions by simply pressing the button.  P.37 “Using the “EXPOSURE” or “ID CARD” function quickly”  P.38 “Selecting “ORIGINAL MODE” quickly” Using the “EXPOSURE” or “ID CARD” function quickly On the first screen of Copy mode, the button function varies depending on the region.
  • Page 38 2.COPY FUNCTIONS Selecting “ORIGINAL MODE” quickly On the first screen of Copy mode, the button can work as the [ORIGINAL MODE] button. Just press the button to access the “ORIGINAL MODE” function so that you can change the original mode. ...
  • Page 39: Copy Settings

    Copy Settings You can make the copy settings on the copy functions menu. Press [CANCEL] to exit from the setting without making any changes.  Adjusting the exposure You can adjust the density to make copies lighter or darker in nine levels from -4 to +4. The auto density setting can represent the copy image in the optimal density.
  • Page 40: Selecting The Original Mode

    2.COPY FUNCTIONS  Selecting the original mode You can achieve the optimal image quality by selecting a suitable original mode. You can directly access this function by pressing .  P.38 “Selecting “ORIGINAL MODE” quickly” READY 100% AUTO EXPOSURE TEXT/PHOTO Menu Functions Settings Description...
  • Page 41: Selecting The Paper

    2.COPY FUNCTIONS  Selecting the paper You can select the paper source in which the paper of the desired size and type is loaded.  P.19 “Acceptable paper types”  Selecting the paper source READY 100% TEXT/PHOTO Menu Functions Settings Description Uses the drawer as the paper source.
  • Page 42 2.COPY FUNCTIONS  Selecting the bypass tray automatically When you load paper into the bypass tray, the paper source automatically changes from the drawer to the bypass tray. The LCD screen automatically changes so that you can easily set the paper size and type for the bypass tray. Press to select the paper size, and then press [OK].
  • Page 43: Enlarging Or Reducing The Copy Size

    2.COPY FUNCTIONS  Enlarging or reducing the copy size You can enlarge or reduce the size of copies in the following three ways.  Specify the ratio manually ( P.43)  Select a fixed zoom ratio ( P.44)  Automatic Magnification Selection (AMS) ( P.46) ...
  • Page 44 2.COPY FUNCTIONS  To make an enlarged or reduced copy of an original in portrait direction placed on the original glass onto a paper in landscape direction, set a fixed zoom ratio.  P.44 “Selecting a fixed zoom ratio”  To make an enlarged or reduced copy of an original in portrait direction placed on the Reversing Automatic Document Feeder onto a paper in landscape direction, select “AMS”...
  • Page 45 2.COPY FUNCTIONS Press to select a zoom ratio, and then press [OK].  To make an enlarged or reduced copy of an original in portrait direction placed on the original glass onto a paper in landscape direction, set a fixed zoom ratio. ...
  • Page 46 2.COPY FUNCTIONS  Automatic magnification selection (AMS) READY 100% 100% Menu Settings Description Functions  P.43 “Specifying the ratio ZOOM Manual zoom (25 - 100 - 400%) manually”  P.44 “Selecting a fixed zoom FIXED ZOOM A/B format: 71% (A4 -> A5), 141% (A4 -> A3 / A5 -> ratio”...
  • Page 47 2.COPY FUNCTIONS Press [COPY]. Press to select the item displayed on the LCD screen, and then press . Press to select “AMS”, and then press [OK]. ZOOM 100% FIXED ZOOM  To make an enlarged or reduced copy of an original in portrait direction placed on the original glass onto a paper in landscape direction, set a fixed zoom ratio.
  • Page 48: Sorting

    2.COPY FUNCTIONS  Sorting pages You can sort a number of copied pages in the same order as the original. NON SORT: Not to sort the copied pages. All copies of the first page are ejected first and then all copies of subsequent pages are ejected in sequence.
  • Page 49 2.COPY FUNCTIONS When an original is placed on the Reversing Automatic Document Feeder, “SORT” is automatically set. READY 100% 100% NON SORT Menu Functions Settings FINISHING NON SORT SORT ROTATE SORT Press [COPY]. Press to select the item displayed on the LCD screen, and then press . Press to select the setting item, and then press [OK].
  • Page 50: Copying Two Or Four Pages On Each Sheet

    2.COPY FUNCTIONS  Copying two or four pages on each sheet You can copy two or four original pages on each sheet of paper. OFF: Disables this function. 2IN1: Copies two pages on a sheet of paper. 4IN1: Copies four pages on a sheet of paper. ...
  • Page 51 2.COPY FUNCTIONS Follow the instructions on the LCD screen to use the “2IN1/4IN1” function. You are instructed to make the following settings.  ORIGINAL SIZE Press to select the size of the original.  ORIGINAL ORIENTATION Press to select the portrait or landscape orientation of the original. ...
  • Page 52: Copying Both Sides Of A Card On A Sheet

    2.COPY FUNCTIONS  Copying both sides of a card on a sheet You can copy the front and back of a card on a sheet of paper. Front side Back side You can directly enable this function by pressing . The button operation varies depending on the region. For regions other than Europe and the Americas: ...
  • Page 53 2.COPY FUNCTIONS Follow the instructions on the LCD screen to use the “ON” function. You are instructed to make the following settings.  SET FRONT OF ID CARD Place the front of a card face down at the upper left on the original glass, and then press [START]. ...
  • Page 54: Erasing The Shadow On Edges

    2.COPY FUNCTIONS  Erasing the shadow on edges You can erase the shadow on the edges of copies. When you copy thick books, you can erase the surrounding shadow with this function. The area to erase can be changed from 4 mm to 15 mm (0.2" to 0.6") in increments of 1 mm (0.04"). ...
  • Page 55: Shifting The Pages To The Right Or Left

    2.COPY FUNCTIONS  Shifting the pages to the right or left You can shift pages to the right or left. The shifted area can be used as a margin for punching holes or stapling. The margin can be changed from 4 mm to 15 mm (0.2" to 0.6") in increments of 1 mm (0.04"). READY 100% EDGE ERASE:OFF...
  • Page 56: Copying On Both Sides

    2.COPY FUNCTIONS  Copying on both sides You can copy 1-sided or 2-sided originals on the both side of paper. You can make copies of 1-sided originals into the both sides of paper so that you can save paper. 1 > 2 DUPLEX For 2-sided printing, use plain paper (64 to 80g/m , 17 to 20 lb Bond).
  • Page 57: Adding A Page Number And Date/Time On The Copied Paper

    2.COPY FUNCTIONS  Adding a page number and date/time on the copied paper You can add a page number and date/time on the copied paper. READY 100% IMAGE SHIFT:OFF ANNOTATION:OFF Menu Functions Settings ANNOTATION PAGE NO. PAGE No.+DATE/TIME Press [COPY]. Press to select the item displayed on the LCD screen, and then press .
  • Page 58: Removing Blank

    2.COPY FUNCTIONS  Removing blank pages You can skip blank pages in the original when copying. READY 100% ANNOTATION:OFF OMIT BLANK:OFF Menu Functions Settings OMIT BLANK PAGE Press [COPY]. Press to select the item displayed on the LCD screen, and then press . Press to select the setting item, and then press [OK].
  • Page 59: Copying Different Sizes In One Go

    2.COPY FUNCTIONS  Copying different sizes in one go When different sizes of originals are mixed and placed on the Reversing Automatic Document Feeder, some combinations of sizes can be copied in one go. The combination of the original sizes that can be mixed are as follows: Other than North America: A3 and A4 or B4 and B5 North America: LD and LT or LG and LT-R When this function sets to “ON”, the equipment is switched to the automatic paper selection mode.
  • Page 60: Image Direction

    2.COPY FUNCTIONS  Image direction When you make 1-sided portrait originals to 2-sided copy by placing them in a landscape direction, normally the copied pages are “open to top”. With this function you can make them “open to left”. This function is called “image direction”.
  • Page 61: Continuing The Scanning For A Copy

    2.COPY FUNCTIONS  Continuing the scanning for a copy When you copy with the Reversing Automatic Document Feeder (RADF), you can select whether you continue scanning the next originals after the last loaded original is scanned. READY 100% IMAGE DIRECTION:OFF CONTINUE SCAN:ON Menu Functions Settings...
  • Page 62: Using Templates (Copy)

    Using Templates (Copy) Once you have set the several functions and settings, you can register up to three of them as “templates” and recall one of them for frequent use.  Registering the templates Make settings for the functions to register as a template. Press [TEMPLATE].
  • Page 63: Recalling A Template

    2.COPY FUNCTIONS Item Name Settings Omit Blank Page OFF, ON Mixed Size Original OFF, ON Image Direction OFF, ON Continue Scan OFF, ON  Recalling a template Press [TEMPLATE]. Press to select “RECALL”, and then press . TEMPLATE RECALL REGISTRATION Press to select a template, and then press [OK].
  • Page 64 2.COPY FUNCTIONS 64 Using Templates (Copy)
  • Page 65 PRINT FUNCTIONS (Windows) Before Using the Printer Driver..................66 Configuring the options............................66 Setting the department code ..........................69 Printing From Application ....................71 Considerations and limitations...........................71 How to print .................................71 Status Monitor .........................73 Monitoring the print status and reporting print errors..................73 Setting up Print Options ....................74 How to set up ...............................74 Print options.................................77 Printing With Best Functions for Your Needs ...............94...
  • Page 66: Before Using The Printer Driver

    Before Using the Printer Driver Before printing, you have to configure the following options:  Configuration Settings To use devices installed in this equipment, you must first configure their options on the [Configuration] tab of the printer driver.  P.66 “Configuring the options” ...
  • Page 67 3.PRINT FUNCTIONS (Windows) Right-click the printer driver of this equipment and select [Printer properties] from the displayed menu. The printer driver properties dialog box appears.  For Windows Server 2008, select the printer driver for this equipment, and then click [Printer properties] in the [File] menu.
  • Page 68 3.PRINT FUNCTIONS (Windows) Click [Drawer Settings]. The [Drawer Settings] dialog box appears. Set the following options and click [OK]. Drawer 1 — Select the size of paper that is loaded in the Drawer. The paper type for the drawer is fixed to “Plain”. Bypass Tray —...
  • Page 69: Setting The Department Code

    3.PRINT FUNCTIONS (Windows)  Setting the department code When the department code function is enabled on this equipment, you have to enter your department code to send a print job via the printer driver. This allows a network administrator to check the number of copies printed by specific department. Ask your administrator whether you have to enter the department code.
  • Page 70 3.PRINT FUNCTIONS (Windows) Display the [Others] tab menu and enter your department code in the [Department Code] box. The department code is a 5-digit number. Click [Apply] or [OK] to save the settings. 70 Before Using the Printer Driver...
  • Page 71: Printing From Application

    Printing From Application This section describes how to print a document from application.  P.71 “Considerations and limitations”  P.71 “How to print”  Considerations and limitations  Some print options can be set from both the application and the printer driver, such as collation. If the collation is set from the application, documents may not be properly printed.
  • Page 72 3.PRINT FUNCTIONS (Windows) Set the print options on each tab according to how you want to print. Setting the print options varies depending on how you want to print a document.  P.77 “Print options” Click [OK] to save the settings. Click [Print] to print a document.
  • Page 73: Status Monitor

    Status Monitor The status monitor is utility software that is installed with the printer driver. It can monitor the current print job and the current status of the equipment.  P.73 “Monitoring the print status and reporting print errors”  Monitoring the print status and reporting print errors You can start the status monitor from the [Status Monitor] button on the printer driver screen.
  • Page 74: Setting Up Print Options

    Setting up Print Options Print Options are the attributes you set to define the way a print job is processed.  P.74 “How to set up”  P.77 “Print options” To find the printing instructions for your specific needs, see the procedures in the following section. ...
  • Page 75 3.PRINT FUNCTIONS (Windows)  Setting print options using profiles Using profiles, you can save the print settings or apply the saved settings to a print job. In order to print a document using profiles, you must first create the saved profile. ...
  • Page 76 3.PRINT FUNCTIONS (Windows) Loading profile Select a profile in the [Profile] box. The setting options in the profile are reflected on each tab. To restore the default settings after you select the profile, click [Restore Defaults] on each tab. Selecting [None] on the [Profile] box will not restore them.
  • Page 77: Print Options

    3.PRINT FUNCTIONS (Windows)  Print options This section describes print options in each tab of the printer driver. This section will help you to find the description of specific print options, or understand their individual functions.  P.79 “[Basic] tab” ...
  • Page 78 3.PRINT FUNCTIONS (Windows) 1. Printer Name Displays the name given to the printer driver when it was installed, or the name it displays on the icon in the Printer folder. 2. Menu Tabs The menu items of the printer driver are displayed as tabs. Clicking on a tab will display the contents of the selected tab.
  • Page 79 3.PRINT FUNCTIONS (Windows)  [Basic] tab The [Basic] tab contains basic print operation settings, such as the original paper size, print paper size, paper source, paper type, orientation, and so on. Original Paper Size Selects the size of a document to be printed. Available original paper sizes are listed below: ...
  • Page 80 3.PRINT FUNCTIONS (Windows) Paper Source Selects a paper source to print a job in the most suitable paper size. The figure on the right indicates the paper size set for each paper source. When you select a paper source, the chosen one is indicated with a green square in the figure.
  • Page 81 3.PRINT FUNCTIONS (Windows)  [Finishing] tab The [Finishing] tab allows you to enable sort printing and N-up printing. Copy Handling Sets how to sort the printed sheets when more than one copy is made for printing. - Sort Copies — Select this for sort-printing (1, 2, 3... 1, 2, 3...). - Group Copies —...
  • Page 82 3.PRINT FUNCTIONS (Windows) 2-Sided Printing This sets printing on both sides of paper. Select this check box and then the position of the margin for 2-sided printing. - Long Edge — Select this to print on both sides of the paper with a margin on the long edge. Portrait Landscape - Short Edge —...
  • Page 83 3.PRINT FUNCTIONS (Windows) Use Custom Margin Enables you to set the custom margins. Select this check box and click [Details] to open the dialog box, then set the margin settings.  When [Booklet] is selected from [2-Sided Printing], this option is unavailable. ...
  • Page 84 3.PRINT FUNCTIONS (Windows) - Restore Defaults — Restores the [Margins] settings to their defaults. If the printing area or the printed image has run off, printing will be performed by cutting off the exceeded portions. The binding margin on the back side of the paper will be made to the opposite end of the front side in 2-sided printing.
  • Page 85 3.PRINT FUNCTIONS (Windows) Margin - Center This sets the gutter in the center of a 2 facing pages. You can enter the value between 0.00 and 12.70 mm (0.00 and 0.50 inches). The printed images will be reduced according to the margin setting. Margin - Outer This sets the gutter on the outside edges on the page.
  • Page 86 3.PRINT FUNCTIONS (Windows)  [Image Quality] tab The [Image Quality] tab allows you to select how images are printed. Halftone This sets how halftones are printed. - Detail — Select this to print halftone in detail. - Smooth — Select this to print halftone smoothly. This function is not available for the XPS printer driver.
  • Page 87 3.PRINT FUNCTIONS (Windows)  [Effect] tab The [Effect] tab contains print options that add effects to your print jobs such as Watermarks and Rotate printing. Watermark Selects the watermark to be used or edited. The following values except [None] are the default watermarks that have been registered in the printer driver.
  • Page 88 3.PRINT FUNCTIONS (Windows) Print on First Page Only Prints a watermark on the first page only. This setting will become available when any watermark is selected from the [Watermark] box. Rotate 180 Degrees Performs rotation printing of an image. Add/Edit Watermark When you click [Add] or [Edit], the [Watermark] dialog box appears and you can create new watermark or edit selected watermarks.
  • Page 89 3.PRINT FUNCTIONS (Windows) 11. Draw as Outline Prints a outline type of watermark. 12. Transparency Prints a transparent watermark. When you select this, set the brightness from 0 (darker) to 100% (lighter) in increments of 1%. You can also set the brightness using the scroll bar. 13.
  • Page 90 3.PRINT FUNCTIONS (Windows)  In order to set [Custom Paper Size], you must access the printer driver properties from the [Devices and Printers] folder (Windows Server 2008: [Printer]), but not from the [Print] dialog box in the application.  The [Custom Paper Size] can be set only by an operation with the administrator privilege. ...
  • Page 91 3.PRINT FUNCTIONS (Windows) [Delete] Click this to clear and restore the default settings of the selected custom paper size that you selected in the [Paper Size List]. When you click this, the confirmation dialog box appears. Click [Yes] to delete the setting. Name Enter the custom paper size name.
  • Page 92 3.PRINT FUNCTIONS (Windows) Model Selection This sets the model type. Option This option sets whether the following optional devices are installed. Drawers This sets the installation of drawers according to the configuration. - Drawer 1 — Select this when only Drawer 1 is installed. ...
  • Page 93 Community Name — If a community name other than “private” (default) is set for the SNMP community name for your Toshiba MFP, enter its community name.  To find your Toshiba MFP under the SNMP V1/V2 environment, the community names set for the target Toshiba MFP must be specified correctly. For help, consult your administrator.
  • Page 94: Printing With Best Functions For Your Needs

    Printing With Best Functions for Your Needs In this section, procedures are given to print various types of print jobs, using the layout and finishing options. Read this section before starting printing and select the procedure best suited for your needs. ...
  • Page 95: Layout And Finishing Options In [Finishing] Tab Menu

    3.PRINT FUNCTIONS (Windows)  Layout and finishing options in [Finishing] tab menu Using the printer driver, you can set various layout options to suit your preferences. In this section various printing functions enabled with the [Finishing] tab menu are explained. ...
  • Page 96 3.PRINT FUNCTIONS (Windows) Sorting printed documents horizontally and vertically for each copy  Rotated Sort Copies can be enabled only when printing on Letter, A4, or 16K.  To make Rotated Sort Copies, sheets to be used must be placed both horizontally and vertically (example: A4 and A4-R).
  • Page 97 3.PRINT FUNCTIONS (Windows)  Making a booklet You can create a document in a book- or magazine-style publication by selecting the Booklet option. Creating a booklet Display the [Finishing] tab menu. Select the [2-Sided Printing] check box and select the [Booklet] icon. Click [Details].
  • Page 98 3.PRINT FUNCTIONS (Windows) If you want to add a margin space between facing pages, enter a width in the [Center] box, and if you want to add a margin on the outside edge, enter a width in the [Outer] box. ...
  • Page 99: Finishing Options In [Effect] Tab Menu

    3.PRINT FUNCTIONS (Windows)  Finishing options in [Effect] tab menu Using the printer driver, you can set various layout options to suit your preferences. In this section various printing functions enabled with the [Effect] tab menu are explained.  P.99 “Printing with watermarks” ...
  • Page 100 3.PRINT FUNCTIONS (Windows) Creating or editing a watermark Click [Add] to create a new watermark, or select one that you want to edit and click [Edit] to edit a watermark. The [Watermark] dialog box appears. Enter the watermark text in the [Caption] box. You can enter up to 63 characters for the [Caption] box.
  • Page 101 3.PRINT FUNCTIONS (Windows) Deleting a watermark You can delete the default watermarks. However, they cannot be restored by clicking [Restore Defaults]. Select the watermark that you want to delete at the [Watermark] box. Click [Delete]. The [Confirm Delete] dialog box appears. Click [Yes].
  • Page 102 3.PRINT FUNCTIONS (Windows) 102 Printing With Best Functions for Your Needs...
  • Page 103 PRINT FUNCTIONS (macOS) Printing from Application....................104 Considerations and limitations.........................104 How to print ...............................104 Setting up Print Options ....................106 [Page Setup] options ............................106 [Print] options ..............................108...
  • Page 104: Printing From Application

    Printing from Application This section explains printing from OS X 10.11 to macOS 10.14.  P.104 “Considerations and limitations”  P.104 “How to print”  Considerations and limitations Some print options can be set from both the application and the printer driver, such as collation. If the collation is set from the application, documents may not be properly printed.
  • Page 105 4.PRINT FUNCTIONS (macOS) Make sure of your printer name at [Printer] and set the options to print the file.  P.108 “[Print] options” You can preset the options set in the [Print] dialog box. Select [Save as] from the [Presets] menu and save them under a new name.
  • Page 106: Setting Up Print Options

    Setting up Print Options When you print a document from macOS, you need to set up page and print options.  P.106 “[Page Setup] options”  P.108 “[Print] options”  [Page Setup] options When you create a document to print, select [Page Setup] from the [File] menu of your application to open the [Page Setup] dialog box and set the page attributes.
  • Page 107 4.PRINT FUNCTIONS (macOS)  Custom page sizes You can define custom page sizes other than standard ones.  When you print on paper longer than standard sizes, print one sheet at a time.  Paper size cannot be smaller than 100 x 148 mm or larger than 297 x 432 mm. Creating a custom page size Select [Manage Custom Sizes] from the [Paper Size] menu.
  • Page 108: [Print] Options

    4.PRINT FUNCTIONS (macOS) Select a name of your printer from the [Non-Printable Area] menu and enter the width and height in the [Paper Size] boxes.  Use the minimum margin values that are automatically set by selecting the printer name, or you can set values larger than the minimum ones for wider margins.
  • Page 109 4.PRINT FUNCTIONS (macOS) Pages Set the range of pages to print a document. - All — Select this option to print all pages. - From/to — Select this option to print a range of pages. Enter the start and last page numbers. Two-Sided Select this check box to print on both sides of paper, called “two-sided printing”.
  • Page 110 4.PRINT FUNCTIONS (macOS) - Single Hairline — Select this option to draw a single hairline around each page. - Single Thin Line — Select this option to draw a single thin line around each page. - Double Hairline — Select this option to draw a double hairline around each page. - Double Thin Line —...
  • Page 111 4.PRINT FUNCTIONS (macOS) Collate pages Select this check box to collate pages in order when printing two or more copies: all the pages of one copy are printed before the next copy is printed. It is called “sort-printing” (1, 2, 3, ... ; 1, 2, 3, ...). Pages to Print Select one of the options to print all pages, or only odd or even pages.
  • Page 112 4.PRINT FUNCTIONS (macOS)  Cover Page In the [Cover Page] menu, you can set the options to print a cover page. The cover page includes information such as job ID, title, print owner, print source, and billing information. Print Cover Page Select a position to print a cover page.
  • Page 113 4.PRINT FUNCTIONS (macOS) General You can set a media source and type, duplex printing, and resolution. Media Type Select a media type from “Printer’s Default”, “Plain Paper”, “Thick”, “Thick 1”, “Thick 2”, “Transparency”, “Thin”, or “Envelope”. “Printer’s Default” is a default set on the equipment. Printing Modes You can set the printing modes for department codes, thin lines, and no blank pages.
  • Page 114 4.PRINT FUNCTIONS (macOS) Printing Modes DC You can set a department code to print documents. For the necessary department code, consult your administrator. Select [Printing Modes] and set [Department Code] to print documents with the department code. Department Code(DC) - Digit 1 Select the first digit of your department code from 0 to 9.
  • Page 115 4.PRINT FUNCTIONS (macOS) Quality You can set print quality. Halftone This sets how halftones are printed. - Detail — Select this to print halftone in detail. - Smooth — Select this to print halftone smoothly. Smoothing Select this option to print text and graphics smoothly. Toner Save Select this option to save toner for printing.
  • Page 116 4.PRINT FUNCTIONS (macOS) 116 Setting up Print Options...
  • Page 117 SCAN FUNCTIONS Scanning From Application ..................... 118 How to scan................................118 Setting up Scan Options....................120 Scan options...............................120 Scanning from the equipment on the network....................122 Scanning from the equipment connected by USB cable .................123 Using the Easy Set feature..........................123 Scanning from e-STUDIO Scan Editor ................125 Features of e-STUDIO Scan Editor ........................125 Application window ............................125 File window for the scanned images ........................129...
  • Page 118: Scanning From Application

    Scanning From Application This equipment supports scanning from TWAIN-compatible applications. TWAIN is the standard that links applications and scanners that acquire images. For TWAIN support, see your application’s manual. You can make use of e-STUDIO Scan Editor bundled with the equipment. It helps you scan and edit images. For the details, refer to the following page: ...
  • Page 119 5.SCAN FUNCTIONS Click [Scan] to scan the original. While scanning, you can stop scanning by clicking [CANCEL]. When the authentication screen appears, enter the department code that is required to log in to this equipment. For details, ask your administrator. Save the scanned image in your application.
  • Page 120: Setting Up Scan Options

    Setting up Scan Options You can make various options to affect the scanning status. You can save different sets of options in files and recall one of them for frequent use.  P.120 “Scan options”  P.122 “Scanning from the equipment on the network” ...
  • Page 121 5.SCAN FUNCTIONS [Close] Quits the scanning operation. [Pre-Scan] Pre-scans the original. [Scan] Scans the original. 10. Measurement unit Select [Inch], [mm], or [Pixel] to change the measurement unit. Opens the advanced scan dialog.  P.121 “Advanced scan dialog”  Advanced scan dialog You can click the triangle that faces right on the right-hand side of the basic scan dialog box to make scanning settings.
  • Page 122: Scanning From The Equipment On The Network

    5.SCAN FUNCTIONS ADF/Platen Selects the equipment on which the originals are placed: Platen Scan, ADF Scan, or Duplex Scan. The displayed items differ depending on the installed options and destinations. Rotation Rotates the imaged clockwise by 90 degrees, counterclockwise by 90 degrees, or by 180 degrees. This option takes effect on the image to scan but not on the preview image: OFF, Right 90, Left 90, or 180.
  • Page 123: Scanning From The Equipment Connected By Usb Cable

    5.SCAN FUNCTIONS  Scanning from the equipment connected by USB cable Click on the basic scan dialog box. When the [IO Type] dialog box appears, select [USB]. Click [OK].  Using the Easy Set feature When you have made scan settings, you can save them as an Easy Set file. This allows you to load a specific batch of settings without changing the scan settings each time.
  • Page 124 5.SCAN FUNCTIONS  Deleting the Easy Set files You can delete the Easy Set files in the same way as for normal files. Locate the folder where you have saved the Easy Set file, right-click the file, and then click [Delete] from the menu. Click [Yes] to delete the file. When you are working in the preview window, click the folder icon next to the Easy Set menu so that you can delete the file in the same way.
  • Page 125: Scanning From E-Studio Scan Editor

    Scanning from e-STUDIO Scan Editor e-STUDIO Scan Editor is an application to scan images with the equipment and edit them in Windows. From this application, you can use the scanner driver to scan images. When you have followed the standard steps to install the software such as a printer driver for the equipment, you also have installed this application.
  • Page 126 5.SCAN FUNCTIONS  Menu bar The following menus are available on the menu bar located at the top of the application window. You can select commands from them.  P.126 “[File] menu”  P.127 “[Edit] menu”  P.127 “[Insert] menu” ...
  • Page 127 5.SCAN FUNCTIONS [Edit] menu You can select common commands to handle images.  Undo Undoes the last deleting operation.  Cut Cuts the selected image.  Copy Copy the selected image.  Paste Pastes the cut or copied image at any position. ...
  • Page 128 5.SCAN FUNCTIONS [Window] menu You can arrange the file windows in the application window.  Cascade Arranges the file windows by cascading them.  Vertical Arranges the file windows vertically.  Horizontal Arranges the file windows horizontally.  Close All Closes all file windows.
  • Page 129: File Window For The Scanned Images

    5.SCAN FUNCTIONS Print Prints images in the selected file window. When you click this icon, the application starts printing immediately or opens the print dialog box. You can set the action on [Printing] of the [Preferences] dialog box.  P.133 “Printing” Send Attaches the selected file to an e-mail.
  • Page 130 5.SCAN FUNCTIONS You can scan and insert images also by selecting [Scanned Image] from the [Insert] menu on the menu bar.  Editing an image When you double-click a thumbnail, an edit window opens. You can edit the image using the following icons at the bottom of the edit window.
  • Page 131 5.SCAN FUNCTIONS Next Page Shows the next image in a file window. Rotate 90 degrees Clockwise Rotates an image by 90 degrees clockwise. Rotate 90 degrees Anti-Clockwise Rotate an image 90 degrees anticlockwise Tilt / Skew Tilts a skewed image. You can select the action to confirm the operation or to execute it without confirmation on [Editor Options] of the [Preferences] dialog box.
  • Page 132 5.SCAN FUNCTIONS  Arranging the images You can arrange images in two ways:  Move a thumbnail to any position in a file window using a drag-and-drop operation.  Select a file window and select [Arrange Pages] from the [Tools] menu. The [Arrange Pages] dialog box appears so that you can arrange images as follows: - Select an image and click [Move Up] to move it to the previous position.
  • Page 133: Setting The Preferences

    5.SCAN FUNCTIONS  Setting the preferences You can set the preferences to use the basic functions of e-STUDIO Scan Editor. Select [Preferences] from the [Tools] menu or click the [Preferences] icon on the too bar to open the [Preferences] dialog box. Click the icons at the top of the dialog box to set the following functions.
  • Page 134 5.SCAN FUNCTIONS  Scanner You can set the following scan functions on [Scanner].  Current Scanner Shows the current scanner (TWAIN source/driver). When you click [Select], the dialog box opens so that you can select any one source from the list. ...
  • Page 135 5.SCAN FUNCTIONS  Send You can set the following e-mail functions on [Send]. This Send command is not available depending on the version of your Windows.  System used to send image files Shows an e-mail application. When you select [Send] from the [File] menu or click the [Send] icon on the tool bar, you can attach a file to an e-mail and send it with the selected application.
  • Page 136 5.SCAN FUNCTIONS  Select the program you want to use for editing images. Shows an application to edit images. When you click [Browse], the dialog box opens so that you can select an application that you use to edit images. You can type a path of the application directly in the field. When you click the [Edit Page] icon in an edit window, you can open and edit the image within the selected application.
  • Page 137: Scan To E-Mail

    Scan to E-Mail Scan to E-mail allows you to send your scans to specified e-mail addresses. The scanned image is converted to a PDF, TIFF, or JPEG file and sent as an e-mail attachment. Scan to E-mail Send E-mail to the Internet Internet via SMTP server SMTP server...
  • Page 138 5.SCAN FUNCTIONS Press to select “ADDRESS”, and then press . E-MAIL (ADDRESS) DocYYMMDD Press to select “TO (ADDRESS)” or “CC (ADDRESS)”, and then press . E-MAIL ADDRESS TO(ADDRESS) CC(ADDRESS) Select from the Address Book or enter the address directly.  P.154 “Specifying E-mail Addresses” ...
  • Page 139 5.SCAN FUNCTIONS If there are more originals, place the next ones.  When you place originals on the Reversing Automatic Document Feeder (RADF), select “SCAN NEXT” using and press [OK]. (Only when “CONTINUE SCAN” is set to “ON”)  When you place an original on the original glass, select “SCAN NEXT PAGE” using and press [OK].
  • Page 140: Scan To File

    Scan to File Scan to File allows you to store scans as PDF, TIFF or JPEG files in a network folder. From these folders, you can copy the saved data and use it on your computer. If you choose to store your scans in the network folder, the type of operating system, such as Windows or Macintosh, does not matter;...
  • Page 141 5.SCAN FUNCTIONS Press to select “FILE”, and then press . SELECT SCAN TYPE E-MAIL FILE Press to select “REMOTE1” or “REMOTE2”, and then press . FILE REMOTE1 REMOTE2 DocYYMMDD Press to select the item, press , and then make the scan settings as required. FILE REMOTE1 REMOTE2...
  • Page 142 5.SCAN FUNCTIONS If there are more originals, place the next ones.  When you place originals on the Reversing Automatic Document Feeder (RADF), select “SCAN NEXT” using and press [OK]. (Only when “CONTINUE SCAN” is set to “ON”)  When you place an original on the original glass, select “SCAN NEXT PAGE” using and press [OK].
  • Page 143: Scan To Usb Memory

    Scan to USB Memory Scan to USB allows you to save scanned images as PDF, TIFF, or JPEG files in a USB storage device.  Procedure for Scan to USB Memory USB storage devices must meet requirements below. However, some USB storage devices may not be used with this equipment even though the requirements below are met.
  • Page 144 5.SCAN FUNCTIONS To store scans in a USB storage device, connect the device to the equipment and wait a few seconds. Press to select “USB”, and then press [OK]. SELECT SCAN TYPE MOBILE BLACK Press , and then make the scan settings as required. DocYYMMDD The settings available for Scan to USB Memory are as follows: Menu Functions...
  • Page 145 5.SCAN FUNCTIONS Press [START]. When you store scans in a USB storage device, never attempt to remove the device from the equipment until data transmission is completed. Removing the USB storage device during data transmission may corrupt the device. If there are more originals, place the next ones. ...
  • Page 146: Scan To Mobile

    Scan to Mobile Scan to Mobile allows you to save scanned images as PDF, TIFF, or JPEG files in an Android device connected with a USB cable.  Procedure for Scan to Mobile  Scan to Mobile function is available on an Android device with OS 7 or later. ...
  • Page 147 5.SCAN FUNCTIONS To store scans in an Android device, connect it to the equipment and wait a few seconds. Press to select “MOBILE”, and then press [OK]. SELECT SCAN TYPE FILE MOBILE Press , and then select the folder to store the scans. MOBILE (FOLDER) DocYYMMDD...
  • Page 148 5.SCAN FUNCTIONS Menu Functions Settings Description FILE NAME(MAX128) An initial file name can be changed.  P.157 “Character entry” FILE FORMAT MULTI Stores your scan as a PDF file. Select [MULTI] for saving several SINGLE pages as a single file. Select [SINGLE] for saving several pages as a separated single file for each page.
  • Page 149: Scan Settings

    Scan Settings You can make the scan settings on the scan functions menu. Press [CANCEL] to exit from the setting without making any changes. You can also exit by pressing if it is active.  Selecting the color mode You can select the color mode best suited to your scan job. SELECT SCAN TYPE MOBILE BLACK...
  • Page 150: Scanning The 2-Sided Originals

    5.SCAN FUNCTIONS  Scanning the 2-sided originals With the single/2-sided scan setting, you can choose whether to scan your originals on both sides. To scan 2-sided originals automatically, the Reversing Automatic Document Feeder is required. SELECT SCAN TYPE BLACK 300dpi SINGLE Menu Functions Settings...
  • Page 151: Scanning Different Sizes In One Go

    5.SCAN FUNCTIONS  Scanning different sizes in one go When different sizes of originals are mixed and placed on the Reversing Automatic Document Feeder, some combinations of sizes can be scanned in one go. The combination of the original sizes that can be mixed are as follows: Other than North America: A3 and A4 or B4 and B5 North America: LD and LT or LG and LT-R SELECT SCAN TYPE...
  • Page 152: Selecting The Orientation

    5.SCAN FUNCTIONS  Selecting the orientation You can change the orientation of your scans. Select the desired rotation pattern. SELECT SCAN TYPE MIX-ORIGINAL:OFF TEXT/PHOTO Menu Functions Settings Description ROTATION Scans originals without a change in orientation. Rotates your scans 90 degrees to the right. Press [SCAN].
  • Page 153: Removing Blank

    5.SCAN FUNCTIONS  Removing blank pages If your original contains blank pages, you can remove them from the scan result. SELECT SCAN TYPE COMPRESS:LOW OMIT BLANK:OFF This function is available only when “BLACK” is selected in the “COLOR MODE” function. Menu Functions Settings OMIT BLANK PAGE...
  • Page 154: Continuing The Scanning

    5.SCAN FUNCTIONS  Continuing the scanning When you scan with the Reversing Automatic Document Feeder (RADF), you can select whether you continue scanning the next originals after the last loaded original is scanned. SELECT SCAN TYPE OMIT BLANK:OFF AUTO EXPOSURE CONTINUE SCAN:ON Menu Functions Settings...
  • Page 155 5.SCAN FUNCTIONS  Selecting from the address book Press to select “SEARCH”, and then press . TO(ADDRESS) REVIEW LIST INPUT ADDRESS SEARCH Using or , select letters tab that you want to display. Using or , select the desired contact, and then press [OK].
  • Page 156 5.SCAN FUNCTIONS  Searching the address book with group numbers Press to select “GROUP NUMBER”, and then press . TO(ADDRESS) SEARCH SINGLE NUMBER GROUP NUMBER Using the digital keys, enter the group number for the desired contact. TO:ADDRESS GROUP DIAL(01-20) Press [OK].
  • Page 157: Character Entry

    5.SCAN FUNCTIONS  Character entry The character entry screen is for entering characters when you are setting and entering items. You can enter the following: Alphabet characters, numbers and symbols. Enter the characters using the digital keys and , , or , after switching the type of the character with the [*] digital key.
  • Page 158: Scan Speed

    5.SCAN FUNCTIONS  Relationship between the digital keys and the input character The character entered by each digital key differs depending on the input mode. The assignment of characters in the character input mode is as follows. Characters entered in the character input mode You can enter the characters displayed on the upper side of the digital keys.
  • Page 159 5.SCAN FUNCTIONS The color mode and resolution settings can be changed on the scan setting screen. For details, see the following sections:  P.149 “Selecting the color mode”  P.149 “Selecting the resolution” Scan Settings 159...
  • Page 160: Using Templates (Scan)

    Using Templates (Scan) Once you have set the several functions and settings, you can register up to three of them as “templates” and recall one of them for frequent use.  Registering the templates Make settings for the functions to register as a template. Press [TEMPLATE].
  • Page 161: Recalling A Template

    5.SCAN FUNCTIONS Item Name Settings Exposure AUTO, MANUAL(±4) Continue Scan OFF, ON *1 When the “FULL COLOR” mode has been selected, you cannot select the original size larger than A4 or LT. *2 When the “FULL COLOR” mode has been selected, you can select “600 dpi” only for the original of A5-R or ST-R size. Scan to E-mail Item Name Settings...
  • Page 162 5.SCAN FUNCTIONS 162 Using Templates (Scan)
  • Page 163 VARIOUS FUNCTIONS Copy Menu List....................... 164 Copy menu items ...............................164 Scan Menu List ....................... 165 Scan menu items ...............................165 Network Menu List ......................168 NIC status ................................168 Setting the Ethernet speed..........................168 Setting the TCP/IP protocol..........................169 Setting the HTTP network service........................170 User Functions Menu List ....................
  • Page 164: Copy Menu List

    Copy Menu List See the following page for information on using the copy menu.  P.31 “COPY FUNCTIONS”  Copy menu items When you press on the main screen (Copy), you enter the copy menu which allows you to use copy functions. The table below shows the functions and reference pages available in the copy menu.
  • Page 165: Scan Menu List

    Scan Menu List See the following page for information on using the scan menu.  P.117 “SCAN FUNCTIONS”  Scan menu items When you press on the main screen (Scan), you enter the scan menu which allows you to use basic and advanced scan functions.
  • Page 166 6.VARIOUS FUNCTIONS Menu Functions Settings Description and Reference Pages FILE FORMAT MULTI Sets the file format to attach the scanned data to the E-mail. SINGLE  P.137 “Procedure for Scan to E-Mail” TIFF MULTI SINGLE JPEG MESSAGE SIZE NONE, 64, 128, 256, 512, 1024, 2048 When the scanned data is bigger than the selected size, divides the data into the set size before sending the E-mail.
  • Page 167 6.VARIOUS FUNCTIONS  Mobile functions Menu Functions Settings Description and Reference Pages FILE NAME(MAX128) You can use up to 128 characters. Enter the file name to save.  P.146 “Procedure for Scan to Mobile”  P.157 “Character entry” FILE FORMAT MULTI Sets the file format to save.
  • Page 168: Network Menu List

    Network Menu List You can set various network functions. For instructions on how to display the NETWORK menu, see the following page:  P.171 “User Functions Menu List” NETWORK COMPLETE NIC STATUS ETHERNET  P.168 “NIC status”  P.168 “Setting the Ethernet speed” ...
  • Page 169: Setting The Tcp/Ip Protocol

    6.VARIOUS FUNCTIONS  Setting the TCP/IP protocol You can set the TCP/IP protocol that is commonly used in most network systems. When using Web-based utilities such as TopAccess or network features of this equipment such as network printing and network scanning, you are required to set the TCP/IP protocol.
  • Page 170: Setting The Http Network Service

    6.VARIOUS FUNCTIONS  Setting the HTTP network service You can enable or disable the HTTP network server service that provides web-based utilities on this equipment, such as TopAccess. HTTP HTTP SERVER PRIMARY PORT NUMBER Item name Description  ENABLE — Press this button to use the HTTP network server service. HTTP SERVER ...
  • Page 171: User Functions Menu List

    User Functions Menu List Before you start operating the “USER FUNCTIONS” menu, learn the general procedure below.  Press [CANCEL] to exit from the setting without making any changes. You can also exit with the button if it is active. ...
  • Page 172: User Functions Menu Items

    6.VARIOUS FUNCTIONS  User functions menu items When you press [USER FUNCTIONS] on the main screen (Copy), you enter the “USER FUNCTIONS” menu which enables you to change each setting and execute the device functions. The table below shows the functions and reference pages available in the “USER FUNCTIONS” menu. Menu Functions Reference Pages ...
  • Page 173 6.VARIOUS FUNCTIONS Menu Functions Reference Pages  P.177 “COPY” COPY EXPOSURE EXPOSURE LEVEL AUTO LEVEL MANUAL LEVEL ORIGINAL MODE MAXIMUM COPIES SORT MODE PRIORITY IMAGE ROTATION AUTO 2-SIDED MODE 2IN1/4IN1 ORIGINAL SIZE ORIG. ORIENTATION PAGE LAYOUT BACKGROUND SHARPNESS OMIT BLANK PAGE CONTINUE SCAN A4-R/LG SWITCH ...
  • Page 174 6.VARIOUS FUNCTIONS Menu Functions Reference Pages  P.180 “LIST” LIST ADDRESS BOOK FUNCTION COUNTER DEPARTMENT PCL FONT  P.180 “WIRELESS WIRELESS SETTING SETTING”  P.182 “ADDRESS BOOK” ADDRESS BOOK E-MAIL SINGLE NUMBER GROUP NUMBER SPEED DIAL PHONE BOOK GROUP DIAL ONE TOUCH ...
  • Page 175 6.VARIOUS FUNCTIONS Menu Functions Settings Description TIMERS AUTO POWER SAVE 1, 3, 4, 5, 7, 10, 15, 20, 30, 45, 60 Sets the period of time (in minutes) that this equipment should wait before low power mode is activated. SLEEP MODE 1, 3, 5, 10, 15, 20, 25, 30, 40, 50, Sets the period of time (in minutes) that this equipment...
  • Page 176 6.VARIOUS FUNCTIONS Menu Functions Settings Description NETWORK COMPLETE Completes the network settings. NIC STATUS Displays the current network communication status. ETHERNET AUTO, 10MBPS HALF DUPLEX, Select the desired combination 10MBPS FULL DUPLEX, of communication speed and 100MBPS HALF DUPLEX, transmission method. 100MBPS FULL DUPLEX TCP/IP ADDRESS...
  • Page 177 6.VARIOUS FUNCTIONS Menu Functions Settings Description SUPPLY DESTINATION Sets the contact information for FAX NUMBER SETUP ordering supplies. NOTICE E-MAIL AUTO DETECT OFF, ON Sets whether to detect information automatically. OTHER CUSTOMER Sets other various contact INFORMATIO NUMBER information. CONTACT NAME CONTACT TEL NUMBER...
  • Page 178 6.VARIOUS FUNCTIONS Menu Functions Settings Description IMAGE ROTATION ENABLE, DISABLE Sets the image rotation setting. When this setting is enabled, the original image is automatically rotated when making copies. As shown in the following figure, when you copy A4 size originals to the one side of the A3 size paper loaded on the bypass tray, disable this function.
  • Page 179 6.VARIOUS FUNCTIONS Menu Functions Settings Description A4-R/LG SWITCH A4-R, LG Switches the size between A4-R or LG when scanning an LG size original set on the Reversing Automatic Document Feeder (RADF).  SCAN Menu Functions Settings Description COLOR MODE BLACK, GRAY SCALE, FULL Sets the default setting for the COLOR color mode.
  • Page 180 6.VARIOUS FUNCTIONS  USB PRINT The following functions and settings are available on the “USB PRINT” menu. Menu Functions Settings Description PAPER SIZE A3, A4, B4, B5, A5-R, FOLIO, LD, Sets the paper size to print files LG, LT, COMP, 13"LG, ST-R, from a USB storage device.
  • Page 181 6.VARIOUS FUNCTIONS To access the wireless network using the WPA2-PSK or WPA2/WPA-PSK authentication, the same PSK passphrase must be assigned in both other wireless devices and the Access Point or the equipment to connect. Use WPA2-PSK for AP Mode.  WEP WEP is a data encryption method using the WEP key between the Access Point and other wireless devices.
  • Page 182 6.VARIOUS FUNCTIONS Use the digital keys to enter the characters. The alphanumeric characters and the following symbols can be used for SSID, passphrase and WEP key (ASCII). (space) - + ~ ! @ # $ % ^ & * ( ) = _ [ ] { } ¦ < > ; : ' ´ " , . / \ ? When the Ethernet function and AP Mode are used simultaneously, IP ADDRESS and SUBNET MASK must be set to the different network segment.
  • Page 183: Department Management

    Department Management You can identify the number of output pages by copying, transmitting and receiving faxes, printing, and scanning by user groups (departments) using the department management function. When the department management function is enabled the department code entry screen is displayed before using this equipment.
  • Page 184 6.VARIOUS FUNCTIONS You need to set the master code (department number: 01) before entering the department code. The master code registration screen is displayed if you have not set the master code. MASTER CODE (NAME) (CODE) ADD DEPARTMENT 184 Department Management...
  • Page 185: Job Status

    Job Status You can confirm the status of jobs, delete jobs, and print files stored in a USB storage device. Press the [JOB STATUS] button. Press to scroll the menu and then press to enter the function menu.  P.185 “JOB STATUS menu items” JOB STATUS JOBS SECURE RX...
  • Page 186 6.VARIOUS FUNCTIONS  Confirming the job status and deleting jobs You can confirm the statuses of print, scan, and fax jobs and delete jobs. Confirming the job status Press to select [JOBS] and then press Press to select [PRINT], [SCAN] or [FAX] and then press Press to select [CONFIRM] and then press Jobs in progress or those on the waiting list appear.
  • Page 187 6.VARIOUS FUNCTIONS Connect a USB storage device to the slot of this equipment. Select the paper size and set the duplex printing mode in [USB PRINT] of the USER FUNCTIONS menu.  P.180 “USB PRINT” The paper size setting is disabled for PDF files as they are printed in the size in which they are scanned. Press the [JOB STATUS] button.
  • Page 188 6.VARIOUS FUNCTIONS Connect an Android device to this equipment by a USB cable. Select the paper size and set the duplex printing mode in [USB PRINT] of the USER FUNCTIONS menu.  P.180 “USB PRINT” The paper size setting is disabled for PDF files as they are printed in the size in which they are scanned. Press the [JOB STATUS] button.
  • Page 189 TROUBLESHOOTING When This Message Appears .................... 190 Paper Misfeed ........................ 193 Find the position of paper misfeeds .........................193 When paper misfeeds occur frequently......................193 When removing misfed paper ...........................193 Paper misfeeds on the Reversing Automatic Document Feeder (RADF)............194 Paper misfeeds on the bypass tray ........................195 Paper misfeeds inside of the side cover ......................196 Replacing Toner Cartridge ....................
  • Page 190: When This Message Appears

    When This Message Appears A message appears when a problem occurs on the equipment. Find the message on the list below and follow the instructions in the Countermeasure. Message Meaning Countermeasure MISFEED xxxx An original or a sheet of copy Remove any misfed paper.
  • Page 191 7.TROUBLESHOOTING Message Meaning Countermeasure TONER EMPTY The toner in the toner cartridge Replace the toner cartridge with a new one.  P.198 “Replacing Toner Cartridge” has run out. MEMORY IS FULL The built-in memory of the Press any button on the control panel to delete the PRESS ANY KEY equipment has become full.
  • Page 192 7.TROUBLESHOOTING Message Meaning Countermeasure CANNOT PRINT THIS An invalid file for USB PRINT is Print a target file from a client computer. DOCUMENT used. 192 When This Message Appears...
  • Page 193: Paper Misfeed

    Paper Misfeed  Find the position of paper misfeeds When a paper misfeed occurs in the equipment, the operation stops, the alert lamp blinks on the control panel, and a message appears on the LCD screen to indicate the positions where the paper is misfed. Check the message, remove any misfed paper, and then press [START] to resume copying.
  • Page 194: Paper Misfeeds On The Reversing Automatic Document Feeder (Radf)

    7.TROUBLESHOOTING  Paper misfeeds on the Reversing Automatic Document Feeder (RADF) Open the upper cover. Open the transport guide and remove the original. Open the Reversing Automatic Document Feeder. Turn the dial to remove the misfed original. 194 Paper Misfeed...
  • Page 195: Paper Misfeeds On The Bypass Tray

    7.TROUBLESHOOTING Close the Reversing Automatic Document Feeder. Raise the feeder tray. Turn the dial to remove the misfed original. Lower the feeder tray. Close the upper cover.  Paper misfeeds on the bypass tray Pull the paper holding lever out, and then pull out the misfed paper on the bypass tray. Check beneath the transport guide inside of the side cover.
  • Page 196: Paper Misfeeds Inside Of The Side Cover

    7.TROUBLESHOOTING  Paper misfeeds inside of the side cover  Be careful not to catch your fingers between the equipment and the side cover. This could injure you.  Do not touch the fuser unit or the metal part around the unit. If you touch the inside of the equipment, this could cause burns or any injury to your hands.
  • Page 197 7.TROUBLESHOOTING Lay down the transfer unit, and then press down the two fuser pressure release levers (green) until they come to a stop. Press down the levers fully until they stop. Raise the transport guide. Release the misfed paper within the fuser unit. Pull the misfed paper up or down as shown below depending on its position.
  • Page 198: Replacing Toner Cartridge

    Replacing Toner Cartridge  When a message for replacement appears When the toner cartridge runs out of toner, the message appears on the LCD screen and the alert lamp blinks on the control panel. Never attempt to incinerate toner cartridges. Dispose of used toner cartridges in accordance with local regulations.
  • Page 199 7.TROUBLESHOOTING Hold the new toner cartridge with its seal side up. Do not touch the metal contact on a circuit board. Shake the new toner cartridge strongly with its seal side up to loosen the toner inside. Pull out the seal in the direction of the arrow. Insert the toner cartridge along the rail.
  • Page 200 7.TROUBLESHOOTING Clean the charger. Hold the cleaning knob of the charger and pull it out toward you carefully until it stops. Then reinsert it in its original position carefully. Repeat this procedure two to three times. Check if the cleaning knob is fully inserted after cleaning. Close the front cover.
  • Page 201: Before Calling Service Technician

    Before Calling Service Technician When you encounter troubles, find the symptom listed below and follow the instructions in the Countermeasure.  General operation Phenomenon Usual cause Countermeasure The equipment does not The power is not turned ON. Turn ON the power of the equipment. work at all.
  • Page 202: Original/Paper-Related Items

    7.TROUBLESHOOTING Phenomenon Usual cause Countermeasure “TONER IS LOW” does not The recommended toner If you are using a toner cartridge other than the one appear on the LCD screen, cartridge is not being used. we recommend, the equipment may not be able to although toner is nearly detect whether it is installed or not.
  • Page 203 7.TROUBLESHOOTING Phenomenon Usual cause Countermeasure The copied image is stained. The Reversing Automatic Lower it fully to block outside light. Document Feeder is not lowered fully. The original glass or platen Clean them.  P.206 “Regular Cleaning” sheet is dirty. The copy density is set Make the density lighter if you use the manual copy darker.
  • Page 204 7.TROUBLESHOOTING 204 Before Calling Service Technician...
  • Page 205: Maintenance And Inspection

    MAINTENANCE AND INSPECTION Regular Cleaning ......................206 Cleaning charger ......................207...
  • Page 206: Regular Cleaning

    Regular Cleaning We recommend you to clean the following items weekly, so that the originals can be scanned in unsoiled conditions.  Be careful not to scratch the portions in cleaning.  When cleaning the surface of the equipment, do not use such organic solvents as thinner or benzine. This could warp the shape of the surface or leave it discolored.
  • Page 207: Cleaning Charger

    Cleaning charger If the inside of the charger is dirty, staining may appear on the copied image. Clean the charger following the procedure below. Open the front cover. Clean the charger. Hold the cleaning knob of the charger and pull it out toward you carefully until it stops. Then reinsert it in its original position carefully.
  • Page 208 8.MAINTENANCE AND INSPECTION 208 Cleaning charger...
  • Page 209 APPENDIX e-STUDIO2822AM/2822AF Specifications ................210 Continuous copying speed..........................212 Specifications of Options ....................213 Packing List ........................214 Copying Function Combination Matrix ................215 Combination matrix............................215...
  • Page 210: E-Studio2822Am/2822Af Specifications

    Reproduction ratio Actual size 100±0.5% Zoom 25 - 400% (in 1% increments) Storage capacity Max. 150 sheets or until the memory is full (Toshiba’s own chart) Paper supply Drawer 250 sheets (80 g/m , 20 lb. Bond) Bypass 50 sheets (80 g/m , 20 lb.
  • Page 211 9.APPENDIX Memory 512 MB USB interface USB2.0 (Hi-Speed) Environment (for normal use) Temperature: 10 º - 30 ºC, Humidity: 20 - 85% (No condensation) Power requirements and power consumption AC 220 - 240 V±10%, 8 A (50 - 60 Hz): 1.5 kW or less (including optional equipments) AC 120 V±10%, 12 A (60 Hz): 1.5 kW or less Dimensions (including equipment and...
  • Page 212: Continuous Copying Speed

    Bypass tray A3 and LD can be loaded only on the bypass tray.  Toshiba-recommended paper is used for the values of the specifications above.  The bypass copying speed is as listed above when specifying the paper size.  This specification varies depending on the copying conditions and the environment.
  • Page 213: Specifications Of Options

    Specifications of Options Wireless LAN Module Model name GN-1160 Transmission format IEEE 802.11b/g/n standard Direct Sequence Spread Spectrum (DSSS) Orthogonal Frequency Division Multiplexing (OFDM) Data transmission speed IEEE 802.11b: 11, 5.5, 2, 1 Mbps IEEE 802.11g: 54, 48, 36, 24, 18, 12, 9, 6 Mbps IEEE 802.11n: MSC0-15 (HT20/40) Frequency band 2.4 GHz (2412 to 2462 MHz)
  • Page 214: Packing List

    Packing List Packing list Safety Information Quick Guide Power cable Modular cable Available only for e-STUDIO2822AF. 214 Packing List...
  • Page 215: Copying Function Combination Matrix

    Copying Function Combination Matrix  Combination matrix Copying Function Combination Matrix 215...
  • Page 216 9.APPENDIX 216 Copying Function Combination Matrix...
  • Page 217: Index

    INDEX Numerics CONTINUE SCAN..... 164, 165, 167, 173, 178, 179 Continuous copying speed ........... 212 2IN1/4IN1............164, 173, 178 Control panel............. 11, 13 2-SIDED ............164, 173, 180 Copies ................108 2-Sided Printing ............82, 96 Copies & Pages .............. 108 2-SIDED SCAN............
  • Page 218 Enable SNMP Communication ........92 [ENERGY SAVER] button..........14 Job Status..............185 [Enhanced Settings] tab ..........122 [JOB STATUS] button ............14 Enlarging copy..............43 JPEG ............... 166, 167 Envelope..............19, 26 e-STUDIO Scan Editor ........... 125 Layout ................109 ETHERNET ..............
  • Page 219 ORIGINAL SIZE........165, 167, 173, 178 REMOTE1................ 165 Original Size ..............121 REMOTE1/2 ..............166 OTHER INFORMATION..........172, 177 REMOTE2................ 165 [Others] tab ..............78, 89 REPORT SETTING ............173 Output Document Layout.......... 84, 97 Reproduction ratio ............16 RESOLUTION........... 165, 167, 173, 179 Resolution..............
  • Page 220 Storing paper ..............21 Style ................. 88 SUBNET MASK ............176, 181 SUPPLY NOTICE............172, 177 tab.................. 122 TCP/IP ..............172, 176 TEL ................... 11 [TEMPLATE] button............14 TERMINAL ID..............173 TEXT CALIBRATION ............172 Thick paper..............19 Thin paper ............... 19 TIFF .................
  • Page 221 e-STUDIO2822AM/2822AF...
  • Page 222 MULTIFUNCTIONAL DIGITAL SYSTEMS User’s Guide 1-11-1, OSAKI, SHINAGAWA-KU, TOKYO, 141-8562, JAPAN © 2019, 2020 Toshiba Tec Corporation All rights reserved Patent; http://www.toshibatec.com/en/patent/ Ver01 F(-)1 2020-08...

This manual is also suitable for:

E-studio 2822af

Table of Contents