Advertisement
Quick Links
Advertisement

Related Manuals for KTM 1290 Super Adventure T 2017


Summary of Contents for KTM 1290 Super Adventure T 2017
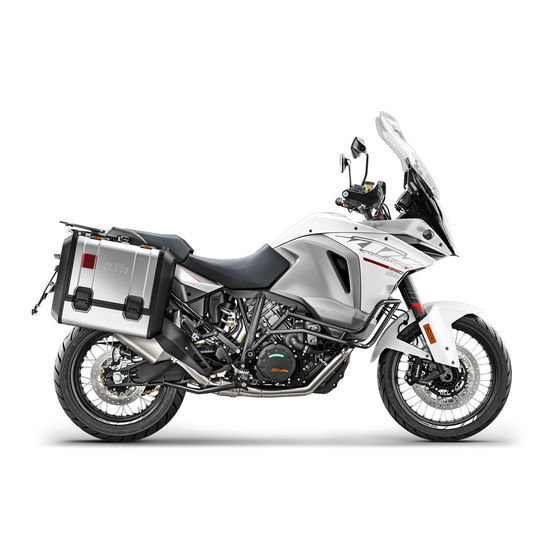
- Page 1 SETUP INSTRUCTIONS 2017 1290 Super Adventure T Art. no. 3213661en...
- Page 3 KTM accepts no liability for delivery options, devi- ations from illustrations and descriptions, misprints, and other errors.
-
Page 4: Means Of Representation
MEANS OF REPRESENTATION Symbols used The meaning of specific symbols is described below. Indicates an expected reaction (e.g. of a work step or a function). Indicates an unexpected reaction (e.g. of a work step or a function). Indicates a page reference (more information is provided on the specified page). Indicates information with more details or tips. - Page 5 SETUP Unpacking and setting up the vehicle – Remove the straps and box. S00694-10 – Remove the adhesive tape in the upper area of the motorcycle. S00695-10 – Roll down the film at the sides. Info To avoid damaging the motorcycle during unpacking, leave the other films on the vehicle until you have finished work on the vehicle.
- Page 6 SETUP – Check the throttle grip for smooth operation. – Mount and tighten the rear mirror on both sides. M00792-01 – Mount reflector with spring washers on holding plate – Mount the holding plate on the license plate bracket. – Mount the license plate holder.
- Page 7 Mount the passenger seat. ( p. 6) (1290 Super Adventure T US) – Mount reflector. ( p. 19) – Refuel. ( p. 16) M00750-10 – Prepare the vehicle according to the specifications in the KTM Dealer.net for han- dover to the customer.
- Page 8 WORK Removing the passenger seat (1290 Super Adventure T EU) – Insert the ignition key in seat lock and turn it clockwise. – Raise front of the passenger seat, pull toward the tank, and remove upward. Info Pay attention to the seat heating cable. S01556-10 (1290 Super Adventure T US) –...
- Page 9 WORK Removing the front rider's seat Preparatory work – Remove the passenger seat. ( p. 6) Main work – Lift the rider's seat back and unhook in the area. Info 0 0 A Pay attention to the seat heating cable. M00856-10 –...
- Page 10 WORK – Remove screw V00091-10 (1290 Super Adventure T EU) – Pull the front part of the mask spoiler laterally out of the supports. V00111-10 (1290 Super Adventure T US) – Pull the front part of the mask spoiler laterally out of the supports. V00115-10 –...
- Page 11 WORK (1290 Super Adventure T US) – Push the front part of the mask spoiler laterally into the supports. V00115-11 – Mount and tighten screw Guideline Screw, mask spoiler M5x17 3.5 Nm (2.58 lbf ft) V00091-11 – Mount and tighten screw Guideline Screw, mask spoiler M5x17...
- Page 12 WORK Installing the bottom triple clamp cover – Plug in connectors of the horn. – Attach temperature sensor M00558-11 – Position the triple clamp cover – Mount and tighten screws Guideline Remaining chassis screws 10 Nm (7.4 lbf ft) M00557-11 Installing the headlight mask with the headlight Main work –...
- Page 13 WORK – Position windshield adapter – Mount and tighten screws Guideline Screw, cover part 3.5 Nm (2.58 lbf ft) V00110-10 Finishing work – Position the mask spoiler. ( p. 8) – Install the wind shield. ( p. 11) – Check the setting of the lighting system. ( p.
-
Page 14: Recharging The Battery
WORK – Mount and tighten fittings Guideline Remaining chassis screws 10 Nm (7.4 lbf ft) The crash bars are evenly aligned with each other. – Tighten all the screws of the crash bar. Guideline Remaining chassis screws 10 Nm (7.4 lbf ft) Remaining chassis screws 25 Nm S01601-11... - Page 15 WORK Alternative 4 Battery charger XCharge-professional CH (00029095053) Info Follow the instructions of the charger and the manual. – Disconnect the battery charger after charging the battery. Guideline The charging current, charging voltage, and charging time must not be exceeded. Charge the battery regularly when the 3 months motorcycle is not in use...
-
Page 16: Installing The Battery
WORK 3.14 Installing the battery Warning Risk of injury Battery acid and battery gases cause serious chemical burns. – Keep batteries out of the reach of children. – Wear suitable protective clothing and safety glasses. – Avoid contact with battery acid and battery gases. –... - Page 17 WORK Warning Danger of poisoning Fuel is poisonous and a health hazard. – Avoid skin, eye and clothing contact with fuel. – Immediately consult a doctor if you swallow fuel. – Do not inhale fuel vapors. – In case of skin contact, rinse the affected area with plenty of water. –...
- Page 18 WORK 3.17 Refueling Danger Fire hazard Fuel is highly flammable. The fuel in the fuel tank expands when warm and can escape if overfilled. – Do not refuel the vehicle in the vicinity of open flames or lit cigarettes. – Switch off the engine for refueling. –...
- Page 19 WORK – Make two further marks spaced apart to the left and the right of the second marking. Guideline 0 0 A 71.5 cm (28.15 in) Distance 0 0 B 0 0 B 402426-10 – Position the vehicle perpendicular to the wall at a distance from the wall and switch on the low beam.
- Page 20 WORK 3.19 Adjusting the headlight range Preparatory work – Check the setting of the lighting system. ( p. 16) – Remove the bottom triple clamp cover. ( p. 9) Main work – Turn adjusting screw to adjust the headlight range. Info Turn clockwise to increase the headlight range;...
- Page 21 WORK – Turn adjusting screw to adjust the right cornering light range. Info Turn clockwise to increase the headlight range; turn counterclockwise to reduce the headlight range. S01613-10 – Set the upper segment on the left marking. Guideline The light-dark boundary of the upper segment must run exactly through the right marking.
- Page 22 WORK – Position reflector in the upper third of the rear recess of the left-hand suitcase, and then press down on the reflector. C00932-10 – Remove protective film from the back of second reflector C00931-11 – Position reflector in the upper third of the rear recess of the right-hand suit- case, and then press down on the reflector.
-
Page 23: Technical Data
TECHNICAL DATA chassis tightening torques – Nut, passenger seat heating switch PG21 2 Nm (1.5 lbf ft) Nut, tire pressure sensor ISO 10V2 12 Nm (8.9 lbf ft) Loctite ® 2701™ – Screw, fixed grip handlebar EJOT Spiralform ® M4x6‑K 2.7 Nm (1.99 lbf ft) –... - Page 24 TECHNICAL DATA – Screw, voltage regulator 6 Nm (4.4 lbf ft) – Screw, wheel speed sensor, front 10 Nm (7.4 lbf ft) – Screw, wheel speed sensor, rear 10 Nm (7.4 lbf ft) – Remaining chassis nuts 25 Nm (18.4 lbf ft) –...
- Page 25 SUBSTANCES Super unleaded (ROZ 95/RON 95/PON 91) Standard/classification – DIN EN 228 (ROZ 95/RON 95/PON 91) Guideline – Only use unleaded super fuel that matches or is equivalent to the specified fuel grade. – Fuel with an ethanol content of up to 10 % (E10 fuel) is safe to use. Info Do not use fuel containing methanol (e.
- Page 26 *3213661en* 3213661en 01/2017 KTM Sportmotorcycle GmbH 5230 Mattighofen/Austria Photo: Mitterbauer/KTM http://www.ktm.com...
Need help?
Do you have a question about the 1290 Super Adventure T 2017 and is the answer not in the manual?
Questions and answers