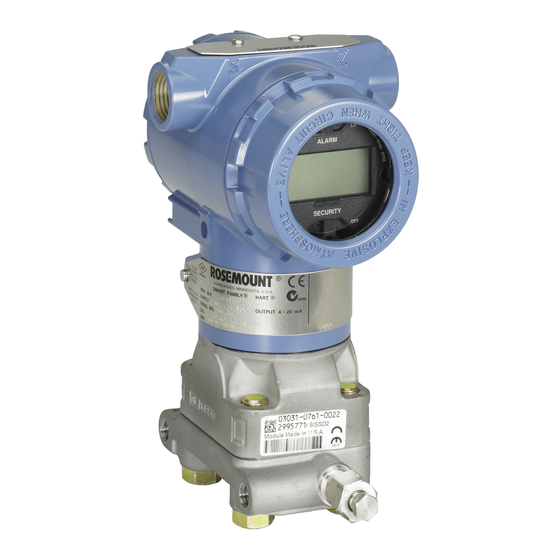
Emerson Rosemount 3051 Quick Start Manual
Pressure transmitter and dp flowmeters with wirelesshart protocol
Hide thumbs
Also See for Rosemount 3051:
- Quick start manual ,
- Reference manual (222 pages) ,
- Manual (127 pages)

Related Manuals for Emerson Rosemount 3051


Summary of Contents for Emerson Rosemount 3051
- Page 1 Quick Start Guide 00825-0100-4100, Rev CA May 2015 Rosemount 3051 Pressure Transmitter and Rosemount 3051CF DP Flowmeters ® with WirelessHART Protocol...
-
Page 2: Table Of Contents
Quick Start Guide NOTICE This guide provides basic guidelines for Rosemount 3051 Wireless Transmitters. It does not provide instructions for configuration, diagnostics, maintenance, service, troubleshooting or Intrinsically Safe (I.S.) installations. Refer to the Rosemount 3051 Wireless Reference Manual (document number 00809-0100-4100) for more instruction. -
Page 3: Wireless Considerations
Quick Start Guide May 2015 Wireless considerations Power up sequence The power module should not be installed on any wireless device until the Smart Wireless Gateway is installed and functioning properly. This transmitter uses the green power module (order model number 701PGNKF). Wireless devices should also be powered up in order of proximity from the Smart Wireless Gateway, beginning with the closest. -
Page 4: Mount The Transmitter
May 2015 Quick Start Guide Step 1: Mount the transmitter Mounting in liquid flow applications 1. Place taps to the side of the line. 2. Mount beside or below the taps. 3. Mount the transmitter so that the drain/vent valves are oriented upward. Figure 2. - Page 5 Quick Start Guide May 2015 Attaching mounting brackets Figure 5. Panel and Pipe Mount Panel mount Pipe mount Coplanar flange Traditional flange In-line...
- Page 6 Use only bolts supplied with the transmitter or sold by Emerson Process Management as spare parts. Figure 6 illustrates common transmitter assemblies with the bolt length required...
- Page 7 Quick Start Guide May 2015 Table 1. Torque Values for the Coplanar Flange and Flange Adapter Bolts Initial Final Head markings Bolt material torque torque Carbon Steel (CS) 300 in.-lbs. 650 in.-lbs. Stainless Steel (SST) 150 in.-lbs. 300 in.-lbs. In-line gage transmitter orientation The low side pressure port (atmospheric reference) on the in-line gage transmitter is located in the neck of the transmitter, behind the housing.
-
Page 8: Connect The Power Module
Field Communicator or configuration buttons. ® For instructions using AMS , see the Rosemount 3051 Wireless Product Manual (00809-0100-4100). Note When performing a zero trim, ensure that the equalization valve is open and all wet legs are filled... - Page 9 Quick Start Guide May 2015 It is not recommended to zero an absolute transmitter, models 3051CA or 3051TA. Trimming with a Field Communicator 1. Equalize or vent the transmitter and connect Field Communicator. 2. At the menu, input the HART Fast Key sequence. 3.
-
Page 10: Verify Transmitter Configuration
The LCD will display the output values at the same rate as the wireless update rate. Refer to the Rosemount 3051 Wireless manual for error codes and other LCD messages. Press and hold the Diagnostic button for at least five seconds to display the TAG, Device ID, Network ID, Network Join Status, and Device Status screens. - Page 11 Quick Start Guide May 2015 Table 2. Device Revision 1, DD Revision 1 Fast Keys WirelessHART Function 2, 1, 1, 1, 1 Date 2, 1, 1, 1, 5 Descriptor 2, 1, 1, 1, 3 Message 2, 1, 1, 1, 4 Long Tag 2, 1, 1, 1, 2 Network ID...
- Page 12 May 2015 Quick Start Guide Figure 11. Gateway Network Settings Verifying configuration using AMS Wireless Configurator When the device has joined the network, it will appear in the Wireless Configurator as shown in Figure Figure 12. Wireless Configurator Network Setup...
-
Page 13: Troubleshooting
Quick Start Guide May 2015 Troubleshooting If the device has not joined to the network after power up, verify the correct configuration of the Network ID and Join Key. Verify that Active Advertising has been enabled on the Smart Wireless Gateway. The Network ID and Join Key in the device must match the Network ID and Join Key of the Gateway. -
Page 14: Product Certifications
RF spectrum. Nearly every country requires this type of product certification. Emerson is working with governmental agencies around the world to supply fully compliant products and remove the risk of violating country directives or laws governing wireless device usage. - Page 15 Quick Start Guide May 2015 FM Intrinsic Safety (IS) Certificate: 3046325 Standards: FM Class 3600 - 2011, FM Class 3610 - 2010, FM Class 3810 - 2005, ANSI/ISA 60079-0 - 2009, ANSI/ISA 60079-11 - 2009, NEMA 250 - 2003, ANSI/IEC 60529 Markings: IS CL I, DIV 1, GP A, B, C, D T4;...
- Page 16 May 2015 Quick Start Guide International IECEx Intrinsic Safety Certificate: IECEx BAS 12.0124X Standards: IEC 60079-0: 2011, IEC 60079-11: 2011 Markings: Ex ia IIC T4 Ga, T4(-40 °C ≤ T ≤ +70 °C) IP66/IP68 Special Conditions for Safe Use (X): 1.
- Page 17 Quick Start Guide May 2015 Figure 13. Rosemount 3051 Wireless Declaration of Conformity...
- Page 18 May 2015 Quick Start Guide...
- Page 19 Quick Start Guide May 2015...
- Page 20 May 2015 Quick Start Guide...
- Page 21 Quick Start Guide May 2015...
- Page 22 Standard Terms and Conditions of Sale can be found at: www.rosemount.com\terms_of_sale. Emerson Process Management The Emerson logo is a trademark and service mark of Emerson Electric Co. Emerson FZE P.O. Box 17033, Rosemount, and Rosemount logotype are registered trademarks of Jebel Ali Free Zone - South 2 Rosemount Inc.
Need help?
Do you have a question about the Rosemount 3051 and is the answer not in the manual?
Questions and answers