
Related Manuals for Chauvin Arnoux Metrix MTX 3292B


Summary of Contents for Chauvin Arnoux Metrix MTX 3292B
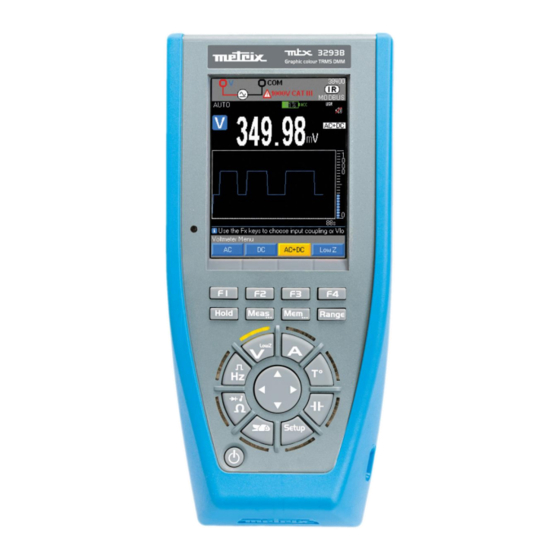
- Page 1 EN - User Manual MTX 3292B-BT MTX 3292B MTX 3293B MTX 3293B-BT PORTABLE 100,000-CTS GRAPHIC MULTIMETERS...
-
Page 2: Table Of Contents
CONTENTS GENERAL INSTRUCTIONS ..........................4 1.1. Precautions and safety measures ......................4 1.1.1. Symbols .............................. 4 1.1.2. Definitions of the measurement categories ..................4 1.1.3. Precautions for use ........................... 5 GETTING STARTED ............................5 2.1. Delivery condition ............................5 2.2. Accessories and spares .......................... - Page 3 5.8.2. Main measurement .......................... 32 5.9. Temperature .............................. 33 5.9.1. Connecting the multimeter ......................33 5.9.2. Main measurement .......................... 34 5.10. Measurement on an MLI type speed variator ..................34 5.10.1. Connecting the multimeter ......................34 5.10.2. Main measurement .......................... 35 5.11.
-
Page 4: General Instructions
GENERAL INSTRUCTIONS Thank you for purchasing a MTX 3292B / MTX 3293B. For best results from your instrument: read this user manual carefully, comply with the precautions for use. 1.1. Precautions and safety measures This device is compliant with safety standard IEC 61010-2-033, the leads are compliant with IEC 61010-031. Failure to observe the safety instructions may result in electric shock, fire, explosion, or destruction of the instrument and of the installations. -
Page 5: Precautions For Use
1 statement of manufacturer's measurements Optical USB communication lead 1 carrying bag 2.2. Accessories and spares Current clamps (see CHAUVIN ARNOUX catalogue) Two-wire Pt100 temperature probe (HX0091) Two-wire Pt1000 temperature probe (HA1263) K thermocouple with banana adapter (P011021067) Metrology software for Windows (HX0059B) -
Page 6: System Settings
To switch the instrument on, press the key. Make sure that the batteries are adequately charged. When the instrument is off and connected to mains using the USB adapter provided, the LEDs of the switch blink to indicate that the instrument is charging. 2.3.2. -
Page 7: Switch
3.1.1. Switch Changing from one setting to another resets the measurement mode. Around the switch, a fixed orange LED indicates which function is selected and an orange LED flashes for setup. During the charging cycle (OFF), each function LED lights by turns to indicate charging in progress. In the centre, a "4 position"... -
Page 8: Keypad
3.1.2. Keypad The keypad has the following function keys: The keys are taken into account and applied when pressed. If the key press is validated, the instrument beeps. The active keys on a long press are identified by "…": Meas…, Mem… , Setup… Short press Long press Hold of the display. -
Page 9: Units
3.1.6. Units Volt Ampère Hertz Ω Farad °F Degree Fahrenheit °C Degree Celsius Kelvin millisecond (kΩ - kHz) kilo (MΩ - MHz) Méga nano (nF) pico (pF) ... -
Page 10: Getting Started
n Symbol of the prefix nano- p Symbol of the prefix pico- μ Symbol of the prefix micro- m Symbol of the prefix milli- k Symbol of the prefix kilo- M Symbol of the prefix méga- Symbol of the audible continuity measurement Symbol of the measurement and testing of a semiconductor junction Symbol of the Zener diode Warning, possibility of electric shock () -
Page 11: Alert Signal
3.2.5. Alert signal An intermittent audible signal is emitted: in the "Voltage" setting, when the range is exceeded (MANUal and AUTO mode - last range) in the "Current" setting, when the range is exceeded (MANUal mode), starting from a measurement of 10 Amperes ... -
Page 12: Setup 1/3: General Configuration Of The Multimeter
4.1.1. SETUP 1/3: general configuration of the multimeter utility for adjusting the lighting, the standby mode, the audible beep of the keys, the language, and the internal clock on 2 configuration levels. for communication and adjustments of the IR/BT type, then the IR rate in baud, and the protocol, MODBUS or SCPI. - Page 13 Util 2/2: Language and clock : Selection of one of the two languages loaded. Four combinations of two languages are available: English/Italian, English/Spanish, English/German, and English/French. As default, the multimeter contains English/French. The other combinations can be downloaded from: www.chauvin-arnoux.com ...
-
Page 14: Setup 2/3: Configuration Of The Measurement Parameters
4.1.2. SETUP 2/3: Configuration of the measurement parameters : configures the filter, the impedance, the reference in dBm and in power : configures the type of input, current or voltage, the ratio indicated on the clamp, and the unit (default is A). ... - Page 15 Measurement 2/2: configuration of the measurement parameters (cont'd) : resistive power reference W Adjustment of the reference resistance between 1 and 10,000, for resistive power measurements. The calculation performed is: (measured voltage) / Ref (unit W) (measured current) x Ref (unit W) ...
-
Page 16: Setup 3/3: Configuration And Customization
4.1.3. SETUP 3/3: Configuration and customization : retrieval of files, of the number of records (10,000 for the MTX3292B and 30,000 for the MTX 3293B), and of the frequency of recording (from every 0.3s up to 23:59:59). : choice of retrieval of the PLANT configuration, of the User (USR), Basic (default), or Locked (LCK) start-up mode. -
Page 17: Description Of The "Keypad" Keys
4.2. Description of the "Keypad" keys 4.2.1. HOLD key: Management and hold of the display Three operating modes are possible: the RUN mode HOLD inactive the HOLD mode [F2] the AUTO HOLD mode [F3] The HOLD mode freezes the screen with the main measurement in progress and the history curve as they were when the HOLD key was pressed. - Page 18 MEAS 1/3 3 levels of advanced measurements are possible : selects graphic display of the screen for the quantity measured vs time. arrows can be used to change the depth of acquisition of the graph, from 1mn28s to 1h13mn20s. A search for the min and max of the main measurement is made for the duration represented by one pixel horizontally.
- Page 19 MEAS 2/3 : directly displays the tolerance of the measurement in progress; there is no need to search for it and calculate it. From the main measurement, the display: recalls the specifications (x% L ±n D) according to the type of measurement, the range selected and the frequency (in AC and AC+DC) calculates the range in which the true value lies, if the device is within its tolerance:...
-
Page 20: Mem Key: Storage Of The Measurements, Recording Mode
MEAS 3/3 : The WFORM mode is available only in AC, for frequencies between 10 and 600Hz. It is used to display waveforms. When the frequency does not lie within the measurement interval, or cannot be measured, the multimeter indicates "Frequency out of bounds…". - Page 21 Look-up of the recorded files under [F1] Files and selection by the navigator, then possibility: of opening the selected sequence [F1], of deleting a selected sequence [F2], of deleting all recorded sequences [F3] Select the Files menu in the MEM function to display the list of successive records. Each record is identified by its date, its start time, and the name entered by the user.
-
Page 22: Range Key : Management Of Ranges
The multimeter can communicate with a PC, making it possible: to update the embedded software Connect the multimeter to the computer via the USB link and run the application downloaded from the CHAUVIN ARNOUX web site. to calibrate the multimeter using the optional SX-MTX 329X calibration software (HX0059B). -
Page 23: Measurements
MEASUREMENTS 5.1. Voltage measurement 5.1.1. Connecting the multimeter 5.1.2. Main measurement In this setting, the user can measure the true RMS value of an alternating voltage with its bias component (no capacitive coupling): "TRMS" measurement (default coupling is AC+DC). In the “DC” mode, you measure a direct voltage or the DC component of an AC voltage. Selection of the coupling from among: alternating voltage measurement AC [F1] direct voltage measurement DC [F2]... -
Page 24: Waveform
The 100mV range is present only in MANUAL mode, by In all cases, "OL" is displayed above 1050V and a beep sounds when the measurement exceeds 600V. The hazardous voltage symbol is displayed if "V" exceeds 60 V or 25 V 5.1.4. -
Page 25: Direct Measurement Of Current
5.2. Direct measurement of current 5.2.1. Connecting the multimeter 5.2.2. Main measurement A in series in a circuit The current is the flow of electrons through a conductor. To measure the current, you must open the circuit to be checked and connect the inputs of the multimeter in series in the circuit. Selection of the coupling from among: alternating current measurement AC [F1] direct current measurement DC [F2]... -
Page 26: Procedure
5.2.5. Procedure Press function A, then select the coupling according to your measurements: AC, DC, AC+DC (AC+DC is default) Connect the black lead to the COM terminal, the red lead to A, and the probe tips in series between the source and the load as shown below: Read the measurement indicated on the main display unit. -
Page 27: Main Measurement
The clamp function includes a precise ratio xxxx.XA/xxxx.XV or XA, making it possible to connect a broad range of current clamps that you will find in the CHAUVIN ARNOUX catalogue; it is however necessary to verify that the input/output range of the clamp matches the ranges available on the multimeter. - Page 28 CNT+ et CNT- :counting of pulses PW+ et PW- :pulse width the mathematical function associated: MATH the period, the positive duty cycle and the mathematical function: PER_DCY+_MATH the period, the negative duty cycle and the mathematical function: PER_DCY-_MATH the positive pulse width, the counting of positive pulses, its reference and the mathematical function: PW+_CNT+_MATH the negative pulse width, the counting of negative pulses, its reference and the mathematical function: PW-_CNT-_MATH...
-
Page 29: Resistance Measurement
5.5. Resistance measurement 5.5.1. Connecting the multimeter 5.5.2. Main measurement The multimeter measures resistance (opposition to the flow of current) in ohms (Ω). For this purpose, it sends a weak current through the measurement leads to the circuit being tested. The input (+, COM) must not have been overloaded by the accidental application of a voltage on the input terminals with the switch set to Ω... -
Page 30: Audible Continuity Measurement
100 Ohm measurements Press the F3 key to access this function. So as not to damage the circuit tested, note that the multimeter provides a current of approximately 10mA max. at an open-circuit voltage of 28 volts max. For low resistance measurements, <100 Ohm, this single range provides good resolution. 5.6. -
Page 31: Diode Test
5.7. Diode test 5.7.1. Connecting the multimeter This function performs a diode forward voltage check to verify: diodes, transistors, silicon-controlled rectifiers (thyristors) and other semiconductor components. This function tests a semiconductor junction by passing a current through it and measuring the voltage drop across the junction. -
Page 32: Capacitance Measurement
Zener diode or LED: selecting this diode applies the same function as for the diode above but with a maximum voltage of 26V and a maximum current of 10mA. 5.8. Capacitance measurement 5.8.1. Connecting the multimeter 5.8.2. Main measurement Capacitance characterizes the ability of a component to store an electric charge. The unit of capacitance is the farad (F). -
Page 33: Temperature
AUTO range selection, automatic (default) or manual: Range + or Range - “Active” protection by PTC thermistor Maximum open-circuit Voltage: 1V typ., 4V max. Use the REL function for values <10% of the range in order to restore the residual zero (compensation for the capacitance of the leads) ... -
Page 34: Main Measurement
5.9.2. Main measurement To measure a temperature: Connect the sensor to the V and COM terminals, making sure to get the polarity right. Choose the unit: °C (Celsius), K (Kelvin) or °F (Fahrenheit). Select ".../…". Choose the type of sensor Pt100, Pt1000, TCJ, or TCK. If "OL"... -
Page 35: Main Measurement
Connecting the multimeter to filter a current >300Hz 5.10.2. Main measurement The multimeter has a low-pass AC filter that blocks voltages or currents at undesirable frequencies. The MLI filter is activated as follows: Setup Measurement Filter YES: a symbol then appears on the screen. -
Page 36: Graphic Mode
Integration time at least 200ms, programmable according to your configuration: Start Stop, then look-up of the quantities on the screen, in a specific window. It is possible to recover a screen grab of this window under our SX-DMM software, but this mode cannot be stored in the instrument. -
Page 37: Spec Mode
5.14. SPEC mode Using the internal technical specifications of the multimeter, the SPEC mode directly displays the tolerance on the measurement in progress, with no need to look for it and calculate it. This mode is very useful for the metrology of the instrument. 5.15. -
Page 38: Configuration Of The Link Under Sx Dmm
6.2. Configuration of the link under SX DMM With some Bluetooth adapters, a reboot of the PC is recommended to validate the connection. The connection parameters are specific to each multimeter. They must be assigned manually, the first time only. 6.3. -
Page 39: Reactivation Of The Connection After An Interruption Or To Look Up The Com Port Number
6.4. Reactivation of the connection after an interruption or to look up the COM port number Click the Bluetooth Manager icon of the menu bar at the bottom of the screen. Click the icon associated with the multimeter in the peripheral management window and note the COM port number created 6.5. -
Page 40: Installing The Software
7.2. Installing the software Install the "SX-DMM" software on the PC using the CD. Start the software for data acquisition and study the various display possibilities (curves, tables, etc.). symbol appears on the display unit when the instrument is controlled from the PC (REMOTE mode). For more information, refer to the "Help"... -
Page 41: Ac And Ac+Dc Voltage
serial mode:> 60dB at 50Hz and 60Hz Automatic or manual selection of the ranges Protection by varistors 8.2. AC and AC+DC voltage With this function, the user can measure the true RMS (TRMS) value of an AC voltage with its DC component (no capacitive coupling) or without its DC component. -
Page 42: Mtx 3293B
8.2.2. MTX 3293B Accuracy Range Input impedence Resolution 45 Hz 100 to 1 to 100 kHz to 1 kHz 200 kHz 1 μV 100 mV () 10 MΩ 1 % R ± 50D 1 % R + 0,05 % x [F(kHz) - 1] R ± 50D () 0,5%R + 0,2% x [F(kHz) - 1]R ±... -
Page 43: Ac And Ac+Dc Trms Current
() with the fuse supplied with the device ()100A range limited to 20A Specifications valid from 0% to 100% of the range Limiting condition on the current An overload of 20A is acceptable for 30 seconds max. with a pause of at least 5 minutes between measurements 8.4. -
Page 44: Secondary Frequency Measurement
Range Resolution Protection Accuracy 10 à 100 Hz 0,001 Hz 100 à 1000 Hz 0,01 Hz 1000 Hz à 10 kHz 0,1 Hz 1414 Vpk 0,02 % ± 10 D 10 à 100 kHz 1 Hz 100 à 1000 kHz 10 Hz 1 MHz à... -
Page 45: 100Ω Measure
Particular reference conditions: The (+COM) input must not have been overloaded following the accidental application of a voltage to the input terminals with the switch set to Ω or T°. If this happens, the return to normal may take about ten minutes. Protection : 1414 Vpk Range Accuracy... -
Page 46: Diode Test
8.8. Diode test Indication of the junction voltage in the forward direction, from 0 to 2.1V in a single range (10V range) Normal Z Diode Accuracy 2 % R ± 30 D Resolution 0,1 mV 10 mV Measurement current < 0,5 mA <... -
Page 47: Rapid Peak
Note 1: The stated accuracy in external temperature measurement does not take into account the accuracy of the K thermocouple. Note 2: Operation of the thermal time constant (0.7 min/°C): If there is a sudden variation of the temperature of the multimeter, by 10°C for example, the multimeter will reach 99% of the final temperature at the end of 5 time constants, or 0.7min/°Cx10°Cx5 cts = 35 min (to which must be added the constant of the external sensor) -
Page 48: Duty Cycle
8.17. Duty cycle Display of the measurement in % of a logical signal (TTL, CMOS, etc.) = DC+ duty cycle DC- Duty cycle = T- Resolution 0.01% Minimum duration for 10s Maximum duration for T 0.8s Minimum duration for T 200s (5 kHz) Nominal range 5 to 90% typical... -
Page 49: Variation In The Nominal Range Of Use
8.21. Variation in the nominal range of use Quantity of influence voltage Primary battery Temperature range 4.1 < U < 6.4 V (max influence.) 10 V/m Humidity Functions Storage battery 500 MHz 4.1 < U < 5.5 V V DC 0,003 % / °C V AC+DC 0,05 % / °C... -
Page 50: Power Supply
9.2. Power supply Mains power via USB charger (100-240VAC/50-60 Hz/0.5A) Primary batteries: 4x1.5V nominal, LR6 Alkaline (or more if possible) Life: ≈100 h in VDC (ultra power) Storage batteries: 4x1.2V A-A storage batteries, NI-MH LSD 2500 Life: ≈80h (2500mAh). In order to optimize the life of the storage batteries, the charging of the multimeter with the charger is operational up to <35°C. -
Page 51: Replacement Of The Fuse
11.2. Replacement of the fuse For safety reasons the fuse must always be replaced by an identical model: 11A: 10x38 -1,000V -F 11.3. Updating of the internal software With a view to providing, at all times, the best possible service in terms of performance and technical upgrades, Chauvin Arnoux invites you to update the embedded software of the device by downloading the new version, available free of charge on our web site. -
Page 52: 13. Appendix
13. APPENDIX 13.1. Default configuration In User mode, the device restarts in the user's personal configuration (General and Measurement menus) and the function selected when switched off, but coupling in Volt function (AC+DC). In Basic mode, the default, the multimeter starts up in its elementary configuration (default values) and in the Volt function (AC+DC). - Page 53 13.3. Table of secondary measurements Secondary display Secondary display Display unit 1: mean measurement Secondary display unit 2 unit 1 unit 3 V AC A AC Ω V DC A DC function unit function unit function unit V AC+DC A AC+DC FREQ MATH funct.
Need help?
Do you have a question about the Metrix MTX 3292B and is the answer not in the manual?
Questions and answers