Table of Contents
Advertisement
Aurora
Advanced Installation Guide
Aurora Always Ready
Smart Bulb Dimmer
Z3-1BRL
Thank you for purchasing the Aurora Always Ready Smart Bulb Dimmer from Lutron. This document will guide
you through several additional installation topics beyond those covered in the quick-start guide included with
your product.
Table of Contents
Installation Using a PhilipsR HueR Bridge ...................................................................Page 2 - 4
Installation Without a Bridge (Standalone) .................................................................Page 5
Multi-location Setup without a Bridge ........................................................................Page 6
Restoring Factory Defaults ..........................................................................................Page 7
Converting from Standalone to a Bridge System .......................................................Page 8
Mounting ........................................................................................................................Page 9
Battery Replacement ....................................................................................................Page 10
Troubleshooting and LED Feedback ...........................................................................Page 11
Removing Base from Knob ..........................................................................................Page 12
Reliability Issues ...........................................................................................................Page 13
Difficulty Mounting to a Toggle Switch .......................................................................Page 14
Unpairing Bulbs / Resetting Bulbs to Factory Defaults .............................................Page 15
Installation Using an Unsupported ZigbeeR Hub .......................................................Page 16
1
0301916b 1/2020
Advertisement
Table of Contents

Related Manuals for Lutron Electronics Aurora Z3-1BRL


Summary of Contents for Lutron Electronics Aurora Z3-1BRL
-
Page 1: Table Of Contents
Aurora 0301916b 1/2020 Advanced Installation Guide Aurora Always Ready Smart Bulb Dimmer Z3-1BRL Thank you for purchasing the Aurora Always Ready Smart Bulb Dimmer from Lutron. This document will guide you through several additional installation topics beyond those covered in the quick-start guide included with your product. -
Page 2: Installation Using A Philipsr Huer Bridge
Aurora Installation Using a PhilipsR HueR Bridge Install Install your lights Install your PhilipsR HueR bridge by following the manufacturer's Screw in and power on your HueR lamps. instructions. Add your lights to the system PhilipsR HueR bridge NOTE: Only compatible with PhilipsR HueR square-shape bridge V2. - Page 3 Aurora Installation Using a PhilipsR HueR Bridge (continued) Add Aurora dimmer Create and assign rooms Add your Aurora dimmer to the system and select the room you Create rooms and assign your lights to the appropriate room. want the dimmer to control. Settings >...
- Page 4 Aurora Installation Using a PhilipsR HueR Bridge (continued) Add Aurora dimmer (continued) Select scene for dimmer to activate (Optional) As indicated on the app From the list of rooms that you Select the icon under the Select your desired scene, or screen, quickly double-press have previously created, select header "Press"...
-
Page 5: Installation Without A Bridge (Standalone)
Aurora Installation Without a Bridge (Standalone) Turn the desired lights OFF and then back ON NOTE: This allows the lights to connect with controls for about 15 minutes. Connect the light +3 sec 6 sec <4 in (10 cm) While holding the Aurora dimmer as close as possible to the bulb, press and hold the button on the Aurora dimmer. -
Page 6: Multi-Location Setup Without A Bridge
Aurora Multi-location Setup without a Bridge Connect lights to second unit Multiple Aurora dimmers can be used to control the same group of lights in standalone mode. Special steps need to be taken to allow more than one Aurora dimmer to control the same set of +3 sec 6 sec lights. -
Page 7: Restoring Factory Defaults
Aurora Restoring Factory Defaults Follow the instructions below to erase device settings (including light or bridge pairings) and return to factory defaults. Tap button quickly 3x On the third tap, continue holding until LED blinks (6 seconds) 6 sec Once LED is blinking quickly tap button 3x again. LED will flash rapidly to show success. -
Page 8: Converting From Standalone To A Bridge System
Aurora Converting from Standalone to a Bridge System If you previously had an Aurora dimmer connected to a lamp without a bridge, and you wish to add it to a bridge system, please follow the steps below, or reset the lights to factory defaults as described on page 15. -
Page 9: Mounting
Aurora Mounting Make sure light is ON Install mounting base While the light is ON, place base over the toggle switch as shown While holding the base against the wallplate, use a Phillips CORRECT head screwdriver to turn the screw until the clamp has securely attached to the toggle switch. -
Page 10: Battery Replacement
Aurora Battery Replacement Pull knob away from base Tips for Removing the Battery NOTE: Due to natural oils on your finger, it can be difficult to slide the battery out for removal. Many common household items Grab the outside of can help. -
Page 11: Troubleshooting And Led Feedback
Aurora Troubleshooting and LED Feedback Two slow blinks after a press Red LED blinks after a press (Not connected/Light is switched off) (Low battery) Slowly fading in and out Red LED continuously blinks without using unit (Connecting is in progess) (Unit resetting, replace battery. -
Page 12: Removing Base From Knob
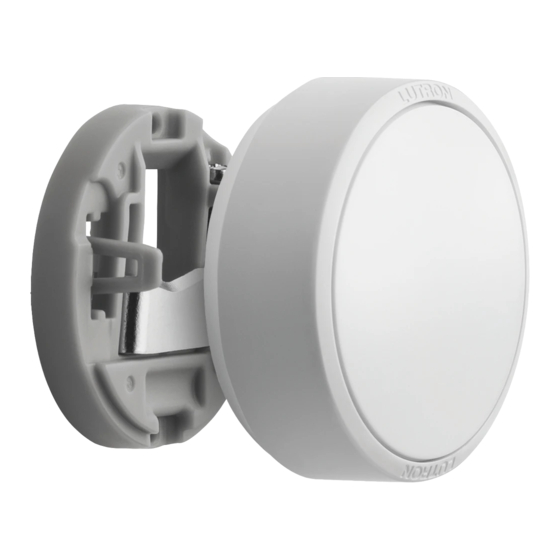
Aurora Removing Base from Knob If for any reason your base is attached to your knob when the base is not attached to your switch, here is how to separate the two pieces. Use screwdriver to pull knob away from base Gently insert flathead screwdriver in small slot between the mounting base and the knob. -
Page 13: Reliability Issues
Aurora Reliability Issues If you are experiencing issues with responsiveness of your lights to button presses or rotary dimming, you may have RF range or interference issues. Ensure your PhilipsR HueR bridge is located per the manufacturer's recommendations. If using in a standalone system, ensure that the Aurora dimmer is located within 30 ft (9 m) of the closest smart light to which it is connected. -
Page 14: Difficulty Mounting To A Toggle Switch
Aurora Difficulty Mounting to a Toggle Switch Aurora toggle tape is a solution for attaching the rotary dimmer to older toggle switches made from a material to which the clamp may have difficulty attaching. Toggle tape may be required for switches manufactured before 1980. -
Page 15: Unpairing Bulbs / Resetting Bulbs To Factory Defaults
Aurora Unpairing Bulbs / Resetting Bulbs to Factory Defaults On the third tap, continue holding button for a long Follow the instructions below to erase all of a bulb’s pairings (to time (19 seconds total) remotes and/or a hub) and reset it to the “factory default” state. Turn power to the light OFF and then back ON +3 sec 16 sec... -
Page 16: Installation Using An Unsupported Zigbeer Hub
Aurora Installation Using an Unsupported ZigbeeR Hub Follow the instructions below to pair an Aurora dimmer to a Remove battery third-party ZigbeeR hub that doesn’t have app support for the Remove the Aurora’s battery for 10 seconds, and then re-insert Aurora dimmer. - Page 17 Go to www.lutron.com/smartbulbdimmers for additional information. )Lutron, Lutron and Aurora are trademarks or registered trademarks of Lutron Electronics Co., Inc. in the US and/or other countries. Apple and the Apple logo are registered trademarks of Apple Inc. App Store is a service mark of Apple Inc.
Need help?
Do you have a question about the Aurora Z3-1BRL and is the answer not in the manual?
Questions and answers