Stuv P-10 Directions For Use Manual
Hide thumbs
Also See for P-10:
- Installation instructions manual (48 pages) ,
- Directions for use manual (44 pages) ,
- Directions for use manual (40 pages)

Related Manuals for Stuv P-10


Summary of Contents for Stuv P-10
- Page 1 To give to the user Directions for use This guide is available in digital format at: www.stuv.com Find us also on: March 2020 P-10.2 SN 203951 > ... APF 134...
- Page 2 WELCOME TO THE WORLD OF STÛV! You have just opted for an eco-friendly, high-performance heating system. We hope that you enjoy using it from this moment on. You will find advice and instructions for the use and maintenance of your Stûv in this document.
-
Page 3: Table Of Contents
Description of the interface and the different menus Controlling your Stûv P-10 with a smartphone Lighting the Stûv P-10 2 modes: power mode VS thermostat mode Some advice on getting the most our of your Stûv P-10 Shutting down the Stûv P-10 MAINTENANCE Daily maintenance... -
Page 4: Presentation Of The Product
Recommended draught at maximum power 6 Pa Recommended draught at minimum power (P1) 3 Pa Minimum draught at the output of the appliance for flue calculation. 0 Pa Stûv P-10.2 - directions for use [en] - 03/20 SN 203951 - ... -
Page 5: Stûv P-10 Ce Marking
> Cast steel for the structural elements of the burner > Aluminium for the smoke extraction flue Stûv P-10.2 - directions for use [en] - 03/20 > HDPE for the Pellet hopper SN 203951 - ... -
Page 6: Dimensions
Dimensions wood and “to be sheet metal version trimmed” version 1400 Ø 60 Ø 80 Ø 60 wood and “to be trimmed” version sheet metal version Stûv P-10.2 - directions for use [en] - 03/20 SN 203951 - ... -
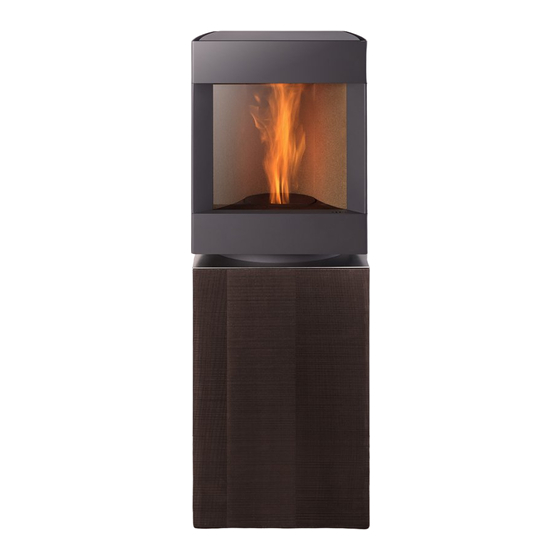
Page 7: Overview Of The Stove Components
S. Electronic card T. Ashpan U. Reloading hatch V. Front hood with dust channel *Facings are available in two versions. The illustration shows one side of each finish. Stûv P-10.2 - directions for use [en] - 03/20 SN 203951 - ... -
Page 8: How Does Your Stûv P10 Work
Stûv P-10 will adjust its output and maintain this by adjusting: - The quantity of pellets burned [diagram 3] - The quantity of air supplied to combustion [diagram 4] Stûv P-10.2 - directions for use [en] - 03/20 SN 203951 - ... -
Page 9: Fuel
Pellet storage Pellets must be stored in a dry place where the temperature is Stûv P-10.2 - directions for use [en] - 03/20 SN 203951 - ... -
Page 10: Use
Every Stűv P-10 is subjected to a factory check. There may be traces of combustion or light residues after this test. General recommendations Caution! Important! The appliance is not designed to be The stove should be used in In order to best use the qualities of used with cooking utensils. -
Page 11: Recommendations Before First Use
The paint will harden when heated for the first few times. and the odours will disappear. Consequently, take care when handling the appliance. Stûv P-10.2 - directions for use [en] - 03/20 SN 203951 - ... -
Page 12: Basic Usage
Rotating the lantern Use the cool handle to turn the device lantern round 90° [diagrams 6-7]. 45° 45° Stûv P-10.2 - directions for use [en] - 03/20 SN 203951 - ... -
Page 13: Description Of The Remote Control
2 and 5 days depending on the use. During long periods of disuse, charge the remote control at least once a month to avoid damaging the battery. Stûv P-10.2 - directions for use [en] - 03/20 SN 203951 - ... -
Page 14: Pairing A Remote Control With A Stove
> A message shows that a figure 1. The light should flash connection has been successfully purple. established [figure 5]. > On the home screen of the un-paired remote control, press Stûv P-10.2 - directions for use [en] - 03/20 SN 203951 - ... -
Page 15: Description Of The Interface And The Different Menus
Use these buttons to choose your preferred operating mode. Using the “adjust setpoints” sub-menu you can choose the setpoint temperature or power. The operating modes are described on page 20. Stûv P-10.2 - directions for use [en] - 03/20 SN 203951 - ... - Page 16 The SMARTmode function is only available in thermostat mode. The activation button turns orange when the function is not available. Stûv P-10.2 - directions for use [en] - 03/20 SN 203951 - ...
- Page 17 When you have finished setting the schedule for the week, press the tick (H). To cancel the schedule (the data will be lost), press the cross (H). NEXT DAY Stûv P-10.2 - directions for use [en] - 03/20 SN 203951 - ...
- Page 18 Warning! In schedule mode, the stove is constantly active. Press the button to completely switch off the device and exit schedule mode. Stûv P-10.2 - directions for use [en] - 03/20 SN 203951 - ...
- Page 19 Lets you set the date and time on the remote control. P-10 P-10 Set time/date Temperature sensor Pellet set 15 - may - 2019 Set date/time Set language Backlight 14 : 58 Stûv P-10.2 - directions for use [en] - 03/20 SN 203951 - ...
- Page 20 > Maximum output as a function of the pellet setting: Pellet set Max. Output P-10 P-10 Pellet set Temperature sensor Pellet set Set date/time Set language Backlight Stûv P-10.2 - directions for use [en] - 03/20 SN 203951 - ...
- Page 21 Turn the button sounds on/off by using the appropriate toggle switch. Pellet set Intensity 100 % Set date/time Set language Standby mode Backlight 30 sec Sound of keys Stûv P-10.2 - directions for use [en] - 03/20 SN 203951 - ...
- Page 22 P-10 P-10 System status Logs Logs Screw 1 alarm Logs Screw 1 alarm 16/06/2017 Date: Maintenance Time: 14:32 Leak alarm Phase: extinction (00:17:32) System Max. temperature alarm Stûv P-10.2 - directions for use [en] - 03/20 SN 203951 - ...
- Page 23 Serial number of the stove Logs APF version 04.02.05 Firmware version Maintenance Gateway serial number SOE1940 Gateway ID adress 192.168.002.155 System 879573 Remote control serial number Remote control software version 00.00.41 Stûv P-10.2 - directions for use [en] - 03/20 SN 203951 - ...
-
Page 24: Controlling Your Stûv P-10 With A Smartphone
N.B.: you need to allow camera access. > Enter a 4-figure PIN code [figure 3]. > Enter a recovery email address [figure 4]. > Give the stove a name [figure 5]. Stûv P-10.2 - directions for use [en] - 03/20 SN 203951 - ... - Page 25 Never touch the ashpan whe the appliae is operating (risk of burns). Check carefully that there are no unburned pellets in the ashpan before the appliance is lit. Stûv P-10.2 - directions for use [en] - 03/20 SN 203951 - ...
-
Page 26: Lighting The Stûv
Never remove ash from the the pellets (e.g. slightly damp pellets device while lighting it! etc.) Once the flame appears, all the smoke will disappear. Stûv P-10.2 - directions for use [en] - 03/20 SN 203951 - ... -
Page 27: Modes: Power Mode Vs Thermostat Mode
16. can remove this throttle after checking to make sure the flue is compatible. Some advice on getting the most our of your Stûv P-10 To make sure your device is working - Alternate between different power the "service" screen on the remote as well as it possible can, we also settings. -
Page 28: Shutting Down The Stûv
Shutting down the Stûv P-10 > To turn your Stûv P-10 off, slide the button to the left. From this time on, the appliance will stop one of the two feed screws and empty the second. P-10 The Stûv P-10 will therefore continue... -
Page 29: Maintenance
[diagram 5]. > Check that in the end, the control returns to its original position (rod to the right). Only remove the ash when the appliance is extinguished! Stûv P-10.2 - directions for use [en] - 03/20 SN 203951 - ... -
Page 30: Weekly Maintenance
Once empty, put the ashpan back firmly into position, and make sure it is fully closed. If it is not, the device will emit a LEAK alarm. Stûv P-10.2 - directions for use [en] - 03/20 SN 203951 - ... - Page 31 Weekly maintenance (continued) If you need to operate the grille or remove the ashpan when the appliance is hot, do these various operations using the control key. Stûv P-10.2 - directions for use [en] - 03/20 SN 203951 - ...
- Page 32 Do not open the door of the lantern while the unit is hot. Cleaning the ash removal grille > Remove the vermiculite ring. > Remove the flame modeller. > Vacuum the grilles. Stûv P-10.2 - directions for use [en] - 03/20 SN 203951 - ...
-
Page 33: Annual Maintenance
(in the “installer" menu on the remote control). N.B.: Stûv’s statutory and extended guarantee are not valid for devices that have not been maintained as described above. Stûv P-10.2 - directions for use [en] - 03/20 SN 203951 - ... - Page 34 In the event of a problem, Stûv’s statutory and extended guarantee will only be valid for devices that have been maintained in accordance with the methods described in the previous chapter. Total operating Comments (please note all hours Date Carried out by alarms recorded etc.) Stûv P-10.2 - directions for use [en] - 03/20 SN 203951 - ...
-
Page 35: In Case Of Problems
If not, fill the hopper and try to light the device again. If the alarm starts again, contact the installer. > If the hopper is full or the alarm is displayed when there is a flame, contact the installer. Stûv P-10.2 - directions for use [en] - 03/20 SN 203951 - ... - Page 36 > Wait for 5 minutes then make a note of the alarm and clear it by pressing and holding > Let the device go out > Contact the installer. Screw 1 alarm Stûv P-10.2 - directions for use [en] - 03/20 SN 203951 - ...
- Page 37 > Wait for 5 minutes then make a note of the alarm and clear it by pressing and holding > Let the device go out > Contact the installer. Screw speed ratio alarm Stûv P-10.2 - directions for use [en] - 03/20 SN 203951 - ...
- Page 38 > Wait for 5 minutes then make a note of the alarm and clear it by pressing and holding > Let the device go out Smoke sensor alarm > Contact the installer. Stûv P-10.2 - directions for use [en] - 03/20 SN 203951 - ...
- Page 39 If you aren’t sure, change the pellets. > Restart the device. If the alarm starts again, contact the installer. Stûv P-10.2 - directions for use [en] - 03/20 SN 203951 - ...
- Page 40 > Once the device has gone out and cooled down, remove the ash, Black-out making sure that no unburned pellets are left on the burner grille and empty the ash pan. > Restart the device. Stûv P-10.2 - directions for use [en] - 03/20 SN 203951 - ...
- Page 41 ThingsPlay/Hottoh > Once the device has gone out and cooled down, contact the installer. communication alarm Stûv P-10.2 - directions for use [en] - 03/20 SN 203951 - ...
- Page 42 Location of the serial number If you encounter a problem or if you notice any deterioration, please contact your installer, telling them the serial number of your appliance. P-10 Stûv P-10.2 - directions for use [en] - 03/20 SN 203951 - ...
-
Page 45: Product Datasheet (Eu 2015/1186)
Output at minimum capacity Special precautions that must be taken during assembly, instal- lation or maintenance of the decentralised heating device: Consult the installation, usage and maintenance in- structions Stûv P-10.2 - directions for use [en] - 03/20 SN 203951 - ... -
Page 46: Declaration Of Performance (Eu 305-2011)
Declaration of performance EU 305/2011 DECLARATION OF PERFORMANCE (EU 305-2011) Stûv P-10 Domestic wood pellet heating appliance complying with the EN 14785 : 2006 standard Recommended fuel: Wood pellets only Manufactured by: Stûv s.a Rue Jules Borbouse, 4 B-5170 Bois-de-Villers Tél: +32(0)81.43.47.96 - Fax: +32(0)81.43.48.74... -
Page 48: The Extension Of The Stûv Guarantee : A Simple Procedure For More Peace Of Mind
A list of these is available on If, despite our best efforts, a fault our website www.stuv.com should occur, we undertake to – faults that have occurred during, resolve it. 2. Complete the... - Page 49 Complete your guarantee form directly online at www.stuv.com ! We strongly recommend : – that you entrust installation (or in any event check-over) to a qualified professional who is able, in particular, to check that the characteristics of the smoke...
-
Page 51: Contacts
CONTACTS Stûv stoves are designed and manufactured in Belgium by: Stûv sa rue Jules Borbouse 4 B-5170 Bois-de-Villers (Belgium) info@stuv.com – www.stuv.com Stûv P-10.2 - directions for use [en] - 03/20 SN 203951 - ... - Page 52 However, we do not accept responsibility for any errors that may have been made. Contact your distributor or visit www.stuv.com Editor: Gérard Pitance - rue Jules Borbouse 4 - 5170 Bois-de-Villers - Belgium 9310XXXX - directions for use - Stûv P-10.2...
Need help?
Do you have a question about the P-10 and is the answer not in the manual?
Questions and answers