Table of Contents
Advertisement
Quick Links
Advertisement
Table of Contents

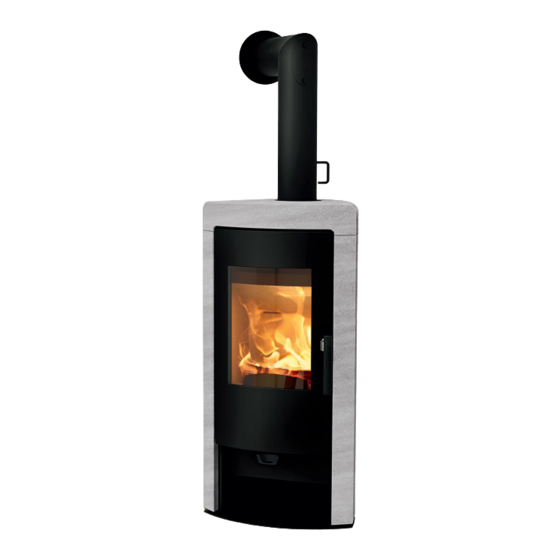
Summary of Contents for RIKA Rikatronic4
- Page 1 RIKATRONIC4 Operating manual...
-
Page 2: Table Of Contents
Dimensions �����������������������������������������������������������������������������������������������������������������������������������������������������������������������������������������������������������������������������������4 Amount of fuel ���������������������������������������������������������������������������������������������������������������������������������������������������������������������������������������������������������������������������4 Technical data ���������������������������������������������������������������������������������������������������������������������������������������������������������������������������������������������������������������������������4 Packaging ��������������������������������������������������������������������������������������������������������������������������������������������������������������������������������������������������������������������������������������4 Electrical connection (Rikatronic4) ������������������������������������������������������������������������������������������������������������������������������������������������������������������������4 Spare part overview - exploded diagram �������������������������������������������������������������������������������������������������������������������������������������������������������� 5 Spare part overview - article numbers ����������������������������������������������������������������������������������������������������������������������������������������������������������������7 2. INSTALLING THE STOVE Connection to the chimney ������������������������������������������������������������������������������������������������������������������������������������������������������������������������������������������� 8 Connecting to a steel chimney ����������������������������������������������������������������������������������������������������������������������������������������������������������������������������������... -
Page 3: Preface
7. CLEANING AND MAINTENANCE Basic information ����������������������������������������������������������������������������������������������������������������������������������������������������������������������������������������������������������������� 14 Cleaning the combustion chamber ��������������������������������������������������������������������������������������������������������������������������������������������������������������������� 14 Empty the ash drawer ������������������������������������������������������������������������������������������������������������������������������������������������������������������������������������������������������ 14 Checking the door contact ������������������������������������������������������������������������������������������������������������������������������������������������������������������������������������������ 14 Cleaning the door glass �������������������������������������������������������������������������������������������������������������������������������������������������������������������������������������������������� 14 Cleaning the flame temperature sensor ��������������������������������������������������������������������������������������������������������������������������������������������������������� 14 Cleaning painted surfaces ������������������������������������������������������������������������������������������������������������������������������������������������������������������������������������������� 14 Cleaning the convection air openings ���������������������������������������������������������������������������������������������������������������������������������������������������������������15 Combustion air - intake ���������������������������������������������������������������������������������������������������������������������������������������������������������������������������������������������������15 Cleaning the flue pipes ����������������������������������������������������������������������������������������������������������������������������������������������������������������������������������������������������15... -
Page 4: Dimensions
Part load Amount of fuel 8 kW ~2,2 kg* ~1,1 kg* Electrical connection (Rikatronic4) Amount of fuel 6 kW ~2,0 kg* The stove is supplied with an approx� 2m long connecting cable *Practical values may vary depending on fuel quality�... -
Page 5: Spare Part Overview - Exploded Diagram
Spare part overview - exploded diagram... - Page 6 RIKATRONIC4...
-
Page 7: Spare Part Overview - Article Numbers
Side casing soapstone B16464 Transmission air regulator Z36079 Side casing sandstone Z36381 Magnet holder plate Z36025 Side casing stone white B17681 Mainboard Rikatronic4 N103693 Flat seal black 8x2 Z36389 Cover panel, bottom L02766 Stone retaining bracket N102647 Hexagonal socket spanner N108395... -
Page 8: Installing The Stove
Connect at the air intake either a pipe Ø 125 mm for log wood and We recommend original flue pipes from RIKA for proper connection� combi stoves, or Ø 50 mm or Ø 60 mm for pellet stoves� Fix it with a hose clamp (not included!)�... -
Page 9: Important Information
RIKA stoves should only be installed in rooms with normal humidity (dry areas according to VDE 0100 Part 200)� The furnaces are not splash water protected and may not be installed in wet areas�... -
Page 10: Prior To Set
Stoves type 1 (BA 1): Prior to set up Suitable for multiple occupancy� (Note the different country Floor bearing capacity regulations�) Ensure that the substructure is capable of bearing the weight of the These may only be operated with the combustion chamber door stove prior to set-up�... -
Page 11: Brief Information On Combustible - Logs
4. BRIEF INFORMATION ON COMBUSTIBLE - LOGS Suitable fuels and fuel amounts Output controlling Your stove is generally suitable for burning dry firewood� You can The output of your stove is regulated manually or via the Rikatronic- also burn combustibles such as wood briquettes� control�... -
Page 12: Assembly / Dismantling Stone
Place the stone flat on a soft base� The stone should never be placed Only work on the unit when the stove has cooled down completely� on the edges - risk of breakage! Type Rikatronic4: Only work on the unit when it is switched off and the mains plug has been disconnected� Note During any conversion work, take particular care of your fingers and any panels and stove attachments�... -
Page 13: Manual Operation
2� Now place further pieces of chipboard in crosswise layers on top of the logs and place 2-4 ribs of the RIKA-firelighter on the left on top of the chipboard� Some uncoated paper can be placed underneath the chipboard in case there is no firelighter available�... -
Page 14: Cleaning And Maintenance
Your stove must be cooled before any maintenance work is wooden door handle, these will damage the wood� performed� Type Rikatronic4: Only work on the unit when it is switched off and the mains plug has been disconnected� Cleaning the flame temperature sensor... -
Page 15: Cleaning The Convection Air Openings
Cleaning the convection air openings Checking door seal Vacuum clean any dust deposits from the convection air openings Annually! at regular intervals� The condition of the seals at doors and glass should be checked at The stove should be cleaned thoroughly prior to the start of the least once a year�... -
Page 16: Problems - Possible Solutions
8. PROBLEMS - POSSIBLE SOLUTIONS Problem 1 Problem 2 Fire burns with weak, orange flame, window is sooted up� Stove smells strongly and / or fumes are emitted� Cause(s) Cause(s) Poor chimney draught Burning-in phase (taking into service) Damp wood Stove has accumulated dust and/or dirt Possible solution(s) Incorrect heating up... -
Page 17: Guarantee Conditions
In cases of doubt, or in the case of missing or incorrect translations, the German version is always the sole valid version. In the interest of ensuring damage limitation in good time, the guarantee claim should be sent in writing to the RIKA specialist or contract dealer. - Page 18 Electronic Waste RIKA Innovative Ofentechnik GmbH is ensuring that its products are eco-friendly throughout the product life cycle� This is why our commitment for electronic products goes beyond the end of their product life cycle� In accordance with the European Directive (2012/19/EU) Waste Electrical and Electronic Equipment (WEEE) and other local regulations, RIKA supports the setup of take-back systems and recycling infrastructures�...
- Page 20 German version is the only Müllerviertel 20 valid one. Subject to technical and visual 4563 Micheldorf / AUSTRIA changes as well as layout and printing errors.. Tel.: +43 (0)7582/686 - 41, Fax: -43 © 2021 | RIKA Innovative Ofentechnik GmbH verkauf@rika.at www.rika.at...


Need help?
Do you have a question about the Rikatronic4 and is the answer not in the manual?
Questions and answers