Advertisement
Quick Links
Advertisement

Related Manuals for laerdal VitalsBridge


Summary of Contents for laerdal VitalsBridge
- Page 1 VitalsBridge for SimMan 3G Directions for Use rev. A.4 p/n 10149...
-
Page 2: Regulatory Information
Web Downloads: Visit http://www.laerdal.com to download the latest Directions for Use and Software. Regulatory Information Use statement: The VitalsBridge is for use in the United States and Canada only. Federal Communications Commission Statement: This device complies with part 15 Subpart B of the FCC rules. - Page 3 Global Warranty: See the Laerdal Global Warranty, www.laerdal.com. Manufacturer: The VitalsBridge is made in the USA and is manufactured for Laerdal Medical AS by Dynasthetics LLC. 3487 W. 2100 S. #300 Salt Lake City, Utah, 84119 rev.
- Page 4 Warnings and Caution Follow all cautions and warnings outlined in the SimMan 3G Directions for Use. − The VitalsBridge is intended solely for use during patient simulation. It is not a medical device. − Warning: Never connect the VitalsBridge to a patient.
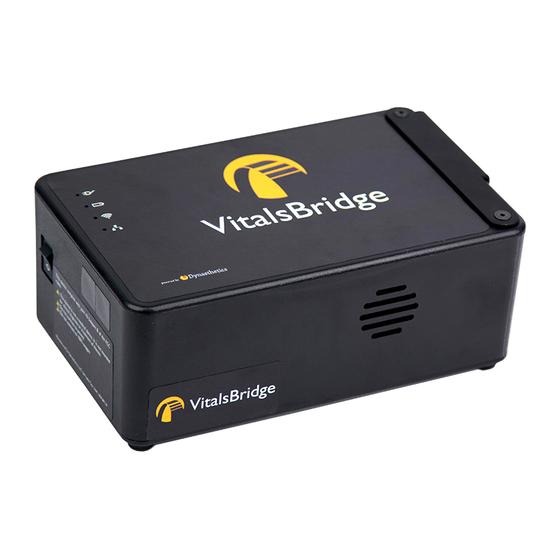
- Page 5 VitalsBridge Overview The VitalsBridge consists of a device that allows vital signs from the SimMan 3G to be presented on a clinical vital signs monitor. It is intended to increase the fidelity of simulation for users where they may view, interact, and control a vital signs monitor that is used in their clinical practice. The VitalsBridge presents opportunities for high-fidelity simulations that involve critical care, training and education on clinical monitoring, patient information systems testing, just to name a few.
- Page 6 The VitalsBridge converts the SimMan 3G's digitized vital signs waveforms and numbers into signals that are compatible with a vital signs monitor. Compressed gases (air, CO ) are used for non-invasive blood pressure and capnography to generate the signal. The vital signs created by the VitalsBridge are controlled using the SimMan 3G Instructor Application.
- Page 7 SimMan 3G and instructor PC running the application software version 2.3 or later A commercially available patient vital signs monitor, with relevant cables that connect between the patient and the monitor. The monitor is not included with the VitalsBridge. rev. A.4...
-
Page 8: Internal Battery Charging
Use the power supply marked "VitalsBridge Use" when running the VitalsBridge. Charging the Internal Battery: Use the power supply marked "Battery Charging Only", and connect it to the power port on the rear panel of the VitalsBridge. This charger will fully charge a depleted battery in 6-12 hours. - Page 9 DVD/CD ROM drive and double click on the file "VitalsBridge For SimMan 3G Setup.exe". Follow the on-screen installation instructions. Upon successful installation, a VitalsBridge icon will be created on the PC's desktop. rev. A.4...
- Page 10 rev. A.4 p/n 10149...
- Page 11 VitalsBridge Network Configuration using an external local area network: Consult your network administrator for assistance for configuring the VitalsBridge on an external LAN. Using an Ethernet cable, connect the VitalsBridge to a LAN where the PC is located. Note: the local area network must have UDP multicasting enabled.
- Page 12 Resetting to default network configuration: To reset the VitalsBridge to default network settings, use the power toggle switch located on the side of the VitalsBridge device to power on the VitalsBridge for 2 seconds, power off for 2 seconds. Repeat for a total of 4 power on/off cycles.
- Page 13 Connect the SpO extension cable between the VitalsBridge and this connector on the arm. connector (to sensor in Manikin's finger) connector (to VitalsBridge) Connect the SpO extension cable into the appropriate connector on the VitalsBridge. rev. A.4 p/n 10149...
- Page 14 Place a non-disposable finger-clip style SpO probe from the Vital Signs monitor squarely over the index finger of the manikin’s right hand. Correct placement and position of the SpO probe is important: Ensure it is not “twisted” on the finger, and leave a gap of 1-2 mm between the tip of the finger and the top housing of the probe.
- Page 15 Temperature: The temperature cable is a short white cable that consists of a short RJ-11 connector on one end, which connects to the VitalsBridge. The other end of the cable is a transducer-style connector, which connects to the temperature patient monitor cable. Two temperature cables are supplied with the VitalsBridge.
- Page 16 Using the Portable CO Regulator: The portable CO regulator uses 12g or 16g cartridges of compressed . It has a luer-lock fitting connection to the VitalsBridge, which may be capped when a CO cartridge is in place but is disconnected from the VitalsBridge.
- Page 17 VitalsBridge: Hold both ends of the luer connector on the blue tubing and the blue connector on the VitalsBridge. Rotate the tubing connector onto the connector labeled CO on the VitalsBridge, but do not over tighten. When ready to simulate using CO...
- Page 18 VitalsBridge. Rotate the tubing connector onto the connector labeled AIR on the VitalsBridge, but do not over tighten. When ready to simulate, turn on the compressed air at its source. 1/8” NPT fitting (male or female) connects to compressed air source (50 –...
- Page 19 Non-invasive blood pressure connection: There are two luer connections for non-invasive blood pressure, a green connector for measuring the pressure in the cuff (NBP ) and a red connector for sending a pulse during measurement (NBP ). Hold both ends of the luer connector to make a firm connection.
- Page 20 The non-invasive blood pressure portion of the patient monitor uses 1 or 2 tubes to inflate the cuff. For 1-tube, the fitting on the green tube (NIBP ) leads from the VitalsBridge and connects to the appropriate fitting on one of the two black tubes on the NIBP cuff. The remaining black tube connects to the patient monitor tube.
- Page 21 Capnography: CO sample line is provided to connect from the VitalsBridge to the CO analyzer on the patient monitor. Connect one end the sample line to the luer fitting marked "Capno" and the other end to the monitor. To side-stream CO connection on vital signs monitor.
- Page 22 Instructor Application are running. Power and Initialization of the VitalsBridge: Use the toggle switch, located on the side panel, to power VitalsBridge on or off. Once powered on, the VitalsBridge takes approximately 6 seconds to initialize and connect to a network.
- Page 23 Power indicator: no light: switch is off or VitalsBridge does not have adequate battery charge or external power connected solid: switch is on and VitalsBridge has adequate battery charge or external power Starting the VitalsBridge software: Double click on the VitalsBridge icon, labeled VitalsBridge, located on the computer's desktop.
- Page 24 Upon successful association with the two devices, the main VitalsBridge user interface is shown. A summary of the vital signs that are being sent from the SimMan 3G to the VitalsBridge is shown. SimMan 3G Additionally, if some waveforms are unneeded for the simulation (e.g., PAP, CVP, CO2), uncheck the box next to the vital sign's label.
- Page 25 Zeroing the Invasive Blood Pressures: Invasive blood pressures may be zeroed by setting the blood pressure waveform to “Flat Line” in the Instructor Application. Refer to your patient monitor's documentation for procedures of zeroing the pressures within the monitor's user interface. Once the pressures are zeroed on the monitor, deselect and apply the “Flat Line”...
- Page 26 Calibration: Calibration may be needed if the end-tidal CO reading on the patient vital signs monitor does not properly match the CO waveform on the Instructor Application. From the Device menu on the VitalsBridge software, select CO2, and then select Calibrate. rev. A.4 p/n 10149...
- Page 27 Repeat for all calibration points. Once completed, the calibration data will automatically be stored/retrieved on the VitalsBridge. To use this calibration instead of the default calibration, choose CO2, Calibration Type and User Defined from the Device menu. rev. A.4...
- Page 28 The VitalsBridge is pre-calibrated with factory settings for Nellcor, Masimo and GE probes. Select one of these settings from the Device, SpO2, Sensor Type menu, depending on the brand of SpO probe used in your vital signs monitor. If the SpO value set on the Instructor Application significantly deviates from the value on the vitals sign monitor, then it is possible to use your own calibration.
- Page 29 Q: What is the recommended sequence for starting the VitalsBridge? A: If you have been running the manikin for more than 30 minutes prior to starting the VitalsBridge, it is recommended that you exit the Instructor Application software, and power off the manikin. Power on the manikin, wait for the manikin to start breathing (chest rise and fall), power on the VitalsBridge, start the Instructor Application software, start the VitalsBridge software.
- Page 30 30-60 minutes or longer, depending on the simulation. When the CO regulator is not in use, disconnect from the VitalsBridge and securely fit the cap, without over tightening, to the outlet of the regulator. Q: My CO...
- Page 31 Q: How do I simulate a pulmonary-capillary wedge pressure with the VitalsBridge? A: This feature is not yet accessible from Laerdal server software used by the VitalsBridge. In a future software update, pulmonary capillary wedge pressure is anticipated to be available.
Need help?
Do you have a question about the VitalsBridge and is the answer not in the manual?
Questions and answers