Table of Contents
Advertisement
Advertisement
Table of Contents

Related Manuals for laerdal VitalSim


Summary of Contents for laerdal VitalSim
- Page 1 VitalSim...
-
Page 2: Table Of Contents
Start ......... 7 one (1) year period, Laerdal Medical will, upon receipt Programming ECG . -
Page 3: Introduction
Introduction and Intended Use Important Information VitalSim is designed to be used for realistic medical This device complies with Part 15 of the FCC Rules. training within emergency care and nursing. It can be Operation is subject to the following two conditions:... -
Page 4: Features
- Pulse strength settable to weak, normal or strong - Pulse strengths dependent on blood pressure Use with Laerdal Manikins Scenario Function VitalSim is designed to work with a variety of manikins - Pre-programmed scenarios eases operation manufactured by Laerdal.VitalSim will automatically and simulations... -
Page 5: Overview
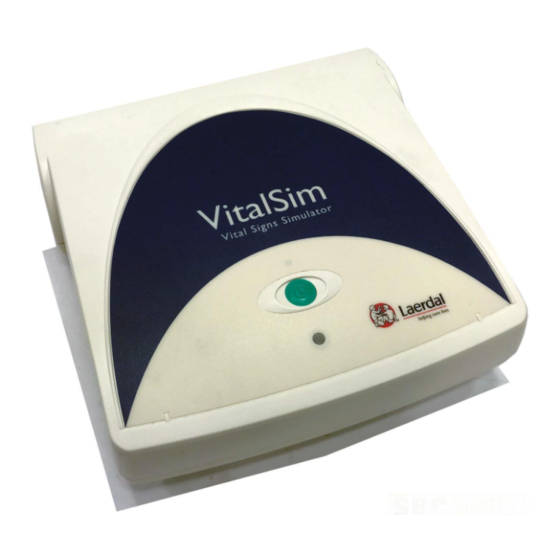
Overview A. On/Off button and Indicator. Press once to turn the unit on. Press again to turn the unit off. The indicator is steady green if the base unit has contact with the remote control. If there is no contact with the remote control the indicator will be blinking green. -
Page 6: Start
Start Once your manikin has been connected to the VitalSim, turn the base unit and remote control on. The VitalSim will automatically detect the connected manikin and set the initial parameters accordingly. Main Display The main display screen shows the current status, and allows for modifying some parameters directly using the quick execution buttons. - Page 7 Operation Using left / right navigation buttons, tab over to the desired functional area of the display. Once the desired area is highligh- ted, use the up / down navigation buttons to scroll through to the desired selection. When the desired functional area is highlighted, press OK to edit the settings.
-
Page 8: Programming Ecg
Programming ECG Set Running Rhythm On the main display, using the left / right navigation buttons, highlight the ECG functional area and press OK to edit the functions. Note: Some functions may be changed directly from the main display using the quick execution buttons. •... - Page 9 Set Waiting Rhythm From the main display use the left / right navigation buttons to highlight the ECG functional area. Scroll down to Waiting rhythm. Press OK to edit the selection. Select a Waiting rhythm in the same way as the Running rhythm. When a Waiting rhythm is selected, two additional quick execution buttons appear in the quick execution area: •...
-
Page 10: Sounds
Sounds On the main display, using the left / right navigation buttons highlight the sounds functional area. The sound volume for the selected highlighted sound can be set directly from the main display using the - and + quick execution buttons. The selected Vocal sound can be activated using the quick execution button.(When ”Cough”... - Page 11 Set Heart Sounds Heart sounds are set in the same manner as Lung sounds. On the main display, using the left / right navigation buttons highlight the sounds functional area. Scroll down to the Heart sound. Use the + / - quick execution buttons to alter volume directly, or Recall to recall the previously selected Heart sound.
-
Page 12: Blood Pressure And Pulse
Blood Pressure and Pulse The set blood pressure (BP) affects the pulse strength as described in the specifications chapter. The Normal pulse can be adjusted to three levels,Weak, Normal or Strong. If the pulse is set to be normally weak, a weak pulse because of low BP will be almost impossible to detect. If the Running rhythm is a rhythm with no BP, i.e.VF or Asytole, BP will automatically be set to 0/0. -
Page 13: Breathing Rate
Breathing Rate Breathing rate is automatically set to 0 if BP is 0.The breathing rate is not automatically set back to normal if a BP is set. Breathing rate can be adjusted between 0 and 60 breaths per minute. Set Breathing Rate On the main display, using the left / right navigation buttons, highlight the Breathing rate functional area. -
Page 14: Log
The top section of the main functional area controls log and scenario. The VitalSim automatically generates a log of events from the moment the unit is turned on. Elapsed time and name for the current log is displayed in the upper left corner of the display. Unless saved, the log will be erased when the base unit is turned off. -
Page 15: Scenario
Scenario The VitalSim can run preprogrammed scenarios, generated on a PC-based scenario builder program.These scenarios can be transferred to the base unit using the VitalSim PC utility program. Execution of a scenario is started using the Scen button on the remote control. - Page 16 To start a scenario, press the Scen button. Note: It usually takes a little time to transfer all of the scenario information to the remote control. Select the desired scenario and press OK. The scenario will start with the clock set to 0 and a new log will begin.The current log will be erased, unless it is saved before the scenario is started.
-
Page 17: Setup
Setup To activate the Setup Menu, press the Menu button. Use the navigation buttons to select function. Use quick execu- tion buttons or the navigation buttons to make a selection. Press OK to save. Display backlight can be turned on or off. Unless used in a dark room, it is recommended to have the backlight off to preserve batteries. - Page 18 Com. Channel To be able to operate several VitalSim units in the same vicinity, it is possible to select 5 different communication channels. Factory setting is channel 1. Communication channels can only be changed if the remote control and base unit are connected via cable.
- Page 19 Battery Status The battery status in the remote control is indicated in the upper right corner of the display. Batteries should be replaced immediately when battery empty is indicated. When the battery is totally empty, the remote control will turn itself off without any warning. Replace the remote control batteries with 4 AA size alkaline batteries.
-
Page 20: Pc Software Utilities
The VitalSim can be connected to the PC through the USB connector. Through this connection scenarios made on the PC can be downloaded to the VitalSim for execution. Logs generated and saved on the VitalSim can also be uploaded to the PC for review, printing and permanent storage. - Page 21 VitalSim unit. Log and Scenario Control This utility is used to load scenarios into the VitalSim, and to re- trieve logs that have been saved in the VitalSim. Connect the VitalSim to the PC using the USB cable.Turn the VitalSim on, and start the Log and Scenario program from the Start Menu.
-
Page 22: Specification
Specifications Remote Control RF Communication Batteries: 4 AA type (LR6) Alkaline batteries. Frequency ranges. Europe version 868,0 – 868,6 MHz Battery life: Approximately 20 hours. US version 915,5 – 916,4 MHz LCD display: High Resolution B&W LCD display. Operation range: 10 m (30 ft) max. - Page 23 QRS Types: Seven different QRS waveforms named “A” to “G” can be selected. Available QRS types vary with each basic rhythm. Supraventricular QRS types for: Sinus, A-tach, A-flutt, A-fib, Junctional, 1°AVB, 2°AVB types 1 and 2, 3°AVB (high rates), PACs and PJCs A.
- Page 24 Lung sounds: Lung sounds are synchronized to breathing rates, adjustable from 0 – 60 breaths / min. Adult Child Infant Manikin Manikin Manikin Default breathing rates: (BPM) Adult Child Infant Lung sounds: Manikin Manikin Manikin Normal Breath Sounds • • •...
- Page 25 Blood Pressure: Pressure range 0 - 300 mmHg Accuracy +/- 4 mmHg Calbration: Pressure sensor must be calibrated to sphygmomanometer. See Setup menu. Adult Child Infant Manikin Manikin Manikin Default Blood Pressures (mmHg) 120/80 100/70 94/66 Pulse: Available pulses: Carotid, Brachial and Radial Only 2 pulses can be palpated simultaneously.
- Page 26 2-13-12, Shinjuku, Shinjuku-ku,Tokyo 160-0022 E-mail: laerdal.norway@laerdal.no Tel. 81-3-5919-2121, Fax: 81-3-5919-2122 E-mail: laerdal.japan@laerdal.co.jp Australia: LAERDAL Pty. Ltd. (ABN 47 003 817 490) 23 Edward Street, Oakleigh,Victoria 3166 Malaysia: LAERDAL HOSPILINE Sdn Bhd Tel. +61 3 9569 4055,Toll free 1800 331 565...
Need help?
Do you have a question about the VitalSim and is the answer not in the manual?
Questions and answers