Table of Contents
Advertisement
Quick Links
Instruction for installation and maintenance
GRAF MINIMAX-PRO Filter internal
MINIMAX-PRO Filter internal
with curved / straight outlet
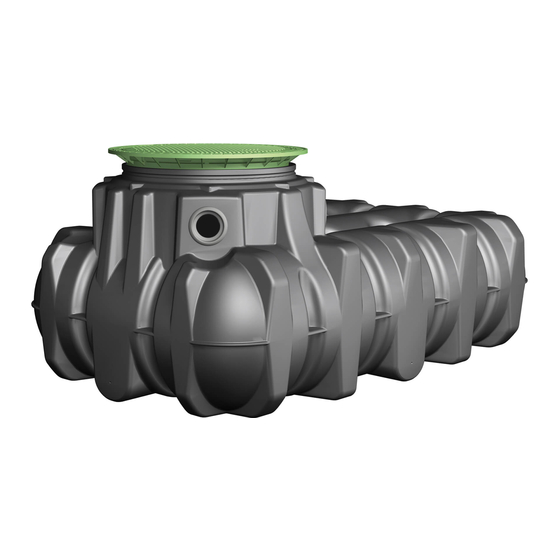
Order No. 340093
Platin Package 3
Order No. 342038
Carat Package
Order No. 340119
The points described in these
instructions must be observed
under all circumstances. All
warranty rights are invalidated
in the event of non-observance.
Separate
instructions are enclosed in the
transportation packaging for all
additional
articles
from GRAF.
The
components
checked for any damage prior to
installation
under
circumstances.
Missing
instructions
downloaded on www.graf.info or
can be requested from GRAF.
Table of contents
1.
1.1
2.
installation
2.1
3.
3.1
Dimensions with curved outwith curved outlet
purchased
4.
4.1
5.
5.
must
be
5.1
5.2
all
5.3
5.4
5.
can
be
5.5
5.6
5.7
5.8
6.
7.
66Acc 6.
11
11
11
11
12
13
13
14
14
14
15
15
16
16
16
17
17
18
18
18
Accessory e
Advertisement
Table of Contents

Related Manuals for Graf MINIMAX-PRO


Summary of Contents for Graf MINIMAX-PRO
-
Page 1: Table Of Contents
Instruction for installation and maintenance GRAF MINIMAX-PRO Filter internal MINIMAX-PRO Filter internal with curved / straight outlet Order No. 340093 Platin Package 3 Order No. 342038 Carat Package Order No. 340119 Table of contents The points described in these instructions must be observed under all circumstances. -
Page 2: General Notes
Except when working in the tank; the tank cover must always be kept closed due to acute danger of accident. GRAF offers an extensive range of genuine parts & accessories, all of which are designed to ensure the system performs as specified. The use of non-genuine Grafparts or accessories may lead to system's functional capability or failure, therefore invalidating Warranties &... -
Page 3: Technical Data
3. Technical data Dimensions with curved outlet inlet Zulauf Ablauf outlet Ablauf Zulauf Ablauf Zulauf Ablauf Zulauf Ablauf tank Tank Tank Tank Tank Siphon Siphon Siphon Siphon Siphon Fließrichtung Fließrichtung Fließrichtung Fließrichtung flow direction Fließrichtung... -
Page 4: Technical Data
3. Technical data Dimensions with straight outlet Ablauf inlet outlet Zulauf Ablauf Zulauf Ablauf Zulauf Ablauf Zulauf Ablauf tank Tank Tank Tank Tank Fließrichtung Fließrichtung Fließrichtung Fließrichtung Flow direction... -
Page 5: Assembly
4. Assembly Clear transparent cover/ Filter insert Housing including nozzle holder Outlet bend 87° Optional cleaning unit (340040) 5. Installation and assembly Overview Platin tank / Filter with curved outlet... -
Page 6: Installation Of Inflow Pipe And Overflow Siphon
5. Installation and assembly 5.2 Installation of inflow pipe and overflow siphon Insert the overflow siphon in the lower seal till block. Insert the inflow pipe DN100 from outside. 5.3 Preparation filter for installation Connect the filter body with a PVC pipe DN 100 (on site) with the inflow Calming Foot (contained in filter package 342038). -
Page 7: Insert The Filter Into The Tank
5. Installation and assembly 5.4 Insert the filter into the tank Insert the filter, prepared with the inflow Calming foot, in the tank. Slide the outlet bend of the filter into the overflow siphon from above, align the supply pipe flush with the filter and then fix with the quick-connection sleeve (included in filter package 342038). -
Page 8: Installation Of Inflow Pipe And Overflow Siphon
5. Installation and assembly 5.6 Installation of inflow pipe and overflow siphon Insert the overflow siphon in the lower seal till block. Insert the inflow pipe DN100 from outside. 5.7 Preparation filter for installation Connect the filter body with a PVC pipe DN 100 (on site) with the inflow Calming Foot (contained in filter package 340119). -
Page 9: Insert The Filter Into The Tank
5. Installation and assembly 5.8 Insert the filter into the tank Insert the filter, prepared with the inflow Calming Foot, in the tank. Align the supply and drain pipes flush with the filter and then fix with the two quick-connection sleeves (included in filter package 340119).
Need help?
Do you have a question about the MINIMAX-PRO and is the answer not in the manual?
Questions and answers