Table of Contents
Advertisement
Quick Links
For replacement parts visit
WENPRODUCTS.COM
Your new tool has been engineered and manufactured to WEN's highest standards for dependability, ease
of operation, and operator safety. When properly cared for, this product will supply you years of rugged,
trouble-free performance. Pay close attention to the rules for safe operation, warnings, and cautions.
If you use your tool properly and for its intended purpose, you will enjoy years of safe, reliable service.
NOTICE: Please refer to wenproducts.com for the most up-to-date instruction manual.
DUAL TEMPERATURE
IMPORTANT:
NEED HELP? CONTACT US!
Have product questions? Need technical support?
Please feel free to contact us at:
800-232-1195
techsupport@wenproducts.com
WENPRODUCTS.COM
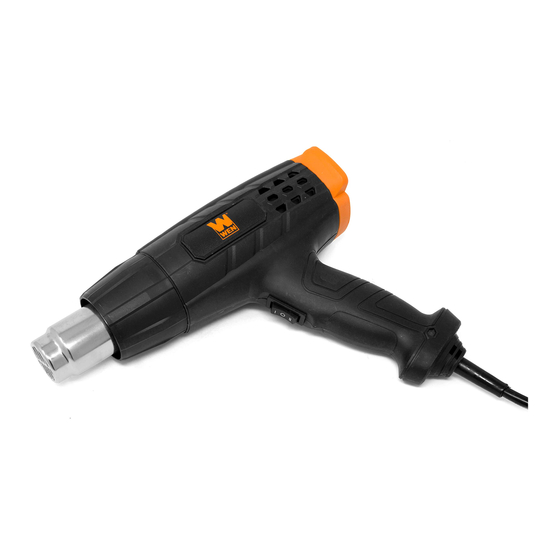
MODEL HG1022
HEAT GUN
(M-F 8am-5pm CST)
HG-ACA500QB
Advertisement
Table of Contents

Summary of Contents for Wen HG1022
- Page 1 WENPRODUCTS.COM IMPORTANT: Your new tool has been engineered and manufactured to WEN’s highest standards for dependability, ease of operation, and operator safety. When properly cared for, this product will supply you years of rugged, trouble-free performance. Pay close attention to the rules for safe operation, warnings, and cautions.
-
Page 2: Table Of Contents
Assembly & Adjustments ..............9 Operation ..................10 Maintenance .................. 11 Troubleshooting Guide ..............12 Exploded View & Parts List ............13 Warranty Statement ............... 15 SPECIFICATIONS Model Number HG1022 Motor 120V, 60 Hz Motor Speed 3500 RPM Cord Length 5.9 feet 662°F 79 GPM 6.3A... -
Page 3: Introduction
INTRODUCTION Thanks for purchasing the WEN Heat Gun. We know you are excited to put your tool to work, but first, please take a moment to read through the manual. Safe operation of this tool requires that you read and understand this operator’s manual and all the labels affixed to the tool. -
Page 4: General Safety Rules
GENERAL SAFETY RULES Safety is a combination of common sense, staying alert and knowing how your item works. SAVE THESE SAFETY INSTRUCTIONS. WARNING: Read and understand all warnings, cautions and operating instructions before using this tool. Failure to follow all instructions listed below may result in personal injury, electric shock, fire and/or tool damage. - Page 5 GENERAL SAFETY RULES 4. Prevent unintentional starting. Ensure the switch is in the off-position before connecting to power source and/or battery pack, picking up or carrying the tool. Carrying power tools with your finger on the switch or energizing power tools that have the switch on invites accidents. 5.
-
Page 6: Specific Safety Rules For Your Heat Gun
SPECIFIC RULES FOR YOUR HEAT GUN WARNING: Do not operate the heat gun until you have read and understood the following instruc- tions and the warning labels. 1. DO NOT TOUCH the end of the heat gun during or directly after operation. Let the gun cool down fully before touching the tip or any nozzles. -
Page 7: Electrical Information
ELECTRICAL INFORMATION DOUBLE-INSULATED TOOLS The tool’s electrical system is double insulated where two systems of insulation are provided. This eliminates the need for the usual three-wire grounded power cord. Double insulated tools do not need to be grounded, nor should a means for grounding be added to the product. All exposed metal parts are isolated from the internal metal motor components with protecting insulation. -
Page 8: Know Your Heat Gun
KNOW YOUR HEAT GUN UNPACKING Carefully remove the heat gun from the packaging. Make sure to take out all contents and accessories. Do not discard the packaging until everything is removed. TOOL PURPOSE This heat gun is designed to strip paints and varnishes, thaw frozen pipes, and soften adhesives for easy removal of linoleum and floor tile as well as stickers and labels. -
Page 9: Assembly & Adjustments
ASSEMBLY & ADJUSTMENTS ATTACHING NOZZLES 1. Select the correct nozzle for your job using Table 1 below. 2. Unplug the heat gun. Rest the tool upright with the nozzle facing up and allow it to cool before changing the nozzles. 3. -
Page 10: Operation
OPERATION TWO SPEED SWITCH (FIG. 1) 1. Switch the heat gun off (position "O") and plug the heat gun into an AC 120V 60 Hz receptacle. 2. Toggle the two speed power switch to select the desired heat output and fan speed. A. -
Page 11: Maintenance
Any attempt to repair or replace electrical parts on this tool may be hazardous. Ser- vicing of the tool must be performed by a qualified technician. When servicing, use only identical WEN replacement parts. Use of other parts may be hazardous or induce product failure. ROUTINE INSPECTION Before each use, inspect the general condition of the tool. -
Page 12: Troubleshooting Guide
TROUBLESHOOTING GUIDE WARNING: Stop using the tool immediately if any of the following problems occur. Repairs and replacements should only be performed by an authorized technician. For any questions, please contact our customer service at (800) 232-1195, M-F 8-5 CST or email us at techsupport@wenproducts.com. -
Page 13: Exploded View & Parts List
EXPLODED VIEW & PARTS LIST... - Page 14 EXPLODED VIEW & PARTS LIST Part No. Description Qty. HG1022-001 Front Cover HG1022-002 Label Frame HG1022-003 Label HG1022-004 Right Housing HG1022-005 Screw HG1022-006 Screw HG1022-007 Clamp HG1022-008 Power Cord HG1022-009 Power Cord Sheath HG1022-010 HG1022-011 Air Duct Ring HG1022-012 Screw...
-
Page 15: Warranty Statement
(2) years from date of purchase. Ninety days for all WEN products if the tool is used for professional or commercial use. SELLER’S SOLE OBLIGATION AND YOUR EXCLUSIVE REMEDY under this Limited Warranty and, to the ex-... - Page 16 THANKS FOR REMEMBERING...


Need help?
Do you have a question about the HG1022 and is the answer not in the manual?
Questions and answers