Table of Contents
Advertisement
Advertisement
Table of Contents

Related Manuals for Planika MONROE 900 F


Summary of Contents for Planika MONROE 900 F
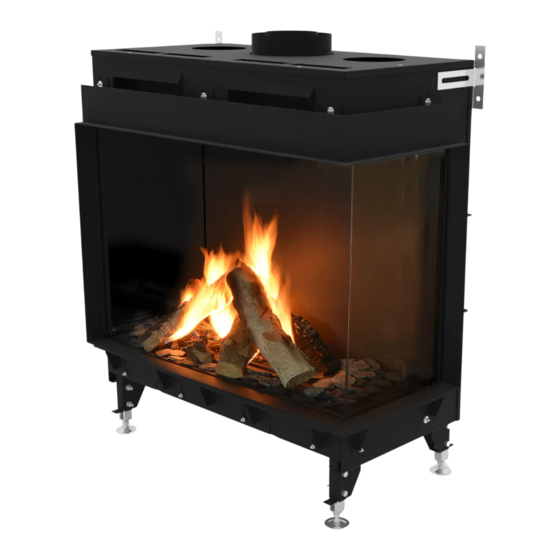
- Page 1 INSTALLATION MANUAL MONROE 900 F, MONROE 900 LF/FR, MONROE 900 LFR G20/G25 (Natural Gas) G30/G31 (Propane-Butane/Propane) Produced by: Planika Sp. z o.o. Bydgoska 38 86-061 Brzoza Poland Copyright Planika Sp. z o.o. www.planikafires.com IG0139#02 30.07.2018...
-
Page 2: Table Of Contents
Distances of the exhaust outlet from the structural elements of the building ..........35 5.10. Ventilation and air circulation inside the fireplace housing ................38 5.11. Placing decorative elements .......................... 39 5.11.1. Arranging decorative logs ..........................41 Copyright Planika Sp. z o.o. www.planikafires.com IG0139#02 30.07.2018... - Page 3 MAINTENANCE ................................59 8.1. Spare parts ................................. 60 DELIVERY ..................................60 WARRANTY ................................61 TROUBLESHOOTING ............................... 62 TECHNICAL DRAWINGS ............................64 TECHNICAL SPECIFICATIONS ..........................66 CONTACT DETAILS OF THE MANUFACTURER ......................66 Copyright Planika Sp. z o.o. www.planikafires.com IG0139#02 30.07.2018...
-
Page 4: Introduction
CE Declaration of conformity We hereby declare that both the design and construction of a gas heating device manufactured by Planika Sp. z o.o. (with registered office at Bydgoska 38 86-061 Brzoza Polska) meet the essential requirements contained in the Directive and the Ordinance on gas appliances. -
Page 5: General Information
Installation of the unit must allow easy access to all components subject to maintenance and service, and to allow free access to the components of the system closing the front glass . Do not use the device before you fully install it in the chosen destination. Copyright Planika Sp. z o.o. www.planikafires.com IG0139#02... - Page 6 Never leave the fireplace MONROE unattended (as in the case of any other type of fireplace or fire in the room). Fireplace series MONROE should be installed out of reach of children, unauthorized persons and animals so direct contact with hot parts of the fireplace is not possible. Copyright Planika Sp. z o.o. www.planikafires.com IG0139#02...
-
Page 7: Safety Instructions For Monroe's Fireplace Instalation
Incorrect placement of decorative materials may result in shortening the useful life of the hearth and its damage. WARNING! Make sure you don’t place any decorative elements around the ignition and ionization electrodes. Copyright Planika Sp. z o.o. www.planikafires.com IG0139#02 30.07.2018... -
Page 8: Safety Instructions For The Use Of Fireplace Powered By Gas Cylinder
3.3. Safery sensors Planika fireplaces are equipped with advanced safety sensors detecting hazards related to the presence of carbon monoxide (CO) and gas (LPG or natural gas, depending on the device category). In the event of any danger, the sensor will automatically turn off the fireplace and, additionally, it will inform the user about the threat detected by sound signals. -
Page 9: Seismic Sensors
3.4. Seismic sensors Planika fireplaces are additionally equipped with seismic detectors that automatically switch off the fireplace when any shocks (eg. Earthquake) are detected that endanger the safe use of the device. WARNING! The sensor must always be pointing up. By default it is mounted so that it works properly with a gas valve installed vertically. - Page 10 Installation of the gas valve 90 degrees to the left Installation of the gas valve 90 degrees to the right Copyright Planika Sp. z o.o. www.planikafires.com IG0139#02...
-
Page 11: Unpacking
To do this, contact the distributor. When ordering, always specify type and serial number of the device. Warning! You should never connect any device adapted to the combustion of liquefied gas to the gas network of natural gas and vice versa. Copyright Planika Sp. z o.o. www.planikafires.com IG0139#02 30.07.2018... -
Page 12: Gas Connection
• You must use the gas pipe with the correct dimensions, so there are no pressure loss. • Ball gas valve should be installed in an easily accessible place and have the necessary CE mark. Photo 1 - Gas Connector Copyright Planika Sp. z o.o. www.planikafires.com IG0139#02... -
Page 13: Electrical Connection
(max 230V AC / 0.8A). This connector cannot be controlled with the remote control and operates independently from the user. This connector is not active. Photo 2 - Diagram of electrical connections Copyright Planika Sp. z o.o. www.planikafires.com IG0139#02... -
Page 14: Device Positioning
Create an opening for the needs of concentric air combustion system with the following diameters: o pipe diameter +50 mm for the needs of the channel passing through combustible material; o pipe diameter +200 mm for needs of the channel passing through combustible material; Copyright Planika Sp. z o.o. www.planikafires.com IG0139#02... -
Page 15: Fireplace Housing Execution
WARNING! The device must not be used as a supporting construction - it cannot keep the weight of the fireplace wall. Copyright Planika Sp. z o.o. www.planikafires.com IG0139#02 30.07.2018... - Page 16 Before closing the fireplace wall completely, please ensure that: Concentric flue system has been places correctly. Channels, mounting brackets and any connecting terminals, which will not be available after installation, are mounted correctly by using self-tapping screws. Copyright Planika Sp. z o.o. www.planikafires.com IG0139#02 30.07.2018...
-
Page 17: Installation Of The Fireplace Housing With A Front Glass F
430mm. In case of the location of the inspection hatch next to the product, the height is minimum 215mm. 5.6.2. Installation of the fireplace housing with two-sided glazing LF / FR. Copyright Planika Sp. z o.o. www.planikafires.com IG0139#02... -
Page 18: Lfr Installation Of The Fireplace Housing With A Tripartite Glazing Lfr
You cannot allow the platform weight to rest on the device. To do this, use the appropriate mounting kit (e.g. frame made of aluminum profiles). Copyright Planika Sp. z o.o. www.planikafires.com IG0139#02... - Page 19 Fireplace with two-sided glazing Decorative frame Fireplace with tripartite glazing Decorative frame Copyright Planika Sp. z o.o. www.planikafires.com IG0139#02 30.07.2018...
-
Page 20: Fireplace Housing Without Decorative Frame
30 mm. To properly construct fireplace housing, you should pay attention to make appropriate cut in the horizontal part of the fireplace housing according to the drawings below. Fireplace with two-sided glazing Fireplace with tripartite glazing Copyright Planika Sp. z o.o. www.planikafires.com IG0139#02 30.07.2018... - Page 21 Keep a minimum distance of 5 mm from the edge of the horizontal fireplace housing and the vertical surface of the front glass. WARNING! The platform shall be constructed of non-flammable and heat-resistant material. Picture 3 - Disassembly of the lower decorative frame Copyright Planika Sp. z o.o. www.planikafires.com IG0139#02 30.07.2018...
-
Page 22: Adjustment Of The Upper Decorative Frame
Tighten all nuts that press the frame to the fireplace body WARNING! Take care that the frame does not slip down in an uncontrolled way and damaging eg the front glass of the fireplace. Copyright Planika Sp. z o.o. www.planikafires.com IG0139#02 30.07.2018... -
Page 23: Placing The Inspection Hatch
Unroll the ignition cables and ionization electrode cable. This will prevent, among other things, poor operation of ignition. Be sure not to lead the ionization electrode cables and ignition electrodes next to the metal parts. Copyright Planika Sp. z o.o. www.planikafires.com IG0139#02... - Page 24 When placing the inspection hatch with gas assembly, the minimum size necessary for proper and safe installation should be considered. Picture 6 - The minimum size for gas assembly installation needs Copyright Planika Sp. z o.o. www.planikafires.com IG0139#02 30.07.2018...
-
Page 25: The Exhaust And Combustion Air Supply System
In all these cases you must comply with regulations in force in the country. Use the concentric system supplied by Planika. This system has been tested in conjunction with MONROE series. -
Page 26: Recommendations For Proper Installation Of The Concentric Flue System
Place the terminal seam (grooved/ribbed) to the top with a slope of 1 cm/meter towards the outside in order to prevent rainwater coming into its interior. WARNING! Detailed installation manual of the concentric flue system is supplied together with this system. Copyright Planika Sp. z o.o. www.planikafires.com IG0139#02 30.07.2018... -
Page 27: Construction Of The Concentric Flue System
WARNING! For the insert using LPG, it is recommended to use up to 2 meter of horizontal section (not including terminal). Picture 8 – Possible system configurations with the wall terminal Copyright Planika Sp. z o.o. www.planikafires.com IG0139#02 30.07.2018... - Page 28 If necessary, the individual elements of the concentric flue system can be stabilized by using wall brackets. Picture 9 - Example of system configuration with wall terminal Copyright Planika Sp. z o.o. www.planikafires.com IG0139#02 30.07.2018...
- Page 29 The various elements of the concentric flue system should be joined together by special clamps for added rigidity. If necessary, the individual elements of the concentric flue system can be stabilized by wall brackets. Copyright Planika Sp. z o.o. www.planikafires.com IG0139#02...
- Page 30 Picture 10 - Example of system configuration with roof terminal Copyright Planika Sp. z o.o. www.planikafires.com IG0139#02 30.07.2018...
- Page 31 A properly selected flue gas restrictor should be placed during the installation of the fireplace before connecting the concentric flue system. It should be installed in the exhaust pipe (internal) in specially designed brackets. Copyright Planika Sp. z o.o. www.planikafires.com IG0139#02 30.07.2018...
- Page 32 In such a case to replace the flue gas restrictor you should: Disassemble the front glass of the fireplace, Unscrew the nuts holding the plate located in the upper part of the combustion chamber, Disassemble the plate, Copyright Planika Sp. z o.o. www.planikafires.com IG0139#02 30.07.2018...
- Page 33 Replace the flue gas restrictor, paying special attention to place it properly in specially designed brackets. Mount the plate in the upper part of the combustion chamber, Install the front glass of the fireplace. Copyright Planika Sp. z o.o. www.planikafires.com IG0139#02 30.07.2018...
- Page 34 WARNING! Installation manual is supplied separately with the supplied system. Picture 11 – Sample configuration of connecting to an existing chimney Copyright Planika Sp. z o.o. www.planikafires.com IG0139#02 30.07.2018...
-
Page 35: Distances Of The Exhaust Outlet From The Structural Elements Of The Building
Height near a roof window. Location near a roof window. Location under the balcony and below the edge of the roof. Copyright Planika Sp. z o.o. www.planikafires.com IG0139#02 30.07.2018... - Page 36 Height above the ground level. Location near the door and window openings. Location near shading projections. Copyright Planika Sp. z o.o. www.planikafires.com IG0139#02 30.07.2018...
- Page 37 10 meters from the obstacle, the outlet chimney must be placed at least 0,3 m above the surface of the roof with a slope greater than 12° and at least 0,6 m above the surface of the flat roof. Copyright Planika Sp. z o.o. www.planikafires.com IG0139#02...
-
Page 38: Ventilation And Air Circulation Inside The Fireplace Housing
Picture 13 - Vents with use of hot air distributor Copyright Planika Sp. z o.o. www.planikafires.com IG0139#02... -
Page 39: Placing Decorative Elements
Decorative set of filling the combustion chamber attached to the unit consists of: Vermiculite Vermiculite chips Glowing wires Copyright Planika Sp. z o.o. www.planikafires.com IG0139#02 30.07.2018... - Page 40 Set of decorative logs Ceramic logs which will be placed on the 3 top burners have suitable recesses at their bottom part that match the shapes and sizes of burners Copyright Planika Sp. z o.o. www.planikafires.com IG0139#02 30.07.2018...
-
Page 41: Arranging Decorative Logs
WARNING! The surface of the burner should be completely covered with vermiculite, in order not to shorten the life of the burner. Copyright Planika Sp. z o.o. www.planikafires.com IG0139#02 30.07.2018... - Page 42 Logs cannot completely cover the shape of the burner which may cause the main burner not igniting properly. This can lead to incorrect operation of the device, and the device may quickly get dirty with soot which adversely affect the image of the flame. Copyright Planika Sp. z o.o. www.planikafires.com IG0139#02...
- Page 43 Copyright Planika Sp. z o.o. www.planikafires.com IG0139#02 30.07.2018...
- Page 44 Identify all the ceramic logs from A to C. During the identification, follow the traces of burns on the surface of the branches and their shape. Place ceramic logs on the top burners in the order shown below, taking care not to damage the logs. Copyright Planika Sp. z o.o. www.planikafires.com IG0139#02 30.07.2018...
- Page 45 Copyright Planika Sp. z o.o. www.planikafires.com IG0139#02 30.07.2018...
-
Page 46: Glasses
Mount the side pressure strips "A" in the holes in the side frame and by pushing them down, lock in the vertical position (6). Remove the suction cup. Copyright Planika Sp. z o.o. www.planikafires.com IG0139#02 30.07.2018... - Page 47 Move the horizontal strip fixing the front glass to the right until it stops and tighten it with screws "A" (5). Make sure that the screws are not tightened too much, because it can then lead to their breakage or damage of the thread. Remove the suction cup. Copyright Planika Sp. z o.o. www.planikafires.com IG0139#02 30.07.2018...
- Page 48 Move the horizontal strip fixing the front glass to the right until it stops and tighten it with screws "A" (4). Make sure that the screws are not tightened too much, because it can then lead to their breakage or damage of the thread. Remove the suction cup. Copyright Planika Sp. z o.o. www.planikafires.com IG0139#02 30.07.2018...
-
Page 49: Dissasembly Of The Glass
Then by making a move down and then towards yourself, you should pull out the front glass and put it in a safe place on a flat surface (6). Remove the suction cup. Copyright Planika Sp. z o.o. www.planikafires.com IG0139#02... - Page 50 Then by making a move down and then towards yourself, you should pull out the front glass and put it in a safe place on a flat surface (5). Remove the suction cup. Picture 18 – Disassembly of the front glass in the fireplace with two glasses Copyright Planika Sp. z o.o. www.planikafires.com IG0139#02 30.07.2018...
- Page 51 Then by making a move down and then towards yourself, you should pull out the front glass and put it in a safe place on a flat surface (4). Remove the suction cup. Picture 19 – Disassembly of the front glass in a fireplace with three glasses Copyright Planika Sp. z o.o. www.planikafires.com IG0139#02 30.07.2018...
-
Page 52: Control
Startup screen display means the end of the login process and configured remote control which is now ready to work with a fireplace. WARNING! All functions are explained in detail with supplied User Manual. Copyright Planika Sp. z o.o. www.planikafires.com IG0139#02 30.07.2018... -
Page 53: Orange Remote Control For The Installer
This may be a wired or wireless connection. Planika fireplaces can be (after purchasing an additional Ethernet Bridge module) controlled by Planika Control application available for free download for mobile devices with Android (Google Play) and iOS (iTunes). - Page 54 By default, the device is configured to use 2 burners (middle and side sections). Copyright Planika Sp. z o.o. www.planikafires.com IG0139#02...
-
Page 55: The Wireless Connection Through The Protocol "Modbus
"Modbus". This type of connection can be established only by using the communication module (Picture 20 "M"). This module can be ordered from Planika. This module converts the communication protocol "Modbus" from home automation system for the wireless signal to the receiver. -
Page 56: Final Inspection
To connect the measuring device, unscrew the screw on the test nipple (9 mm) by half a turn and connect the hose. Photo 3 - Nozzles measuring gas pressure Copyright Planika Sp. z o.o. www.planikafires.com IG0139#02... -
Page 57: Ignition Of The Main Burner
Repeat the ignition procedure several times and perform the checks described in section 7.3.2. Since then, the hearth should light up without problems. WARNING! Always wait 3 minutes before retrying ignition of the device. You cannot make any modifications to the gas assembly. Copyright Planika Sp. z o.o. www.planikafires.com IG0139#02 30.07.2018... -
Page 58: The Hearth
Make sure that the image of the flame on the hearth is correct. If the image of the flame is not acceptable, use the table of error messages to solve the problem. Copyright Planika Sp. z o.o. www.planikafires.com IG0139#02 30.07.2018... -
Page 59: Checklist
To make sure that the device operates properly and safely, it should be inspected and cleaned once a year and if necessary repaired by a qualified technician who specializes in the field of gas heating and electrical Copyright Planika Sp. z o.o. www.planikafires.com IG0139#02 30.07.2018... -
Page 60: Spare Parts
When the unit is lit for the first time, it comes to the evaporation of volatile components from paint, materials, etc. and during the volatilization of these substances, the device should work with the highest heat load. o The room should be well ventilated. Copyright Planika Sp. z o.o. www.planikafires.com IG0139#02 30.07.2018... -
Page 61: Warranty
10. WARRANTY Planika Sp. z o.o. grants the Client guarantee of quality for the smooth operation of the goods specified on the sales document. The warranty is determined for a given period from the date of purchase (based on the warranty card together with the receipt of purchase). -
Page 62: Troubleshooting
3-4 mm flame could not be detected in time. Replace the ignition electrodes Check if the cables for the ignition electrode are connected correctly No Gas Make sure, there is a gas connection Copyright Planika Sp. z o.o. www.planikafires.com IG0139#02 30.07.2018... - Page 63 Straighten them connector are bent Damage to the bridge of the upper limit Check the bridge of the upper limit ESYS Hardware failure ESYS Damage ESYS (burner module) Exchange ESYS (burner module) Copyright Planika Sp. z o.o. www.planikafires.com IG0139#02 30.07.2018...
-
Page 64: Technical Drawings
12. TECHNICAL DRAWINGS MONROE 900 F MONROE 900 LF Copyright Planika Sp. z o.o. www.planikafires.com IG0139#02 30.07.2018... - Page 65 MONROE 900 FR MONROE 900 LFR Copyright Planika Sp. z o.o. www.planikafires.com IG0139#02 30.07.2018...
-
Page 66: Technical Specifications
13. TECHNICAL SPECIFICATIONS TECHNICAL SPECIFICATIONS MONROE 900 F, MONROE 900 LF, Name of the product MONROE 900 FR, MONROE 900 LFR Type of the device To be built-in Combustion Closed combustion chamber Supply and discharge system Concentric Flue System 200/130... - Page 67 Installation and User's Manuals. The installed gas fireplace is ready for safe operation. Installer’s seal and signature Copyright Planika Sp. z o.o. www.planikafires.com IG0139#02 30.07.2018...
- Page 68 Date, signature and seal of the chimney sweeper Date, signature and seal of the chimney sweeper Date, signature and seal of the chimney sweeper Date, signature and seal of the chimney sweeper Copyright Planika Sp. z o.o. www.planikafires.com IG0139#02 30.07.2018...
Need help?
Do you have a question about the MONROE 900 F and is the answer not in the manual?
Questions and answers