Table of Contents
Advertisement
Quick Links
Advertisement
Table of Contents

Subscribe to Our Youtube Channel
Related Manuals for Planika VALENTINO 1300 F

Summary of Contents for Planika VALENTINO 1300 F
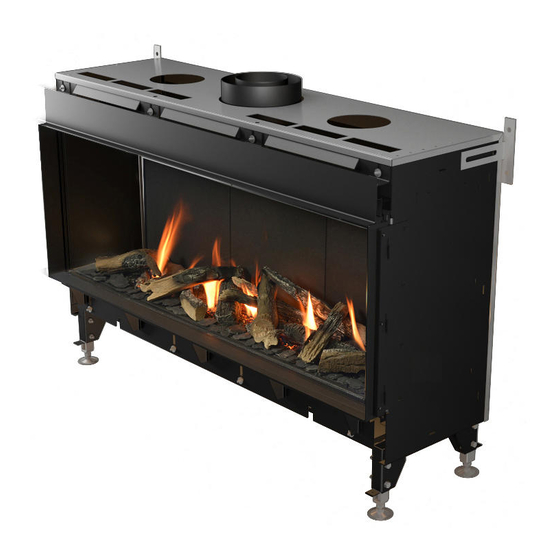
- Page 1 USER MANUAL VALENTINO 1300 F, VALENTINO 1300 LF/FR, VALENTINO 1300 LFR G20/G25 (Natural Gas) G30/G31 (Propane-Butane/Propane) Produced by: Planika Sp. z o.o. ul. Bydgoska 38 86-061 Brzoza Poland Copyright Planika Sp. z o.o. www.planikafires.com IG0058#00 31.03.2017...
-
Page 2: Table Of Contents
8.1. Manual control ..............................19 8.1.1. Ignition of the device ..........................20 8.1.2. Flame height adjustment ..........................21 8.1.3. Temperature regulation ..........................21 8.1.4. Temporary disruption of the temperature control ..................22 Copyright Planika Sp. z o.o. www.planikafires.com IG0058#00 31.03.2017... - Page 3 Assembly of the glass ..........................28 11.3. Dissassembly of the glass ..........................31 ENVIRONMENTAL PROTECTION .......................... 34 12.1. The device ..............................34 WARRANTY ................................35 TECHNICAL SPECIFICATIONS ..........................36 CONTACT DETAILS OF THE MANUFACTURER ..................... 36 Copyright Planika Sp. z o.o. www.planikafires.com IG0058#00 31.03.2017...
-
Page 4: Introduction
EN 613 on convection space gas heaters, and norm EN 778:2010. Each gas fireplace produced by Planika is subjected to quality control, during which passes stringent safety tests. High- quality materials used for its production guarantee the user a smooth and reliable operation of the device. -
Page 5: General Information
Fireplace series VALENTINO should be monitored at least once a year in accordance with this installation • manual and as well as all applicable national and local regulations concerning safe installation and use of gas appliances. Copyright Planika Sp. z o.o. www.planikafires.com IG0058#00 31.03.2017... - Page 6 If the unit is not used for a long time, depending on the type of fuel, close the main valve on the LPG cylinder • or close the valve supplying natural gas to the device. Copyright Planika Sp. z o.o. www.planikafires.com IG0058#00...
-
Page 7: Safety Instructions
(eg. an additional switch of electricity on the power cord; closing the ball valve on the gas supply line to the device) in order to avoid damage to objects or injuries and the use of to all safety instructions in this manual. Copyright Planika Sp. z o.o. www.planikafires.com IG0058#00... -
Page 8: Safety Instructions For The Use Of Gas Cylinder
Turn off gas cylinder, if the device is not in use. • Filling the gas cylinders should only be done at certified gas filling stations. • Exchange of empty bottles for full should take place only at authorized points. • Copyright Planika Sp. z o.o. www.planikafires.com IG0058#00 31.03.2017... -
Page 9: Usage
These problems can be partially prevented by ensuring adequate ventilation the room in which the device is located. Copyright Planika Sp. z o.o. www.planikafires.com IG0058#00 31.03.2017... -
Page 10: Remote Control
(based on readings from the thermometer located in the remote control). 5.1. Display and buttons Picture 1: Rmote Control Copyright Planika Sp. z o.o. www.planikafires.com IG0058#00 31.03.2017... -
Page 11: Explanation Of Symbols
The remote control can communicate with a device only when it is registered on the device . To do this, you must do the following: Copyright Planika Sp. z o.o. www.planikafires.com IG0058#00... -
Page 12: Battery Exchange
Mount the back cover of the remote control, placing the tabs A and B of the rear cover (Picture 2, Part 3) in • the corresponding notches of the remote control housing (Picture 2, Part 2). Copyright Planika Sp. z o.o. www.planikafires.com IG0058#00... -
Page 13: User Menu
Using the remote control, this feature can be enabled and disabled. Please note, however, that this is only possible when the device is turned on. By default, the Eco Flow is turned off. Copyright Planika Sp. z o.o. www.planikafires.com IG0058#00... -
Page 14: Relay - Control Of Additional Optional Lighting
AC (max 230V AC/0, 8A), mounted for example in the wall of the fireplace housing. The fan can be used to improve air circulation within the housing or to distribute warm air from inside the housing to the other rooms. Copyright Planika Sp. z o.o. www.planikafires.com IG0058#00 31.03.2017... -
Page 15: The Choice Of Control Options
• 6.5. Date and time settings In the Time Menu (Screen 5 User Manual) the following settings are available: Time, • Day of the week, • Time schedule. • Copyright Planika Sp. z o.o. www.planikafires.com IG0058#00 31.03.2017... -
Page 16: Setting The Time Schedule
2 seconds, then again briefly press • the button six times . Start time of the first period flashes. Using the arrow keys on the remote control set the correct • start time of the first period. Copyright Planika Sp. z o.o. www.planikafires.com IG0058#00 31.03.2017... -
Page 17: Installation Menu
Press and hold the button for 10 seconds. The currently selected time display format starts flashing. • Change the format of the time display by pressing the arrow buttons on the remote control • Copyright Planika Sp. z o.o. www.planikafires.com IG0058#00 31.03.2017... -
Page 18: Time Schedule (1Day, 5 + 2, 7 Days Or Manual)
Select the desired number of periods per day by pressing the arrow keys on the remote control • o II – two periods during the day, o IV – four periods during the day, o VI – six periods during the day, Copyright Planika Sp. z o.o. www.planikafires.com IG0058#00 31.03.2017... -
Page 19: User Menu Settings
Copyright Planika Sp. z o.o. www.planikafires.com IG0058#00 31.03.2017... -
Page 20: Ignition Of The Device
From that point on, manual flame height adjustment will be possible. Copyright Planika Sp. z o.o. www.planikafires.com IG0058#00 31.03.2017... -
Page 21: Flame Height Adjustment
Back to the main screen can be done by pressing the button or after waiting five seconds of pressing last button. Copyright Planika Sp. z o.o. www.planikafires.com IG0058#00... -
Page 22: Temporary Disruption Of The Temperature Control
3 minutes from the moment it was switched off. Copyright Planika Sp. z o.o. www.planikafires.com IG0058#00 31.03.2017... -
Page 23: Automatic Control - Time Schedule
After turning the device off, symbol will start flashing, which means that the device can be turned on manually by simultaneously pressing buttons When the device is re-lit, time schedule will be active. Copyright Planika Sp. z o.o. www.planikafires.com IG0058#00 31.03.2017... -
Page 24: Signal Quality
"F", after which you will see a two-digit error code. Full list of error codes is shown in the table below, which presents a summary of any incident that may occur, possible causes and ways to overcome them. Copyright Planika Sp. z o.o. www.planikafires.com IG0058#00... - Page 25 Any obstacles between the Remove any obstacles between the transmitter and the receiver transmitter and receiver may interfere with the signal Power transmission is too weak Check the power transmission (see. Instruction Manual Chapter 9) Copyright Planika Sp. z o.o. www.planikafires.com IG0058#00 31.03.2017...
- Page 26 Damage the coil of the gas valve Replace the coil of the gas valve Throttling of the flame Check the patency of the combustion air system Copyright Planika Sp. z o.o. www.planikafires.com IG0058#00 31.03.2017...
-
Page 27: Maintenance
If visible traces of the suction cup will remain on the glass, they should be removed. Copyright Planika Sp. z o.o. www.planikafires.com IG0058#00... -
Page 28: Assembly Of The Glass
Mount the side pressure strips "A" in the holes in the side frame and by pushing them down, lock in the vertical • position (6). Remove the suction cup. • Copyright Planika Sp. z o.o. www.planikafires.com IG0058#00 31.03.2017... - Page 29 Move the horizontal strip fixing the front glass to the right until it stops and tighten it with screws "A" (5). • Make sure that the screws are not tightened too much, because it can then lead to their breakage or damage • of the thread. Remove the suction cup. • Copyright Planika Sp. z o.o. www.planikafires.com IG0058#00 31.03.2017...
- Page 30 Move the horizontal strip fixing the front glass to the right until it stops and tighten it with screws "A" (4). • Make sure that the screws are not tightened too much, because it can then lead to their breakage or damage • of the thread. Remove the suction cup. • Copyright Planika Sp. z o.o. www.planikafires.com IG0058#00 31.03.2017...
-
Page 31: Dissassembly Of The Glass
Then by making a move down and then towards yourself, you should pull out the front glass and put it in a • safe place on a flat surface (6). Remove the suction cup. • Copyright Planika Sp. z o.o. www.planikafires.com IG0058#00 31.03.2017... - Page 32 Then by making a move down and then towards yourself, you should pull out the front glass and put it in a • safe place on a flat surface (5). Remove the suction cup. • Copyright Planika Sp. z o.o. www.planikafires.com IG0058#00 31.03.2017...
- Page 33 Then by making a move down and then towards yourself, you should pull out the front glass and put it in a • safe place on a flat surface (4). Remove the suction cup. • Copyright Planika Sp. z o.o. www.planikafires.com IG0058#00 31.03.2017...
-
Page 34: Environmental Protection
Do not place the product in unsorted waste and take it to an official collection point for this type of waste. For this purpose, please contact your local authorities for information about the available systems of delivery and acceptance of this type of waste. Copyright Planika Sp. z o.o. www.planikafires.com IG0058#00... -
Page 35: Warranty
13. WARRANTY Planika Sp. z oo grants the Client guarantee of quality for the smooth operation of the goods specified on the sales document. The warranty is determined for a given period from the date of purchase (based on the warranty card together with the receipt of purchase). -
Page 36: Technical Specifications
14. TECHNICAL SPECIFICATIONS TECHNICAL SPECIFICATIONS VALENTINO 1300 F, VALENTINO 1300 LF, Name of the product VALENTINO 1300 FR, VALENTINO 1300 LFR Type of the device To be built-in Combustion Closed combustion chamber Supply and discharge system Concentric Flue System 200/130...
Need help?
Do you have a question about the VALENTINO 1300 F and is the answer not in the manual?
Questions and answers