
Related Manuals for Vimar ELVOX 46316.210


Summary of Contents for Vimar ELVOX 46316.210
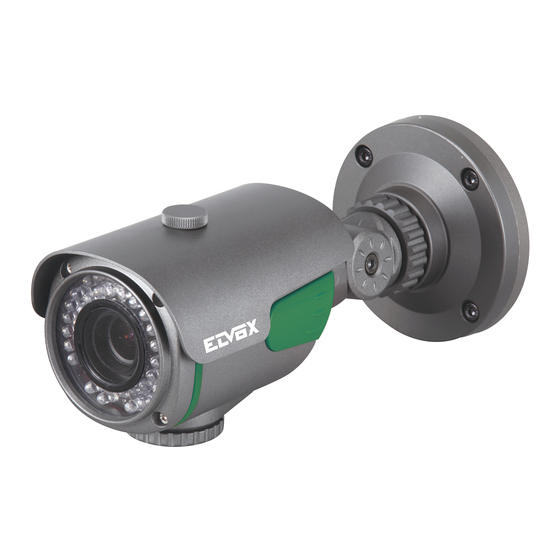
- Page 1 MANUALE UTENTE 46316.210 46312.004 46322.004 46326.210 46332.012 TELECAMERA A COLORI DAY & NIGHT HD-SDI DNR TVCC...
- Page 2 TVCC ATTENZIONE RISCHIO DI SCOSSA ELETTRICA CAUTION NON APRIRE CAUTION RISK OF ELECTRIC SHOCK ATTENZIONE:PER RIDURRE IL RISCHIO DI SCOSSA ELETTRICA RISK OF ELECTRIC SHOCK DO NOT OPEN DO NOT OPEN NON RIMUOVERE IL COPERCHIO(O LA PARTE POSTERIORE). CAUTION:TO REDUCE THE RISK OF ELECTRIC SHOCK CAUTION:TO REDUCE THE RISK OF ELECTRIC SHOCK NESSUNA PARTE RIPARABILE DALL’UTENTE AL L’INTERNO.
-
Page 3: Table Of Contents
TVCC Indice Indice Caratteristiche generali Precauzioni Avvertenze Configurazione del menu ▶ Pulsante di controllo OSD ▶ Menu Set Up (impostazioni) ▶ Configurazione del menu ▶ Lens (obiettivo) ▶ Exposure (esposizione) ▶ Back Light (controluce) ▶ Day & Night ▶ White Bal. (bilanciamento del bianco) ▶... -
Page 4: Caratteristiche Generali
TVCC 3D-DNR Caratteristiche generali DNR(riduzione rumore digitale) Digital Noise 3D-DNR Reduction La tecnologia DNR di queste telecamere, utilizza sia un filtro adattativo 2D per ridurre il 3D-DNR rumore che si crea nella luminosità dell'immagine, sia un filtro adattativo 3D per l'attenuazione del rumore causato dal movimento. -
Page 5: Precauzioni
TVCC Precauzioni Non installare la telecamera in Non installare o utilizzare la telecamera Non installare la telecamera in condizioni di temperatura estreme. in ambienti con valori di umidità elevati. condizioni di luminosità instabile. Non installare o utilizzare la telecamera in Utilizzare la telecamera solo in condizioni di Sbalzi di illuminazione o sfarfallii possono ambienti con valori di umidità... -
Page 6: Avvertenze
TVCC Avvertenze Precauzioni per l'uso ◑ La telecamera deve essere installata solo da personale qualificato ◑ Non contiene parti riparabili dall'utente ◑ Non smontare la telecamera se non per effettuare le regolazioni iniziali ◑ Utilizzare alimentazione regolata a 24 volt c.a. o 12 volt c.c. approvata UL ◑... -
Page 7: Configurazione Del Menu
TVCC Pulsante di controllo OSD 1. Il pulsante di controllo OSD del tipo A, B e C può essere utilizzato quando è necessario il controllo OSD. 2. Il tipo D è un'opzione extra (telecomando a filo) Tipo B Tipo A (Opzione) Tipo D Tipo C... -
Page 8: Menu Set Up (Impostazioni)
TVCC Come impostare il menu della telecamera Menu Set Up (impostazioni) ● MENU INDOOR (Modo interno) MODE OUTDOOR (Modo esterno) LENS RETURN (Obiettivo) MANUAL 0~20 Livello selezionabile BRIGHTNESS (Luminosità) AUTO SHUTTER (Otturatore) 1/25,1/30,1/60,1/50, 1/120, 1/240, 1/500, 1/1000, 1/2000, 1/4000, Manuale 1/8000,1/16000, 1/30000, 1/60000 EXPOSURE x2 , x3, x4, x8, x16, x32, x64 Livello selezionabile... - Page 9 TVCC Come impostare il menu della telecamera Menu Set Up (impostazioni) ● 0 ~ 20 Livello selezionabile SENSIBILITÀ 0 ~ 60 Livello selezionabile DET H - POS DET V - POS 0 ~ 40 Livello selezionabile 0 ~ 60 Livello selezionabile DET H - SIZE MOTION 0 ~ 40 Livello selezionabile...
-
Page 10: Configurazione Del Menu
TVCC Configurazione del menu 1. Premere il tasto SET (impostazione) per accedere alla modalità menu. 2. Selezionare la funzione desiderata utilizzando la direzione SU/GIÙ (/\ \/) del tasto SET. Se la freccia del tasto ENTER ( ) è visualizzata accanto alla funzione, premere il tasto SET per accedere al menu di funzione. -
Page 11: Exposure (Esposizione)
TVCC Se si sceglie DC, si potrà decidere di utilizzare la telecamera al chiuso o all'aperto. Il controllo dell'obiettivo e dell'otturatore è ottimizzato automaticamente in base alla situazione del momento. - MODE [INDOOR, OUTDOOR]: Modo interno, esterno Se si sceglie INDOOR, Interno il diaframma e l'otturatore sono impostati su valori fissi. Ciò... - Page 12 TVCC EXPOSURE BRIGHTNESS IIIIIIIIIIIIIIIIIII SHUTTER AUTO SENS-UP IIIIIIIIIIIIIIIIIII RETURN BRIGHTNESS (Luminosità) [0 ~20]: Questa funzione è utilizzata per regolare la luminosità dell'immagine della telecamera. SHUTTER [1/25, 1/30, 1/60, 1/50, 1/120, 1/240, 1/500, 1/1000, 1/2000, 1/4000, 1/8000, 1/16000, 1/30000, 1/60000]: È possibile selezionare una delle 14 opzioni da 1/25 a 1/60000K per l'otturatore elettronico fisso ad alta velocità, che è...
-
Page 13: Backlight (Controluce)
TVCC Backlight (controluce) Per superare situazioni di luce difficili, le telecamere HD-SDI offrono diverse opzioni per migliorare la qualità dell'immagine. MENU LENS EXPOSURE BACKLIGHT DAY / NIGHT AUTO WHITE BAL MIDDLE IMAGE MOTION SYSTEM EXIT HLC(Compensazione della luce forte): Questa funzione viene utilizzata allo scopo di sopprimere o mascherare una forte sorgente luminosa (ad esempio fari di autoveicoli di notte) in modo che altri soggetti possano essere visti in maggiore dettaglio. - Page 14 TVCC BLC (Compensazione controluce): Questa funzione viene utilizzata per controbilanciare l'immagine dello schermo aumentando la luminosità in modo che un soggetto che appare scuro a causa di una forte controluce può essere visualizzato in modo più dettagliato. Se si seleziona BLC, compare un sottomenu da cui è...
-
Page 15: Day & Night
TVCC NOTA * La funzione WDR potrebbe portare ad un framerate ridotto e ad effetti "fantasma" in zone con sfondo molto luminoso. Day / Night: (Giorno /Notte) Qui è possibile scegliere diverse impostazioni per il controllo della funzione DAY&NIGHT. MENU LENS EXPOSURE BACKLIGHT... - Page 16 TVCC - ANTI-SAT[0-20]: Quando si passa a B/W, la saturazione si verifica in condizioni specifiche a seconda della luminosità. In questa situazione, è possibile evitare la saturazione definendo il livello di anti-SAT. - AGC THRES [0-20]: Attivare l'alternanza giorno/notte a seconda del livello di AGC utilizzato per aumentare la luminosità...
- Page 17 TVCC ATW (rilevamento automatico del bilanciamento del bianco): Con la funzione di rilevamento automatico del bilanciamento del bianco, il bilanciamento del bianco in un luogo viene automaticamente regolato mentre il colore della temperatura cambia. La modalità ATW è adatta ad ambienti con sorgenti luminose che hanno una temperatura di colore compresa nell'intervallo 1800 ~ 10500K.
-
Page 18: Dnr(Riduzione Rumore Digitale)
TVCC DNR(riduzione rumore digitale) Questa funzione è utilizzata per migliorare la qualità dell'immagine filtrando il rumore che viene generato in condizioni di scarsa luminosità brillante. È possibile impostare diversi livelli qui. MENU LENS EXPOSURE BACKLIGHT DAY / NIGHT AUTO WHITE BAL MIDDLE IMAGE MOTION... - Page 19 TVCC COLOR GAIN [0 ~ 20]: Controllare la saturazione del colore dell'immagine video. MIRROR [ON, OFF]: Capovolge l'immagine orizzontalmente sullo schermo. FLIP [ON, OFF]: Ribalta l'immagine verticalmente sullo schermo. D-ZOOM [1.0x~8.0x]: È possibile utilizzare lo zoom digitale lineare bi-cubico fino a x8. D-WDR [LOW, MIDDLE, HIGH, OFF]: La funzione WDR (ampia gamma dinamica) corregge la luce in eccesso all'interno del fotogramma per produrre un'immagine utilizzabile.
- Page 20 TVCC PRIVACY [ON, OFF]: Maschera le aree che si desiderano nascondere sullo schermo. La telecamera può attivare fino a 32 maschere privacy. Alternare ON e OFF per attivare o disattivare questa funzione. PRIVACY ZONE NUM ZONE DISP H-POS V-POS H-SIZE V-SIZE Y LEVEL IIIIIIIIIIIIIIIIIII...
-
Page 21: Motion (Movimento)
TVCC Motion (movimento) Questa funzione viene utilizzata per rilevare oggetti in movimento nell'area monitorata. Quando si sceglie ON, compare il seguente sottomenu, da cui è possibile regolare le impostazioni per la funzione MOVIMENTO. MENU LENS EXPOSURE BACKLIGHT DAY / NIGHT AUTO WHITE BAL MIDDLE... -
Page 22: System (Sistema)
TVCC System (sistema) Selezionando, apparirà il seguente sottomenu. MENU LENS EXPOSURE BACKLIGHT DAY / NIGHT AUTO WHITE BAL MIDDLE IMAGE MOTION SYSTEM EXIT COLOR SPACE [COLOR1~3]: Selezionare diverse impostazioni di colore per un'immagine più calda o più fredda. FRAME RATE [25 FPS, 30 FPS]: Selezionare il frame rate. CVBS [PAL, NTSC]: Selezionare il formato video che corrisponde al sistema TV del momento RESET [ON↓]: Tutte le impostazioni sono ripristinate ai valori di fabbrica. -
Page 23: Risoluzione Dei Problemi
TVCC Risoluzione dei problemi PROBLEMA CAUSA PROBABILE ☞ Controllare il cavo di alimentazione, l'uscita di alimentazione e il Assenza di immagini collegamento video tra la telecamera e il monitor. nel monitor. ☞ L'obiettivo della telecamera o il vetro dell'obiettivo sono sporchi? Pulire l'obiettivo / il vetro con un panno morbido e pulito. - Page 24 Via Pontarola, 14/a 35011 Campodarsego PD - Italia Tel. +39 049 920 2511 Fax +39 049 920 2603 S6I.TVC.001 RL. 00 13 03 www.elvox.com ELVOX - Campodarsego - Italia...
- Page 25 USER MANUAL 46316.210 46312.004 46322.004 46326.210 46332.012 HD-SDI DNR DAY & NIGHT COLOR CAMERA TVCC...
- Page 26 TVCC CAUTION RISK OF ELECTRIC SHOCK CAUTION DO NOT OPEN CAUTION RISK OF ELECTRIC SHOCK CAUTION:TO REDUCE THE RISK OF ELECTRIC SHOCK RISK OF ELECTRIC SHOCK DO NOT OPEN DO NOT OPEN DO NOT REMOVE COVER(OR BACK). CAUTION:TO REDUCE THE RISK OF ELECTRIC SHOCK NO USER-SERVICEABLE PARTS INSIDE.
-
Page 27: Contents
TVCC Contents Contents General Features Precautions Sefety Instructions Menu Set Up ▶ OSD Control Button ▶ Set Up Menu ▶ Menu Set Up ▶ Lens ▶ Exposure ▶ Back Light ▶ Day & Night ▶ White Bal. ▶ ▶ Image ▶... -
Page 28: General Features
TVCC 3D-DNR General Features 3D-DNR 3D-DNR DNR(Digital Noise Reduction) Digital Noise Reduction HDPRO DNR technology utilizes both an adaptive 2D filter reducing noise in the brightness of the image and an adaptive 3D filter reducing noise caused by 3D-DNR Digital Digital movement. -
Page 29: Precautions
TVCC Precautions Do not install the camera in extreme Do not install or use the camera in an Do not install the camera under temperature conditions. environment where the humidity is high. unstable lighting conditions. Do not install or use the camera in an Only use the camera under conditions Severe lighting change or flicker can environment where the humidity is high. -
Page 30: Sefety Instructions
TVCC Sefety Instructions Precautions for use ◑ This camera should be installed by qualified personnel only ◑ There are no user serviceable parts inside ◑ Do not disassemble this camera other than to make initial adjustments ◑ Use a UL approved regulated 24 volt AC or 12 volt DC power supply ◑... -
Page 31: Menu Set Up
TVCC OSD Control Button 1. Type A, Type B, Type C of OSD button could be used when it needs to OSD control. 2. Type D is extra Option (wired Remote controller) -
Page 32: Setup Menu
TVCC How to Set Up the camera menu Setup Menu ● MENU INDOOR MODE OUTDOOR LENS RETURN MANUAL 0~20 Level Selectable BRIGHTNESS AUTO SHUTTER 1/25,1/30,1/60,1/50, 1/120, 1/240, 1/500, 1/1000, 1/2000, 1/4000, Manual 1/8000,1/16000, 1/30000, 1/60000 EXPOSURE x2 , x3, x4, x8, x16, x32, x64 Level Selectable SENSE-UP 0 ~ 20 Level Selectable RETURN... - Page 33 TVCC How to Set Up the camera menu Setup Menu ● 0 ~ 20 Level Selectable SENSITIVITY DET H - POS 0 ~ 60 Level Selectable 0 ~ 40 Level Selectable DET V - POS 0 ~ 60 Level Selectable DET H - SIZE 0 ~ 40 Level Selectable MOTION...
-
Page 34: Menu Set Up
TVCC Menu Set Up 1. Press the SET key to access the menu mode. 2. Select the desired feature by using the UP/DOWN direction (/\ \/) of the SET key. If an ENTER arrow ( ) is displayed next to the feature, press the SET key to access the feature's menu. -
Page 35: Exposure
TVCC If you choose DC, you will be able to select if the camera is used indoors or outdoors. The lens and shutter control will be automatically optimised according the present situation. - MODE [INDOOR, OUTDOOR] : If you choose INDOOR, the Iris and the shutter are set to fixed values. This will prevent a “rolling effect”... - Page 36 TVCC EXPOSURE BRIGHTNESS IIIIIIIIIIIIIIIIIII SHUTTER AUTO SENS-UP IIIIIIIIIIIIIIIIIII RETURN BRIGHTNESS [0 ~20] : This function is used to adjust the brightness of the camera picture. SHUTTER [1/25, 1/30, 1/60, 1/50, 1/120, 1/240, 1/500, 1/1000, 1/2000, 1/4000, 1/8000, 1/16000, 1/30000, 1/60000] : You can select one of 14 options from 1/25 to 1/60000K for the fixed high speed electronic shutter, which is mostly used for imaging a fast moving object.
-
Page 37: Backlight
TVCC Backlight To overcome difficult light situations, the HD-SDI cameras feature different options to improve the image quality. MENU LENS EXPOSURE BACKLIGHT DAY / NIGHT AUTO WHITE BAL MIDDLE IMAGE MOTION SYSTEM EXIT HLC (High Light Compensation): This function is used to surpress or mask a strong light source (for example, headlights of cars during night-time) so that other subjects can be seen in more detail. - Page 38 TVCC BLC (Back Light Compensation): This function is used to counterbalance the screen image by increasing the brightness so that a subject which appears dark due to a strong backlight can be displayed in more detail. If you select BLC, a submenu appears where you can make finer adjustments. - H-POS/ V-POS/ H-SIZE/ V-SIZE: Define the position and size of the area of interest by changing the position &...
-
Page 39: Day & Night
TVCC NOTE * The WDR function might lead to a reduced framerate and “ghost” effects in areas with very bright background. Day / Night Here you can choose different settings to control the DAY&NIGHT function. MENU LENS EXPOSURE BACKLIGHT DAY / NIGHT AUTO WHITE BAL MIDDLE... -
Page 40: White Bal
TVCC - ANTI-SAT[0-20] : When switching B/W, saturation occurs in specific condition depending on brightness. In this situation, you can prevent the saturation by defining the level of ANTI-SAT. - AGC THRES [0-20] : Execute the Day/Night switch depending on the AGC level that is used to increase the brightness of the image. - Page 41 TVCC ATW (Auto Tracking White Balance): With the Auto Tracking White Balance function, the white balance in a scene will be automatically adjusted while temperature colour is changing. The ATW Mode is suitable for environments with a light source having a colour temperature in the range roughly from 1800 ~ 10500K.
-
Page 42: Dnr
TVCC DNR(Digital Noise Reduction) This function is used to improve the picture quality by filtering the noise which is generated under low bright light conditions. You can set different levels here. MENU LENS EXPOSURE BACKLIGHT DAY / NIGHT AUTO WHITE BAL MIDDLE IMAGE MOTION... - Page 43 TVCC COLOR GAIN [0 ~ 20] : Kontrollieren Sie die Farbsättigung des Video-Bildes. MIRROR [ON, OFF] : Mirrors the image horizontally on the screen. FLIP [ON, OFF] : Flips the image vertically on the screen. D-ZOOM [1.0x~8.0x] : You can use the up to x8 bi-cubic linear digital zoom. D-WDR [LOW, MIDDLE, HIGH, OFF] : The WDR (Wide Dynamic Range) function works to correct excessive light within the frame to produce a usable image.
- Page 44 TVCC PRIVACY [ON, OFF] : Masks areas that you want to hide on the screen. The camera can activate up to 32 privacy masks. Switch between ON and OFF to activate or deactivate this function. PRIVACY ZONE NUM ZONE DISP H-POS V-POS H-SIZE...
- Page 45 TVCC Motion This function is used to detect moving objects in the monitored area. When choosing ON, the following submenu will appear where you can adjust the settings for the MOTION function. MENU LENS EXPOSURE BACKLIGHT DAY / NIGHT AUTO WHITE BAL MIDDLE IMAGE...
- Page 46 TVCC System When selecting, the following submenu will appear. MENU LENS EXPOSURE BACKLIGHT DAY / NIGHT AUTO WHITE BAL MIDDLE IMAGE MOTION SYSTEM EXIT COLOR SPACE [COLOR1~3] : Select different colour settings for a warmer or a colder image. FRAME RATE [25 FPS, 30 FPS] : Choose a frame rate. CVBS [PAL, NTSC] : Select the video format that matches the present TV system RESET [ON] : All settings will be restored to factory default.
-
Page 47: Trouble Shooting
TVCC Trouble Shooting PROBLEM POSSIBLE CAUSE ☞ Check the power cable, power supply output and video Northing appears on connection between the camera and monitor. the screen. ☞ Are the camera lens or the lens glass dirty? Clean the lens / glass with a soft clean cloth. ☞ Adjust the monitor controls, as required. - Page 48 Via Pontarola, 14/a 35011 Campodarsego PD - Italy Tel. +39 049 920 2511 Fax +39 049 920 2603 S6I.TVC.001 RL. 00 13 03 www.elvox.com ELVOX - Campodarsego - Italy...
Need help?
Do you have a question about the ELVOX 46316.210 and is the answer not in the manual?
Questions and answers