
Related Manuals for ORTAL Wilderness 44H Series


Summary of Contents for ORTAL Wilderness 44H Series
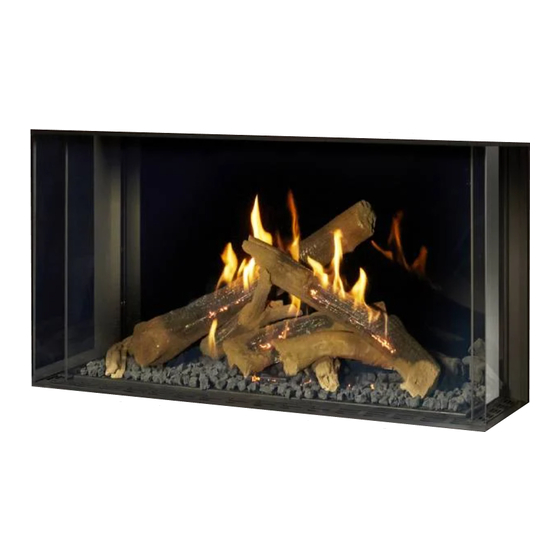
- Page 1 Installation and Operation Manual Wilderness 44H Series Wilderness 44H Series Fireplaces: Wilderness 44H Front Wilderness 44H RS Wilderness 44H LS Wilderness 44H TS Ortal Installation Manual: Wilderness 44H Series (V1)
-
Page 2: General
WARNING: MATERIAL USAGE All materials and objects used to carry out the installation must be certified/approved or specified by Ortal and are suitable for use. Do NOT install the system with different materials or objects than those approved for installation by Ortal. -
Page 3: Table Of Contents
Table of Contents General Safety Information and Warnings Product Information Certification Models Rating Label Zero-Clearance Stand-Offs Installation Prior to Installation Locate the Fireplace Fireplace Installation First Trip to Site: Planning Second Trip to Site: Installation Third Trip to Site: Startup Post-Installation Initial Burning Period Final Inspection Procedure... -
Page 4: Product Information
Certification Wilderness 44H series fireplaces have been tested and approved by CSA Group for safety and efficiency for use with Natural Gas (NG) and Propane (LP) only, and NOT for use with solid fuels. CSA Group is approved by the American National Standards Institute (ANSI) as an Accredited Standards Developer. -
Page 5: Rating Label
Rating Label The fireplace rating label is found on a metal plate separate included with the fireplace. DEALERS/INSTALLERS: You MUST leave the fireplace’s rating label with the fireplace in an area easily accessible by the owner (typically near the access panel, if available). You must instruct the owner before handing over the fireplace where this label can be found. OWNERS: Make sure the installer leaves your fireplace’s rating label in an area that is easily accessible for you. -
Page 6: Installation
Installation Prior to Installation Locate the Fireplace Keep the following factors in mind when selecting a location for the fireplace: Fireplace clearance requirements (review “General Clearances” sections). Heat release and air intake requirements (review “Heat Release” and “Air Intake” sections). ... -
Page 7: Third Trip To Site: Startup
In addition, the installer must review and explain the following to the owner: Safety warnings Fireplace operation Warranty requirements Maintenance requirements Glass is hot during and after operation If any questions or concerns arise, owner must contact the local Ortal dealer/installer for support. ... -
Page 8: Building Around The Fireplace
Building Around the Fireplace Building Checklist The following building checklist is a quick reference for a typical Ortal Wilderness 44H Series fireplace installation. This list is not exhaustive and does not supplement thorough review of the installation manual. Fireplace Location: Ensure the location allows for min. 40” clearance from viewing area to furniture and other combustibles. -
Page 9: Framing
Framing Fireplace chase may be framed with either combustible (typically wood studs) or non-combustible framing (typically metal studs). Any framing within 18” from the top of the fireplace glass (viewing area) must be non-combustible. The framing of the fireplace chase must be designed to carry the entire weight of the wall and finish material. Surrounding material must not transfer weight to the fireplace or be connected in any way to the fireplace, with the exception of 5/8 Type X drywall (or its equivalent). - Page 10 Wilderness 44H Corner (RS/LS) Framing Model Dimension A Dimension B Dimension C Dimension D Refer to pipe manufacturer’s Wilderness 44H RS/LS 55-9/16” 51-15/16” 23-1/4” firestop dimensions Wilderness 44H Three Sided Framing Model Dimension A Dimension B Dimension C Dimension D Refer to pipe manufacturer’s firestop Wilderness 44H TS 55-9/16”...
-
Page 11: 5/8" Type X Drywall Requirements
5/8” Type X Drywall Requirements Framing must be covered with 5/8” Type X Drywall (or equivalent). The chase interior does not require a layer of 5/8” Type X Drywall (or equivalent). The chase interior does not require a non-combustible layer. NOTE: 5/8”... -
Page 12: General Clearances
General Clearances Non-Combustible Zone Furniture and other combustibles are not permitted within the non-combustible zone. The non-combustible zone is an area that extends 40 inches perpendicular from the fireplace glass. Combustibles are permitted below and around the non-combustible zone. Non-Combustible Zone Framing Clearance Maintain a minimum ¼... - Page 13 Clearance to a Side Wall The following requirements apply to the front glass of the fireplace. It does not apply to the side glass of a Corner or Three Sided fireplace. Side Wall > 12 inches Side Wall ≤ 12 inches Top View Building Material Top View...
-
Page 14: Heat Release
Heat Release A heat release is an opening in the fireplace chase that allows the heat inside the chase to passively circulate into an interior room. This heat is generated convectively as the fireplace heats up. It is separate from exhaust heat produced at the combustion chamber of the fireplace. - Page 15 Vertical Heat Release: Split Front Vertical Heat Release: Full Side The heat release is oriented vertically and split between the two sides The heat release is oriented vertically. Entire heat release is on of the chase. one side of the fireplace chase. Split Front Vertical Heat Release Full Vertical Heat Release on One Side Sprinkler Clearance to Heat Release...
-
Page 16: Air Intake
Air Intake When installing a fireplace with a double glass heat barrier, it is essential to maintain cool air flow between the double glass panels. For this purpose, an opening must be provided toward the bottom of the wall to allow the double glass fans to circulate room air through the glass panels and up into the chase. - Page 17 Air Intake for a Platform NOTE: Please refer to the “Platform” section for details on platform construction.
-
Page 18: Mounting A Tv/Artwork
The decision to install a television above an Ortal fireplace is up to the discretion of the owner. TV and art manufacturers may specify that their product should not be installed on, near or above a heat source. Ortal will not be held liable for any adverse effects on a TV, artwork or other equipment located near the Ortal fireplace. - Page 19 Recessed TV/Artwork The top stand-off on the fireplace is composed of two metal panels. The top panel is attached to the bottom panel with a series of bolts. This top panel can be unbolted and removed for recessed TV installations. The first 18 inches above the top of the fireplace viewing area must be framed with non-combustible framing.
-
Page 20: Access Panel
Access Panel An access panel is not required (see note below for exception), but it is highly recommended. It allows for access to the fireplace’s gas and electrical components for servicing. NOTE: An access panel at the fireplace is required for fireplaces with a power vent to allow access to the power vent control box for servicing. -
Page 21: Recessed Ledge
Recessed Ledge A ledge over the top of a fireplace that is less than 24 inches from the top of the fireplace viewing area must maintain a minimum of 12 inches from the top of the viewing area to the bottom of the building material. Entire structure must be non- combustible (framing and finish). -
Page 22: Structural Weight Support
The following drawing shows a recommended approach to this type of installation. Please note that these drawings are not to scale. All fireplace drawings with correct dimensions are available on the Ortal website. -
Page 23: Step-By-Step Chase Construction
Step-by-Step Chase Construction The following checklist is a simplified overview of typical chase construction for an Ortal Wilderness 44H Series fireplace installation. This list is not exhaustive and does not supplement thorough review of the installation manual. Step 1 BUILD BACK AND SIDE WALLS Frame the back and side walls according to framing requirements. -
Page 24: Finishing
Finishing The following diagrams show various finish applications. IMPORTANT NOTES: All recessed installations must comply with applicable maximum overhang limit and side wall clearances. See “Maximum Overhang Depth” and “Clearance to a Side Wall” sections for details. No material is permitted to extend past the ½” metal lip surrounding the fireplace viewing area. This area must be unobstructed ... - Page 25 Recessed Installation The finish must maintain at least a 1/8” clearance to the fireplace. MANUFACTURED STONE: A minimum 2-inch recess is suggested. Consult stone manufacturer for clearance requirements. NOTE: 5/8” DensGlass® Fireguard® Sheathing is an approved 5/8” Type X Drywall equivalent. This may be necessary for use with heavier finishes.
-
Page 26: Combustible Finish
Combustible Finish Flush Installation... - Page 27 Recessed Installation...
-
Page 28: Combustible Floor/Hearth
Combustible Floor/Hearth WARNING: Wood floor/hearth extension may dry out, crack, warp or become discolored over time. Consult with floor manufacturer for required clearances to a heat source. -
Page 29: Venting
“Vent Configuration Diagrams” section to determine if your fireplace needs a power vent. NOTE: See the Ortal Power Vent Manual for more details on power venting. WARNING: Do not combine vent components from different vent manufacturers. Please follow the manufacturer’s instructions for vent system installation. -
Page 30: Vent Clearances
They do not count in the offset total. NOTE: If the initial vertical vent rise off the top of the fireplace does not meet the V minimum, consider an Ortal Power Vent System, which can allow for any initial vertical rise amount. See the Ortal Power Vent Manual for details. -
Page 31: Vent Configuration Diagrams
The following sections provide information for calculating vent configuration distances. For vent configurations that exceed these maximums, consider Ortal’s Power Vent System. See the Ortal Power Vent Manual for details. NOTE: It is not required to maintain ¼” of rise per foot of venting. -
Page 32: Vent Restrictor Sizing Guidelines
Vent Restrictor Sizing Guidelines SCENARIO A The vent configuration has two vertical 45˚offsets. No additional length for the (H) calculation for the restrictor plate size is needed. For example: Total height of duct work = 6 feet (V) Length between the center of the two 45˚ elbows = (B) = 3 feet The (H) calculation is (H) = (B) so the restrictor plate size is 1.97”, per the table. -
Page 33: Restrictors And Vent Configuration
Restrictors and Vent Configuration The information in this section will help you calculate the correct restrictor selection for your vent configuration. The table below show the restrictor required for a specific rise to run vent configuration. Any venting pathway that does not appear in the tables requires approval from the manufacturer. -
Page 34: Vent Termination
Vent Termination Horizontal Termination Clearance Diagram... -
Page 35: Vertical Termination Clearance Diagram
CAUTION NOTE: If exterior walls are finished with vinyl siding, it is required that a vinyl protector kit be installed. Vertical Termination Clearance Diagram NOTE: This chart does not apply to a chimney shroud application. See the “Chimney Shroud” section on the next page for more information. -
Page 36: Chimney Shroud
Chimney Shroud Keep a minimum 6-inch clearance around the diameter of the cap’s side edge and extending above and below the cap. Vent Maintenance Regular inspection of the vent system by a qualified service technician is recommended every six months. The following maintenance routing is recommended: Inspect for excessive condensation, e.g., water droplets forming in the inner lining, and subsequently dripping from the joints. -
Page 37: Gas
Gas conversion (NG to LP or LP to NG) can be done in the field. Gas conversion must be performed only by technicians who have specific authorization by Ortal to change these components. The conversion kit must be supplied by Ortal. Using parts from other manufacturers or having an unauthorized party performing the conversion will void your fireplace’s warranty. -
Page 38: Gas And Electrical Components
Pilot Base Connection fitting 4mm One-piece Thermocouple NG Fitting for main line inlet to gas valve GV60 Thermocouple LPG The manufacturer of Ortal’s gas and electrical components is Mertik Maxitrol. For information on these components, please visit the manufacturer’s website: www.mertikmaxitrol.com... - Page 39 Electrical WARNING: Disconnect the power supply before servicing any electrical components. Electrical Requirements The fireplace is supplied with a 120V AC Adapter to connect the fireplace electrical receiver unit to a single gang outlet (120V, 15 amp, 60Hz). AC Adapter is required for operation. Outlet must be installed in the location where the gas and electrical components will be placed, which must be to the side or back of the fireplace within 36 inches of the pilot (see diagram in “Routing the Gas Line”...
- Page 40 Wiring Diagrams The following diagrams show the electrical wiring required for different feature combinations. Wiring Diagram: Screen Fireplace with Interior Lighting...
- Page 41 Wiring Diagram: Screen Fireplace with Interior Lighting and Ortal Power Vent...
- Page 42 Wiring Diagram: Double Glass Fireplace with Interior Lighting...
- Page 43 Wiring Diagram: Double Glass Fireplace with Interior Lighting and Ortal Power Vent...
- Page 44 Carbon Monoxide Detector Wiring Diagrams CO Kit Wiring Diagram: Screen Fireplace...
- Page 45 CO Kit Wiring Diagram: Double Glass Fireplace...
- Page 46 Log placement of the Driftwood Log Set is crucial for optimal fireplace operation and safety purposes. Logs must be arranged as depicted in this manual. No other arrangement is permitted. No other interior design media options are permitted for the Wilderness 44H series fireplaces.
- Page 47 Log Placement Logs must be arranged as detailed in the following pages. Alternative log arrangement will affect fireplace safety, operation, and performance. Handle logs gently to avoid paint damage. Log placement is the same for NG and LP. Items supplied with Driftwood Log set STEP 1 Use your fingers to separate the nickel strands (supplied 2x20”...
- Page 48 STEP 2 Place nickel strands on top of the burner holes. Arrange logs as shown in the following pictures. STEP 3 Step 3 Top View...
- Page 49 STEP 4 Step 4 Top View The base of log #3 can be adjusted to fit the position shown in pictures above (see “Log Base Position Adjustment” section for details). STEP 5...
- Page 50 STEP 6 Step 6 Top View STEP 7 Step 7 Top View The base of log # 7 can be adjusted to fit the position shown in the pictures above (see “Log Base Position Adjustment” section for details).
- Page 51 STEP 8 Step 8 Top View The base of log # 6 can be adjusted to fit the position shown in the pictures above (see “Log Base Position Adjustment” section for details). STEP 9 Step 9 Top View...
- Page 52 STEP 10 Step 10 Top View STEP 11 (Optional) Add pebbles. Step 11 Top View...
- Page 53 Log Base Position Adjustment...
- Page 54 Adjustment Instructions NOTE: The following images are for illustrative purposes only.
- Page 57 Log Base Aeration...
- Page 58 Operation WARNING – Read these instructions carefully before lighting the fireplace. IMPORTANT NOTES: Wiring of valve and receiver must be completed before starting ignition. Failure to do so could damage the electronics. If operating the fireplace without an AC adapter, battery replacement is recommended at the beginning of each heating season. ...
- Page 59 Turning the Fireplace Off 1. Press the button to turn the fireplace off. NOTE: The fireplace may be turned on again after the OFF icon stops flashing. Flame Height Adjustment 1. To increase flame height, press and hold the button to desired flame height. 2.
- Page 60 Compatible with IEEE 802.11 b/g/n Fireplace Maintenance General Maintenance All servicing, maintenance, interior cleaning and handling of the fireplace, parts and glass must be performed by an authorized Ortal dealer service technician only. Servicing Turn off the gas and electricity BEFORE servicing the fireplace.
- Page 61 Submerged Parts Do not use the fireplace if any part has been under water, or if you suspect that it may have been under water. The Ortal dealer service technician must inspect and, if necessary, replace any parts of the control system and any gas controls which have been under water.
- Page 63 © Ortal 2020 Version 1, October 2020 SKU: KPMANWILD44V1 Ortal USA 8421 Canoga Ave Canoga Park, CA 91304 T: (818) 238-7000 | F: (818) 678-0541 info@ortalheat.com | www.ortalheat.com...
Need help?
Do you have a question about the Wilderness 44H Series and is the answer not in the manual?
Questions and answers