
Related Manuals for Thermann 26NG50C


Summary of Contents for Thermann 26NG50C
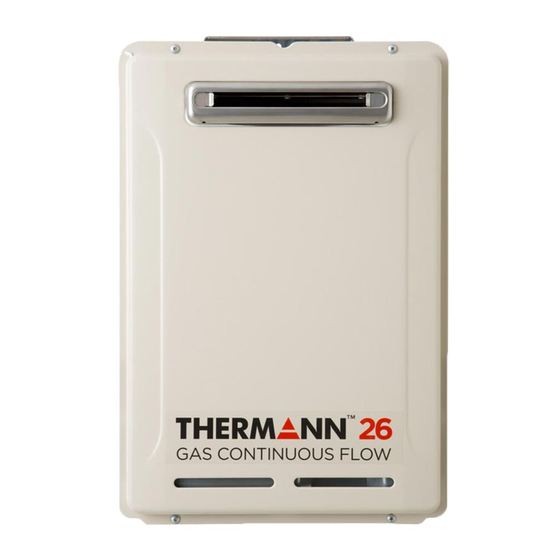
- Page 1 SERVICE MANUAL Model:26NG50C/26LP50C 26NG60C/26LP60C GAS CONTINUOUS FLOW WATER HEATERS (Residential Outdoor Unit) TO BE USED BY A LICENSED PLUMBER ONLY...
-
Page 2: Table Of Contents
Table of Contents 1. General Outline of Appliance 1 - 1 Specifications ..........................3 1 - 2 Performance ..........................4 1 - 3 General Construction (Parts Names) ..................5 1 - 4 Main Component Structures ....................... 6 1 ... -
Page 3: General Outline Of Appliance
1. General Outline of Appliance 1-1 Specifications MODEL Nominal hourly gas consumption by MJ/h proportional electronic gas control Minimum gas supply pressure (Natural Gas) 1.13 Maximum gas supply pressure (Natural Gas) kPa Minimum gas supply pressure (Propane) 2.75 Maximum gas supply pressure (Propane) 0.84 Test point pressure High (Natural Gas) 0.16 Test point pressure Low (Natural Gas) 1.27 Test point pressure High (Propane) 0.21 Test point pressure Low (Propane) Water heating capacity raised 40°C L/min 16.25 Minimum working pressure Maximum working pressure 1200 Gas injectors diameter (Natural Gas) 1.00 / 1.50 Gas injectors diameter (Propane) 0.7 / 1.0 Input voltage single phase 50Hz Maximum output current 0.66 Inlet gas connection male thread R3/4” (20mm) Cold water connection male thread R3/4” (20mm) -
Page 4: Performance
1-2 Performance Performance-Capacity characteristic curves. 22.0(Maximum) Inlet water temperature 15 C 25 C 2.2(Minimum) Outlet water temperature [ C] - 4 -... -
Page 5: General Construction (Parts Names)
1-3 General Construction (Parts Names) 10 12 d 10 PARTS NAME PARTS NAME PCB(Natural Gas) Fan Motor Temperature Sensor PCB(Propane) Manifold Assy(Natural Gas) 10 Anti-Frost Heaters Manifold Assy(Propane) 11 Ignitor 12 Pressure Relief Valve Gas Control Valve Electrode 13 Water Flow Control Valve(with Sensor) Flame Rod 14 Water Filter 15 Ambient Temperature Sensor Heat Exchanger Assy Primary Heat Exchanger Assy 16 Neutralizer Assy Secondary Heat Exchanger Assy Neutralizer Anti-Frost Heater for Neutralizer Over Heat Thermostat... -
Page 6: Main Component Structures
1-4 Main Component Structures 1. Gas Control Valve • Feeds the necessary amount of gas to heat water to a set temperature, based on the amount of water flowing in through the inlet measured by the Water Flow Sensor and the water temperature calculation. Gas Valve 1 OUT1 OUT2 11DC0697 Main Gas Valve LP/NG 4D00001 Gas Control Valve Filter Gas Valve 2 Gas Valve 1 (No.2) (No.1) Main Gas Valve (No.0) 2. Water Flow Control Valve with Sensor * M easures the water flow as its rotor (bladed wheel) spins with the passing water. The rotation of the rotor is detected by the sensor rotor (blade equipped with a magnet) of the wheel and the Hall element which calculates the water quantity. - Page 7 3. Combustion Control of Rich and Lean Burners 1) Ignition start After the Main Gas Valve, Gas Valve 1, Gas Valve 2 open respectively as required, the Gas Control Valve, being held at the slow ignition position (with gas supply at a constant rate), operates to ignite Burners. 2) During combustion Depending on the required heating capacity, each Gas Valve opens or closes. The combinations are below, Gas valve 1&2&3 open Higher 1&2 Lower Electrode 2burners 5burners 10burners Flame Sensor Gas Valve 2 Gas Valve 3 Fan Motor Gas Valve 1 Gas Control Valve Main Gas Valve - 7 -...
-
Page 8: Main Safety Devices
1-5 Main Safety Devices 1. Water Flow Sensor (Boil-dry protection) When the Water Flow Sensor detects the flow rate is set for starting ignition (ignition water flow) or higher, the water heater starts operation. Ignition water flow : 2.7 L/min. Extinction water flow : 2.2 L/min. 2. Flame Sensor (Flame failure detection) Electric signals are transmitted to the flame detection circuit to confirm the normal combustion when the Flame Sensor detects the rectification of normal combustion flame. Therefore, if the combustion of the Burners is not normal, the signals are not sent via the Flame Sensor. The gas control assemblies are closed without the signals and the error code "111" or "121" is displayed on the remote controllers. 3. Thermal Fuse (Over-temperature protection system) The Thermal Fuse is placed around the Primary Heat Exchanger Assembly. If the ambient temperature inside the water heater becomes extremely high, the fuse will melt down to break the power circuit. In such a case, as no power is supplied to the gas control assemblies, the gas supply is stopped and the combustion is stopped. (The system is activated to blow the fuse at 169°C.) 4. Over Heat Thermostat (residual) Even if the Primary Heat Exchanger Assembly is over heated by no-water combustion, every gas path is closed to avoid risks. At this time, the error code "141" is displayed on the remote controllers. (The switch is provided with a auto-restoration function and turns OFF at 100°C.) 5. Fan Revolution Detection Device (Hall IC) The device detects the fan revolution speed to control the air supply necessary for normal combustion. If the fan revolution is out of the preset standard range, the gas control assemblies are closed to stop the combustion before combustion failure occurs. In this case, the error code "611" is displayed on the remote controllers. 6. Freeze Protection System (Anti-Frost Heaters) To prevent freezing in the hot water supply circuit, Anti-Frost Heaters are provided at major points of water flow paths in the unit. The heaters are activated by the Ambient Temperature Sensor in the unit. -
Page 9: Installation And Related Work
2. Installation and Related Work 2-1 Installation Instructions • The cases shown below are classified by the degree of risk and damage. Be sure to follow the instructions for your safety. “Danger” indicates that serious injuries or even death may result from the improper installation due to negligence of following the instructions. “Warning” indicates the possibility that serious injuries or even death may result from the improper installation due to negligence of following the instructions. “Caution” indicates the possibility that some injuries or material damage may result from the improper installation due to negligence of following the instructions. Each mark indicates: General prohibited Never fail to do. Ground Never install the unit indoors as it is exclusively for outdoor use. Do not install it in the bathroom. Electric shock or leakage may result. Installation requirements The Water Heater must be installed in accordance with the following: 1. These instructions. 2. National Construction Code and Local authority regulations. 3. AS/NZS 3500.4 Plumbing and Drainage - Heated Water Services. 4. The Australian standard for gas installations AS/NZS 5601. 5. Any other statutory regulation that may apply. 6. A notice of intention to install shall be lodged with the relevant local Gas Authority prior to installation. INSTALLAION MUST BE CARRIED OUT ONLY BY AN AUTHORISED AND APPROPRIATE LICENSED PERSON - 9 -... - Page 10 Before installation. Verification of the unit. • Make sure the unit to be installed suits the intended use and application. • Do not use any gas other than specified on the sticker. • Do not operate with any power source (voltage/frequency) other than specified on the sticker. Location of the unit. Decide where to install the unit by considering customer’s request and clearances. Ventilation • Install the unit where there is enough space for ventilation. • Do not install the unit where flammables such as gasoline, benzene, and adhesive are handled. • This unit does not allow the use of extended exhaust pipes. • Install the unit as far as possible, away from anything in front or above even if it is non- combustible in order to prevent exhaust gas recirculation, and staining of surfaces. • Take preventive measures against snow drifts for air inlet and exhaust outlet to stay unaffected in case there is a possibility that they may be blocked by snow fall. - 10 -...
- Page 11 Installation. • Reinforce the wall if necessary as this unit weighs about 20.5kg. 1. Fix 1 screw (for wall hanging) into the wall leaving about 4mm length to hook on. 2. Hook the center hole of the wall hanging bracket onto the screw and securely fix the unit with 4 screws. Screw (for wall hanging) Wall hanging bracket Screw (for wall hanging) Screw (for wall hanging) Screw (for wall hanging) Screw Wall hanging bracket (for wall hanging) - 11 -...
- Page 12 • Check if adjacent wall or ceiling is fire resistant and allows safe distance for fire prevention. • This water heater is suitable for residential water (potable) heating only. Do not use this water heater for space heating, combination space heating/domestic water heating, or commercial water heating applications. • The Water Heater is not suitable for use in pool or spa applications. • Maintain proper space around the unit for proper servicing and operation. Minimum clearances from combustible materials are listed below. Top of heater 30cm Front of heater 60cm Sides of heater 15cm Back of heater Floor 30cm • Secure enough space so that the inspection and repairs can be done easily. • Secure space not only in front but also under the unit. • Do not install the unit over other combustion appliances. Oil residue and dust in the air can adhere to the Burner and the Primary and Secondary Heat Exchanger resulting in deformation, loss of efficiency, or damage to electronic components. • Do not install the exhaust outlet near the outlets of the other appliances. Install the air inlets away from the wind path as the wind may cause imperfect combustion. • Do not install the unit where commercial chemicals are used. Those chemicals are ammonia, sulfur, chloride, ethylene compound and acids which are used at beauty shop, laundry, factory and so forth. • Do not install the unit over food or dishes. • Pipe pressure relief to a drain or outside environment, or within 100mm of the floor. Pipe pressure relief discharge to a drain or outside environment. • The appliance should be located in an area where leakage from the unit or connections will not result in damage to the area adjacent to the appliance or to lower floors of the structure. When such locations can not be avoided, it is recommended that a suitable drain pan, adequately drained, be installed under the appliance. The pan must not restrict combustion airflow. - 12 -...
-
Page 13: Dimensions
2-2 Dimensions 366mm 21mm 205mm 15mm 68mm 68mm 68mm 68mm 350mm 260mm 208mm 174mm 143mm 46mm HOT WATER OUTLET GAS SUPPLY INLET R3/4 /20 R3/4 /20 PRESSURE RELIEF VALVE WATER INLET FILTER DRAIN OUTLET POWER CABLE ENTRY COLD WATER INLET R3/4 /20 - 13 -... -
Page 14: Gas Piping
2-3 Gas Piping • Install the manual gas valve in the gas inlet connection of the Water Heater. • A union should be used to connect the unit and the gas pipe. • Check the gas type and the gas inlet pressure before connecting. • Remove the screw from the test plug before checking the gas inlet pressure. Connect the manometer to the plug with the silicon tube and measure the gas inlet pressure and confirm from the rating label on the appliance. • Put the screw back in the test plug and fasten tightly. • Make sure to conduct gas leakage test before operating the Water Heater. 2-4 Water Piping • Install a manual water valve in the water inlet connection of the Water Heater. • A union should be used on both the hot and cold water supply lines for connection. • Purge the water lines to remove all debris and air. • Make sure both the hot and cold water supply lines are connected correctly. • A filter is placed at the water supply inlet to remove debris. Clean the filter regularly. Do not operate the unit without the filter in place. In areas of heavy debris, such as with some wells, install a whole house water filter in line before the unit. - 14 -... -
Page 15: Condensate Drain Piping
2-5 Condensate Drain Piping This unit generates condensate continuously at a rate of up to 5 litres per hour as a by-product of the highly efficient gas burner system. This condensate must be drained via a pipe to a suitable point of discharge. As the condensate is a by-product of gas combustion, it is mildly acidic. For this reason, copper tube and fittings MUST NOT be used, as they will corrode. The unit has an in-built condensate neutralizer to make the condensate safe for discharge. It is recommended to use DN15 high pressure PVC pipe and fittings for the condensate drain line. IMPORTANT CONSIDERATIONS FOR THE CONDENSATE DRAIN PIPE The content of AS/NZS 3500 ‘Temperature/Pressure Relief and Expansion Control Valve Drain Lines’ has been used as a guide in preparing these considerations. Drainage of condensate water Condensate drain outlet connection, R1/2" (15mm) BSP male nylon. Note: the white plastic shipping cap MUST BE removed from the condensate drain outlet prior to water heater operation. In the case that white-ish stone pieces (calcium carbonate) comes out of the neutralizer when the cap is removed, they should be discarded. The condensate drain line must have a continuous fall (of at least 2°) from the water heater to the discharge point. Lengths and bends must be in accordance with 'Length and changes of direction' diagram below. Fix with pipe clip Drain outlet 2° fall PVC piping Lengths and changes of direction Max relief drain length (m) - Page 16 Installation 1. The drain line MUST NOT discharge onto electrical connections, earth stakes, copper pipes, concrete paths or into a pond. 2. The point of discharge from each drain line shall be located so that the release of condensate does not cause a nuisance, is readily discernable and incurs no risk of damage to the building. In view of (1) and (2), suitable points of discharge are deemed to be drains or sewers. 3. There shall be no tap, valve, or other restrictions in any line. 4. The drain line shall fall continuously to the approved point of discharge. 5. Where discharging over a tundish or gully trap, drain lines shall have an air gap of a size at least twice the diameter of the drain line. Interconnection of condensate drain lines Condensate drain lines from multiple water heaters may be joined together provided they conform with the 'Installation requirements' on page 9. Common stack discharge Where individual water heaters are installed in a multi-story building, the condensate drain line may discharge into a common stack, subject to the following: (a) The discharge from the common stack is to a tundish, having a discharge line that is not less than the size of the common stack, directly connected to a fixture trap, and installed in connection with any adjacent soil or waste stack. (b) The discharge point of the common stack is such that any discharge is readily visible and not cause any nuisance. (c) The common stack is vented by extending the pipe upwards above the roof level. Tundish drain lines The drain line from any tundish shall not be less than DN20 or less than one size larger than that of the largest drain line discharging into the tundish. Tundish drain lines shall comply with the’Installation requirements’ on page 9.
-
Page 17: Electrical Connection
2-6 Electrical Connection • Label all wires prior to disconnection when servicing controls. Wiring errors can cause improper and dangerous operation. Verify proper operation after servicing. Field wiring to be performed at time of appliance installation. • Completely turn off the power before starting the work. Do not turn the power on until the electric wiring is finished and all work is completed. Otherwise electric shock or personal injury may result. • The Water Heater requires 240V AC at 50Hz. Disconnect the power supply if the unit is not in use for a long time. • Remove residual water in the unit when the power supply is off because the freeze prevention in the unit will not activate, resulting in possible freezing damage. - 17 -... -
Page 18: Wiring Remote Controller
2-7 Wiring Remote Controller 1. Number of controllers One, two or three remote controllers can be installed as optional extras. 2. Remote Controller locations The remote controllers allow the water temperature to be set from the various locations where they are installed at kitchen, laundry, bathroom and ensuite. 3. Connection of cable to the thermann unit (1)Remove the front cover from the unit. (2)Install the cable to the Thermann main unit using conduit or by concealing the cables in the wall cavity. (3)Install the cable into the cabinet through the conduit in accordance with the table in next page. (4)Based on “How to fix the cables”, attach the cable to the plate adjacent to the terminal block, using the cable clamp provided. (5)Attach the cables to the terminals for the remote controllers. (6)Replace the front cover of the water heater. - 18 -... - Page 19 How to fix the cables (Remote controller cable(s) and cascade cable) Number of cable Tie two cables and Tie the cables Make a knot Tie two cables make a knot on the two by two rest cable How to tie the cable(s) at the power cable entry...
-
Page 20: Testing Operation
2-8 Testing Operation • Follow the steps below, to ensure the Water Heater has been properly installed. Preparation for testing operation. 1. Fully open the water supply main valve. 2. Flush out the water supply piping to clean out any installation debris, clean out filter. 3. Turn on power to unit and open gas supply valve. 4. Operate the remote controllers according to “INITIAL SETTING REMOTE CONTROLLERS” in the installation instructions. Testing operation. 1. Operate the unit according to "Operation of Remote Controller ” in the operating instructions. 2. Make sure the unit operates normally. • Does the Burner ignite and shut off properly? Check the combustion lamp on the PCB. The Burner may not ignite at first until the air in the gas supply pipe is driven out. Repeat the procedure until it ignites. • Is temperature setting workable? Check if the temperature can be adjusted as desired. Procedure after testing operation. • If the residence is not ready for habitation or the unit will not be used for an extended time, the residual water in the unit and the pipe may freeze and damage the unit, or the residual water in the Primary and Secondary Heat Exchanger may deteriorate. Be sure to remove the water in the unit and the pipe. 1. Close the gas supply main valve. 2. Close the water supply main valve 3. Take off the water filter and pressure relief valve (drain stopper), and remove the water. Take this procedure when the unit cools down after the testing operation. -
Page 21: Cascade Installation
• If connecting optional remote controllers, they must be connected to one unit only. That unit will need to be set up as the MASTER unit for the system to operate correctly. • All fittings, valves and branch lines should be matched sets to each of the water heaters. (50-1000mm) the MASTER unit the SLAVE unit Remote Weatherproof Controller GPO×2 Remote Controller Connection Terminals Thermann genuine cascade cable Branches DN20 Gas Supply Cold Water Supply Line Manifold DN25 Hot Water Supply Line Recommendation Manifold line size for cold, hot and gas pipes is DN25. Branch line size for cold, hot and gas pipes is DN20. (Refer to AS/NZS 5601 for gas pipe and AS/NZS 3500.4 for water pipe requirements). -
Page 22: Service And Maintenance
3. Service and Maintenance 3-1 Operation Principles [Before operation] • When ON/OFF Button (Power switch) on the remote controller is turned ON, the ON indicator iluminates (in the case of operation with a remote controller). Gas is supplied to the Gas Valve. [During operation (when hot water is supplied)] • When the hot water supply tap is opened, water flows through the Water Flow Control Valve (with sensor) into the Primary and Secondary Heat Exchanger Assembly. The water heated by the Heat Exchanger Assembly passes through the Outgoing Water Temperature Sensor to go to a hot water outlet. At this time, the Water Flow Sensor detects water flow. Then the PCB starts the Fan Motor, activating the electrode. The Main Gas Valve, Gas Valve 1 and Gas Valve 2 are opened simultaneously when the spark is emitted by the Electrode. • The gas supply is set at the slow ignition level by the Gas Control Valve and goes to Burners. When Burners are ignited, the Flame Sensor detects the flame condition, the “In Use” Indicator lights and the sparking is stopped. • The PCB detects the water flow rate based on the signal from the Water Flow Sensor, calculates the energy required to heat the water up to the set temperature, and adjusts the opening position of the Gas Control Valve and the Fan Motor rpm. After this, PCB maintains the combustion to keep the water at the set temperature by checking with the Outgoing Water Temperature Sensor, while controlling the Fan Motor rpm and gas supplied by the Gas Control Valve. (Feedforward feedback control) [Operation stop] • When the hot water tap is closed, the Water Flow Sensor detects no water flow. In response to this, PCB closes all the Gas Valves and the Fan Motor stops after running for 65 seconds. (Post purge) - 22 -... - Page 23 Operational flow chart Hot water supply normal operation Supply power (insert power plug into outlet) Push ON/OFF button With use of remote controller ON indicator lights Hot water tap, OPEN Water Flow Sensor detects water flow [over approximately 2.7 Liter/min.] Fan Motor, ON Fan Motor detects revolution Ignitor, ON Main Gas Valve, OPEN...
-
Page 24: Schematic Diagram
3-2 Schematic Diagram Secondary Heat Exchanger Over Heat Thermostat Flame Rod Primary Heat Exchanger Electrode Thermal Fuse Burner Gas Valve 3 Ignitor Fan Motor Gas Valve 1 Water Flow Gas Valve 2 Control Valve Neutralizer Remote Outgoing Controller Temperature Sensor Gas Control Valve Water Level Electrode Main Gas Valve Incoming... -
Page 25: Flow Charts
3-3 Flow Charts Power supply Cause cleaning Water Flow Control ① Initial check all on Valve failure No Turn ON/OFF button on remote controller Kitchen remote controller failure Push ON/OFF button Hot water Bath/Ensuite remote on remote controller faucet Close controller failure Remote controller communication failure... -
Page 26: Fault Findings And Error Code
3-4 Fault Findings and Error Code Error code ERROR CODE CONDITION NUMBER CORRECT REFER PHENOMENON SYMPTOM CAUSE CHECK METHOD VALUE FIGURE REMOTE LED IN PCB FLASHING CONTROL NOTHING STARTS AND REMOTE’S FUSE DEFECT CHECK THE CONTINUITY OF FUSE ON PCB 0Ω Fig.1 DISPLAY DOES NOT INDICATE WATER INLET FILTER CLOG UP. VISUAL CHECK AND CLEAN IT. - Page 27 ERROR CODE CONDITION NUMBER CORRECT REFER PHENOMENON SYMPTOM CAUSE CHECK METHOD VALUE FIGURE REMOTE LED IN PCB FLASHING CONTROL NEUTRALIZER NEED TO BE CLOSE TO END-OF-LIFE REPLACE MEMORY PCB AND NEUTRALIZER AT THE FLASHING Page30 REPLACED NEUTRALIZER SAME TIME (WARNING) COMBUSTION ABNORMAL REMOVE CLOGGING OF DRAIN PIPING OR STOPS AND LED Infinite FLASHING WATER LEVEL IN...
- Page 28 Fault findings < Fig. 1> < Fig. 2> < Fig. 3> < Fig. 4> Continuity of Fuse Water Flow Sensor Voltage of Continuity of Ignitor Transformer Thermal Fuse Connect directly pulling out connector Measure voltage without pulling out connector Thermal fuse AC240V unused pin Connect...
-
Page 29: Replacement Of Pcb
3-5 Replacement of PCB CAUTION The new PCB does not have the Memory PCB. The Memory PCB has the life-record of Neutralizer. The Memory PCB mounted on the original PCB should be moved to the new PCB. If not, the error code “732” (Memory PCB unattached) is displayed on the remote controller and the unit cannot be operated. Procedure 1. Unplug power supply cable. 2. Remove the PCB. New PCB (See “Removing PCB” in page 38) 3. Remove the Memory PCB from the Memory PCB connector. 4. The Memory PCB in step 3 should be attached on the Memory PCB connector Attachment of the new PCB. 5. Replace the new PCB and insert the Removed each connector to the new PCB. Memory PCB 6. Plug power supply cable. 7. Run water to the unit and check the normal combustion. Then, adjust the Memory PCB Gas. secondary pressure. connector In case that hot water is not supplied and the error code “732” (Memory PCB unattached) is displayed, check that the Memory PCB is attached correctly. Then, unplug power supply cable and plug it... -
Page 30: Replacement Of Neutralizer
3-6 Replacement of Neutralizer CAUTION In replacing the Neutralizer, the Memory PCB must be replaced at the same time. The Memory PCB has the life-record of Neutralizer. Procedure [Replacement of neutralizer] 1. U nplug power supply cable. 2. D isconnect the drain pipe at the bottom of the Water Heater. Rubber hose 3. U nhook the lead wires. 4. D isconnect the Water level electrode 2P Water level electrode 2P connector connector, the Anti-Frost heater 2P relay connector and the outgoing temperature sensor connector. Setscrew of Manifold Assy 5. P ull out the rubber hose from the Neutralizer removing the hose band. 6. R emove the setscrew of Manifold Assy. 7. P ull up and remove the Neutralizer. -
Page 31: Wiring Diagram
3-7 Wiring Diagram WATER FLOW CONTROL VALVE GAS VALVE 3 GAS VALVE 2 : White : Black DIP SWITCH 2 : Brown GAS VALVE 1 : Blue : Grey : Light Blue GAS VALVE REMOTE : Orange CONTROLLER : Red (MAIN) : Green : Purple THERMAL FUSE... -
Page 32: Cascade Flow Charts
3-8 Cascade Flow Charts Hot water tap Open Cumulative amount of combustion, Master unit < Slave unit ? Master unit ON Slave unit ON Required heat capacity, shortage ? The other unit ON The other unit OFF Hot water tap Close ? All units Stop - 32 -... -
Page 33: Manifold Gas Setting Procedure
3-9 Manifold Gas Setting Procedure 1. Preparation (1) Make sure the appliance is not in operation. Then, remove the screw from the pressure check hole. (2) Connect the hose of the manometer to the pressure check hole. 2. Adjusting nozzle pressure settings <Minimum pressure should be set before setting the maximum pressure.> (1) Make sure that “Dip Switch” No. 1 on PCB is set to the position for the appropriate gas type. If installation is a cascade type, change the dip switch block No.2 to all OFF and remove wires from Remote controller Connection Terminals. (2) After igniting for combustion by opening the hot water supply valve, set “Dip Switch” No. 5 to ON position to set the combustion at a minimum capacity level. By pressing the Gas Volume Adjusting Button under the “Remote Controller Connection Terminals”, set the gas amount for the minimum capacity level. (3) Shut the hot water supply valve. Open the valve again for combustion. Repeat the steps (2) to check that the settings are correct. (4) With the combustion going on, set “Dip Switch” No.6 to ON position to set the combustion at a maximum capacity level. At this time, a substantial amount of water should be supplied. (As the maximum capacity is forced, if the water inlet temperature is high, the heated water may reach boiling point.) (5) Set the gas amount for the maximum capacity level by pressing the Gas Volume Adjusting Button. (6) Shut the hot water supply valve. Open the valve again for combustion. Repeat the steps (5) to check that the settings are correct. (7) Set “Dip Switch” No. 5 and 6 to OFF. (8) Shut the hot water supply valve to stop combustion. Disconnect the rubber hose of the manometer from the pressure check hole. Seal the hole by installing and tightening the screw. After tightening the screw, make sure there is no gas leak. -
Page 34: Combustion Specification, Various Combination Setting
3-10 Combustion Specification, Various Combination Setting Combustion specifications Gas consumption Manifold Assy [MJ/h] Gas type Dip Switch Gas type Nozzle diameter (mm) on PCB Gas type Maximum Rich Lean mark [Top side] [Bottom side] Propane Φ0.70×17 pcs Φ1.00×17 pcs DipSw. No.1 : OFF Natural Gas Φ1.00×17 pcs Φ1.50×17 pcs DipSw. No.1 : ON Manifold Assy Gas type mark ”A” = Propane ”G” = Natural Gas - 34 -... - Page 35 Comfort Dip Switch Setting Pattern(Various Combination Setting) <Dip Switch> (The illustrated switch settings show the factory settings for the Propane and 60°C preset.) To switch gas type (Propane or Natural Gas) To change hot water temperature (without remote controller) To fix to the minimum combustion To fix to the maximum combustion • Switching gas type Dip SW setting for gas type Applicable gas type No. 1 Propane Natural Gas • Changing hot water temperature (when the remote controller is not connected, the hot water temperature setting can be changed by selecting one of these settings.) Dip SW settings for different temperature Temperature (°C)
- Page 36 Delivery Temperature Adjustment for 50°C Preset Model This instruction must be read in conjunction with the Operating & Installation instructions and the caution sheet “Instructions for units supplied set at 50°C to comply with AS 3498” which are supplied with the appliance. Application This instruction applies only to appliances labelled “50°C Preset” on the front cover. Background “50°C preset” appliances are “Factory Set” to deliver a maximum temperature not exceeding 50°C. However, they have an incremental adjustment mechanism that allows the installer to increase the appliance delivery temperature incrementally from the “Factory Set” value to temperatures exceeding 50°C. This is intended to enable compensation for temperature losses in the pipework between the water heater and any outlets and achieve the required temperature at the outlet. This instruction contains the procedure steps for carrying out such adjustment. Procedure Steps - Delivery Temperature Adjustment Measure the maximum hot water temperature from the sanitary fixture used primarily for the purposes of personal hygiene that is closest to the hot water heater (for example, a shower outlet in the bathroom closest to the water heater) as follows. 1. Unplug power supply cable to the unit. 2. Move up one notch on dip switch from the existing step. (Factory preset mode is “FACTORY DEFAULT”. See Table 1 Dip Switch setting (page 37)) 3. Plug power supply cable to the unit. 4. Open the tap. When flow rate and temperature become stable, measure the stabilised hot water temperature. (It should be 48°C) 5. If the temperature is less than the appropriate temperature (refer to 4), return to 1 and adjust again. - 36 -...
- Page 37 Table 1 Dip Switch Setting Temperature adjustment of hot water FACTORY STEP1 STEP2 STEP3 STEP4 supply DEFAULT • Ensure building occupants do not have access to any hot water outlets during this procedure. • If the hot water temperature from ANY outlets used primarily for the purposes of personal hygiene exceed 48°C after temperature adjustment in step has been performed, check your work and repeat the temperature delivery adjustment procedure as required. Temperatures exceeding 48°C from any outlets primarily used for the purposes of personal hygiene do not comply with AS3500 and may contravene local regulations. Guidance Note for Table 1 “Dip Switch Setting” For a given installation, temperature loss is typically greatest in winter when ambient air and water temperatures are lowest. Conversely, temperature loss is typically lowest in summer when these ambient temperatures are highest. It follows that the delivery temperature of water flowing through outlets is typically higher in summer than it is in winter. The installer is to take into consideration the effects of these seasonal variations in ambient temperatures when carrying out temperature adjustments. - 37 -...
-
Page 38: Disassembling/Assembling Parts
3-11 Disassembling/Assembling Parts Procedure Illustration When the unit is disassembled or assembled, turn off the power and drain water. Pressure Relief Valve Water Filter Removing PCB (1)Remove the setscrew fixing the PCB case and lead wires from the PCB claw. To remove the hook part of the PCB PCB case setscrew case from the bottom panel, lift the case up slightly and pull it out. PCB claw Hook part (2)Disconnect the connectors (9 pcs) from the PCB. (3)If remote controllers are connected, disconnect the remote controller cables. Connectors - 38 - - 38 -... - Page 39 Procedure Illustration Removing Neutralizer. Hook Connectors (1)Disconnect the drain pipe at the bottom of the Water Heater. Band (2)Unhook the lead wires. Setscrew (3)Disconnect Water Level Electrode 2P connector, Anti-Frost Heater 2P relay connector and Outgoing Temperature Sensor connector. (4)Pull out the rubber hose from the Neutralizer removing the band. (5)Remove the setscrew of Manifold Assy. (6)Pull up and remove the Neutralizer. - 39 - - 39 -...
- Page 40 Procedure Illustration Removing Water Flow Contorol Valve. Water Flow Contorol (1)Remove the setscrew fixing the PCB Valve connector case. Lift the case up and pull it out. (2)Disconnect Water Flow Contorol Valve 8P connector(on PCB side), Water Flow Sensor 3P relay connector and Incoming Water Flow Sensor Temperature Sensor connector. relay connector Incomming Temperature Sensor connector (3)Remove the 2 quick-fasteners and take out Water Flow Contorol Valve. Quick-fasteners Water Flow Control Valve Removing Over Heat Thermostat (1)Disconnect the Over Heat Thermostat connectors (2 pcs). (2)Pull the Over Heat Thermostat forward. Over Heat Thermostat - 40 - - 40 -...
- Page 41 Procedure Illustration Removing Ignitor Screw with steel washer (1)Disconnect the high-voltage cord. Remove the setscrew retaining the Ignitor from Manifold Assy. (Screw with steel washer is used for Ignitor earthing.) High-voltage cord (2)Pull out the Ignitor. Ignitor connector (3)Disconnect the Ignitor 2P connector. (4)Remove the setscrew retaining the Ignitor. Screw with steel washer (earthing plate side) (Attention) When inserting the connector to the Ignitor, marking should face downward like the illustration. If reverse side, it can be disconnected. Ignitor setscrew marking ( downward) - 41 - - 41 -...
- Page 42 Procedure Illustration Removing Manifold Assy Flame Rod connector (1)Disconnect Flame Rod connector. (2)Remove Ignitor. (see previous step) (3)Remove the setscrew fixing the PCB case. Lift the case up and pull it out. Remove the setscrews of Manifold Assy M4 x 7 pcs (4)Remove the setscrews fixing the Setscrews Manifold Assy (M4 x 7 pcs, M4 with M4 with washer x 3 pcs washer x 3 pcs). Connector of the Gas Valve 3 (5)Pull the connector of the Gas Valve 3. Removing Gas Control Valve (1)Remove Manifold Assy. (see previous step) (2)Remove setscrew of Power cable clamp. Power cable clamp (3)Remove setscrews(4 pcs). Gas Control Valve setscrews(4 pcs) - 42 - - 42 -...
- Page 43 Procedure Illustration (4)Pull the Gas Control Valve out and Gas Valve connectors disconnect from the Gas Valves (4 pcs) and remove them as one unit. (Attention) When connecting, the number of connectors should match with the one of valves marked on Manifold Assy. Number of Valves Number of Connectors Removing Fan Motor (1)Remove Neutralizer. (see previous step) (2)Remove the setscrew fixing the PCB case. Lift the case up and pull it out. (3)Disconnect the connector for Fan Motor Fan Motor connector from the PCB. (4)Remove the setscrews (3 pcs) fixing the Fan Motor to pull it out forward. Fan Motor setscrews(3 pcs) - 43 - - 43 -...
- Page 44 Procedure Illustration Removing Electrode and Flame Rod Electrode holder setscrews(2 pcs) (1)Disconnect high-voltage cord and Flame Rod connector. (2)Remove setscrews (2 pcs) fixing the Flame Rod connector Electrode holder to pull the holder out. Electrode High-voltage cord Removing Heat Exchanger Assy. (1)Remove Neutralizer and Manifold Assy. (see previous step) (2)Remove setscrews (2 pcs) fixing the combustion chamber. (3)Remove the setscrew fixing the PCB case.Lift the case up and pull it out. Combustion chamber setscrews(2 pcs) (4)Disconnect the following connectors: 1. Thermal Fuse (front) 2P relay connector. 2. Anti-Frost Heaters 2P connector from the PCB. 3. Fan Motor 4P connector from the PCB. 4. Over Heat Thermostat connectors (2 pcs) and other connected items. Over Heat Thermostat connectors(2 pcs) Thermal Fuse relay connector - 44 - - 44 -...
- Page 45 Procedure Illustration (5)Remove setscrews (2 pcs) retaining the quick-fasteners hot water outlet pipe. (6)Remove the 2 quick-fasteners and Hot water outlet pipe setscrew fixing the Anti-Frost Heater. setscrews(2 pcs) Anti-Frost Heater setscrew (7)Remove setscrews (2 pcs) retaining the Heat Exchanger Assy setscrews(2 pcs) Heat Exchanger Assy. (8)Pull the Heat Exchanger Assy forward to take it out. Note : I f any gaskets or seals are damaged or torn during disassembling, they must be replaced. - 45 - - 45 -...
-
Page 46: Exploded View
3-12 Exploded View 1 Screw with steel washer 2 Special earth Screw with projections 3 Memory PCB - 46 -... -
Page 47: Parts List
3-13 Parts List PARTS NAME PARTS NAME Temperature Sensor PCB(Natural Gas) 10 Anti-Frost Heaters PCB(Propane) Manifold Assy(Natural Gas) 11 Ignitor Manifold Assy(Propane) 12 Pressure Relief Valve Gas Control Valve 13 Water Flow Control Valve(with Sensor) Electrode 14 Water Filter Flame Rod 15 Ambient Temperature Sensor 16 Neutralizer Assy * Heat Exchanger Assy 17 Anti-Frost Heater for Neutralizer Over Heat Thermostat Fan Motor *For spare parts, the Neutralizer Assy includes the Memory PCB. GA-16(1) - 47 -...
Need help?
Do you have a question about the 26NG50C and is the answer not in the manual?
Questions and answers
Does the Therman26 require 4 45kg cylinders linked on parallel to function. Nowhere in the manual does it say that however my plumber said it was required. That $600 of gas to run one unit.