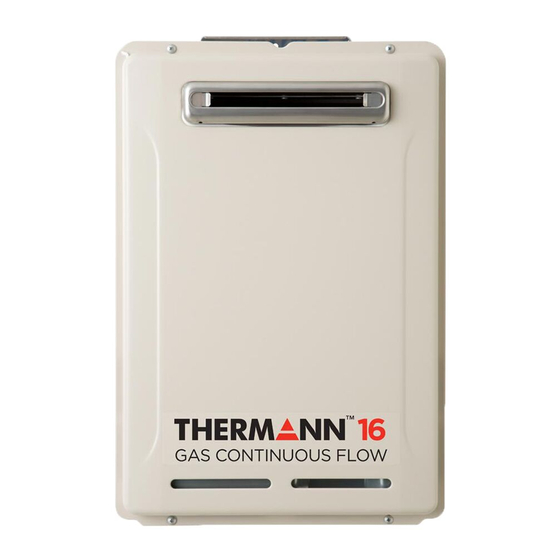
Thermann 16NG50-6 Instruction Manual
Hide thumbs
Also See for 16NG50-6:
- Operating instructions manual (17 pages) ,
- Service manual (41 pages) ,
- Owner's manual (16 pages)

Subscribe to Our Youtube Channel
Related Manuals for Thermann 16NG50-6


Summary of Contents for Thermann 16NG50-6
-
Page 1: Installation Instructions
GAS CONTINUOUS FLOW WATER HEATERS INSTALLATION INSTRUCTIONS FOR MODELS 16NG50-6/16LP50-6, 16NG60-6/16LP60-6, 20NG50-6/20LP50-6, 20NG60-6/20LP60-6, 26NG50-6/26LP50-6, 26NG60-6/26LP60-6... - Page 2 INSTALLATION INSTRUCTIONS...
-
Page 3: Important Safety Instructions
IMPORTANT SAFETY INSTRUCTIONS Danger DO NOT INSTALL INDOORS The unit is for outdoor installation only. Never install indoors. It will be extremely dangerous because and incomplete combustion. WATCH FOR GAS LEAK Warning When gas leak is noticed, stop using the unit immediately and close the gas valve. -
Page 4: Electrical Connection
ELECTRICAL CONNECTION DANGER OF WET HANDS Do not touch power plug with wet hands. It can cause electric shock. Warning INSERT POWER PLUG FULLY INTO POWERPOINT Check that the power plug is clean and undamaged, Check then fully insert into the power point. DO NOT PULL POWER CORD Do not remove the power plug by pulling the cord. - Page 5 For use as a solar booster, the setting temperature must be altered to 70°C (Refer to wiring diagram attached on the unit). For this application, it is suitable to connect to a Thermann solar evacuated tube manifold assembly. In that case, these instructions must be read in conjunction with the Thermann solar hot water system technical (installation) manual.
-
Page 6: Exploded Diagram Of Unit
EXPLODED DIAGRAM OF UNIT Model : 16/20 PARTS DESCRIPTION 1. FLUE OUTLET 2. GAS VALVE 3. CIRCUIT BOARD 4. BURNER CASE 5. HOT WATER OUTLET 6. COLD WATER INLET 7. GAS SUPPLY INLET 8. HEAT EXCHANGER 9. WATER VOLUME PROPORTIONAL VALVE Model : 26 PARTS DESCRIPTION 1. - Page 7 DIMENSIONS CONNECTIONS POWER CABLE ENTRY REMOTE CONTROLLER CABLE ENTRY HOT WATER OUTLET WATER INLET FILTER R3/4 /20 PRESSURE RELIEF VALVE GAS SUPPLY INLET R3/4 /20 COLD WATER INLET R3/4 /20 INSTALLATION INSTRUCTIONS...
-
Page 8: Technical Data
TECHNICAL DATA MODEL Nominal hourly gas consumption by MJ/h proportional electronic gas control Test point pressure (NG) 0.56 0.80 0.80 Test point pressure (Propane) 0.91 1.40 1.50 Water heating capacity raised 40°C L/min 12.5 16.25 Minimum working pressure Maximum working pressure 1200 1200 1200... -
Page 9: Cold Water Connection
COLD WATER CONNECTION COLD WATER SUPPLY TO WATER HEATER Refer to the Technical Sheet for the position of connections. Copper tube of a minimum size of R3/4" (20mm) should be connected to the appliance. The water inlet connections are R3/4" (20mm) male BSP and requires a union to allow for removal of the water heater. -
Page 10: Gas Connection
ELECTRICAL CONNECTION 1. The appliance is equipped with a three pinned earthed plug to be connected to a 240V 50Hz power supply. The electrical rating of the appliance is 0.39/0.45/0.46Amp. for the Thermann 16/20/26 respectively. 2. The appliance requires a 240V 50Hz weatherproof power outlet installed in a protected position adjacent to the appliance. -
Page 11: Remote Controllers
3. CONNECTION OF WIRING TO THE THERMANN UNIT Remove the front cover from the unit. Install the wiring to the Thermann main unit using conduit or by concealing the wires in the wall cavity. Install the wiring into the cabinet through the conduit. - Page 12 REMOTE CONTROLLERS 4. INSTALLATION OF CONTROLLERS The heat will cause electrical component problems, or deform the exterior. ethylenic compound and acids etc are used. Chemicals Do Not screws(2pcs) in the screw holes provided. Then attach face plate again. Do not tighten the screws excessively, as the screw hole may be damaged. INSTALLATION INSTRUCTIONS...
- Page 13 REMOTE CONTROLLERS Installation For Bathroom and feed spare cable back into wall. screws excessively, as the screw hole may be damaged. In case of mounting the remote controller on tile, cement or mortar, use appropriate wall anchors. Then attach covers again. * Seal the remote controller using suitable grade silicone.
- Page 14 REMOTE CONTROLLERS Before using, the following initial setting procedure is necessary for all remote controllers. ``Lo´´ are indicated on the display. Select ``Lo´´ or ``Hi´´ by pushing button Hi(temp.) : Kitchen Controller (Only ONE kitchen controller is available for one unit) Lo(temp.) : Bathroom or Ensuite Controller(s) After selecting ``Lo´´...
- Page 15 REMOTE CONTROLLERS 6. COMMISSIONING AND TESTING After completing the installation of the unit, turn the water, power and gas supplies on to the unit. 7. CONTROLS OPERATION Turn the remote control in a kitchen ON by pressing the ON/OFF button on the control to the ON position.
- Page 16 REMOTE CONTROLLERS YST-2807 Controller) Universal This remote controller is intended to be used in the kitchen, laundry room, bathroom and ensuite. Digital Monitor Indicates the selected water temperature. Error messages flash in the event of failure. High Temp. Indicator Indicates the setting temperature is higher than 50 ゜...
- Page 17 The units will operate in a range between 25 MJ/h and 400 MJ/h when two units are connected together. both units. Thermann genuine cascade cable can be used to connected the two units. The distance between the two units must be in the range of 5 -100 cm.
-
Page 18: Cascade Set Up
CASCADE INSTALLATION (ONLY FOR 26L MODEL) In case that three remote controllers are connected, two (small and large) cable clamps shall be used. REMOTE CONTROLLER CONNECTION TERMINALS CASCADE CABLE CONTROLLER CABLE CABLE CLAMP (Small) CABLE CLAMP (Large) (Maximum Four Cables) CASCADE SET UP Do not supply power to either unit until steps 1-4 below are completed. -
Page 19: Wiring Diagram And Remote Controls Installation Schematic
(OUTGOING TEMP .) ANTI-FROST HEATERS FLAME ROD COMBUSTION INDICATOR FUSE GAS VOLUME ADJUSTING BUTTON (UP) (250V T5A) AC240V GAS VOLUME ADJUSTING BUTTON(DOWN) MODEL NAME PCB NO. 16NG50-6/16LP50-6 WATER FLOW SENSOR 16NG60-6/16LP60-6 GC-153 FAN MOTOR 20NG50-6/20LP50-6 GAS VALVE (CONTROL) 20NG60-6/20LP60-6 26NG50-6/26LP50-6 GC-162... -
Page 20: Fault Monitor
FAULT MONITOR When installed with remote controllers the THERMANN HOT WATER UNIT HAS A SELF DIAGNOSING FUNCTION FOR FAULTS. When the unit does not operate correctly an error code is displayed on the remote control TEMPERATURE DISPLAY INDICATOR. The cause of the fault can be determined after checking the fault numbers display on the remote control display. - Page 24 Works for you. ™ 20749230 (M)
Need help?
Do you have a question about the 16NG50-6 and is the answer not in the manual?
Questions and answers