Table of Contents
Advertisement
Congratulations
You have purchased the finest winch available in its
service class. It features a highly efficient 3 stage
planetary gear set which transmits torque from
a series wound DC motor. A semi automatic
clutch allows free spooling for quick cable deployment
and eliminates unnecessary trips back to the winch.
A wireless r e m o t e a l l o w s t h e w i n c h t o b e
o p e r a t e d w h i l e s t a n d i n g u p t o 5 0 feet away.
An automatic load holding brake is designed to hold
the full rated capacity of the winch. It was designed
and manufactured to provide you with the utmost in
utility. As with any device that combines power and
movement in its use, there are dangers if improperly
used. At the same time, there are easier ways for get-
ting the job done if certain precautions are taken first.
Please read this manual carefully. It contains useful
ideas in ob taining the most efficient operation from
your Ramsey Winch and safety procedures you need
to know before beginning use. When you follow our
guidelines for operation, your Ramsey Winch will give
you many years of satisfying service. Thank you for
choosing Ramsey. You will be glad you have one
working for you.
CAUTION:
Read and understand this manual before installation and operation of winch. See Safety Precautions!
Layer of Cable
1
(lbs)
9,500
Rated Line Pull Per Layer
(kg)
4,309
Cumulative Capacity Per
(ft)*
15
Layer (3/8" x 100'
(m)*
4
Synthetic Rope)
(lbs)
NO
Line Pull First Layer
(kg)
LOAD
(FPM)
12V
35.4
24V
29
Line Speed First Layer
(MPM)
12V
10.7
24V
8.8
12V
97
Amp Draw
24V
45
* Depends on rope being uniformly wound onto drum.
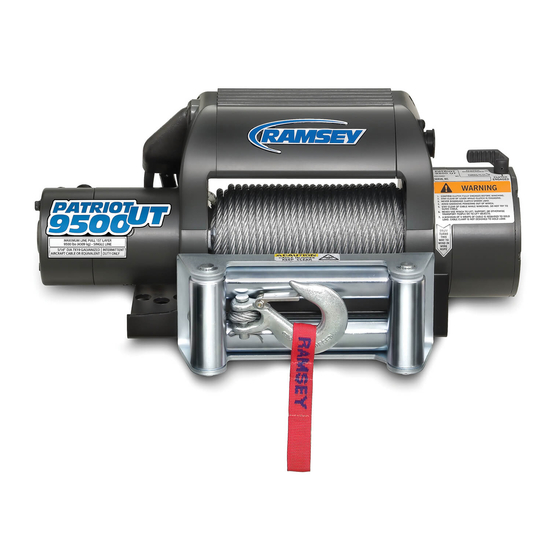
OWNER'S MANUAL FRONT
MOUNT ELECTRIC WINCH
PATRIOT 9500 UT
with synthetic rope
2
3
4
5
7,700
6,500
5,700
4,900
3,480
2,940
2,580
2,210
34
58
86
100
10
17.5
26
30.5
2,000
4,000
6,000
8,000
900
1,810
2,720
3,620
16.7
12.7
10.6
9
16
13
10
9
5.1
3.8
3.2
2.7
4.9
4.0
3.0
2.7
180
260
335
395
95
128
165
192
Contents
Performance Specifications ........................... Front Cover
Safety Precautions ...................................................... 2
Tips for Safe Operation ............................................... 2
Techniques of Operation ............................................. 3
Installation ................................................................... 4
Operating Instructions ................................................. 5
Electrical Connections and Operation ......................... 5
Rope Maintenance ...................................................... 5
Rope Installation Inst . ................................................. 6
Troubleshooting Guide ................................................ 8
Winch Parts List ..................................................... 10
Warranty ....................................................... Back Cover
Please note:
Ramsey Patriot
front mount vehicle use. The winches are not designed for and should
not be used in indus trial applications (car haulers/carriers, wreckers,
hoisting, etc.), and Ramsey d o e s n o t w a r r a n t t h e m t o b e
s u i t a b l e f o r s u c h u s e . R a m s e y m a k e s a s e p a r a t e , complete
line of winches for industrial/commercial use. Please contact the fac tory
for further information.
9,500
4,309
7.8
8
2.3
2.4
430
212
series winches are designed for
OM 914266-0514-A
Advertisement
Table of Contents

Subscribe to Our Youtube Channel
Related Manuals for Ramsey Winch PATRIOT 9500 UT


Summary of Contents for Ramsey Winch PATRIOT 9500 UT
-
Page 1: Table Of Contents
. R a m s e y m a k e s a s e p a r a t e , complete your Ramsey Winch and safety procedures you need line of winches for industrial/commercial use. -
Page 2: Safety Precautions
G. Modification, alteration, or deviation to the winch should only dam age. Always use a sling or chain of suitable strength, as shown be made by Ramsey Winch Company. in the illustration. Observe your winch while winching, if possible, while standing at a H. -
Page 3: Techniques Of Operation
TECHNIQUES OF OPERATION Techniques of Operation When pulling a heavy load, place a blanket, jacket or The best way to get acquainted with how your winch tarpau lin over the cable five or six feet from the hook. oper ates is to make a few test runs before you It will slow the snap back in the event of a broken actually need to use it. -
Page 4: Installation
INSTALLATION NOTES Installation It is recommended that Ramsey mounting channels be used with all non-Ramsey mounting. The winch shown in this owner’s manual is solely and exclusively designed for vehicle mounted, non-industrial Attach aluminum hawse fairlead to channel using hard - applications. -
Page 5: Operating Instructions
ELECTRICAL AND OPERATING INSTRUCTIONS stopped fully before reversing. To actuate winch Operating Instructions simply plug remote control switch into receptacle in The winch clutch allows rapid unspooling of the wire cover of winch. Run winch forward and reverse to rope for hooking onto the load or anchor point. The check directions. -
Page 6: Rope Installation Inst
REPLACEMENT ROPE INSTALLATION/ INSPECTION Replacement Rope Installation Notes: · Rope should be installed so that it feeds from the bottom of the drum. · An Aluminum Hawse Fairlead, P/N 251266 (included with winch), is required for use with the Ramsey Synthetic Rope. - Page 7 Rope Inspection When rope is first used, the outer filaments of the rope will quickly fuzz up. This is the result of these filaments breaking and this roughened surface will actually protect the fibers underneath. The condition should stabilize, not progress.
-
Page 8: Troubleshooting Guide
Troubleshooting Guide Condition Possible Cause Correction MOTOR RUNS IN Defective or stuck Jar each solenoid to free contacts. Check each ONLY ONE DIRECTION solenoid solenoid by applying 12 volts to coil terminal (it should make an audible click when energized). Defective remote control Disengage winch clutch, remove remote control switch... - Page 9 SOLENOID ASSEMBLY To mount Solenoid Assembly, use included Solenoid mount- ing Bracket. Mount bracket to tie bar using (1) ¼-20NC x 1” capscrew in place of ¾” tie bar capscrew. Install bracket to back of solenoid using included nuts and lockwashers. When mounting winch, con- nect labeled motor leads com- ing from solenoid assembly...
-
Page 10: Winch Parts List
PATRIOT 9500 UT EXPLODED VIEW 49 11... - Page 11 PATRIOT 9500 UT PARTS LIST ITEM NO. QTY. PART NO. DESCRIPTION ITEM NO. QTY. PART NO. DESCRIPTION 247009 GEAR CARRIER ASSEMBLY-INPUT 414960 CAPSCREW-#8-32 X 7/8 LG. SOC HD, Z/P 247023 GEAR CARRIER ASSEMBLY-OUTPUT 416208 CAPSCREW-#8-32NC X 1/2 LG, SOC HD...
- Page 12 SOLENOID ASSEMBLY Solenoid Assembly Parts List 278195 (PATRIOT 9500 UT) Item Item Qty. Part No. Description Qty. Part No. Description 289015 WIRE ASSY - BATTERY CABLE 289196 WIRE ASSY - MOTOR LEAD 289195 WIRE ASSY - MOTOR LEADS 430022 CONNECTOR...
-
Page 13: Warranty
To the extent such warranties of fitness Limited Lifetime Warranty Warranty, statutory otherwise, for a particular purpose or merchantabil- Ramsey Winch offers a limited lifetime is limited to the replacement or ity are deemed to apply to this product, warranty for each new Ramsey con- repair manufac turer’s...
Need help?
Do you have a question about the PATRIOT 9500 UT and is the answer not in the manual?
Questions and answers