Advertisement
PRE-ASSEMBLY:
Remove all parts and hardware from box and lay out on a carpeted or scratch-free work surface (The
shipping box provides and ideal work surface), as this will avoid damaging any parts during assembly.
Do not dispose of any contents until assembly is completed to avoid accidentally discarding small parts
or hardware.
Two people are recommended for ease of assembly.
Use the parts and hardware lists to identify and separate each of the pieces included prior to starting
The illustrations provided allow for easier assembly when used in conjunction with the assembly
instructions.
Note: Do not fully tighten all bolts until all parts are in place. Failure to follow these instructions may
cause the bolts to misalign during assembly.
If using power tools to aid in assembly please use caution. Power tools can damage hardware of split
wood.
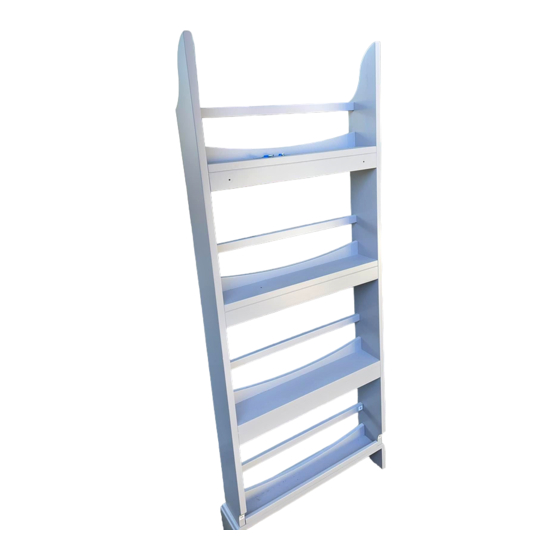
PARTS INCLUDED:
A – Bookrack Base (x1)
B – Left side panel (x1)
C – Right side panel (x1)
D – Front rail (x4)
E – Shelf with holes (x1)
F – Shelf w/o holes (x2)
TOOLS REQUIRED:
Phillips head screwdriver (not included)
G – Ball Tip Allen Key (included)
HARDWARE:
H –Allen bolt 1/4"x45x15mm (x6)
I –Allen bolt 1/4"x32x15mm (x4)
pottery barn kids
MADISON BOOKRACK TALL
1
Advertisement
Table of Contents

Subscribe to Our Youtube Channel
Related Manuals for pottery barn kids MADISON


Summary of Contents for pottery barn kids MADISON
- Page 1 MADISON BOOKRACK TALL PRE-ASSEMBLY: Remove all parts and hardware from box and lay out on a carpeted or scratch-free work surface (The shipping box provides and ideal work surface), as this will avoid damaging any parts during assembly.
- Page 2 J –Metal washer 1/4"x24x12x8mm (x6) K – Drywall Anchors 5/32” x63x14mm(x2) L – Screw 5/32”x53mm(x2) M – Phillips head wood screw 8x38mm (x2) N – Paper template (x1) ASSEMBLY: 1. Lay the Right side panel (C) down as shown in the illustration below. Attach the Shelf with holes (E) and Shelf w/o holes (F) to the Right side panel (C) using 3pcs Allen bolt 1/4”x45x15mm (H) and 3pcs washer 1/4"x24x12x8mm Metal...
- Page 3 2. Fit 4pcs Front rail (D) to the Right side panel (C) firmly as shown. Shelf with holes (E) and Shelf w/o holes (F) using 3pcs Allen 3. Attach the Left side panel (B) to the bolt 1/4”x45x15mm (H) and 3pcs Metal washer 1/4"x24x12x8mm (J) , tighten with Allen key (G).
- Page 4 4. Attach the Bookrack Base (A) to the Left side panel (B) and Right side panel (C ) using 4pcs Allen bolt 1/4”x32x15mm (I) as shown. Assembly completed. the paper template (N) at the desired loation on wall and ensure that the template is level. 5.
- Page 5 6. For drywall mounting: using a Phillip’s head screwdriver, insert the drywall anchors (K) into the wall at the insertion points. Press and turn clockwise until anchors are flush with the wall. 7. Align the holes in the bookrack with the anchors. Then insert each screw (L) into the anchors at the insertion points, leaving approximately 1/2”...
- Page 6 8. For stud mounting: using 2 each Phillips head wood screws 8x38mm (M), insert each wood screw thru the appropriate holes in the wooden rack. Align them with the wall stud or pencil marks and attach the rack to the wall.
Need help?
Do you have a question about the MADISON and is the answer not in the manual?
Questions and answers