Table of Contents
Advertisement
Installation, Operation & Maintenance
Table of contents
1. Safety & Handling
1.1. Safety .............................................................................................................. 1
1.2. Transportation ............................................................................................. 4
1.3. Handling ....................................................................................................... 4
1.4. Lifting ............................................................................................................. 5
1.5. Unit Receiving & Inspection .................................................................. 6
2. Nomenclature and General Technical Features ................................ 7
3.1. Components of Inverter Unit .............................................................. 13
3.2. Components of Fixed Unit ................................................................... 13
3.3. Components Flowchart ........................................................................ 14
4.1. General Recommendations ................................................................. 15
4.2. Installation on Site .................................................................................. 15
4.3. Dimensions ................................................................................................. 16
4.4. Minimum Clearance Recommended for Installation. ................ 17
4.6. Electrical Data ............................................................................................ 26
4.7. Data for Electrical Interconnection ................................................... 27
4.8. Electrical Connections ........................................................................... 29
4.9. Application Data ...................................................................................... 29
4.10. Water Connections ............................................................................... 32
5.1. System Confi guration ............................................................................ 33
5.2. Start-up ....................................................................................................... 34
5.3. Modbus ...................................................................................................... 43
6.1. Refrigerant Circuit Maintenance ........................................................ 48
6.2. Electrical Maintenance .......................................................................... 49
6.3. Condenser Coil ......................................................................................... 50
6.4. Water Quality - Carrier Recommendations .................................... 50
6.5. Routine Cleaning of Coil Surfaces ..................................................... 51
6.6. Removal of Closing Panels ................................................................... 52
6.7. Lubrication ................................................................................................. 53
6.8. Switchboard .............................................................................................. 53
6.9. Troubleshooting ...................................................................................... 54
Attachment I - Electrical Diagrams ........................................................... 63
Attachment II - Conversion Table R-410A .............................................. 67
Attachment III - Set Point Table ................................................................. 68
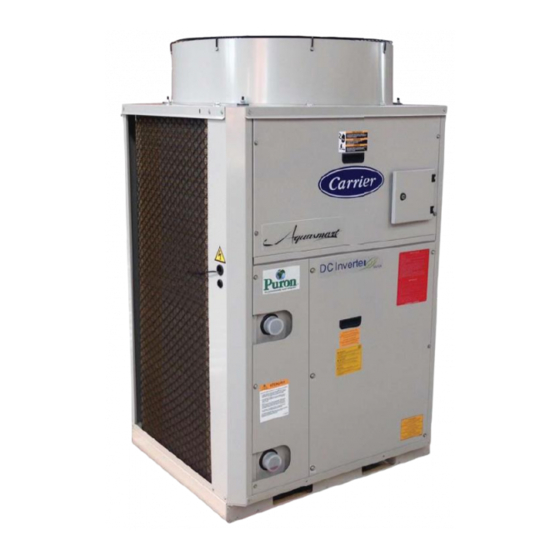
Air Cooled Scroll Chiller
15 to 120 Nominal Tons
Introduction
The professionals involved in field installation,
initial star t-up procedures, operation and
maintenance of Aquasmar t® 30E V / 30EX
liquid chiller units - should be familiar with the
instruction manual, and specific design data of
the installation site. The 30E units are designed to
provide a high level of safety during installation,
start-up, operation and maintenance, with proper
security and reliability, as long as it is operated
in accordance with its specifications.
This manual provides general information necessary
to familiarize you with the control system before
starting the start-up procedures. The procedures
in this manual are organized according to the
required sequence for machine installation, start-
up, operation and maintenance. Make sure you
have understood and followed all procedures and
safety precautions that are part of the machine
instructions, as well as those listed in this guide.
1. Safety & Handling
Installing, starting and servicing this equipment may
be dangerous due to system pressures, the electrical
components and the equipment installation site. Only
service mechanics and skilled and trained installers
should install, start up, and repair this equipment.
1.1. Safety
Aquasmart® 30EV / 30EX liquid chillers are designed
to provide a safe and reliable service when operated
within the design specifi cations. However, due to
system pressure, electrical components and unit
movement, some aspects of the installation, start-up
and maintenance should be observed.
When working on the equipment, read all warnings
specifi ed in the manual and on the labels affi xed to the
unit, follow all applicable safety regulations and wear
suitable protective clothing and equipment.
AQUASMART
30EX / 30EV
®
1
Advertisement
Table of Contents

Related Manuals for Carrier AQUASMART 30EX Series


Summary of Contents for Carrier AQUASMART 30EX Series
-
Page 1: Table Of Contents
Aquasmart® 30EV / 30EX liquid chillers are designed 6.3. Condenser Coil ..................50 to provide a safe and reliable service when operated 6.4. Water Quality - Carrier Recommendations ........50 within the design specifi cations. However, due to 6.5. Routine Cleaning of Coil Surfaces ............. 51 system pressure, electrical components and unit 6.6. - Page 2 1. Safety & Handling (cont.) THINK SAFE! Reminders: 1. Keep a suitable fi re extinguisher near the work site. Check ATTENTION the fi re extinguisher regularly to make sure it is fully charged and working perfectly. - Observe all safety codes. 2.
- Page 3 Oxygen gas reacts violently with oil, grease or other common substances. These products incorporate equipment or components under pressure, manufactured by Carrier or other manufacturers. Do not exceed the specified maximum operating pressures. We recommend that you consult the appropriate national...
-
Page 4: Transportation
1. Safety & Handling (cont.) The necessary protective equipment, and fi re extinguishers 1.2. Transportation suitable for the system and type of refrigerant used must be The current standards for transportation, handling and accessible. lifting (in the latest available revision) shall be observed: Avoid spilling liquid refrigerant on skin or eyes. -
Page 5: Lifting
1.4. Lifting The lifting must generally be carried out with at least 4 points of support. Also note the following requirements: • Safety procedures relating to lifting operations; • If there is damage to the packaging or equipment that may aff ect lifting or safety in the strapping process; •... -
Page 6: Unit Receiving & Inspection
Carrier immediately. location. 30E AQUASMART SCROLL CHILLER Springer Carrier Ltda. Rua(Street) Berto Círio, 521 - B. São Luiz CNPJ 10.948.651/0001-61- CEP (ZIP CODE) 92420-030 Canoas - RS - Brasil (Brazil) - Tel.(Phone):(5551)3477-9500 Modelo... -
Page 7: Nomenclature And General Technical Features
2. Nomenclature and General Technical Features 3 0 E X A 1 5 2 2 6 M A H - - - S Machine Request Type 30E Air Conditioning Modular Standard Module Type Reserved Digits Fixed Speed Reserved digits Variable Speed Controls Design Series No control (slave only) - Page 8 2. Nomenclature and General Technical Features (cont.) Table 2a - General Technical Features (SI) 30EVA15 30EXA15 Nominal Capacity Eff ective Capacity 42,2 51,4 COP (full load) IPLV Capacity control range (per unit) 16 to 100% 50 / 100% Power supply 220V / 380V / 440V (three-phase) Control - Water pump and on/off valves 24 VCA...
- Page 9 Table 2b - General Technical Features (English) 30EVA15 30EXA15 Nominal Capacity Tons Eff ective Capacity 42,2 51,4 COP (full load) IPLV Capacity control range (per unit) 16 to 100% 50 / 100% Power supply 220V / 380V / 440V (three-phase) Control - Water pump and on/off valves 24 VCA Flow Switch / Remote Alarm power supply...
- Page 10 2. Nomenclature and General Technical Features (cont.) Table 3a - Inverter Systems In an Inverter system, the Inverter module will always be the master machine. Nominal Sequence of Installation MODELS Capacity (TR) (Inverter Machine, address 0000, will always be the Master) 30EVA15 (01x) 30EVA15 + (01x) 30EXA15 (01x) 30EVA15 + (02x) 30EXA15...
- Page 11 Converter that allows communication in the Modbus RTU protocol. *** Provided by Carrier and installation is the customer’s responsibility. The flow switch must be installed before starting the unit. Aquasmart units have the main protection routines: •...
- Page 12 2. Nomenclature and General Technical Features (cont.) Victaulic-weld Connection with Y Filter Kit Contains couplings and tubes with Victaulic® standard grooves, Y fi lter (Mesh 40) and pipe sections for welding in the piping. These parts are intended to provide a complete system for connection to the evaporator as well as its protection through the fi lter, which is a mandatory part of the hydraulic system.
-
Page 13: Components
3.Components 3.1 Inverter Unit Components Check Service Safety Valve Valve Valve Shut-off Valve Plate Exchanger Suction Inverter + Fixed Accumulator Compressors Dryer Filter Liquid Sight Gauge High and Low Pressure Switch 3.2 Fixed Unit Components Safety Check Plate Valve Valve Exchanger High and Low... -
Page 14: Components Flowchart
3.Components (cont.) 3.3 Components Flowchart FLOWCHART - FIXED UNIT FIXED SYSTEMS 7/8" DIST1 DIST2 CMCT Water Inlet 7/8" 7/8" REWT SUCT Condenser 1.1/8" 1.1/8" Ø 60,3 mm Water Outlet ULWT 1.1/8" 5/8" 5/8" Cooler Ø 60,3 mm INVERTER SYSTEMS FLOWCHART - VARIABLE UNIT 7/8"... -
Page 15: Installation
4. Instalation 4.1. General recommendations • Locations near machines that generate high frequencies. • Locations where the discharge of air from external IMPORTANT units directly interferes with the well-being of the • The units should be positioned in a location that will neighborhood. -
Page 16: Dimensions
Painting Care - Installations in Machines Surroundings: Carrier recommends that, during installation in the machine surroundings, as a precaution to avoid damage to the paint, the machine should be isolated/protected so that chips derived from cutting procedures on metal parts do not come in contact with the machine. -
Page 17: Minimum Clearance Recommended For Installation
4.4. Minimum Clearance Recommended for Installation The minimum recommended maintenance area to ensure proper airfl ow through the condenser coils and to allow the fan to be maintained is indicated below. CAIXA ELÉTRICA VOLTADA CAIXA ELÉTRICA VOLTADA SWITCHBOARD SWITCHBOARD PARA ESTE LADO PARA ESTE LADO FACING THIS SIDE FACING THIS SIDE... -
Page 18: Data For Hydraulic Interconnection And System Water Sensors
4. Instalation (cont.) 4.5. Data for Hydraulic Interconnection and System Water Sensors The Aquasmart system always relies on the modulation between its units in order to ensure that the system’s outlet water (mixing water) is meeting the temperature set point set on the master machine. Simple and safe operation is achieved by adopting a set of sensors that allows the reading of control temperatures and keeps both the system and each module operating safely. - Page 19 Remote sensors Flow sensor and water Sensors mm (minimum) A water fl ow sensor (WFC) (Figure 7) is supplied with each master and slave unit, and must be installed in the fi eld. The system water sensors (outlet RLWT & inlet REWT) (Figure 11) comes with the master unit and must be installed in the fi eld.
- Page 20 4. Instalation (cont.) Temperature sensor FIG. 11 - Water sensor Heatsink for sensor insertion FIG. 13 - Mounting of the heatsink on the sensor NOTE The heatsink is provided with the unit. It is necessary that fi eld pipeline supports this sink. 5/8in.HEX 1/4-18NPT 6 in...
- Page 21 NOTE The layout of the modules and pipeline design depend on the characteristics of each installation. It is the customer’s responsibility to design their piping and install the modules meeting the minimum requirements required by Carrier. IMPORTANT The piping design shall provide for a correct distribution of fluid flow to the modules in the system, avoiding excess or lack of flow in each of the modules.
- Page 22 4. Instalation (cont.) System Hydraulic Interconnection The control allows two types of hydraulic interconnection: Interconnection with Single Pump or Individual Pump. It is necessary to confi gure the control. a) Interconnection with single pump Concept where there is only one power pump for the system. An ON / OFF valve must be installed for each module that will control it individually.
- Page 23 a1) Interconnection with single pump and use of a 3-way valve Alternative concept for using a superior quality power pump for the system. A three-way valve where the bypass must be discharged after the RLWT sensor. This adjustment is required to provide system stability and a more precise control. IMPORTANT The chiller does not have on its electrical switchboard a power system for the pumps, only signal sending to ON/ OFF.
- Page 24 4. Instalation (cont.) b) Interconnection with single pump Concept where each module will be interlocked with its dedicated pump, facilitating the fl ow balance in each unit. When a module is switched off (by demand or due to a triggered alarm), the pump will automatically shut down. Proper fl ow control is mandatory.
- Page 25 If it is necessary for the fl ow control, a signal from the unit, we suggest the confi guration versus connection that follows: • Setting on the pump control (WP) in SYSTEM (see Section 5.2.6); Inverter Speed 1 = K4 (master unit) Inverter Speed 2-8 = K2 (each slave unit) K4 Off = Speed Ø...
-
Page 26: Electrical Data
4. Instalation (cont.) 4.6. Electrical Data... -
Page 27: Data For Electrical Interconnection
4.7. Data for Electrical Interconnection a) Power supply The power supply must be individual per module. The switchboard has a power terminal for this connection. Diameter to be dimensioned Cables dimensioned in fi eld as per POWER CABLE Power switch FOR SWITCHBOARD 220V - as per 3F + GND... - Page 28 4. Instalation (cont.) NOTE The control mounted on the front panel of the unit is low DC voltage and does not require batteries to store user settings in memory. IMPORTANT The communication mode used is the RS-485 COM pattern (See fi gure 20). Use a twisted-pair cable with shield communication A and B.
-
Page 29: Electrical Connections
Carrier is not responsible for any problems resulting from failure to comply with this recommendation. It is advisable to use a padlock to lock the switch or circuit 4.9. - Page 30 4. Instalation (cont.) Maximum water fl ow on the evaporator This volume is necessary for temperature stability and accuracy. To achieve this volume, it may be necessary to add a reservoir This is limited by the pressure drop allowed in the evaporator. tank to the circuit.
- Page 31 Load loss on evaporator Flow Curve vs Load Loss 10,0 11,0 12,0 13,0 14,0 15,0 16,0 17,0 18,0 19,0 20,0 21,0 22,0 23,0 Flow Rate [m³/h] Flow Pressure Lost Flow Load loss 10,7 11,6 12,2 13,1 14,3 15,2 15,6 16,1 16,8 17,3 17,9...
-
Page 32: Water Connections
4. Instalation (cont.) 4.10. Water Connections IMPORTANT Depending on the weather conditions in your area, you Regarding the size and position of the inlet and outlet water connections, refer to the dimensional drawings provided with should: the unit. The water pipes must not transmit any radial or axial •... -
Page 33: Operation
5. Operation 5.1 System Confi gurations IMPORTANT Before putting the unit / system into operation by pushing the Power button, you need to set the units and system confi gurations. Each unit has a confi guration switch (DIP), as Figure 22 on the side, and it is used to set up the address and capacity of each unit. -
Page 34: Start-Up
5. Operation (cont.) 5.2. Start-up Before starting the unit, check the above conditions and the IMPORTANT following items: The units have crankcase resistors in the compressors. Check the chilled water circulating pumps the air terminal The resistors are connected depending on the outside units (Fan Coil) and all other equipment connected to temperature. - Page 35 5.2.2 Keyboard Instructions Back to the Set the Select Page, main screen parameters Option or Function MODO AJUSTAR CANCELAR VERIFICAR SELECIONAR ALTERAR CONFIRMAR VENTILADOR ALARME Displays the history of errors and alarms Check the Change the Confi rm the operating selected performed parameters...
- Page 36 5. Operation (cont.) 5.2.4 Set Date and Time 5.2.5 Set Timer 1. Press AJUSTAR “Set” (A) to enter the menu; NOTE On Timer: Time programmed to call. 2. Use the buttons SELECIONAR “Select” (B) to select the “Set Timer OFF Scheduled time to shut down. Time”...
- Page 37 Current Mode: Daily Mode: 1. Press AJUSTAR “Set” (A) to enter the menu; 1. Press AJUSTAR “Set” (A) to enter the menu; 2. Use the buttons SELECIONAR “Select” (B) to select the 2. Use the button SELECIONAR “Select” (B) to select the “Time “Time Mode”...
- Page 38 5. Operation (cont.) Weekly Mode: 5.2.6 System Parameters Setup 1. Press AJUSTAR “Set” (A) to enter the menu; ATTENTION 2. Use the buttons SELECIONAR “Select” (B) to select the Note that whenever you need to change some system parameters, the software will ask for the password. “Time Mode”...
- Page 39 To set the System Voltage: To set the number of outdoor units “Number of ODU” : In the “Service Access” menu use the buttons SELECIONAR Use the buttons ALTERAR “Change” (E) to choose the “Select” (B) to select the “Voltage” option. amount of system units (1-8) and press CONFIRMAR “Enter”...
- Page 40 5. Operation (cont.) To enable or disable the differential pressure switch “DPS To set the design’s water temperature diff erence Delta Protection”, follow these steps: (FLWD): In the “Service Access” menu use the buttons SELECIONAR Press SELECIONAR “Select” (B) down to “FLWD”, press “Select”...
- Page 41 To set the opening / closing time of the valve To Reset the Alarm of a unit or system: Use the buttons SELECIONAR “Select” (B) to select the 1. In the “Service Access” menu use the buttons SELECIONAR option “WVSCSDT” (C) and press CONFIRMAR “Enter” (D); “Select”...
- Page 42 5. Operation (cont.) 5.2.7 Checking the System Information Comp freq: 000Hz 4th Page Comp INV AMP: 00.0A (for INVERTER Heatsink Temp: 30°C NOTE system only) Dc bus Volt: 000 [01] - To switch between the units, press [CHANGE]. - To navigate the pages of chiller units, press [SELECT] up Driver NEC ver.: 000 or down to view the next page or the previous Driver DSP ver: 000...
-
Page 43: Modbus
5.3 Modbus IMPORTANT RTU MODBUS COMMUNICATION PROTOCOL The system communication is performed serially in RS-485 standard, with enclosed protocol. To convert to Modbus RTU protocol, the K35402026 converter should be used (called Gateway). FIG. 23 - Modbus Kit Features “Modbus Gateway” is a slave device. The RS485 standard is robust to noise and interference, but the higher the distance the shorter the transmission rate. - Page 44 5. Operation (cont.) 5. Electrical Connection: GATEWAY RS485 - Closed RS485 - Modbus RTU Protocol. It comes Protocol. Go to from Cond. or HMI Supervisory 220VAC NOTE When using an RS485 converter> 232, do not power it from the Gateway. Reading and Writing map Input Register (Function 04) - CHILLER 1 Address...
- Page 45 Reading and Writing map (Cont.) Input Register (Function 04) - CHILLER 2 Address Description Comment H0101 Reserve H0102 Error Code H0103 Outlet Water Temperature (INT) H0104 Inlet Water Temperature (INT) Chiller <2, referring to Chiller unit. Chiller> 2, referring to the system. H0105 Outdoor Temperature H0106...
- Page 46 5. Operation (cont.) Reading and Writing map (Cont.) Input Register (Function 04) - CHILLER 3-16 Address Description Comment H0201-701 Reserve H0202-702 Error Code H0203-703 Outlet Water Temperature (INT) H0204-704 Reserve H0205-705 Outdoor Temperature H0206-706 Middle Condenser Temperature H0207-707 Suction Temperature H0208-708 Discharge Temperature Comp.1 H0209-709...
- Page 47 Type of System Address: H0001 Address: H0001 System Type: System Type: High High Fixed 15 Inverter 15 Fixed 30 Inverter 30 Fixed 45 Inverter 45 Fixed 60 Inverter 60 Fixed 75 Inverter 75 Fixed 90 Inverter 90 Fixed 105 Inverter 105 Fixed 120 Inverter 120 Table DI...
-
Page 48: Maintenance & Repair
IMPORTANT • Dehydration: Refer to the Carrier’s Standard Service Techniques Manual, Chapter 1, Refrigerants, Sections 6 Before performing any work on the machine, ensure that and 7 for more details. Do not reuse the compressor to the power supply is turned off . -
Page 49: Electrical Maintenance
To minimize discharge to the atmosphere, refrigerants and lubricating oil must be transported using IMPORTANT methods which reduce leaks and losses to a minimum. Carrier does recommend, maintenance Leaks must be repaired immediately. procedures, that the refrigerant be collected in the All units are equipped with two special connections in suction condenser unit, using the compressor unit. -
Page 50: Condenser Coil
10%, to clear a 2m² coil 6. Dissolved silicon: Silicon is an acid element of water surface. This process can be performed with a Carrier gun, or and can also lead to corrosion risks. with a spray gun in the low-pressure position. One should be Content <... -
Page 51: Routine Cleaning Of Coil Surfaces
This cleaner Within a range of 7 to 9 for copper. In a range from 5 to is available in the Carrier service division with code P902-0301 9, nickel-copper pipes can be used. -
Page 52: Removal Of Closing Panels
6. Maintenance & Repair (cont.) 6.6. Removal of Closing Panels WARNING a) Switchboard Section DO NOT USE water over 130 ° F (54.4 ° C), to not destroy Turn off the power of the 30E. enzymatic activity. To access the switchboard on the units, remove the screws 5. -
Page 53: Lubrication
b) Pressure switches WARNING The low and high pressure switches are of the miniaturized, 1. To dismantle the fan, it is necessary to remove automatic reset type, and are directly coupled to the the protective cover in the Flying Bird propeller, suction and discharge lines respectively. -
Page 54: Troubleshooting
6. Maintenance & Repair (cont.) 6.9. Troubleshooting CONSEQUENCE CONSEQUENCE ERROR TYPE OF ERROR of ERROR only on of ERROR only on RECOMMENDED ACTIONS CODE Chiller 1 (Master) Chiller 2 to 8 (Slaves) Phase Sequence No unit in the Only the unit with Turn off the unit with error. - Page 55 CONSEQUENCE CONSEQUENCE ERROR TYPE OF ERROR of ERROR only on of ERROR only on RECOMMENDED ACTIONS CODE Chiller 1 (Master) Chiller 2 to 8 (Slaves) With the unit running measure suction pressure. Low Suction Pressure Check pressure switch actuation. Replace It only turns off the faulty unit.
- Page 56 6. Maintenance & Repair (cont.) CONSEQUENCE CONSEQUENCE ERROR of ERROR only TYPE OF ERROR of ERROR only on RECOMMENDED ACTIONS CODE on Chiller 2 to Chiller 1 (Master) 8 (Slaves) Check the building’s emergency system. If the unit is running, It only turns off the Only restart the system if you are sure that the system will...
- Page 57 CONSEQUENCE CONSEQUENCE ERROR of ERROR only TYPE OF ERROR of ERROR only on RECOMMENDED ACTIONS CODE on Chiller 2 to Chiller 1 (Master) 8 (Slaves) Error in communication Communication cable between E-23 between the fan board It only turns off the indicated unit. the fan board and main board.
- Page 58 6. Maintenance & Repair (cont.) CONSEQUENCE CONSEQUENCE ERROR of ERROR only TYPE OF ERROR of ERROR only on RECOMMENDED ACTIONS CODE on Chiller 2 to Chiller 1 (Master) 8 (Slaves) Check/correct: Turns off the compressors. If the unit is turned off , it does not Saturated suction temperature sensor.
- Page 59 CONSEQUENCE ERROR CONSEQUENCE of ERROR TYPE OF ERROR of ERROR only on RECOMMENDED ACTIONS CODE only on Chiller 1 (Master) Chiller 2 to 8 (Slaves) Models 380/440V: Turns off or does not enable Inverter Check/correct: compressor starting. Supply voltage on the board Error in the Inverter E-40 Models 220V:...
- Page 60 6. Maintenance & Repair (cont.) CONSEQUENCE ERROR CONSEQUENCE of ERROR of ERROR only TYPE OF ERROR RECOMMENDED ACTIONS CODE only on Chiller 1 (Master) on Chiller 2 to 8 (Slaves) Models 380/440V: Check/correct: Inverter compressor High Heatsink temperature (maximum 80°C). won’t start temperature in Voltage and current on the...
- Page 61 CONSEQUENCE CONSEQUENCE ERROR of ERROR only TYPE OF ERROR of ERROR only on RECOMMENDED ACTIONS CODE on Chiller 2 Chiller 1 (Master) to 8 (Slaves) Check/correct: Board supply voltage. Connection Models 380/440V: between board and compressor. Shuts off the Inverter Error in the DC Voltage on components - reactor and capacitor.
- Page 62 6. Maintenance & Repair (cont.) CONSEQUENCE CONSEQUENCE ERROR of ERROR only TYPE OF ERROR of ERROR only on RECOMMENDED ACTIONS CODE on Chiller 2 to Chiller 1 (Master) 8 (Slaves) Check/correct: Overload on Shuts off only the faulty unit, resetting Connection between board and E-55 fan start...
-
Page 63: Attachment I - Electrical Diagrams
Attachment I - Electrical Diagrams... - Page 64 Attachment I - Electrical Diagrams (cont.)
- Page 66 Attachment I - Electrical Diagrams (cont.)
-
Page 67: Attachment Ii - Conversion Table R-410A
Attachment II - Conversion Table R-410A Steam Pressure Steam Pressure Steam Pressure Saturated Saturated Saturated Temperature kg/cm² Temperature kg/cm² Temperature kg/cm² (°C) (°C) (°C) 0,075 0,695 2,310 23,6 0,083 0,721 2,369 24,2 0,091 0,747 2,429 24,8 0,100 0,774 2,490 25,4 0,109 0,802 2,552... -
Page 68: Attachment Iii - Set Point Table
Attachment III - Set Point Table Minimum Values N° Chiller´s Delta... - Page 69 Minimum Values N° Chiller´s...
- Page 70 Attachment III - Set Point Table (cont.) Maximum values N° Chiller´s Delta 14,0 14,0 14,0 14,0 14,0 14,0 14,0 14,0 14,0 14,0 14,0 14,0 14,0 14,0 13,9 13,9 14,0 14,0 14,0 14,0 14,0 13,9 13,9 13,9 14,0 14,0 14,0 14,0 13,9 13,9 13,9...
- Page 71 Maximum values N° Chiller´s 14,0 13,8 13,4 13,2 13,1 13,0 12,9 12,9 13,9 13,8 13,4 13,2 13,0 13,0 12,9 12,9 13,8 13,8 13,3 13,1 13,0 12,9 12,9 12,8 13,7 13,7 13,3 13,1 13,0 12,9 12,8 12,8 13,6 13,6 13,3 13,1 13,0 12,9 12,8...
- Page 72 At the factory’s discretion and with the objective of improving the product, the features mentioned here may change at any time without notice. IOM Aquasmart 30E ING - A - 07-17...
Need help?
Do you have a question about the AQUASMART 30EX Series and is the answer not in the manual?
Questions and answers