Advertisement
Quick Links
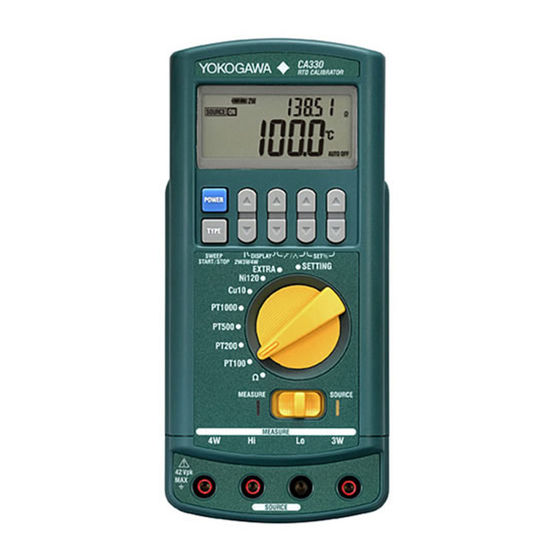
CA330
User's
RTD Calibrator
Manual
User's Manual
This manual explains how to use the RTD Calibrator.
Keep this manual in a safe place for quick reference in the event that a question arises.
2nd Edition: January 2016 (YMI)
All Rights Reserved, Copyright © 2015, Yokogawa Meters & Instruments Corporation
Printed in Japan
Safety Precautions
The handling precautions, component names, and specifications are covered in the separate Getting
Started Guide (IM CA310-02EN).
Be sure to read the Getting Started Guide before using this instrument.
Basic Setup
1.
Turn the instrument on, and set the rotary switch to
2.
Use the left-most up and down keys to select the setting and the right-most up and down keys to
switch the options.
3.
Press OUTPUT ON/OFF to confirm the setting.
Selects the setting Selects an option
▲
▲
▲
POWER
TYPE
Confirms the settings
Auto power-off
If this is set to ON when the instrument is running on batteries, the power automatically turns off
if you do not operate the instrument for approx. 20 minutes. This is invalid when the instrument is
running off of the AC adapter.
Backlight
Turns the backlight on and off. If set to Timer, the backlight turns on for approx. 2 minutes every
time you operate a key.
Sweep time
When sweeping in steps, set the output duration of each step. When sweeping linearly, set the
output duration for the value to change from 0% to 100% (or 100% to 0%).
Initialization of Span Settings
Initializes the span settings.
Initialization of Settings
Initializes settings.
Measurement
1.
Set the CA330's measure/source switch to
2.
Follow the instructions in the Getting Started Guide to connect the CA330 to the device to be
measured using the included lead cable.
3.
Use the rotary switch to set the range.
4.
If you set the range to EXTRA, press
Select a sensor from Cu100Ω, Cu50Ω, PT50, PT50G, and PT100G.
If you set the range to PT100, press TYPE
Select a coefficient from IEC(3851), 3850, JPT100(3916), and 3926.
TYPE
If you set the range to Ω, press
5.
Press the left-most ▼ key to set the wiring system to 2W (two-wire), 3W (three-wire), or 4W
(four-wire).
Sourcing
1.
Set the CA330's measure/source switch to
ON appears on the screen, and the output is turned on.
2.
Use the rotary switch to set the range.
3.
If you set the range to EXTRA, press
If you set the range to PT100, press TYPE
Select a coefficient from IEC(3851), 3850, JPT100(3916), and 3926.
TYPE
If you set the range to Ω, press
Note
At the 3000Ω setting, the CA330 sources resistance ranging from 0.0 Ω to 3300.0 Ω. At the 500Ω
setting, the CA330 sources resistance ranging from 0.00 Ω to 550.00 Ω. It can be used to calibrate
a RTD in this range.
4.
Follow the instructions in the Getting Started Guide to connect the CA330 to the target device
using the included lead cable.
5.
Follow the instructions for common operations in the Getting Started Guide, and set the output
value with the ▼ and ▲ keys. The number of counts that change when the ▼ or ▲ key is
pressed is different when the range is set to Ω and when it is set to some other setting.
Note
•
The CA330 is calibrated excluding the voltage dip in the lead cable.
Load current readings include an error resulting from the lead cable resistance.
•
The included binding post can also be attached to the terminal.
•
If the excitation current exceeds the upper limit, the source value display blinks.
SETTING
.
Display
Setting
Options
Auto power-off
ON
▲
ON/OFF
Backlight
Sweep time
15s
Initialization of
—
span settings
—
Initialization of
settings
*: Default value
MEASURE
.
TYPE
sensor.
several times to select the
sensor coefficient.
to select the
to select 3000Ω or 500Ω.
SOURCE
.
TYPE
sensor.
to select the
to select the
sensor coefficient.
to select 3000Ω or 500Ω.
Changing the Output Mode
1.
Refer to "Keys" in the Getting Started Guide, and set the output mode.
Normal output (no display): The set value is output. The output value can be varied using the ▼
and ▲ keys.
Span check (
span.
Step sweep(
Linear sweep (
▲
Press simultaneously to set the output mode.
Sweeping
IM CA330-01Z2
The output value is varied automatically between 0% and 100% of the specified span. There are
2nd Edition
two sweep modes: step and linear.
Step sweep
Sweep time
100%
0%
1.
Set the 0% and 100% of the span, which is the sweep range.
Set the span 0% value using the ▼ and ▲ keys and then press simultaneously the first and the
second ▼ keys from the right. SET is displayed, and 0% is set.
Likewise, set the span 100% value using the ▼ and ▲ keys and then press simultaneously the
first and the second ▼ keys from the right.
/OFF
*
For details on key operation, see "Keys" in the Getting Started Guide.
2.
Set the output mode to step sweep or linear sweep. The ON indicator blinks.
/TIMER
*
3.
TYPE
Press
/30s/45s/60s
*
Pressing
value continues to be output while sweeping is paused.
Pressing
When sweeping is paused, pressing the left-most ▲ key sets the output to the span 0% value.
Changing the Sub Display
The temperature shown on the main display can be displayed using a value converted into a
resistance or a percentage of the span. This is invalid when the range is Ω.
▲
▲
Press simultaneously to set the sub display.
): In addition to normal output, the output can be varied in units of 25% of the
): The output is varied automatically in steps of 25% of the span.
): The output is varied linearly from 0% to 100%.
Output setting for span check
Set to 100% of
▲
▲
▲
span
Set to 0% of
span
Pressing this when sweeping is
paused sets the output to the
span 0% value.
Linear sweep
100%
0%
Time
. Sweeping will start. The ON indicator changes to solid.
TYPE
again pauses sweeping and causes the ON indicator to blink. The displayed
TYPE
yet again resumes sweeping from the last output value.
▲
▲
▲
▲
▲
▲
Increase or
decrease
by 1 count
Increase or decrease
by 100 counts
Increase or decrease in
25% steps of span
Sweep time
Time
IM CA330-01Z2
Advertisement

Related Manuals for YOKOGAWA CA300 Series


Summary of Contents for YOKOGAWA CA300 Series
- Page 1 Increase or decrease in span 0% value. 25% steps of span 2nd Edition: January 2016 (YMI) All Rights Reserved, Copyright © 2015, Yokogawa Meters & Instruments Corporation Printed in Japan Sweeping IM CA330-01Z2 The output value is varied automatically between 0% and 100% of the specified span. There are 2nd Edition two sweep modes: step and linear.
- Page 2 ▲ ▲ ▲ ▲ に設定 とお役に立ちます。 スパンの0% 1カウント増減 に設定 同時に押して出力モードを設定 100カウント増減 スパンの25%ステップで増減 スイープ一時停止中に押すと、 スパ ンの0%に設定 スイープ 2nd Edition: January 2016 (YMI) All Rights Reserved, Copyright © 2015, Yokogawa Meters & Instruments Corporation 設定したスパンの 0%と 100%の間で、自動的に出力値が変化します。スイープには、 Printed in Japan ステップスイープとリニアスイープがあります。 IM CA330-01Z2 2 版 ステップスイープ リニアスイープ スイープ時間 スイープ時間 本機器を安全にご使用いただくために 100% 100% 本機器を使用するときの注意、各部の名称、仕様については、別冊のスタートガイド (IM CA310-02JA) に記載しています。 本機器を使用する前に、必ずスタートガイドをお読みいただき、正しくご使用ください。 0%...
Need help?
Do you have a question about the CA300 Series and is the answer not in the manual?
Questions and answers