Table of Contents
Advertisement
Quick Links
User's
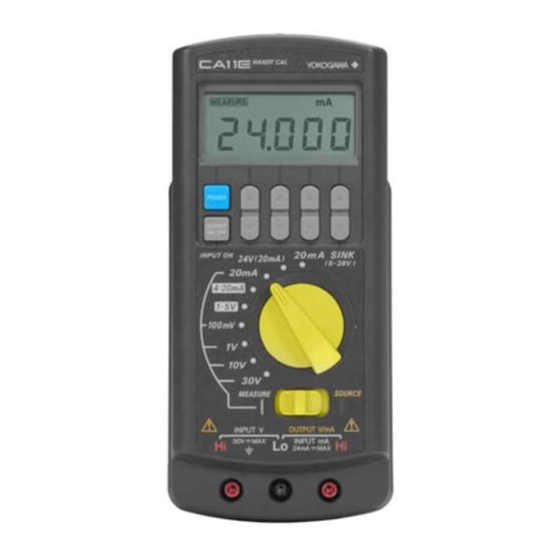
CA11E
HANDY CAL
Manual
(Voltage/Current Calibrator)
Keep this manual in a safe place so that
you can refer to it when necessary.
Safety Precautions
The following manual, including this manual, are provided as manuals for the CA11E.
Please be sure to read all manuals.
IM CA11E-03EN
(Getting Started Guide: For Safety)
IM CA11E-01E (User's Manual - 1 - : Generation, Measurement, and Other features)
IM CA11E-02E (User's Manual - 2 - : Calibration procedure and Specification): This manual
8. Calibration Procedure
■ Calibration Procedure
To maintain a high level of accuracy, it is recommended that the CA11E HANDY CAL
be calibrated annually.
The "Selecting the Standards" section below presents calibration methods using the
recommended standards.
■ Selecting the Standards
<Source feature>
Items to be
Names of
Range
calibrated
standards
100 mV
Digital
1000 mV
DCV
multimeter
10 V
(DMM)
30 V
Digital
20 mA
20 mA (4-20 mA)
multimeter
Digital
20 mA
multimeter,
20 mA SINK
SINK
standard DC
voltage generator
<Measurement feature>
Items to be
Names of
Range
calibrated
standards
100 mV
Standard DC
1000 mV
DCV
voltage generator
10 V (1-5 V)
30 V
Standard DC
20 mA
20 mA (4-20 mA)
current generator
■ Environmental Conditions for Calibration
Ambient temperature:
23 ± 1°C
Relative humidity:
45 to 75% RH
Warm-up:
Warm-up time as specified for the standard
■ Calibration Points
• The calibration points are as specified in the following tables.
• It is possible to independently select the necessary range to be recalibrated.
• Always calibrate the zero (0) point and full scale (FS) as a pair for generation.
<Source>
Calibration points
Standard Value *1
0
0 mV
100 mV
FS
100 mV
0
0 mV
1 V
FS
1000 mV
0
0 V
10 V
FS
10 V
0
0 V
30 V
FS
30 V
0
0 mA
20 mA
FS
20 mA
0.1
0.1 mA
20 mA
SINK
FS
20 mA
*1:
Make adjustments to CA11E according
to the reading of the standard
(CA11E output Value) as specified in
the table.
- 2 -
Printed in Korea
IM CA11E-02E
4th Edition: Dec. 2014(YMI)
Measuring
Accuracy
Remarks
range
Max. 110 mV
±(0.005%+5 μV)
Max. 1.1 V
±(0.005%+20 μV)
Model 7561
Max. 11 V
±(0.005%+200 μV)
(YOKOGAWA)
Max. 33 V
±(0.005%+2 mV)
or equivalent
Max. 24 mA
±(0.01%+0.8 μA)
0.01 to 24 mA
---
5 to 28 V
Generated
Accuracy
Remarks
value
100 mV
±(0.01%/100 mV)
Model 2552
1 V
±(0.01%/1 V)
(YOKOGAWA)
10 V
±(0.0%/10 V)
or equivalent
30 V
±(0.02%/30 V)
20 mA
±(0.02%/20 mA)
---
<Measurement>
Calibration points
Standard Value *2
100 mV
FS
100 mV
1 V
FS
1 V
10 V
FS
10 V
30 V
FS
30 V
20 mA
FS
20 mA
*2:
Set the Value to the standard as
specified in the table.
■ Calibration the Generation Feature
Operation procedure:
<1> Warm up the standard.
<2> Before turning on the power of the CA11E calibrator, connect it to the standard.
<3> Turn on the power of the instrument.
<4> Simultaneously press and hold the
"Assignment of Keys for Calibration" section below) for about 2 seconds to enter
the calibration mode.
<5> Select the generation range to calibrate using the MEASURE/SOURCE selection
switch and range selection rotary switch. The display unit shows "CAL," "SOURCE,"
"ON," "0," and the lower limit.
<6> Read the output value of the CA11E using the standard (digital multimeter), and using
the
adjustment keys adjust the CA11E so that the output value is set to the offset
value. Then press and hold the
to fix the setting.
After fixing the setting, the display unit reading changes to "CAL," "SOURCE," "ON,"
"FS," and a full scale of the range.
<7> Read the output value of the CA11E using the standard (digital multimeter), and using
the
adjustment keys adjust the CA11E so that the output value is set to the full
scale value. Then press and hold the
1 second to fix the setting.
After fixing the setting, the display unit shows "0 FS" blinking. Re-press and hold
the
input determination (ENTER) key for about 1 second to write the calibration
coefficients to the EEPROM of the instrument.
(This overwrites the previous calibration coefficients.)
When this is complete, the instrument returns to the status in Step 5.
<8> Repeat Steps 5 to 7 for each range to be calibrated.
To return to the previous step:
<9> To return to the previous step without fixing the setting, press and hold the
cancellation key for about 1 second.
Note that this is possible only before writing to the EEPROM.
To return to the nomal operation mode:
<10> Simultaneously press and hold the
"Assignment of Keys for Calibration" section below) for about 2 seconds, or press
the [POWER] key to turn off the power once and then press it again to turn it back on.
■ Calibration Precautions
Connection for 20 mA SINK calibration
Connect the CA11E calibrator to the standard as show below:
CA11E
Lo Hi
■ Assignment of Keys for Calibration
When the CA11E calibrator is in the calibration mode, keys are assigned as specified here.
Input cancellation key
(For about 1 second)
Input determination
(ENTER) key
(For about 1 second)
■ Calibration the Measurement Feature
Operation procedure:
<1> Warm up the standard.
<2> Before turning on the power of the CA11E calibrator, connect it to the standard.
<3> Turn on the power of the instrument.
<4> Simultaneously press and hold the
"Assignment of Keys for Calibration" section below) for about 2 seconds to enter
the calibration mode.
<5> Select the measurement range to calibrate using the MEASURE/SOURCE
selection switch and range selection rotary switch.
"CAL" and "MEASURE" appear and "FS" blinks on the display unit.
(If a value nearly equivalent to full scale has been input, a measured value and
"FS" appear.)
<6> Set up the standard in order to input the full scale value to the instrument.
Wait until the reading stabilizes, then press and hold the
(ENTER) key for about 1 second to fix the setting.
<7> After fixing the setting, "0" and "FS" indications on the display unit start blinking.
Re-press and hold the
input determination (ENTER) key for about 1 second
to write the calibration coefficients to the EEPROM of the instrument.
(This overwrites the previous calibration coefficients.)
When this is complete, the instrument returns to the status in Step 5.
<8> Repeat Steps 5 to 7 for each range to be calibrated.
To return to the previous step:
<9> To return to the previous step without fixing the setting, press and hold the
cancellation key for about 1 second.
Note that this is possible only before writing to the EEPROM.
To return to the nomal operation mode:
<10> Simultaneously press and hold the
"Assignment of Keys for Calibration" section below) for about 2 seconds, or press
the [POWER] key to turn off the power once and then press it again to turn it back on.
keys (shown in the figure in the
input determination (ENTER) key for about 1 second
input determination (ENTER) key for about
keys (shown in the figure in the
H
DMM
current range
L
SINK
Constant-voltage
power supply
(Vo: 5 to 28 V)
SOURCE
ON
CAL
0
1
2
3
4
Mode switching
(calibration or nomal)
(Press and hold two keys
simultaneously for 2 seconds.)
Adjustment keys
(six keys)
Digit to adjusted by
the adjustment keys
keys (shown in the figure in the
input determination
keys (shown in the figure in the
IM CA11E-02E <Page 1>
input
input
Advertisement
Table of Contents

Subscribe to Our Youtube Channel
Related Manuals for YOKOGAWA CA11E HANDY CAL


Summary of Contents for YOKOGAWA CA11E HANDY CAL
- Page 1 Note that this is possible only before writing to the EEPROM. To return to the nomal operation mode: To maintain a high level of accuracy, it is recommended that the CA11E HANDY CAL keys (shown in the figure in the be calibrated annually.
- Page 2 With reference to the equipment types in the WEEE directive Annex I, this product is classified as a “Monitoring and Control instrumentation” product. Measured-value indication updating intervals: When disposing products in the EU, contact your local Yokogawa Europe B. V. office. Approximately 1 second Do not dispose in domestic household waste.
Need help?
Do you have a question about the CA11E HANDY CAL and is the answer not in the manual?
Questions and answers