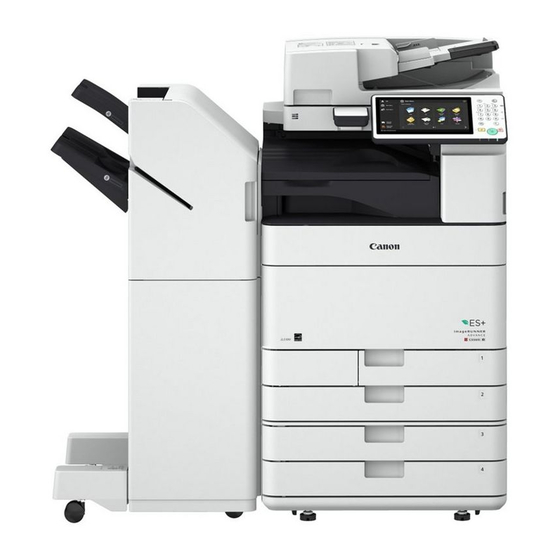
Canon imageRUNNER ADVANCE C5560 Series Troubleshooting Manual

Canon imageRUNNER ADVANCE C5560 Series Troubleshooting Manual

Hide thumbs Also See for imageRUNNER ADVANCE C5560 Series:

Advertisement

Troubleshooting Guide
imageRUNNER ADVANCE
C5560 Series
April, 2017
OIP Field Quality Assurance Div.

Advertisement

Table of Contents
loading

Summary of Contents for Canon imageRUNNER ADVANCE C5560 Series

  • Page 1 Troubleshooting Guide imageRUNNER ADVANCE C5560 Series April, 2017 OIP Field Quality Assurance Div.
  • Page 2 [Regarding Troubleshooting Guide] Please be advised of the release of Troubleshooting Guide for image RUNNER ADVANCE C5560 Series. Troubleshooting Guide is a booklet compiled from FAQs issued by Canon Inc. [Additional case(s)] There is no additional case at April, 2017.
  • Page 3: Table Of Contents

    Contents Image Faults......................1 Image displacement when using ADF due to broken grounding sheet..........1 Horizontal white line appears at 120mm from the leading edge of the sheet with a Bk halftone image............................... 2 Horizontal lines with 94mm pitch on a halftone image................ 3 Image failure occurring repeatedly at the same interval (xx pitch)............
  • Page 4: Image Faults

    Image Faults Copier Color | iR-ADV C5560/C5550/C5540/C5535 Series | imageRUNNER ADVANCE C5535, imageRUNNER ADVANCE C5535F, imageRUNNER ADVANCE C5535i, imageRUNNER ADVANCE C5540, imageRUNNER ADVANCE C5540F, imageRUNNER ADVANCE C5540i, imageRUNNER ADVANCE C5550, imageRUNNER ADVANCE C5550F, imageRUNNER ADVANCE C5550i, imageRUNNER ADVANCE C5560, imageRUNNER ADVANCE C5560F, imageRUNNER ADVANCE C5560i Copier Color | iR-ADV C5255/C5250/C5240/C5235 Series | iR_ADV C5235I, iR_ADV C5255, iR_ADV C5255F, iR_ADV C5255I, iR_ADV C5250, iR_ADV C5250F, iR_ADV C5250I, iR_ADV C5240, iR_ADV C5240F, iR_ADV C5240I, iR_ADV C5235, iR_ADV C5235F, iR_ADV C5240A, iR_ ADV C5235A...
  • Page 5: Horizontal White Line Appears At 120Mm From The Leading Edge Of The Sheet With A Bk Halftone Image

    Copier Color | iR-ADV C5560/C5550/C5540/C5535 Series | imageRUNNER ADVANCE C5535, imageRUNNER ADVANCE C5535F, imageRUNNER ADVANCE C5535i, imageRUNNER ADVANCE C5540, imageRUNNER ADVANCE C5540F, imageRUNNER ADVANCE C5540i, imageRUNNER ADVANCE C5550, imageRUNNER ADVANCE C5550F, imageRUNNER ADVANCE C5550i, imageRUNNER ADVANCE C5560, imageRUNNER ADVANCE C5560F, imageRUNNER ADVANCE C5560i Horizontal white line appears at 120mm from the leading edge of the sheet with a Bk halftone image For CE...
  • Page 6: Horizontal Lines With 94Mm Pitch On A Halftone Image

    Copier Color | iR-ADV C5560/C5550/C5540/C5535 Series | imageRUNNER ADVANCE C5535, imageRUNNER ADVANCE C5535F, imageRUNNER ADVANCE C5535i, imageRUNNER ADVANCE C5540, imageRUNNER ADVANCE C5540F, imageRUNNER ADVANCE C5540i, imageRUNNER ADVANCE C5550, imageRUNNER ADVANCE C5550F, imageRUNNER ADVANCE C5550i, imageRUNNER ADVANCE C5560, imageRUNNER ADVANCE C5560F, imageRUNNER ADVANCE C5560i Horizontal lines with 94mm pitch on a halftone image For CE Symptom...
  • Page 7: Image Failure Occurring Repeatedly At The Same Interval (Xx Pitch)

    Copier Color | iR-ADV C5560/C5550/C5540/C5535 Series | imageRUNNER ADVANCE C5535, imageRUNNER ADVANCE C5535F, imageRUNNER ADVANCE C5535i, imageRUNNER ADVANCE C5540, imageRUNNER ADVANCE C5540F, imageRUNNER ADVANCE C5540i, imageRUNNER ADVANCE C5550, imageRUNNER ADVANCE C5550F, imageRUNNER ADVANCE C5550i, imageRUNNER ADVANCE C5560, imageRUNNER ADVANCE C5560F, imageRUNNER ADVANCE C5560i Image failure occurring repeatedly at the same interval (xx pitch) For CE [Symptom]...
  • Page 8 a) When the interval is 34.9 mm pitch, check Developing Cylinder [a] in Developing Assembly (FM1-N370/-N371/-N372/-N373). b) When the interval is 94.2 mm pitch, check Drum [b]. [Note] If the failure occurs in all the colors, checkFixing Film [i] or Fixing Pressure Roller [j]. c) When the interval is 44 mm pitch, check Charging Roller [c] of the Drum Unit.
  • Page 9: Faulty Feeding

    Faulty Feeding Copier Color | iR-ADV C3330/C3325/C3320 Series | imageRUNNER ADVANCE C3320F, imageRUNNER ADVANCE C3320i, imageRUNNER ADVANCE C3320, imageRUNNER ADVANCE C3320L, imageRUNNER ADVANCE C3325, imageRUNNER ADVANCE C3325i, imageRUNNER ADVANCE C3330, imageRUNNER ADVANCE C3330F, imageRUNNER ADVANCE C3330i Copier Color | iR-ADV C5560/C5550/C5540/C5535 Series | imageRUNNER ADVANCE C5535, imageRUNNER ADVANCE C5535F, imageRUNNER ADVANCE C5535i, imageRUNNER ADVANCE C5540, imageRUNNER ADVANCE C5540F, imageRUNNER ADVANCE C5540i, imageRUNNER ADVANCE C5550, imageRUNNER ADVANCE C5550F, imageRUNNER ADVANCE C5550i, imageRUNNER ADVANCE C5560, imageRUNNER ADVANCE C5560F, imageRUNNER ADVANCE C5560i...
  • Page 10 [Note] This operation stops the alignment plate at the alignment position +5.0mm. 3) Set one sheet of paper [1] in the processing tray unit, fit it to the edge [b] of the rear alignment plate [2], and then measure the gap [a] between the edge of the front alignment plate [3] and the paper with a scale.
  • Page 11 - 25 - 20 - 15 - 10 5) Take copy with a single sheet of original into 10 sets of output to verify if the symptom does not occur any more.
  • Page 12: Malfunction

    Malfunction Copier Color | iR-ADV C5560/C5550/C5540/C5535 Series | imageRUNNER ADVANCE C5535, imageRUNNER ADVANCE C5535F, imageRUNNER ADVANCE C5535i, imageRUNNER ADVANCE C5540, imageRUNNER ADVANCE C5540F, imageRUNNER ADVANCE C5540i, imageRUNNER ADVANCE C5550, imageRUNNER ADVANCE C5550F, imageRUNNER ADVANCE C5550i, imageRUNNER ADVANCE C5560, imageRUNNER ADVANCE C5560F, imageRUNNER ADVANCE C5560i Toner leakage from the bottom of the process unit due to the spring in the shutter coming off For CE...
  • Page 13: Insert The Toner Container" Is Displayed Caused By Half-Insertion Of The Front Door Sw Connectors

    Copier Color | iR-ADV C5560/C5550/C5540/C5535 Series | imageRUNNER ADVANCE C5535, imageRUNNER ADVANCE C5535F, imageRUNNER ADVANCE C5535i, imageRUNNER ADVANCE C5540, imageRUNNER ADVANCE C5540F, imageRUNNER ADVANCE C5540i, imageRUNNER ADVANCE C5550, imageRUNNER ADVANCE C5550F, imageRUNNER ADVANCE C5550i, imageRUNNER ADVANCE C5560, imageRUNNER ADVANCE C5560F, imageRUNNER ADVANCE C5560i "Insert the toner container"...
  • Page 14 5) Remove the 1 screw [2] and 1 screw [3], and remove the right upper cover [1]. 6) Remove the front upper right cover [1]. 7) Remove the 1 boss [2] and remove the inner delivery cover (left rear) [1]. 8) Remove the delivery tray [1] by removing the 4 hooks [2] and the 2 projections [3].
  • Page 15 9) Remove the 4 hooks [2] and remove the inner delivery cover (left) [1]. 10) Remove the 2 bosses [2] and remove the inner delivery middle cover [1]. 11) Open the 4 small covers [1] and remove the 4 toner containers [2]. 12) Remove the 4 screws [3], remove the 2 connectors [2] and remove the toner container front inner cover [1].
  • Page 16 13) Check whether the 4 connectors [1] on the inner side of the toner bottle inner door are half inserted. If the connectors are half inserted, push them. If they are not half inserted, look for other causes. 14) Attach the parts by reversing the steps from 12). 15) Start the main body and confirm that the symptom does not occur.
  • Page 17: Points To Note When Installing The Rail Unit (Inner Finisher-H1)

    Copier Color | iR-ADV C5560/C5550/C5540/C5535 Series | imageRUNNER ADVANCE C5535, imageRUNNER ADVANCE C5535F, imageRUNNER ADVANCE C5535i, imageRUNNER ADVANCE C5540, imageRUNNER ADVANCE C5540F, imageRUNNER ADVANCE C5540i, imageRUNNER ADVANCE C5550, imageRUNNER ADVANCE C5550F, imageRUNNER ADVANCE C5550i, imageRUNNER ADVANCE C5560, imageRUNNER ADVANCE C5560F, imageRUNNER ADVANCE C5560i Points to note when installing the rail unit (Inner Finisher-H1) For CE [Symptom]...
  • Page 18: Jam (Delivery Options)

    Jam (Delivery options) Copier Color | iR-ADV C5051/C5045/C5035/C5030 Series | imageRUNNER ADVANCE C5030i, imageRUNNER ADVANCE C5030, imageRUNNER ADVANCE C5030F, imageRUNNER ADVANCE C5035, imageRUNNER ADVANCE C5035i, imageRUNNER ADVANCE C5035F, imageRUNNER ADVANCE C5045, imageRUNNER ADVANCE C5045i, imageRUNNER ADVANCE C5045F, imageRUNNER ADVANCE C5051, imageRUNNER ADVANCE C5051F, imageRUNNER ADVANCE C5051i, imageRUNNER ADVANCE C5051F_R, imageRUNNER ADVANCE C5035F_R Copier Color | iR-ADV C5255/C5250/C5240/C5235 Series | iR_ADV C5235I, iR_ADV C5255, iR_ADV C5255F, iR_ADV C5255I, iR_ADV C5250, iR_ADV C5250F, iR_ADV C5250I, iR_ADV C5240, iR_ADV C5240F, iR_ADV C5240I, iR_ADV C5235, iR_ADV C5235F, iR_ADV C5240A, iR_...
  • Page 19 BUFFER PASS UNIT-G1 The flange is attached to the 30 T/40 T pulley [1] in 2 places. Prepare 2 flanges and 2 E rings. BUFFER PASS UNIT-L1 The flange is attached to the 30 T/40 T pulley [1] in 1 place. Prepare 1 flange and 1 E ring.
  • Page 20 2) Remove the spacer [1] and the timing belt [2]. 3) Attach the flange [1] to the 30 T/40 T pulley. In the case of the buffer pass unit -G1, attach the flange to the 30 T/40 T pulley in 2 places in the steps above. 4) Attach the parts by reversing the procedure from the step 2).
  • Page 21 [Service parts] BUFFER PASS UNIT-G1 Part Number Description Q'ty Fig.No. FE8-8792-000 Flange 0->2 XD9-0136-000 RING, E 0->2 BUFFER PASS UNIT-L1 Part Number Description Q'ty Fig.No. FE8-8792-000 Flange 0->1 XD9-0136-000 RING, E 0->1 [Countermeasure cut-in serial numbers in factory] Model Serial number BUFFER PASS UNIT-G1 TMP80898 BUFFER PASS UNIT-L1...
  • Page 22: Error Code

    Error Code Copier Color | iR-ADV C5560/C5550/C5540/C5535 Series | imageRUNNER ADVANCE C5535, imageRUNNER ADVANCE C5535F, imageRUNNER ADVANCE C5535i, imageRUNNER ADVANCE C5540, imageRUNNER ADVANCE C5540F, imageRUNNER ADVANCE C5540i, imageRUNNER ADVANCE C5550, imageRUNNER ADVANCE C5550F, imageRUNNER ADVANCE C5550i, imageRUNNER ADVANCE C5560, imageRUNNER ADVANCE C5560F, imageRUNNER ADVANCE C5560i E583-8001/E583-8002 due to malfunction of the front/rear tray auxiliary guides(Staple/Booklet Finisher_Y1) For CE...
  • Page 23 [Service work] If the above-mentioned symptom occurs, check whether the front/rear tray auxiliary guide operates normally. If the front/rear tray auxiliary guide does not operate normally, prepare the washer (XD1-1106-235), modify the bushing of the lower delivery roller and adjust the assembly of the front/rear tray auxiliary guide holder by following the procedures below. However, in case of replacement by the new-type lower delivery roller, washer (XD1-1106-235) is not necessary.
  • Page 24 5) Attach the washer (XD1-1106-235) [3] between the E-ring [1] and the bushing [2] of the lower delivery roller However, if the lower delivery roller is a new type, attaching the washer (XD1-1106-235) [3] is not required. 6) While attaching the bushing on the rear side of the lower delivery roller, attach the supporting plate [1] which was removed in the step 3).
  • Page 25 [Countermeasure cut-in serial number in factory] Model Serial number Staple Finisher Y1 WEU02657 Booklet Finisher Y1 WEY00839...

This manual is also suitable for:

Imagerunner advance c5560Imagerunner advance c5560fImagerunner advance c5560i

Table of Contents