Table of Contents
Advertisement
Quick Links
Original Instructions, Revision 1 August 2020
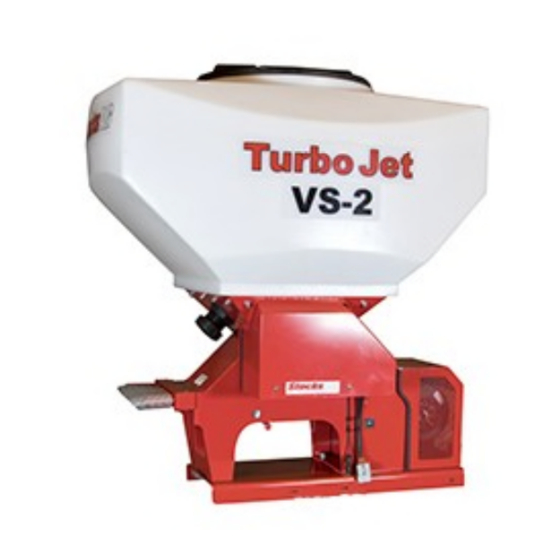
Turbo Jet 8 & 10 VS-2
Original Operating Manual
and Parts List
Read carefully before installation
and operation
This document must not be copied duplicated or distributed without prior consent.
All and patent rights apply
STOCKS AG LIMITED, CROMWELL ROAD, WISBECH, CAMBRIDGESHIRE, UK.
Tel: 00 44 (0) 1945 464 909 Fax: 00 44 (0) 1945 464985 www.stocks-ag.co.uk
1
Advertisement
Table of Contents

Related Manuals for Stocks AG Turbo Jet 8 VS-2


Summary of Contents for Stocks AG Turbo Jet 8 VS-2
- Page 1 This document must not be copied duplicated or distributed without prior consent. All and patent rights apply STOCKS AG LIMITED, CROMWELL ROAD, WISBECH, CAMBRIDGESHIRE, UK. Tel: 00 44 (0) 1945 464 909 Fax: 00 44 (0) 1945 464985 www.stocks-ag.co.uk...
- Page 2 Index Section Page No. Index 3.1 - 3.2 General information & Technical data 3.3 - 3.4 Intended use & Unintended use Contents of the EC Declaration of Conformity 5.1 - 5.2 Machine identification & Warranty Safety Safety WARNING decals 8.1 - 8.4 Emergency stop, Storage, Optional covers, Disposal General maintenance 10.1 Installation guide Page 1 of 2...
-
Page 3: Unintended Use
3 .2 Technical data Model: Turbo Jet 8 VS-2 and Turbo Jet 10 VS-2 Hopper capacity: 240 litre or 400 litre 240 litre machine: Net weight: 90kg with Spreader Kit 120kg... - Page 4 Safety of machinery – Safety distances to prevent hazard zones aaaaaaaaaaaaaaaaaaaaaaaaaaaaaaaaaabeing reached by the upper and lower limbs. The manufacturer stated above holds the technical file for this machine. Signed on behalf of Stocks Ag Ltd Name: J Woolway Date:...
- Page 5 5.1 Machine identification The machine can be identified by the serial number decal mounted on the steel chassis to the left of the feed cassette 5.2 Warranty We provide a 12 month warranty as of the date of invoice (your invoice for the machine which will serve as a warranty certificate). This warranty is applicable for cases of material or construction faults and does not include parts that are damaged by normal or excessive wear.
- Page 6 After working the machine ensure that any unused product is returned safely to its original packaging Stocks AG Ltd. does not accept any liability for the storage and use of the material being applied If unsure contact the material supplier for more information.
- Page 7 Safety WARNING decals Important ; observe this safely decals on the machine WARNING Read and understand the Operators Manual instructions before operating this machine Operator errors can result in serious injury WARNING Danger moving parts Risk of serious injury whilst the machine is in operation WARNING Risk of injury...
- Page 8 Heavy Duty White PVC covers available for both the 240L and 400L machines Fitted with eyelets and bungie cord for easy attachment Please contact your locals Stocks AG dealer for more information 8.4 Disposal Ensure that any persons handling the machine are aware that the machine may have been used to apply toxic chemicals and so the appropriate personal protection equipment should be worn.
-
Page 9: General Maintenance
9 General maintenance WARNING Always ensure the power supply is disconnected before any maintenance work or cleaning of this machine by unplugging the power cable or removing the 40amp fuse in the power cable. Ensure the parent machine is stationary and parked on level ground before working on the machine The machine must be checked regularly by the operator for any damage loose bolts or electrical connections, vibrations, unusual sounds, and to ensure they function correctly. -
Page 10: Base Plate
10.1 Installation guide (Page 1 of 2) The Turbo Jet can be used for a wide variety of seeding applications in conjunction with a wide variety of parent implements. It is not practical to supply tailored mounting brackets for every implement on the market, and so the final attachment of the Turbo Jet to the implement is the responsibility of the supplying dealer or end user. - Page 11 11 Installation guide (Page 2 of 2) Spreader Plates The machines have 8 or 10 outlet tubes, feed hoses can be split with the black “ Y” connectors provided, to give 16 or 20 spreader plates. Depending on the implement width and if you require a broadcast or band sown effect, use as many outlets as required, with or without the spreaders.
- Page 12 The 6m instrument lead connects to the junction box of the Turbo Jet, and runs to the control panel in the tractor cab. NOTE Extension power and instrument cables available if required. Please contact your local Stocks AG dealer for more information.
-
Page 13: Fan Inspection
13.1 12v Fan inspection WARNING Always isolate the power before inspecting To inspect the fan unit undo the two over-centre catches and hinge up the guard as shown below. Use an air line and brush to clean the fan blades regularly to maintain performance and prevent eccentric running. - Page 14 14.1 Hopper emptying procedure The hopper drain cap can be removed to help empty the hopper. Any remaining product is best removed by using an industrial vacuum before the feed block is removed from the machine. Once the feed block has been removed from the machine dispose of any remaining product held in the feed block.
-
Page 15: Control System Overview
15 Control system overview This VS-2 control system is designed to provide a simple method of metering product into the airflow of the machine and provide basic system monitoring of functions in the way of audio and visual alarms The machine can be operated without the optional GPS Speed Sensor Kit fitted but the machine will be set at a fixed output and will NOT provide speed proportionate metering. -
Page 16: Control System Operation
Control system operation Cab Control Panel Left Hand Toggle Switch Feed Motor ON (“I”) Lower position, OFF (“O”) Middle position Calibration - forward speed (“C”) Upper position) Middle Toggle Switch Main Power ON (“I”) Lower position) OFF (“O”) Upper position. Power remains connected (in standby mode with slow pulsed led) until the main power cables are disconnected NOTE the forward speed calibration memory will be lost if this happens, and will have to be reset. -
Page 17: Electrical Components
17 Electrical components 1 Cab Control Panel 2 Junction box (machine mounted) 3 Control cable connection 4 GPS sensor connection - Optional (see page 19) 5 Cut Out Switch connection - Optional (see page 18) 6 Power cable connection 7 12v Fan connection 8 Hopper level sensor connection - Optional (see page 18) 9 Agitator motor connection 10 Feed motor connection... - Page 18 18.1 Optional Cut Out Switch Part No. TJ-004-C/OUT-KIT This switch can be mounted in a suitable place on the implement or linkage of the tractor, thus deflecting the spring, and automatically switching the feed motor off or on accordingly as the circuit is made or broken. NOTE The feed motor must be switched ON at the control panel for the spring finger switch to work automatically.
- Page 19 19 Optional GPS Speed Sensor Kit For best results and to avoid over applying product we recommend the machine is fitted with this optional GPS sensor kit as this will give speed proportionate metering of product whilst maintaining the pre-set application rate in line with forward speed changes.
- Page 20 20 Feed block assembly guide WARNING Moving parts of this machine are powerful and can cause injury. Be especially careful whilst performing calibration tests. WARNING Always observe all application standards and guidelines provided by the product manufacturer as some seed dressings and granular products may be toxic ! NOTE if unsure contact your seed or product supplier for more information.
- Page 21 21.1 Optional Feed Block Assemblies For some applications such as applying very small seed or granular product a “Norwood” feed block assembly is recommended. This block has been developed to eliminate finer products from leaking around the feed rollers and into the airstream. Part Number;...
- Page 22 22 VS-2 Calibration (Page 1 of 3) To carry out the calibration procedure you will need the plastic calibration tray supplied, a timer, and an accurate set of scales to weight the product . NOTE Ensure the correct configuration and type of feed rollers are fitted for the product being applied (see page 20) WARNING Always observe all application standards and guidelines provided by the product...
- Page 23 23 VS-2 Calibration (Page 2 of 3) LOW RANGE MID RANGE HIGH RANGE Settings 1 - 12 Settings 13 -24 Settings 25-36 Dial setting Speed RPM Dial setting Speed RPM Dial setting Speed RPM 1 (13) 24.48 1 (25) 42.96 7.54 2 (14) 26.02...
- Page 24 - and then re-calibrate. If unable to calibrate correctly or you have any other questions about the machine please contact us Tel. +44(0)1945 464909 or email: sales@ stocks-ag.co.uk STOCKS AG LIMITED, CROMWELL ROAD, WISBECH, CAMBRIDGESHIRE, PE14 0SD, UK.
-
Page 25: Parts Drawing
Parts drawing... -
Page 26: Parts List
Parts list (Page 1 of 3) Item Part No. Description Qty. Remarks TJ400A Chassis (8 outlet) TJ400B Chassis (10 outlet) TJ422 Base Plate (8 & 10 outlet) TJ425A Fan Guard (8 outlet) TJ425B Fan Guard (10 outlet) TJ418 Motor Guard (8 outlet) TJ459 Motor Guard (10 outlet) TJ429... - Page 27 Parts list (Page 2 of 3) Item Part No. Description Qty. Remarks TJ128 Hopper Lid TJ129 Neck Ring TJ130 PVC Calibration Tray FJ033A M8 Fem Knob GRO03 Rubber Grommet TJ053 Rubber Washer TJ054 Rubber Washer GA046B Agitator Motor TJ040 Cassette Seal TJ041 Junction Box Seal GA103...
- Page 28 Parts list (Page 3 of 3) Part No. Description Qty. Remarks 79 TJ050 Tank Outlet 80 TJ051 81 TJ052 Blanking Cap 82 TJ251A i-CON Hopper Level Sensor 83 M4-006 M4 Flat Washer 84 M4-003 M4 Setscrew 89 TJ471 Tank Baffle (8 outlet) 400L models only TJ472 Tank Baffle (10 outlet)
- Page 29 27 Feed roller kits parts drawing...
- Page 30 Parts list (Page 1 of 2) Item Part No. Description Qty. Remarks TJ195A 8 Outlet 5mm Small Seed Roller Kit : TJ199 Stainless Steel Shim TJ200 5mm Small Seed Roll (White) TJ201 5mm Small Seed Roll (Yellow) TJ203 24.6mm Spacer TJ204 13.5mm Spacer TJ205...
- Page 31 Parts list (Page 2 of 2) Item Part No. Description Qty. Remarks TJ197C 10 Outlet 5mm Small Seed Roller Kit : TJ199 Stainless Steel Shim TJ200 5mm Small Seed Roll (White) TJ201 5mm Small Seed Roll (Yellow) TJ210 18mm Spacer TJ205 5mm Spacer Includes 3 spare...
- Page 32 Notes page...
Need help?
Do you have a question about the Turbo Jet 8 VS-2 and is the answer not in the manual?
Questions and answers