Advertisement
Quick Links
Advertisement

Related Manuals for Podab BaseLine TS 43 E


Summary of Contents for Podab BaseLine TS 43 E
- Page 1 Installation and operation manual Drying cabinet BaseLine TS 43 E...
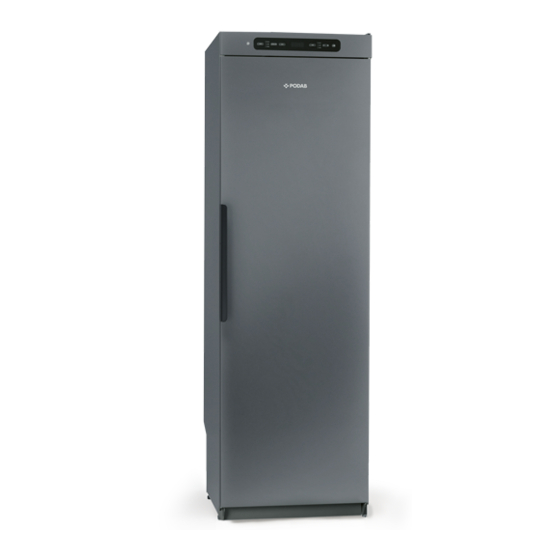
- Page 2 Thank you for choosing the drying cabinet TS 43 E from PODAB. We hope that it will be of great use for you and ask you kindly to read the instructions carefully. Article and serial number See page 25 Art. No: 427001145...
- Page 3 CONTENTS This user mAnuAl cAre clEANINg sAfe operATion SERVIcINg DescripTion of The Drying cAbineT 6 mAnAgemenT of enD-of-life Drying unpAcking cAbineT PAcKAgINg MATERIAlS TechnicAl DATA ASSEMBly KIT TroubleshooTing rehAnging of Door lIST Of ERROR cODES posiTioning/ATTAchmenT DimensionAl DrAwing evAcuATion / supply Air cONNEcTION TO EVAcuATION elecTricAl connecTion sTArT-up...
- Page 4 ThiS uSEr MaNual The contents of this user manual de- Note: Keep this user scribe the drying cabinet’s function manual so that it is always and operation and instructions for to hand for future use installation and maintenance.
- Page 5 SafE OpEraTiON This advice on safe operation has been compiled to enable you to avoid incorrect use and unnecessary risks of accidents and should be read before the drying cabinet is installed and used. CAUTION This equipment is intended only to be used to dry fabrics washed in water.
- Page 6 DESCripTiON Of ThE DryiNg CabiNET The drying cabinet operates with hot air that removes moisture from the laundry. Heat- ing and fan components are combined in the upper part of the drying cabinet behind the control panel. connecting lead control panel Three extendible hanging sections, depending on choice of interior fittings...
- Page 7 air flOw iN ThE DryiNg CabiNET Note the direction of air flow inside the cabinet when positioning laundry. See also this section.
- Page 8 Any damage incurred Packaging materials such as plastic in transit must be reported to PODAB and Styrofoam must be kept out of the within 7 days. reach of children.
- Page 9 uNpaCkiNg aSSEMbly kiT Plastic plug Draught stabiliser Spacer 8.2x12x15 hose, Ø 120 x 1000 mm Spigot Screw TRX 5x70 fzk Washer NB 5x25...
- Page 10 rEhaNgiNg Of DOOr The door may be right-hung or left-hung. 3 Detach the hinge pin at the upper Lay the drying cabinet down on its side. hinge (2) and install it on the opposite 2 Loosen the hinge pin at the lower side.
- Page 11 pOSiTiONiNg/aTTaChMENT The drying cabinet is intended only for location indoors in a dry place and secured to a wall. The drying cabinet must not be placed in an environment in which high-pressure water is used for cleaning. The drying cabinet must be level on a flat The cabinet must be attached to a wall to surface, resting on all four feet.
- Page 12 EVaCuaTiON / Supply air When the cabinet is on, approx. 95 m³ moist air per hour is evacuated. It must therefore be ensured that air can enter the room to replace the moist air that is vented out. CONNECTiON TO EVaCuaTiON The drying cabinet can be connected to the evacuation duct in two ways, either with a draft stabiliser or permanently fitted to a mechanical exhaust vent.
- Page 13 EVaCuaTiON / Supply air With draught stabiliser Moist air out Connect the flexible hose (2) to the spigot. Connect the other end of the hose to the draught stabiliser (3) which is then pressed home on the exhaust vent in the room. The drying cabinet must not be connected to a flue.
- Page 14 ElECTriCal CONNECTiON The drying cabinet must be connected to If the mains lead for any reason is dam- a 230 V single-phase 50-60 Hz and protec- aged, it must be replaced. A genuine tively earthed wall socket. spare part can be obtained from the dealer who supplied the cabinet.
- Page 15 STarT-up CauTiON Read the safety instructions on Read these op erating page 5 before using the cabinet. instructions before using the drying cabinet for the first time. 1 Make sure that the cabinet is firmly attached to the wall. See page 11. 2 Make sure that no packaging mate- rial has been left behind.
- Page 16 arraNgiNg lauNDry fOr DryiNg There are three sections with hangers in the cabinet, depending on choice of interior fittings. Each section has a number of rails for hanging laundry. heavy when wet and stretch unneces- Hang the items in the drying cabinet sarily if they are hung on a peg.
- Page 17 OpEraTiON The drying cabinet is equipped with three automatic programmes and three manually time-controlled programmes suited to different types of clothing. There are also extra functions for the automatic programmes. The drying process is controlled by sensors or timer and temperature settings. Choice of drying programme is guided by: - energy efficiency - gentle treatment of fabrics - dealing with fabrics that are difficult to...
- Page 18 OpEraTiON CONTrOl paNEl Programme selec- Programme selection for au- tion for manual time tomatic time control of the control of the drying drying process process ON/Off Display showing time remaining for selected drying programme. under the time reading, a row of lEDs shows that the drying Start/Stop process is under way.
- Page 19 OpEraTiON you can choose an optional extra function, EXTRA DRy, for AuTO lOW and AuTO hIgh. EXTRA DRY is for fabrics that are thicker and more difficult to dry, such as children's overalls, ski suits, etc. AUTO HIGH and EXTRA DRY or AUTO LOW and EXTRA DRY now light up.
- Page 20 OpEraTiON STarT-up Of ThE DryiNg CabiNET wiTh auTOMaTiC TiME CONTrOl The cabinet is started by pressing ON/OFF. The cabinet is activated by default with the previous programme selection active. If no programme has been selected previously or if the cabinet has been without power or is completely new, the cabinet is started in AUTO HIGH by default.
- Page 21 OpEraTiON STarTiNg ThE DryiNg CabiNET wiTh MaNual TiME CONTrOl The cabinet is started by pressing ON/OFF. The cabinet is activated with the previous programme selection active. If no programme has been selected previously or if the cabinet has been without power or is completely new, the cabinet is started in AUTO HIGH by default, i.e.
- Page 22 OpEraTiON DOOr Avoid opening the door while the drying process is under way as this prolongs the programme time. When the door is opened, the display shows -P-. You have 5 minutes in which to close the door before the cabinet turns the programme off completely and the cabinet has to be restarted.
- Page 23 OpEraTiON parameters to adjust If the laundry is felt not to be dry, increase the parameter value for the programme- specific parameter If the laundry is felt to be over-dried, long drying time,reduce the parameter value for the programme-specific parameter. See the table for the parameter of the programme concerned to be adjusted.
- Page 24 brEakDOwNS OVErhEaT CuT-OuT The cabinet is equipped with an overheat cut-out. This trips when the temperature in the fan unit exceeds 120 °C. When the overheat cut-out has tripped, the display and LEDs fl ash. The user can now reset the overheat cut-out by turning off the power supply with the switch inside the roof of the cabinet.
- Page 25 This information can be found on the identifi cation plate located inside the cabinet. Identifi cation plate (inside) Illustration shows the Sensor Dryer drying cabinet Name of the drying cabinet Article number Serial number (12 digits) follow PODAB instructions in repair and replacement of parts.
- Page 26 MaNagEMENT Of END-Of-lifE DryiNg CabiNET When the drying cabinet has reached the end of its useful life, it must be taken to a recycling centre for disposal. Many parts of the drying cabinet can be re-used, but it also contains other material that must be dispose of cor- rectly.
- Page 27 TEChNiCal DaTa Capacity: Up to 6.0 kg laundry (cotton) Dewatering capacity: Up to 25 g/min Electrical connection: Single-phase 230 V, 50-60 Hz Fuse 10 A Motor: 38 W Heating element output: 2,000 W Overheat cut-out: Fan capacity: 184 m³/hour Hanging length: 16 metres, depending on choice of interior fittings Dimensions: Height: 1900 mm...
- Page 28 TrOublEShOOTiNg Questions what you can do The drying cabinet is 1. Check that the mains lead is connected to a power not working. socket and that power is supplied. 2. Check that no fuse has blown 3. Have you pressed the start button? 4.
- Page 29 TrOublEShOOTiNg liST Of ErrOr CODES error code cause Error 1 Regulator sensor. Error in the sensor at the element. The error is either a discontinuity or short-circuit in Er 1 the sensor. Reset by disconnecting the power supply. Error 2 Outlet sensor.
- Page 30 DiMENSiONal DrawiNg (mm) 1900 1674...
- Page 32 SERVICE/SUPPORT Phone +46 31-752 01 70 E-mail support@podab.se www.podab.com AB PODAB, Ekonomivägen 9, 436 33 Askim, SWEDEN Tel +46 (0)31-752 01 00, E-mail: order@podab.se, www.podab.se ©PODAB 2020-03-16...
Need help?
Do you have a question about the BaseLine TS 43 E and is the answer not in the manual?
Questions and answers