Table of Contents
Advertisement
Quick Links
User's Manual
RICOH PJ WUL5970 / PJ LU580 series /
1. Usage Notice
2. Introduction
3. Basic Operations
4. User Settings
5. LAN Control
6. Troubleshooting
7. Appendices
Read this manual carefully before you use this machine and keep
it handy for future reference. For safe and correct use, be sure to
read the Precautions in this manual before using the machine.
PJ LU580ST series
Advertisement
Table of Contents

Related Manuals for Ricoh PJ WUL5970 Series


Summary of Contents for Ricoh PJ WUL5970 Series
- Page 1 RICOH PJ WUL5970 / PJ LU580 series / PJ LU580ST series User’s Manual 1. Usage Notice 2. Introduction 3. Basic Operations 4. User Settings 5. LAN Control 6. Troubleshooting 7. Appendices Read this manual carefully before you use this machine and keep it handy for future reference.
-
Page 3: Table Of Contents
Table of Contents Table of Contents Table of Contents ......3 Options..........49 3D............51 Usage Notice ......... 4 LAN Control ........ 52 Precautions........4 Controlling.this.Device.with.Web. Safety.Labels.of.This.Machine..13 Browser...........52 Regulation.&.Safety.Notices...15 Connecting.to.the.device....52 Other.Information......19 Crestron...........52 Introduction ......... 20 Crestron.Tools.........53 Crestron.Info........53 Product.Features......20... -
Page 4: Usage Notice
Usage Notice Usage Notice Precautions Follow all warnings, precautions and maintenance as recommended in this user’s guide to maximize the life of your unit. ■ ■ Warning- Indicates a potentially hazardous situation which, if instructions are not followed, could result in death or serious injury. - Page 5 Usage Notice ■ ■ Warning- The■supplied■power■cord■is■for■use■with■this■ machine■only.■Do■not■use■it■with■other■appliances.■ Doing■so■could■result■in■fire■or■electric■shock. ■ ■ Warning- It■is■dangerous■to■handle■the■power■cord■plug■with■ wet■hands.■Doing■so■could■result■in■electric■shock. ■ ■ Warning- Be■sure■to■disconnect■the■power■cord■from■the■ wall■outlet■at■least■once■a■year■and■check■for■the■ following: ■ ■ There■are■burn■marks■on■the■plug. ■ ■ The■prongs■on■the■plug■are■deformed. ■ ■ The■power■cord’s■inner■wires■are■exposed,■ broken,■etc. ■ ■ The■power■cord’s■coating■has■a■crack■or■dent. ■ ■ When■bending■the■power■cord,■the■power■turns■ off■and■on. ■ ■ Part■of■the■power■cord■becomes■hot. ■ ■ The■power■cord■is■damaged.
- Page 6 Usage Notice ■ ■ Warning- If■metal■objects,■or■water■or■other■fluids■fall■ inside■this■machine,■you■must■turn■off■its■power■ immediately.■After■turning■off■the■power,■be■sure■ to■disconnect■the■power■cord■plug■from■the■wall■ outlet.■Then■contact■your■service■representative■and■ report■the■problem.■Do■not■use■the■machine.■Doing■ so■could■result■in■fire■or■electric■shock. ■ ■ Warning- Never■operate■this■unit■on■AC■power■during■a■ thunderstorm.■If■you■see■lightning■or■hear■thunder,■ never■touch■the■unit,■cables■and/or■peripherals.■An■ electric■surge■caused■by■the■storm,■may■result■in■an■ electrical■shock■or■damage■to■the■unit. ■ ■ Warning- If■the■machine■topples,■or■if■a■cover■or■other■ part■gets■broken,■you■must■turn■off■its■power■ immediately.■After■turning■off■the■power,■be■sure■ to■disconnect■the■power■cord■plug■from■the■wall■ outlet.■Then■contact■your■service■representative■and■ report■the■problem.■Do■not■use■the■machine.■Doing■ so■could■result■in■fire■or■electric■shock. ■ ■ Warning- Never■push■objects■of■any■kind■into■this■product■ through■openings■as■they■may■touch■dangerous■ voltage■points■or■short-out■parts■that■could■result■ in■a■fire■or■electric■shock.■Never■spill■liquid■of■any■ kind■on■the■product. ■ ■ Warning- Do■not■place■or■keep■the■projector■within■the■reach■...
- Page 7 Usage Notice ■ ■ Warning- Installing■the■Projector■on■a■Wall■or■Ceiling: a)■Do■not■attempt■to■clean■or■replace■parts■for■a■ machine■that■is■installed■in■a■high■location■on■ a■wall■or■ceiling.■Doing■so■may■cause■it■to■fall■ down,■resulting■in■an■injury. b)■Contact■your■sales■or■service■representative■ to■clean■or■replace■parts■for■a■machine■that■is■ installed■on■a■wall■or■ceiling. c)■If■a■machine■is■incorrectly■installed■on■a■wall■or■ ceiling,■it■may■fall■down■and■cause■an■injury.■ Contact■your■sales■or■service■representative■if■you■ want■to■install■a■machine■on■a■wall■or■ceiling. d)■Do■not■obstruct■the■machine’s■vents.■Doing■ so■risks■fire■caused■by■overheated■internal■ components. e)■For■users,■do■not■install■the■projector■by■yourself.■ Contact■your■sales■or■service■representative■if■you■ want■to■install■the■projector■on■a■wall■or■ceiling. f)■ For■sales■or■service■representatives: ■ – Use■brackets■that■are■strong■enough■to■support■ the■projector.■The■projector■weighs■about■7.8■kg■ (17.2lb)■for■the■PJ■WUL5970■/■PJ■LU580■series/8.0■ kg■(17.6lb)■for■the■PJ■LU580ST■series. ■ – The■projector■must■be■installed■in■a■location■that■ is■sturdy■enough■to■support■the■full■weight■of■the■ projector■and■brackets. ■ – Use■only■the■screws■(M4■screws).■Use■all■four■of■ the■projector’s■screw■holes■to■attach■the■brackets. g)■Do■not■use■projector■in■oil-mist■or■smoke■...
- Page 8 Usage Notice ■ ■ Caution- Do■not■put■your■face■or■hand■near■the■exhaust■ vents.■Doing■so■could■result■in■burns■or■an■accident■ due■to■hot■air■coming■from■the■exhaust■vents. ■ ■ Caution- Do■not■use■the■machine■on■soft■material■such■as■ paper■or■cloth■that■might■get■sucked■into■the■intake■ vents.■Doing■so■may■cause■heat■buildup■inside■the■ machine,■resulting■in■malfunction,■burns,■or■fire. ■ ■ Caution- Do■not■place■the■machine■in■a■location■where■air■ flow■is■poor.■Doing■so■may■cause■fire■due■to■internal■ components■becoming■overheated. ■ ■ Caution- Do■not■place■or■store■the■machine■in■a■location■ where■direct■sunlight■or■heat■generation■might■ occur.■The■heat■may■deform■or■wear■out■the■exterior■ parts■or■negatively■affect■internal■parts.■Doing■so■ could■result■in■fire. ■ ■ Caution- Do■not■place■low■heat■resistant■material■near■the■ exhaust■vents.■Hot■air■may■come■from■the■exhaust■ vents,■resulting■in■damage■to■the■machine■or■an■ accident. ■ ■ Caution- Do■not■obstruct■the■machine’s■vents.■Doing■so■risks■ fire■caused■by■overheated■internal■components.
- Page 9 ■ ■ Caution- Do■not■place■the■machine■on■other■equipment■ or■vice■versa.■Doing■so■may■cause■heat■buildup■ inside■the■machine■or■cause■the■other■equipment■to■ malfunction. ■ ■ Caution- Unplug■the■power■cord■from■the■wall■outlet■before■ you■move■the■machine.■While■moving■the■machine,■ take■care■that■the■power■cord■is■not■damaged■under■ the■machine.■Failing■to■take■these■precautions■could■ result■in■fire■or■electric■shock. ■ ■ Caution- Do■not■use■attachments■not■recommended■by■ RICOH.■Use■of■an■incompatible■attachments■could■ cause■hazards■or■damage■to■the■product. ■ ■ Caution- Make■sure■to■install■the■projector■with■two■or■more■ people.■Otherwise,■it■is■likely■that■this■product■falls■ down■so■that■an■injury■may■result■while■the■product■ is■being■installed. ■ ■ Caution- Unplug■this■product■from■the■wall■outlet■and■take■ the■product■to■qualified■service■personnel■if■you■ encounter■any■of■the■following■conditions: a)■The■power■supply■cord■or■plug■is■damaged. b)■Liquid■has■been■spilled,■or■objects■have■fallen■ into■the■product. c)■The■product■has■been■exposed■to■rain■or■water. d)■The■product■does■not■operate■normally■when■...
- Page 10 Usage Notice ■ ■ Caution- Do■not■place■anything■in■front■of■the■lens■while■the■ projector■is■operating.■Things■placed■in■front■of■the■ lens■may■overheat■and■burn■or■start■a■fire. ■ ■ Caution- Unauthorized■substitutions■may■result■in■fire,■ electric■shock,■or■other■hazards. Upon■completion■of■any■service■or■repairs■to■this■ product,■ask■the■service■technician■to■perform■ safety■checks■to■verify■that■the■product■is■in■proper■ operating■condition. ■ ■ Caution- Do■not■use■the■product■in■a■closed■installation■ location.■Do■not■place■the■product■in■a■box■or■in■any■ other■closed■installation■location.■Otherwise■it■may■ overheat,■which■could■result■in■a■risk■of■fire. ■ ■ Caution- Leave■30■cm■or■over■space■between■the■projectors■ when■projectors■are■installed■side■by■side. > 50 cm (> 19.7”) > 50 cm > 30 cm >...
- Page 11 Usage Notice ABOUT THE LASER LIGHT SOURCE ■ ■ Warning- Do■not■look■into■the■lens■or■vent■when■the■product is■on.■The■bright■light■may■damage■your■eyes.■Be■ especially■careful■in■an■environment■with■children. ■ ■ Caution- This■projector■has■built-in■laser■module.■Possibly hazardous■optical■radiation■emitted■from■this■ product.■Do■not■stare■into■the■beam.■May■be■ harmful■to■the■eyes. ■ ■ Caution- Use■of■controls■or■adjustments■or■performance■of procedures■other■than■those■specified■herein■may result■in■hazardous■radiation■exposure. ■ ■ Caution- Do■not■block■the■projection■light■when■it■is■on.■If■ you■do■so,■the■part■that■is■blocking■the■projection■ light■may■get■quite■hot■and■deform,■deteriorate■ or■cause■a■burn■or■fire.■The■reflected■light■may■ make■the■lens■hot■and■cause■a■product■failure.■To■ temporarily■suspend■projection,■select■the■mute■ function.■To■suspend■longer,■turn■off■the■product. ■ ■ Caution- Notice■is■given■to■supervise■children■and■to■never■ allow■them■to■stare■into■the■projector■beam■at■any■...
- Page 12 Usage Notice REMOTE CONTROL BATTERY Warning •■ Never■throw■batteries■into■a■fire. Using■the■batteries■improperly■may■cause■them■to■explode■or■leak■ and■may■result■in■serious■injury.■If■battery-leaking■fluid■contacts■ skin,■wash■the■fluid■off■immediately■with■clean■water■and■consult■a■ doctor.■If■the■fluid■spills■on■an■instrument,■avoid■contact■and■wipe■ it■off■using■tissue■paper.■Then■dispose■of■the■used■tissue■paper■as■ flammable■garbage■after■moistening■the■tissue■with■water. •■ Keep■new■and■used■batteries■away■from■children. If■the■battery■compartment■does■not■close■securely,■stop■using■the■ product■and■keep■it■away■from■children.■If■you■think■batteries■might■ have■been■swallowed■or■placed■inside■any■part■of■the■body,■seek■ immediate■medical■attention. Notes •■ Be■sure■to■use■AAA■size■batteries. •■ Dispose■of■batteries■in■a■designated■disposal■area. •■ Attention■should■be■drawn■to■the■environmental■aspects■of■battery■ disposal. •■ If■the■remote■control■does■not■operate■correctly,■or■if■the■operating■ range■becomes■reduced,■replace■the■batteries. •■ Avoid■contact■with■water■or■liquid. •■ Do■not■expose■the■remote■control■to■moisture■or■heat. •■ Do■not■drop■the■remote■control. •■ If■the■batteries■have■leaked■in■the■remote■control,■carefully■wipe■ the■case■clean■and■install■new■batteries. •■...
-
Page 13: Safety.labels.of.this.machine
Usage Notice Safety Labels of This Machine 1.■Laser■warning:■ ■ – CLASS■1■LASER■PRODUCT■-■RISK■GROUP■2 ■ – Do■not■stare■into■the■beam,■maybe■harmful■to■the■eyes. ■ – Do■not■look■into■the■light■source■light■using■optical■ instruments■(such■as■magnifying■glasses■and■mirrors).■ Visual■impairment■could■result.■ ■ – When■turning■on■the■projector,■make■sure■no■one■within■ projection■range■is■looking■at■the■lens.■ ■ – Keep■any■items■(magnifying■glass■etc.)■out■of■the■light■ path■of■the■projector.■The■light■path■being■projected■from■ the■lens■is■extensive,■therefore■any■kind■of■abnormal■ objects■that■can■redirect■light■coming■out■of■the■lens,■can■ cause■an■unpredictable■outcome■such■as■a■fire■or■injury■to■ the■eyes. 2.■Do■not■look■into■the■lens■while■the■light■source■is■on.■The■ strong■light■from■the■light■source■may■cause■damage■to■ your■eyesight.■■RG2■IEC■62471-5:2015 3.■Do■not■place■anything■in■front■of■the■lens■while■the■ projector■is■operating.■Things■placed■in■front■of■the■lens■ may■overheat■and■burn■or■start■a■fire.■If■you■want■to■ temporarily■stop■the■projected■image,■use■the■AV■Mute■on■ the■remote■control. 4.■Do■not■remove■any■screws.■Do■not■block■or■cover■the■vents. English English... - Page 14 Usage Notice 等級1雷射產品-IEC/EN60825-1 : 2014 風險組別2:本產品可能發射有害的光輻射勿直射光束,可能對眼睛有害 IEC 62471-5:Ed. 1.0. For more information see Laser Notice No. 57, dated May 8, 2019. Power Switch Symbols The■meaning■of■the■symbols■for■the■switches■on■this■machine■as■follows: ■:■On/Standby■(Off) English...
-
Page 15: Regulation.&.Safety.notices
Regulation & Safety Notices This appendix lists the general notices of your Projector. Notice: Users in the United States of America FCC notice MODEL NAME: RICOH PJ WUL5970 TRADE NAME: PROJECTOR MODEL NAME: RICOH PJ WUL5970 Tested To Comply With FCC Standards FOR COMMERCIAL OR OFFICE USE This■device■complies■with■Part■15■of■the■FCC■Rules.■Operation■... - Page 16 Usage Notice Caution:■Changes■or■modifications■not■expressly■approved■ by■the■party■responsible■for■compliance■could■void■the■user’s■ authority■to■operate■the■equipment. RESPONSIBLE PARTY: Ricoh USA, Inc. 300 Eagleview Boulevard, Suite 200 Exton, PA 19341, U.S.A. Phone: 610-296-8000 Notice: Shielded cables All■connections■to■other■computing■devices■must■be■made■ using■shielded■cables■to■maintain■compliance■with■FCC■ regulations. Caution Changes■or■modifications■not■expressly■approved■by■the■ manufacturer■could■void■the■user’s■authority,■which■is■ granted■by■the■Federal■Communications■Commission,■to■ operate■this■projector. Notes to Users in the State of California Perchlorate■Material■-■special■handling■may■apply,■See■www.
- Page 17 Usage Notice User Information on Electrical and Electronic Equipment Users■in■the■countries■where■this■symbol■shown■in■this■section■ has■been■specified■in■national■law■on■collection■and■treatment■ of■E-waste. Our■Products■contain■high■quality■components■and■are■ designed■to■facilitate■recycling.■Our■products■or■product■ packaging■are■marked■with■the■symbol■below. This■product■contains■substances■which■are■harmful■to■ humans■and■the■environment. The■symbol■indicates■that■the■product■must■not■be■treated■ as■municipal■waste.■It■must■be■disposed■of■separately■via■ the■appropriate■return■and■collection■systems■available.■By■ following■these■instructions■you■ensure■that■this■product■is■ treated■correctly■and■help■to■reduce■potential■impacts■on■the■ environment■and■human■health,■which■could■otherwise■result■ from■inappropriate■handling. Recycling■of■products■helps■to■conserve■natural■resources■and■ protect■the■environment. For■more■detailed■information■on■collection■and■recycling■ systems■for■this■product,■please■contact■the■shop■where■ you■purchased■it,■your■local■dealer■or■sales/service■ representatives. Notice: Users in Turkey AEEE■Yönetmeliğine■Uygundur. Bu■sistem■sarf■malzemeleri■ve■yedek■parçaları■da■dahil■olmak■üzere■ AEEE■Yönetmeliğine■Uygundur. All Other Users If■you■wish■to■discard■this■product,■please■contact■your■local■...
- Page 18 Usage Notice Laser Notice IEC■60825-1:2014:■CLASS■1■LASER■PRODUCT■-■RISK■GROUP■2. Notice: Users in the EU Note for the Battery and/or Accumulator Symbol In■accordance■with■the■Battery■Directive■2006/66/EC■Article■ 20■Information■for■end-users■Annex■II,■the■above■symbol■is■ printed■on■batteries■and■accumulators.■This■symbol■means■ that■in■the■European■Union,■used■batteries■and■accumulators■ should■be■disposed■of■separately■from■your■household■waste.■ In■the■EU,■there■are■separate■collection■systems■for■not■only■ used■electrical■and■electronic■products■but■also■batteries■and■ accumulators.■Please■dispose■of■them■correctly■at■your■local■ community■waste■collection/recycling■centre. Notice: Users in Taiwan 廢電池請回收 請勿將電池當作一般垃圾丟棄。這個標 誌表示電池不應視為一般垃圾丟棄。僅 適用於台灣。 進口商:台灣理光股份有限公司 地 址:台北市南港區市民大道七段8 號12 樓之1 English...
-
Page 19: Other.information
Usage Notice Other Information Copyrights to Images When■projecting■images■using■the■projector,■be■careful■not■to■ infringe■the■copyright■of■protected■materials. The■following■are■examples■that■may■infringe■the■copyright■of■ protected■materials. •■ Broadcasting■images■or■movies■for■commercial■purposes •■ Modifying■images■or■movies■using■functions■such■as■freeze,■ magnify,■or■zoom■to■broadcast■images■for■commercial■ purposes■or■public■viewing •■ Varying■the■aspect■ratio■of■images■or■movies■using■a■ function■that■changes■the■screen■size■to■broadcast■images■ for■commercial■purposes■or■public■viewing Note■to■Users■Viewing■3D■Images Pay■attention■to■the■following■points■when■viewing■images■ using■3D■glasses■with■projector: •■ How■3D■images■are■viewed■may■vary■according■to■the■ individual. •■ Do■not■use■3D■glasses■for■viewing■any■material■other■than■ 3D■images. •■ Before■viewing■3D■images,■make■sure■to■read■the■manuals■ provided■with■your■3D■glasses■and■3D■compatible■content. •■ Avoid■viewing■3D■images■for■a■long■period■of■time.■Take■a■ break■of■15■minutes■or■longer■after■every■hour■of■viewing. •■ If■you■feel■sick■while■viewing■3D■images,■stop■viewing■ them.■If■you■continue■to■feel■sick,■consult■a■doctor. •■ When■viewing■3D■image■in■a■room■where■on■LED■lighting■ system■or■fluorescent■lights■are■used,■you■may■feel■that■the■... -
Page 20: Introduction
Introduction Introduction Product Features Outstanding features include: ■ ■ Native■1920■x■1200■WUXGA■resolution■with■Auto/ Full/4:3/16:9/16:10■aspect■ratio■supported ■ ■ 3D■function■with■Blu-Ray■3D■supported■for■projecting■3D■ content■using■DLP■Link■Technology ■ ■ High■brightness■and■contrast■ratio ■ ■ Various■picture■modes ■ ■ NTSC/PAL/SECAM■and■HDTV■(720p,■1080i,■1080p)■ compatibility■ ■ ■ Economy■(ECO)■mode■for■extending■light■source■life ■ ■ Advanced■keystone■correction■for■delivering■optimum■ presentations ■ ■ User■friendly■multilingual■On■Screen■Display ■ ■ Compatibility■with■Microsoft ■Windows ■7,■8,■8.1,10,■ ®... -
Page 21: Package.overview
Introduction Package Overview This projector comes with all the items shown below. Check to make sure your unit is complete. Contact your dealer immediately if anything is missing. (*)■Due■to■the■ difference■in■ applications■for■each■ country,■some■regions■ may■have■different■ accessories. Projector Remote■Control■■ (with■Batteries,■please■see■page■28) Power■Cord■(*) CD-ROM RGB■Cable Read■This■First■(*) ■Warranty■(*) -
Page 22: Product.overview
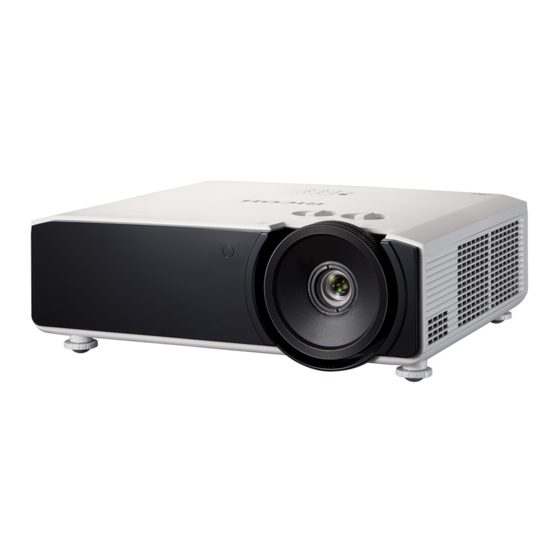
Introduction Product Overview 1. Security■bar 2. Remote■receivers 3. Control■panel 4. Lens■shift■adjustment■knobs 5. Focus■and■Zoom■rings 6. Projection■lens English... -
Page 23: Connection.ports
Introduction Connection Ports The■interface■is■ subject■to■model’s■ specifications. PC-Contorl■terminal Service■terminal Compatible■with■ MHL■version■2,■the■ USB-A■terminal■(5V■2A■Out) charging■power■ LAN■terminal 5V@1A. HDBaseT■terminal HDMI■1■terminal HDMI■2/MHL■terminal Monitor■Out■terminal Computer■In■terminal Audio■In■terminal Audio■Out■terminal AC■In■socket Anti-theft■lock■hole Adjustable■feet English English... -
Page 24: Control.panel
Introduction Control Panel Indicator■LED Refer■to■the■“Problem:■Indicator■ lighting■message”■on■page■60. Menu Press■“Menu”■to■launch■the■on■screen■ display■(OSD),■or■close■the■OSD■ menu.■(See■page■38) Power Refer■to■the■“Powering■On/Off■the■ Projector”■on■page■32. Four■ Use■ ,■ ,■ ,■or■ ■to■select■items■or■ Directional■ make■adjustments■to■your■selection. Select■Keys Enter Select■or■confirm■settings. Input Press■“Input”■to■choose■your■desired■ input■source. AV■Mute Momentarily■turn■off/on■the■audio■ and■video. Exit Cancel■the■selection,■or■go■back■to■ previous■page. English... -
Page 25: Remote.control
Introduction Remote Control AV■Mute Momentarily■turn■off/on■the■audio■and■ video. Power Refer■to■the■“Powering■On/Off■the■ Projector”■on■page■32. Autoset Automatically■synchronize■the■projector■ to■the■input■source. Direct■key■to■change■Laser■mode■ Normal/360/ECO1/ECO2/ECO3. Input Press■“Input”■to■choose■your■desired■ input■source. English English... - Page 26 Introduction Aspect Use■this■function■to■choose■your■desired■ aspect■ratio. Picture Select■the■preset■picture■mode. Four■ Use■ ,■ ,■ ,■or■ ■to■select■items■or■ Directional■ make■adjustments■to■your■selection. Select■Keys Enter Confirm■your■section■of■items■in■sub■ menu■operation. 10 Keystone Press■“Keystone“■to■adjust■image■ distortion■caused■by■tilting■the■projector. 11 Menu Press■“Menu”■to■launch■the■on■screen■ display■(OSD),■or■close■the■OSD■menu.■ (See■page■38) 12 Exit Cancel■the■selection,■or■go■back■to■ previous■page. 13 HDMI Press■“HDMI”■to■choose■between■HDMI1■ In■and■HDMI2/MHL■In■terminal. 14 Computer Press■“Computer”■to■choose■Computer■In■ terminal. 15 Video No■function.
- Page 27 Introduction 21 ID■Set Set■the■code■for■this■remote■control.■Long■ press■for■5■seconds■on■both■“ID■Set”■and■ the■number■(0-7)■button■to■be■designated■ until■the■indicator■on■the■remote■control■ flashes■twice.■You■can■control■projector■ with■the■matching■ID■set■in■the■“Options”■ >■“Control”■>“Projector■ID”■OSD. Press■and■hold■“ID■Set”■for■5■seconds■ until■the■remote■control■flashes■to■a■stop■ to■reset■the■ID■to■“0”. 22 Number■ Input■numbers. (0~9) 23 MHL Press■“MHL”■to■control■your MHL■device. English English...
-
Page 28: Remote.control.battery.installation
Introduction Remote Control Battery Installation ■■ P ush■the■clip■to■release■ ■■ I nstall■new■batteries■ ■■ C lose■the■battery■cover■ the■battery■cover. (AAA/R03/LR03).■ and■press■it■down■until■ Ensure■that■you■have■ it■clicks■into■place.■Do■ the■batteries’■polarity■ not■mix■different■types■ (+/–)■aligned■correctly. of■batteries■or■new■and■ old■batteries. ■To■ensure■safe■operation,■please■observe■the■following■precautions■: ■ ■ Use■AAA/R03/LR03■type■battery. ■ ■ Avoid■contact■with■water■or■liquid. ■ ■ Do■not■expose■the■remote■control■to■moisture■or■heat. ■ ■ Do■not■drop■the■remote■control. ■ ■ If■the■battery■has■leaked■in■the■remote■control,■carefully■wipe■the■case■clean■and■ install■new■battery. -
Page 29: Remote.control.operating.range
Introduction Remote Control Operating Range Point■the■remote■control■toward■the■projector■(Remote■Receiver)■ when■pressing■any■button. Maximum■operating■range■for■the■remote■control■is■about■8m■(26.2’)■ and■±30°■(horizontally),■±30°■(vertically)■in■front■of■or■on■top■of■the■ projector. 8m (26.2’) ±30° (horizontally), ±30° (vertically) 8m (26.2’) ±30° (horizontally), ±30° (vertically) ■ English English... -
Page 30: Basic Operations
Basic Operations Basic Operations Connecting the Projector Make■sure■that■ the■power■plug■is■ Connect to Computer/Notebook/AV fully■inserted■into■ both■the■projector■ equipment/other devices AC■inlet■and■the■ wall■outlet. The■AC■outlet■ Monitor must■be■near■this■ equipment■and■ must■be■easily■ accessible. Due■to■the■ difference■in■ applications■for■ each■country,■ some■regions■may■ have■different■ accessories. To■ensure■the■ projector■works■ well■with■your■ computer,■please■ make■sure■the■ timing■of■the■... -
Page 31: Connect.to.hdbaset.module
Basic Operations Connect to HDBaseT Module HDBaseT■is■a■connectivity■standard■for■whole-house■and■commercial■ distribution■of■uncompressed■HD■multimedia■content.■After■ installing■the■HDBaseT■module■to■the■projector■and■using■the■ HDBaseT■transmitter■(commercially■available),■you■may■connect■ multiple■sources■to■your■projector■with■HDBaseT■connection. IR TX VGA IN YPbPr RJ45 HDMI RS232 RJ45 HD Connect IR RX HDBaseT Transmitter The■illustration■is■ for■reference■only,■ Use■a■shielded■LAN■cable■up■to■100■meters■in■length■rated■at■ ■ actual■layout ™ may■vary. CAT5e■or■better. The■maximum■transmission■distance■is■100■m.However,■it■ ■ ™ may■be■shorter■under■some■circumstances. Avoid■using■the■LAN■cable■when■it■is■coiled■or■bundled. ■... -
Page 32: Powering.on/Off.the.projector
Basic Operations Powering On/Off the Projector If■you■connect■ Powering On the Projector multiple■sources■ 1.■Ensure■that■the■power■cord■and■signal■cable■are■securely■ at■the■same■time,■ connected.■The■Power■indicator■will■turn■orange.■ press■“Input”■on■ the■control■■panel■ 2.■Turn■on■the■light■source■by■pressing■the■ ■button■on■the■ or■the■desired■ control■panel■or■remote■control.■The■Power■indicator■will■ source■button■on■the■ flash■green. remote■control■to■ The■startup■screen■will■display■and■the■Power■indicator■will■ switch■inputs. turn■green. 3.■Turn■on■your■source■(computer,■notebook,■video■player,■ etc.)■The■projector■will■detect■your■source■automatically. Make■sure■that■the■“Auto■Source”■has■been■set■to■“On”. Turn■on■the■ projector■first■and■ CAUTION: then■the■signal■ •. Do.not.look.into.the.lens.while.the.light.source.is.on..The.strong. sources. light.from.the.light.source.may.cause.damage.to.your.eyesight. •. -
Page 33: Powering.off.the.projector
Basic Operations Powering Off the Projector 1.■Press■the■ ■button■and■you■will■see■a■message■on■the■on- screen■display■(when■Power■Off■Message■is■set■to■“On“). 2.■Press■the■ ■button■again■to■turn■off■the■projector■light■ source. 3.■The■cooling■fan■continues■to■operate■for■about■5■seconds■ for■cooling■cycle■and■the■Power■indicator■will■flash■red.■ After■cooling■down,■the■light■stops■flashing,■and■then■the■ projector■will■enter■the■standby■mode. If■you■wish■to■turn■the■projector■back■on,■you■must■wait■ until■the■projector■has■completed■the■cooling■cycle■and■has■ entered■standby■mode.■Once■in■standby■mode,■simply■press■ the■ ■button■on■the■control■panel■or■remote■control■to■ restart■the■projector. 4.■Disconnect■the■power■cord■from■the■electrical■outlet■and■the■ projector. English English... -
Page 34: Warning.indicator
Basic Operations Warning Indicator When■the■“Power”■indicator■lights■green■and■the■ ■ ™ “Temp“■indicator■lights■red,■it■indicates■the■projector■has■ overheated.■The■projector■will■automatically■shut■itself■ down. Error Projector Overheated. Laser will automatically turn off soon. When■the■“Power”■indicator■lights■red■and■“Temp”■ ■ ™ indicator■lights,■it■indicates■the■cooling■fan■failed.■Stop■ using■the■projector■and■disconnect■the■power■cord■from■the■ electrical■outlet,■then■contact■your■local■dealer■or■our■service■ center. For■more■information■of■the■warning■indicator,■please■see■“Problem:■ Indicator■lighting■message”■on■page■60. English... -
Page 35: Adjusting.the.projected.image
Basic Operations Adjusting the Projected Image Adjusting the Position of Projector Image The projector is equipped with adjustable feet to raise and lower the image to fill the screen. 1.■Locate■the■adjustable■foot■you■wish■to■modify■on■the■ underside■of■the■projector. 2.■Rotate■the■adjustable■ring■clockwise■to■raise■the■projector■ or■counter■clockwise■to■lower■it.■Repeat■with■the■remaining■ feet■as■necessary. ■You■can■incline■ the■projector■up■to■ 1.9°■by■rotating■the■ adjustable■feet. Adjusting the Projector Zoom and Focus You■may■turn■the■zoom■ring■to■zoom■in■or■out.■To■focus■the■... -
Page 36: Adjusting.projection.image.size
Basic Operations Adjusting Projection Image Size Top View Screen Screen (W) Projection Distance (D) Screen (H) Screen Width Side View Offset (Hd) Projection Distance (D) Lens shift (horizontal) Max. 0.23W W (image width) Lens shift (horizontal) Max. 0.23W Lens shift (vertical) Max. - Page 37 Basic Operations PJ WUL5970 / PJ LU580 series Diagonal Screen Size W x H Projection Distance (D) Offset (Hd) length (inch) (feet) (feet) (inch) size of 16:10 Width Height Width Height Wide Tele Wide Tele Min. Max. Min. Max. Screen 1.29 0.81 50.88...
-
Page 38: User Settings
User Settings User Settings Using the On Screen Display (OSD) The Projector has a multilingual On Screen Display that allows you to make image adjustments and change a variety of settings. How to operate 1.■To■open■the■OSD,■press■“Menu”■on■the■Control■Panel■or■ Remote■Control. 2.■When■OSD■is■displayed,■use■ ■keys■to■select■any■item■ in■the■main■menu.■While■making■a■selection■on■a■particular■ page,■press■“Enter”■key■to■enter■sub■menu. 3.■Use■... -
Page 39: Image.adjustment
User Settings Image Adjustment Picture Mode Standard Brightness Contrast Sharpness Gamma Standard(2.2) Color Temperature 6500 Advanced Select Enter Exit Image Adjustment Picture■Mode There■are■factory■presets■optimized■for■various■types■of■ images.■The■available■options: Picture Mode Bright Standard Vivid sRGB DICOM SIM. Bright:■Mode■for■emphasizing■brightness. ■ ` Standard:■Mode■for■optimizing■the■balance■between■ ■ ` brightness■and■color■reproduction. Vivid:■Mode■for■emphasizing■color. ■... - Page 40 User Settings Press■the■ ■key■to■increase■the■contrast. ■ ` Sharpness Adjust■the■sharpness■of■the■image. Press■the■ ■key■to■decrease■the■sharpness. ■ ` Press■the■ ■key■to■increase■the■sharpness. ■ ` Gamma Use■this■function■to■optimize■the■image■output.■ The■available■options:■1.8■/■2.0■/■Standard(2.2)■/■2.4■/■Shine■/■■ DICOM■SIM. Gamma Standard(2.2) Shine DICOM SIM. Color■Temperature Use■this■function■to■select■the■preset■color■temperature.■The■ available■options:■5500/■6500■/■7500■/■Native. Color Temperature 5500 6500 7500 Native Use■this■function■to■enhance■color■and■reproduce■vivid■colors. On:■Enable■NCE. ■ ` Off:■Disable■NCE. ■ ` Advanced Wall■Color ■...
- Page 41 User Settings NCE Settings Color Saturation Gain Reset Select Adjust Exit ■ – Color:■Use■ ■key■to■select■a■color■that■you■wish■to■ enhance.■ ■ – Hue:■Use■ ■key■to■change■the■hue■of■the■selected■ color.■ ■ – Saturation:■Use■ ■key■to■change■the■saturation■of■the■ selected■color. ■ – Gain:■Use■ ■key■to■change■the■contrast■level■of■the■ selected■color. ■ – Red/Green/Blue■(When■selecting■“White“■in■“Color“):■ Use■ ■key■to■change■the■level■of■each■color. ■ – Reset:■Use■this■function■to■return■the■adjustments■and■ settings■made■above■to■the■factory■default■values. English English...
-
Page 42: Display.settings
User Settings Display Settings Aspect Auto Phase Frequency H. Position V. Position Keystone Projection Mode Standard Advanced Select Enter Exit Display Settings Aspect Use■this■function■to■choose■your■desired■aspect■ratio. Aspect Auto 16:9 16:10 Zoom Auto:■Automatically■selects■the■appropriate■display■format.■ ■ ` When■input■is■4:3,■the■image■is■displayed■as■4:3.■When■input■ is■16:9,■the■image■is■displayed■as■16:9. 4:3:■Displays■4:3■aspect■ratio. ■ ` 16:9:■Displays■16:9■aspect■ratio. ■ ` 16:10:■Displays■16:10■aspect■ratio. - Page 43 User Settings H.■Position■(Horizontal■Position) Shift■the■projected■image■position■horizontally. “H.■Position”■and■ “V.■Position”■functions■ Press■the■ ■key■to■move■the■image■left. ■ ` are■only■supported■ under■Computer■Signal■ Press■the■ ■key■to■move■the■image■right. ■ ` source. V.■Position■(Vertical■Position) Shift■the■projected■image■position■vertically. Press■the■ ■key■to■move■the■image■down. ■ ` Press■the■ ■key■to■move■the■image■up. ■ ` Keystone Adjust■image■distortion■caused■by■tilting■the■projector. Keystone V. Keystone H. Keystone Four Corners Reset Select Enter Exit V.■Keystone:■Adjust■the■vertical■keystone.
- Page 44 User Settings Projection■Mode Use■this■function■to■select■the■projector■mode,■depending■ upon■how■the■projector■is■mounted. Projection Mode Standard Ceiling Rear Rear Ceiling Standard:■This■is■the■default■selection.■The■image■is■ ■ ` projected■straight■on■the■screen. Ceiling:■When■selected,■the■image■will■turn■upside■down. ■ ` Rear:■When■selected,■the■image■will■appear■reversed. ■ ` Rear■Ceiling:■When■selected,■the■image■will■appear■reversed■ ■ ` in■upside■down■position. Advanced RGB■Input■Range ■ ` Adjust■the■color■range■of■the■HDMI■image■data. RGB Input Range Auto Limited Range Full Range ■ – Auto:■Automatically■detect■RGB■range. ■...
-
Page 45: Default.settings
User Settings Default Settings Language Auto Source Input Source Auto Power Off (Min) Standby Settings Network Security Reset Enter Exit Select Default Settings Language Choose■the■Language.■Press■“Enter”■to■open■the■sub■menu■ and■then■use■the■ ,■ ,■ ,■or■ ■key■to■select■your■preferred■ language.■Press■“Enter”■to■finalize■the■selection. Language Select Enter Exit Auto■Source When■this■function■is■turned■“On”,■the■projector■will■search■ for■other■signals■if■the■current■input■signal■is■lost.■When■ this■function■is■turned■“Off”,■it■will■only■search■a■specified■ connection■port. Input■Source Use■this■option■to■enable/disable■input■sources.■Press■“Enter”■... - Page 46 User Settings Input Source Select Enter Exit Auto■Power■Off■(Min) Sets■the■countdown■timer■interval.■The■countdown■timer■will■ start,■when■there■is■no■signal■being■sent■to■the■projector.■The■ Default■value■of■ projector■will■automatically■power■off■when■the■countdown■ “Auto■Power■Off■(Min)”■ is■20■min. has■finished■(in■minutes).■When■countdown■timer■is■selected■ to■“0”,■auto■power■off■is■disabled. Standby■Settings Network■ ■ ` Enable/Disable■the■network■function. ■ – On:■Enable■the■network■function■at■projector■standby■ status. ■ – Off:■Disable■the■network■function■at■projector■standby■ status. DC■5V■Out ■ ` Use■this■function■to■enable■DC■5V■power■output■through■ USB-A■terminal. Network Configure■the■network■settings. Network Status DHCP IP Address Subnet Mask Apply...
- Page 47 User Settings provided■from■DHCP■server■when■DHCP■is■set■to■“On”. Subnet■Mask:■Set■subnet■mask■number■or■display■subnet■ ■ ` mask■number■provided■from■DHCP■server■when■DHCP■is■ set■to■“On”. Apply:■Select■“Yes”■to■apply■the■changes■made■in■network■ ■ ` configuration■settings. Apply Enter Exit MAC■Address:■Display■MAC■address. ■ ` Security Configure■the■security■settings. The■default■security Password■Protection:■Select■“On”■to■use■the■security■ ■ ` code■is■“12345678”. verification■when■the■turning■on■the■projector.■Select■“Off”■ to■be■able■to■switch■on■the■projector■without■a■password■ verification. Change■Password:■Set■the■password. ■ ` Reset Return■the■adjustments■and■settings■to■the■factory■default■ values.■Choose■“Yes”■to■return■the■display■parameters■on■all■ menus■except■Language■to■the■factory■default■settings. Reset Enter Exit English English...
-
Page 48: Audio
User Settings Options Mute Volume Enter Exit Select Audio Mute Temporarily■turn■off■the■sound. Choose■“On”■to■mute■the■sound. ■ ` Choose■“Off”■to■turn■mute■off. ■ ` Volume Adjust■the■volume■level. Press■the■ ■key■to■decrease■the■volume. ■ ` Press■the■ ■key■to■increase■the■volume. ■ ` English... -
Page 49: Options
User Settings Options Laser Mode Normal High Altitude Mode Status Display Power Settings Control Information Enter Exit Select Options Laser■Mode Set■the■brightness■mode.■Choose■“Normal”■to■increase■the■ brightness■or■choose■“360”,■“ECO1”,■“ECO2”■or■“ECO3”■ to■dim■the■projector■light■source■which■will■lower■power■ When■ambient■ consumption■and■extend■the■light■source■life. temperature■is■over■ 40°C■in■operating,■the■ High■Altitude■Mode projector■will■switch■to■ “ECO”■automatically. When■“On”■is■selected,■the■fans■will■spin■faster.■Set■High■ Altitude■mode■to■“On”■when■the■projector■is■used■over■1500m■ elevation. Status■Display When■“On”■is■selected,■the■status■will■display. Start■on■Input■Detection:■ Choose■“On“■to■activate■this■function.■The■projector■will■ automatically■power■on■when■a■VGA■signal■is■detected,■ without■pressing■the■ ■button. - Page 50 User Settings same■time,■switching■the■remote■control■codes■can■prevent■ interference■from■other■remote■controls.■After■the■Projector■ ID■is■set,■switch■to■the■same■ID■for■the■remote■control■to■ control■this■projector. Control■Channel:■Set■the■control■channel■for■this■projector.■ ■ ` The■available■options:■RS232/LAN■/■HDBaseT. Information Display■the■projector■information. Source:■Display■the■input■source■that■is■currently■connected■ ■ ` Resolution:■Display■the■resolution■setting■of■the■current■ ■ ` input■source. Picture■Mode:■Display■current■Picture■Mode. ■ ` Laser■Mode:■Display■current■Laser■Mode. ■ ` Total■Time:■Display■the■light■source■hours. ■ ` FW■Version:■Display■the■firmware■version. ■ ` English...
- Page 51 User Settings 3D Format Auto 3D Sync Invert Enter Exit Select 3D■Format Use■this■option■to■select■the■appropriate■3D■format■content. Compatible■3D■ 3D Format source,■3D■content■ Auto and■Optical■3D■ Side by Side glasses■are■required■ Top and Bottom Frame Sequential for■3D■viewing. ■■ ■ “3D■Sync■Invert”■is■ Select Enter Exit only■available■when■ 3D■is■enabled. Auto:■Use■this■function■for■the■projector■to■automatically■ ■ ` select■the■3D■format■depending■on■the■3D■content.
-
Page 52: Lan Control
LAN Control LAN Control Controlling this Device with Web Browser You■can■control■this■device■from■a■PC■by■using■a■web■browser. Connecting to the device 1.■Confirmation of the IP address of the device Select■the■“Setting”■→■“Network”■in■the■menu■of■this■ device,■and■verify■the■IP■address.■(See■“Network”■on■page■ 46). Network Status DHCP IP Address Subnet Mask Apply MAC Address Select Enter Exit 2.■Connection Enter■the■IP■address■that■was■verified■by■opening■the■web■... -
Page 53: Crestron.tools
LAN Control •■ Computer •■ HDMI1 •■ HDBaseT •■ HDMI2/MHL Other■buttons■work■in■the■same■manner■as■Projector■ ■ ` Control. Crestron Tools You■can■perform■settings■of■the■projector■network■and■Crestron■ Room■View. After■setting■the■ user■password,■you■ will■be■able■to■access■ Crestron’s■page■by■ entering■the■password. ■■ ■ After■enabling■the■ Admin■password,■you■ will■be■able■to■access■ the■page■of■Crestron■ tool■only■upon■entering■ the■Admin■password. Crestron Info You■can■display■information■about■the■firmware■version■of■the■ projector■and■status■of■the■light■source. Crestron■offers■the■ following■two■types■of■ files. a)■... -
Page 54: Control.the.projector.via.the.. Projector.management.utility
LAN Control Control the Projector via the Projector Management Utility Projector■Management■Utility■conforms■to■the■PJLink■class■1■ standards,■and■is■compatible■with■all■class■1■commands. A■maximum■of■100■projectors■connected■to■the■network■can■be■ This■software managed■using■one■computer. is■to■control■and monitor■projectors Projector■Management■Utility■operating■environment■is■ manufactured■by described■below. our■company.■The software■may■not •■ Supported■operating■system work■properly •■ Windows■7■(32-bit/64bit■version) when■used■to •■ Windows■8■(32-bit/64bit■version) control■other •■ Windows■8.1■(32-bit/64bit■version) projectors. •■ Windows■10■(32-bit/64bit■version) •■ Windows■Server■2008■SP2■(32-bit/64bit■version) •■ Windows■Server■2008■R2■Standard■SP1■(64bit■version) •■... -
Page 55: Register.projectors
LAN Control 7.■When■the■installation■is■complete,■exit■the■installer. A■shortcut■icon■is■created■on■the■desktop. Register projectors 1. Registers the projectors with Auto search. ■ – Click■[Register Projector]■button. ■ – Click■[Auto Search]■button. ■ – List■of■projectors■which■support■PJLink■are■displayed■ in■the■window.■Projector■name■is■displayed■as■ “********”■until■authorization■if■password■is■enable. English English... - Page 56 LAN Control ■ – Select■the■desired■projector■and■click■[Register]■ button.■Password■authorization■is■required■ if■password■of■the■projector■is■set■to■enable. ■ – Click■[OK]■button■to■return■to■the■original■screen. 2. Directly specifies the IP address and registers the projector. ■ – Enter■IP■address■of■the■desired■projector■and■click■■ [Confirm]■button■then■the■projector■name■will■be■ displayed.■After■confirming■the■projector■name,■click■ [Register]■button. English...
-
Page 57: Utility
LAN Control Control the projector with the projector Management Utility Click■[Remote Control]■tab■and■select■the■desired■projector■ in■the■list.■You■can■control■the■selected■projector■by■clicking■ control■buttons■in■the■bottom■of■the■window.■ [Power] button Turn■“On/Off”■the■power■of■the■projectors■or■groups■selected■ from■the■Projector■(/Group)■List. [Input] button Switches■the■input■source■of■the■projectors■or■groups■selected■ from■the■Projector■(/Group)■List. Input■source■will■not■be■changed■if■the■projector■doesn’t■ support■the■selected■input■source. A■Table■of■input■source■name■in■the■projector■and■the■ projector■management■utility. The■projector The■projector■Management■Utility Computer Computer HDMI1 HDMI HDMI2/MHL HDMI HDBaseT HDBaseT English English... -
Page 58: Troubleshooting
Troubleshooting Troubleshooting If you experience trouble with the projector, refer to the following information. If the problem persists, please contact your local dealer or service center. Problem: No image appears on screen Ensure■all■the■cables■and■power■connections■are■correctly■ ■ ` and■securely■connected■as■described■in■the■“Connecting■the■ Projector”■section. Ensure■the■pins■of■terminals■are■not■crooked■or■broken. ■ ` Problem: Partial, scrolling or incorrectly displayed image Press■“Auto■Set”■on■the■remote■control. - Page 59 Troubleshooting Problem: The screen of the Notebook computer is not displaying a presentation If■you■are■using■a■Notebook■PC: ■ ` Some■Notebook■PCs■may■deactivate■their■own■screens■ when■a■second■display■device■is■in■use.■Each■has■a■ different■way■to■be■reactivated.■Refer■to■your■computer’s■ documentation■for■detailed■information. Problem: Image is unstable or flickering Adjust■the■“Phase”■or■“Clock”■to■correct■it.■■ ■ ` Refer■to■the■“H.■Position■(Horizontal■Position)”■or■“V.■Position■ (Vertical■Position)”■section■for■more■information. Check■and■reconfigure■the■display■mode■of■your■graphic■ ■ ` card■to■make■it■compatible■with■the■product. Problem: Image is out of focus Adjust■the■Focus.■(refer■to■page■35) ■...
- Page 60 Troubleshooting Problem: Image is reversed Select■“Display■Settings”■>■“Projection■Mode”■from■the■ ■ ` OSD■menu■to■adjust■the■image. Problem: Indicator lighting message Lamp■ Power■indicator Temp■indicator indicator Status Steady■light■=>■ (Red) (Green) (Orange) (Red) (Green) (Red) (Green) No■light■=>■ Normal Operation Standby Flashing Powering■up (0.5 sec) Normal■ (Power■ON) Flashing Cooling (0.5 sec) Warning Color■wheel■...
- Page 61 Troubleshooting Lamp■ Power■indicator Temp■indicator indicator Status (Red) (Green) (Orange) (Red) (Green) (Red) (Green) Temp■error Problem: Message Reminders Temperature■Error■-■the■projector■is■overheat■inside.■Check■ ■ ` the■environmental■condition. Error Projector Overheated. Laser will automatically turn off soon. English English...
-
Page 62: Appendices
Appendices Appendices List of Compatible Signals A. VGA Analog (1)■VGA■Analog■-■PC■Signal V.Frequency■ H.Frequency■ Modes Resolution (Hz) (kHz) 720■x■400_70 720■x■400 70.1 31.5 VGA_60 59.9 31.5 VGA_72 72.8 37.9 640■x■480 VGA_75 75.0 37.5 VGA_85 85.0 43.3 SVGA_60 60.3 37.9 SVGA_72 72.2 48.1 SVGA_75 75.0 46.9 800■x■600... - Page 63 Appendices A. VGA Analog (1)■VGA■Analog■-■PC■Signal V.Frequency■ H.Frequency■ Modes Resolution (Hz) (kHz) WXGA+_60■(Reduce■ 60.0 55.5 Blanking) 1440■x■900 WXGA+_60 59.9 55.9 SXGA+_60 1400■x■1050 60.0 65.3 UXGA 1600■x■1200 60.0 75.0 1680■x■1050_60■ 59.9 64.7 (Reduce■Blanking) 1680■x■1050 1680■x■1050_60 60.0 65.3 MAC13 640■x■480@67Hz 66.7 35.0 MAC16 832■x■624@75Hz 74.5 49.7...
- Page 64 Appendices B. HDMI (1)■HDMI■-■PC■Signal V.Frequency■ H.Frequency■ Modes Resolution (Hz) (kHz) VGA_60 59.9 31.5 VGA_72 72.8 37.9 640■x■480 VGA_75 75.0 37.5 VGA_85 85.0 43.3 720x400_70 720■x■400 70.1 31.5 SVGA_60 60.3 37.9 SVGA_72 72.2 48.1 SVGA_75 75.0 46.9 800■x■600 SVGA_85 85.1 53.7 SVGA_120■(Reduce■...
- Page 65 Appendices B. HDMI (1)■HDMI■-■PC■Signal V.Frequency■ H.Frequency■ Modes Resolution (Hz) (kHz) 1360■x■768_60 1360■x■768 60.0 47.7 WXGA+_60■(Reduce■ 60.0 55.5 Blanking) 1440■x■900 WXGA+_60 59.9 55.9 SXGA+_60 1400■x■1050 60.0 65.3 UXGA 1600■x■1200 60.0 75.0 1680■x■1050_60■ 59.9 64.7 (Reduce■Blanking) 1680■x■1050 1680■x■1050_60 60.0 65.3 MAC13 640■x■480@67Hz 66.7 35.0 MAC16...
- Page 66 Appendices C. HDBaseT Cable■Type Cable■Range Pixel■Rate HDMI■Format 640■x■480p/60Hz■■4:3 720■x■480p/60Hz■■4:3 720■x■480p/60Hz■16:9 1280■x■720p/60Hz■16:9 1920■x■1080i/60Hz■16:9 1440■x■480i/60Hz■■4:3 CAT■5E/ 100m <=225MHz CAT■6A 1920■x■1080p/60Hz■16:9 720■x■576p/50Hz■■4:3 1280■x■720p/50Hz■16:9 1920■x■1080i/50Hz■16:9 1440■x■576i/50Hz■■4:3 1920■x■1080p/50Hz■16:9 English...
-
Page 67: Configurations.of.terminals
Appendices Configurations of Terminals Terminal: Computer In (Mini D-sub 15 pin) [Monitor Out] Red (R/Cr) Input [R Output] DDC 5V [NC*] Green (G/Y) Input [G Output] Ground (Ver. sync.) Blue (B/Cb) Input [B Output] DDC Data [NC*] Ground (Horiz.sync.) Horiz. sync. Input [Output] (Composite H/V sync. -
Page 68: Specifications
Appendices Specifications ■■List of general specifications Item PJ WUL5970 / PJ LU580 series PJ LU580ST series DLP■chip 0.48”■DMD■WUXGA Light■source■Type Laser F■=■1.81■–■2.1,■f■=■14.3■mm■–■22.9■mm,■ F=■1.83■~■1.86,■f=8.6■mm■~■9.4■mm,■ Projection■Lens■ 1:1.6■manual■zoom■and■manual■focus 1:1.1■manual■zoom■and■manual■focus Projection■Distance■ 1.75■–■9.34■m■(2.8■–■30.65■feet) 1.04■–■3.82■m■(3.42■–■12.53■feet) (focus■range) Throw■Ratio 1.36■–■2.18■(87”■@■2.54■m) 0.81■–■0.89■(87”@■1.51m) Dimension■ 450■x■381■x■132■mm■(without■protruding■part) (WxDxH) 450■x■381■x■162■mm■(with■protruding■parts/with■maximum■lens■shift) Weight Approx.■7.8■kg■(17.2lb) Approx.■8.0■kg■(17.6lb) •■ HDMI1■In •■... -
Page 69: Cabinet.dimensions
Appendices Cabinet Dimensions Unit:■mm Holes for ceiling mount Screw type: M4 Thread the screw into the hole for 9mm (min.) to 10mm (max.) thick. 138.54 276.59 English English... -
Page 70: Trademarks
Appendices Trademarks •■ DLP■is■trademarks■or■registered■trademark■of■Texas■ Instruments. •■ Microsoft,■Windows,■Internet■Explorer■and■PowerPoint■are■ either■a■registered■trademark■or■trademark■of■Microsoft■ Corporation■in■the■United■States■and/or■other■countries. •■ HDMI,■the■HDMI■Logo■and■High-Definition■Multimedia■ Interface■are■trademarks■or■registered■trademarks■of■HDMI■ Licensing■Administrator,■Inc.■ •■ MHL,■Mobile■High-Definition■Link,■and■MHL■Logo■are■ trademarks■or■registered■trademarks■of■MHL,■LLC. •■ Blu-ray■is■a■trademark■of■Blu-ray■Association. •■ HDBaseT™■and■the■HDBaseT■Alliance■logo■are■trademarks■ of■the■HDBaseT■Alliance. •■ Other■product■and■company■names■mentioned■in■this■user’s■ manual■may■be■the■trademarks■or■registered■trademarks■of■ their■respective■holders. English...
Need help?
Do you have a question about the PJ WUL5970 Series and is the answer not in the manual?
Questions and answers