Table of Contents
Advertisement
Quick Links
Advertisement
Table of Contents

Related Manuals for Ricoh PJ WUL6281


Summary of Contents for Ricoh PJ WUL6281
-
Page 3: Table Of Contents
Table of Contents Table of Contents ......1 Basic Operations ......37 Usage Notice ........3 Connecting the Projector ....37 Introduction .........3 Connect to Computer/Notebook ... 37 Precautions .........4 Connect to AV Equipment ....38 Powering On/Off the Projector ..39 Safety Labels of This Machine ..15 Powering On the Projector .... - Page 4 Table of Contents OPTIONS ..........63 3D ............68 LAN Control ........70 Controlling this Device with Web Browser ..........70 Connecting to the device ...... 70 Using the web interface ......71 Control the Projector via the Projector Management Utility ......75 Installing Projector Management Utility.............
-
Page 5: Usage Notice
Usage Notice Introduction This manual contains detailed instructions and notes on the operation and use of this machine. For your safety and benefi t, read this manual before using the machine. Keep this manual in a handy place for quick reference. Important Contents of this manual are subject to change without prior notice. -
Page 6: Precautions
Usage Notice Precautions Follow all warnings, precautions and maintenance as recommended in this manual to ensure the safety when operating and installing this product. In this manual, the following important symbols are used: ■ Indicates a potentially hazardous situation which, if Warning- instructions are not followed, could result in death or serious injury. - Page 7 Usage Notice ■ Caution- Do not place the machine or use it in an environment where it might get wet such as from snow, rain, or being near water. Doing so could result in fi re or electric shock. ■ Caution- Do not put your face or hand near the exhaust vents.
- Page 8 Usage Notice Handling power cords and power cord plugs This section explains safety precautions about handling power cords and power cord plugs. ■ Warning- Do not use any power sources other than those that match the specifi cations shown in this manual. Doing so could result in fi...
- Page 9 Usage Notice the power cord and consult your dealer or service representative. Use of the power cord could result in fi re or electric shock. ■ Warning- Do not use the connection cable if it is deformed, cracked, or damaged. Doing so could result in fi...
- Page 10 Usage Notice Handling the main machine This section explains safety precautions about handling the main machine. ■ Warning- Plastic bags can be dangerous, please do not leave near babies and young children. To avoid the threat of suffocation, please keep away from their nose and mouth.
- Page 11 Doing so may cause heat buildup inside the machine or cause the other equipment to malfunction. ■ Caution- Do not use attachments not recommended by RICOH. Use of an incompatible attachments could cause hazards or damage to the product. ■...
- Page 12 Usage Notice ■ Caution- This product incorporates glass components, including a lens. If this should break, please handle with care to avoid injury and contact your sales representative for repair service. Avoid any broken pieces of glass since they may cause injury. ■...
- Page 13 Usage Notice About the remote control batteries This section explains safety precautions about the remote control batteries. ■ Warning- Never throw batteries into a fi re. Using the batteries improperly may cause them to explode or leak and may result in serious injury. If battery-leaking fl...
- Page 14 Usage Notice About the laser light source This section explains safety precautions about the laser light source. ■ Warning- Do not look into the lens or vent when the product is on. The bright light may damage your eyes. Be espe- cially careful in an environment with children.
- Page 15 Usage Notice ■ Caution- For 360° installation, install the projector more than 100 cm away from the wall or the fl oor. When the air intake and discharge outlet are obstructed, the temperature inside the projector will rise and this may result in a malfunction.
- Page 16 Usage Notice ■ Caution- When installing the projector on the right side, leave a space of at least 100 cm between the exhaust vent and the fl oor and a space of at least 100 cm for the intake vent. ≥...
-
Page 17: Safety Labels Of This Machine
Usage Notice Safety Labels of This Machine The manufacturer shall not be responsible for any damage or expense that might result from the use of parts other than genuine parts from the manufactuere with your product. 1. Do not look into the lens while the light source is on. The strong light from the light source may cause damage to your eyesight. - Page 18 S o r t i e m a x i m a l e : 9 8 m W 一類激光產品-IEC/EN60825-1 : 2014 風險組別2:本產品可能發射有害的光輻射勿直視光束,可能對眼睛有害 クラス1レーザー製品-IEC/EN 60825-1:2014, リスクグループ2:この製品から出力される光は使用状況によっては強力な光となり, 眼に悪影響を及ぼすおそれがありますので光源を直視しないでください。 注)1.細線はアタリケイ 2.ベース色は、2.5Y8/14 3.全ての文字、ロゴマーク、図記号、ラインの色は I(BK) Sargas-PJ1.5 R : S : NA RDHAB45 変更 English 2018/02/03 RICOH Co., Ltd Muraishi ' / / Y0CT 8808 A...
-
Page 19: Regulation & Safety Notices
Regulation & Safety Notices This appendix lists the general notices of your Projector. Notice: Users in the United States of America FCC notice MODEL NAME: RICOH PJ WUL6281 TRADE NAME: PROJECTOR MODEL NAME: RICOH PJ WUL6281 Tested To Comply With FCC Standards FOR COMMERCIAL OR OFFICE USE This device complies with Part 15 of the FCC Rules. - Page 20 Notice: Users in EU countries CE Marking Traceability Information (For EU Countries Only) Manufacturer: Ricoh Co., Ltd. 3-6 Nakamagome 1-chome, Ohta-ku, Tokyo. 143-8555, Japan Importer: Ricoh Europe SCM B.V. Blankenweg 24, 4612 RC Bergen op Zoom, The Netherlands English...
- Page 21 Usage Notice User Information on Electrical and Electronic Equipment Users in the countries where this symbol shown in this section has been specifi ed in national law on collection and treatment of E-waste. Our Products contain high quality components and are de- signed to facilitate recycling.
- Page 22 Usage Notice Notice: Users in Taiwan FCC Class A for Taiwan 警告使用者: 此為甲類資訊技術設備,於居住環境中使用 時,可能會造成射頻擾動,在此種情況下, 使用者會被要求採取某些式當的對策。 Note for battery disposal in Taiwan Notice: Users in the EU Note for the Battery and/or Accumulator Symbol In accordance with the Battery Directive 2006/66/EC Article 20 Information for end-users Annex II, the above symbol is printed on batteries and accumulators.
- Page 23 Usage Notice Notice: Users in China FCC Class A for China 此为A 级产品。在生活环境中,该产品可能会造成无线电干 扰。在此情况下,可能需要用户对干扰采取切实可行的措施。 All Other Users If you wish to discard this product, please contact your local authorities, the shop where you bought this product, your local dealer or sales/service representatives. Laser Notice For USA and Canada This Product is classifi...
- Page 24 Usage Notice • Do not open or disassemble the projector as this may cause damage or exposure to laser radiation. • Do not stare into beam when the projector is on. The bright light may result inpermanent eye damage. • When turning on the projector, make sure no one within projection range is looking into the lens.
-
Page 25: Other Information
Usage Notice Other Information Copyrights to Images When projecting images using the projector, be careful not to infringe the copyright of protected materials. The following are examples that may infringe the copyright of protected materials. • Broadcasting images or movies for commercial purposes •... -
Page 26: Introduction
Introduction Product Features Outstanding features include: Native resolution WUXGA (1920x1200) ■ Maximum resolution HDMI 1920x1200 @ 60Hz ■ Power Zoom/Focus and full lens shift ■ User friendly multilingual on screen display ■ Automatic image resizing to WUXGA (1920x1200) full ■ screen The projector supports 360 degree free orientation ■... -
Page 27: Package Overview
Introduction Package Overview This projector comes with all the items shown below. Check to make sure your unit is complete. Contact your dealer immediately if anything is missing. Mode Info Auto Input Enter Menu Exit Gamma Bright Cont. Lens H Focus Lens V Keystone H... -
Page 28: Product Overview
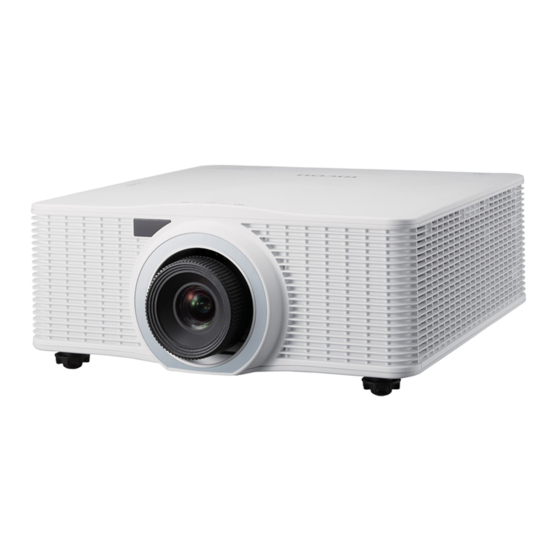
Introduction Product Overview 1. Remote Receiver (front) 2. Lens 3. Lens Ring 4. Adjustable Feet 5. Ventilation (inlet) 6. Ventilation (outlet) English... -
Page 29: Rear View
Introduction Rear View 1. Status Indicators 2. Remote Reciever (top) 3. Connector Port 4. Power Switch 5. AC In socket 6. Security Slot(Kengington Lock) 7. Security Bar 8. Ventilation(inlet) 9. Control Panel English English... -
Page 30: Connection Ports
Introduction Connection Ports 1. LAN terminal 2. HDBaseT terminal 3. 3D Sync In termina 4. 3D Sync Out termina 5. HDMI 1/HDMI 2 In terminal 6. DVI-D In terminal 7. Computer In terminal 8. PC Control terminal 9. Monitor Out terminal 10.Wired Remote In terminal English... -
Page 31: Control Panel
Introduction Control Panel Power Refer to the “Power On/Off the Projec- tor” section. (See pages 39~40). Menu Press “Menu” to launch the on screen display (OSD), or go back to the previ- ous menu. (See page 46) . Enter Select or confi rm settings. Input Select an input for the main or PIP/ PBP image. -
Page 32: Remote Control
Introduction Remote Control Mode Info Auto Input Enter Menu Exit Gamma Bright Cont. Lens H Focus Lens V Keystone H Zoom Keystone V AV Mute Hot Key Pattern Power On Refer to the “Power On the Projector” section. (See page 39) Power Off Refer to the “Power Off the Projector”... - Page 33 Introduction Input Press “Input” to choose your desired input source. Enter Confi rm your section of items in sub menu operation. Four to select items or , , or Directional make adjustments to your selection. Select Keys Menu Press “Menu” to launch the On Screen Display (OSD), back to the top level of OSD for the OSD main menu operation.
-
Page 34: Remote Control Id Setup
Introduction Remote Control ID Setup The IR Remote shall allow individual addressing of projectors. Each projector shall be able to have an address set from 1 to 99. 1. ID Code 0 shall be used to address all projectors (default). 2. -
Page 35: Remote Control Battery Installation
Introduction Remote Control Battery Installation To ensure the safe operation, follow the steps below to install the remote control batteries. Push the clip to Install new batteries (AAA/ Close the battery cover release the battery R03). Ensure that you have and press it down until it cover. -
Page 36: Remote Control Operating Range
Introduction Remote Control Operating Range Point the remote control to the projector (remote receiver) when pressing any button. Maximum operating range for the remote control is about 33.0’ (10m) and ±30° (horizontally) in front of the projector. 33’ (10m) ±30° (front/back) 33’... -
Page 37: Installing The Projector
Introduction Installing the Projector When you select a position for the projector, consider the size and shape of your screen, the location of your power outlets, and the distance between the projector and the rest of your equipment. Follow these general guidelines: Position the projector on a fl... -
Page 38: Installing The Projection Lens
Introduction Installing the Projection Lens 1. Remove the front lens cap and rear lens cap from the optional lens. 2. Remove the dust cap from the projector. 3. Insert the projection lens. 4. Turn the projection lens clockwise until you feel it click into place to lock the lens in position. -
Page 39: Basic Operations
Basic Operations Connecting the Projector Connect to Computer/Notebook Make sure that the power plug is fully inserted into both the projector AC inlet and the wall outlet. The AC outlet must be near this equipment and must be easily accessible. -
Page 40: Connect To Av Equipment
Basic Operations Connect to AV Equipment DVD Player HDTV receiver Make sure that the power plug is fully inserted into both the projector AC inlet and the wall outlet. The AC outlet must be near this equipment and must be easily accessible. -
Page 41: Powering On/Off The Projector
Basic Operations Powering On/Off the Projector Powering On the Projector 1. Ensure that the power cord and signal cable are securely con- nected. The Power indicator will turn red. If you connect 2. Turn on the projector by pressing the button on the con- multiple sources at trol panel or the... -
Page 42: Powering Off The Projector
Basic Operations Powering Off the Projector 1. Press the button on the control panel or remote control and you will see a message as below on the on screen display. 2. Press the button to turn off the projector. If you do not press the button again, the warning message will disap- pear after 10 seconds. -
Page 43: Status Led Indicator
Basic Operations Status LED Indicator Status LED indicators help identify the projector status. The indicators are defi ned as below. Steady light => Flashing => Light LED Status LED AV Mute LED STATUS (Green) (Orange) (Red) (Green) (Orange) (Red) (Green) (Orange) Standby Power on... -
Page 44: Adjusting The Projected Image
Basic Operations Adjusting the Projected Image Adjusting the Position of Projector Image The projector is equipped with rear and front adjustable feet to raise and lower the image to fi ll the screen. The projector has one adjustable foot 1. -
Page 45: Projection Lens
Basic Operations Projection Lens This projector is equipped with optional lens suite with vari- ous throw ratio. A3 is the standard lens for this projector. Replacement Replacement Standard Replacement Replacement Projection Lens Lens Type A1 Lens Type A2 Lens Type A3 Lens Type A4 Lens Type A5 Focal Length (f) - Page 46 Basic Operations Replacement Replacement Standard Replacement Replacement Projection Lens Lens Type A1 Lens Type A2 Lens Type A3 Lens Type A4 Lens Type A5 Replacement Lens Type A2/A4/A5 lens shift range: Motorized Lens Standard Lens Type A3 / Replacement Lens Type A1 lens shift range: Shift (Lens shift range based on screen width and...
-
Page 47: Adjusting The Projecting Image's Position
Basic Operations Adjusting the Projecting Image’s Position To determine where to position the projector, consider the size and shape of your screen, the location of your power outlets, and the distance between the projector and the rest of your equipment. Replacement Replacement Standard Lens... -
Page 48: User Settings
User Settings Using the On Screen Display (OSD) The Projector has a multilingual On Screen Display that allows you to make image adjustments and change a variety of settings. How to operate Follow the steps below to use the OSD menu to confi gure the projector settings. -
Page 49: Picture
User Settings PICTURE Picture Mode There are factory presets optimized for various types of images. The available options: Picture Mode, Bright: Mode for emphasizing brightness. Color Temperature, NCE, and advanced Standard: Mode for optimizing the balance between brightness ... - Page 50 User Settings Brightness Adjust the brightness of the image. Press the key to darken image. Press the key to lighten the image. Contrast The contrast controls the degree of difference between the lightest and darkest parts of the picture. Adjusting the contrast changes the amount of black and white in the image.
- Page 51 User Settings Gamma Use this function to optimize the image output. Options: 1.8 / 2 / Standard(2.2) / 2.4 / Shine. Color Temperature Use this function to select the preset color temperature. Options: 5500/ 6500 / 7500 / Native. High Contrast Mode Use this function to enhance the light and shade details of a movie scene.
- Page 52 User Settings Advanced Use this function to confi gure the advanced image settings. Wall Color: Optimize image color according to the wall color. Options: White/ Light Yellow/ Light Blue/ Pink / Dark Green. NCE Settings: Confi gures the image color settings. ...
-
Page 53: Screen
User Settings SCREEN Aspect Ratio Use this function to choose your desired aspect ratio. Auto: Automatically select the appropriate display format. When input is 4:3, the image is displayed as 4:3. When input is 16:9 above, the image is displayed as 16:9. 4:3: Display 4:3 aspect ratio. - Page 54 User Settings Clock Adjust the number of total dots in one horizontal period. Use the key to adjust number to match your PC image. H. Position (Horizontal Position) Shift the projected image position horizontally. “H. Position” and “V. Position” functions Press the key to move the image left.
- Page 55 User Settings Four Corner: Compensate for image distortion by adjusting one corner at a time. Reset: Return the keystone settings to the factory default values. Auto Ceiling Use this function to determine the image orientation when the pro- jecter is ceiling mounted.
- Page 56 User Settings Projection Use this function to select the projector mode, depending upon how the projector is mounted. Normal: This is the default selection. The image is projected directly onto the screen. Ceiling: When selected, the image will appear upside down. ...
- Page 57 User Settings PIP/PBP: Choose your desired PIP/PBP layout. Select “Off” to display only one image from one input source. Main Source: Choose the main source from the list of available input sources. Sub Source: Choose the sub source from the list of available input ...
- Page 58 User Settings Advanced Confi gure the advanced display settings. Confi gures the advanced screen settings. Confi gures the advanced screen settings. Magnify: Use the key to adjust the image size and position. • H. Magnify: Adjust the image size horizontally. •...
-
Page 59: Settings
User Settings SETTINGS Language Choose the multilingual OSD. Press “Enter” to open the sub menu and then use the key to select your preferred language. Press “Enter” to confi rm the selection. English English... - Page 60 User Settings Auto Power Off (Min) Set the countdown timer interval (in minutes). The countdown timer will start when there is no signal being sent to the projector. The pro- jector will automatically power off when the countdown has fi nished. When countdown timer is selected to “0”, auto power off is disabled.
- Page 61 User Settings Shift Memory: Save the lens focus, zoom, and position, and apply the saved lens settings. One projector can save up to fi ve locations. • Load: Apply the previously saved lens settings. • Save: Save the current lens settings, including focus, zoom, and position.
- Page 62 User Settings • DHCP: Select “On” to allow the projector to obtain an IP address automatically from your network. Select “Off” to manually assign IP, Subnet Mask and Gateway confi guration. • IP Address: Set an IP address or display IP address from DHCP server when DHCP is set to “On”.
- Page 63 User Settings Restart Network: Select “Yes” to restart the network. Reset Network: Select “Yes” to reset the network settings to factory default values. Remote Settings Use this menu to confi gure remote settings. Top Receiver: Enable or disable the top remote receiver. ...
- Page 64 User Settings Change Password: Set password for the projector. The default security code is “123456”. Reset Return the adjustments and settings to the factory default values. Choose “Yes” to return the display parameters on all menus except Language to the factory default settings. English...
-
Page 65: Options
User Settings OPTIONS Auto Source When this function is turned “On”, the projector will search for other signals if the current input signal is lost. When this function is turned “Off”, it will only search a specifi ed connection port. Input Source Use this menu to enable/disable input sources. - Page 66 User Settings Network Standby Set the projector’s standby mode. On: Allow the user to monitor the projector through network when the projector is standby. Off: This mode has less power consumption which does not allow the user to communicate with the standby peojector. High Altitude When “On”...
- Page 67 User Settings Power Settings Use this menu to confi gure the power settings. Direct Power On: Select “On” to automatically power on the projector when the AC power is supplied. If this option is set to “Off”, user needs to press the “Power” button on the control panel “...
- Page 68 IP Address, and Gamma information. Control Channel: Select the serial port path from PC Control or HDBaseT. Service Mode: A pin is required to enter the service mode. Only Ricoh service technitian is allowed to enter the service mode. English...
- Page 69 User Settings Information This menu displays the projector information.. Signal Information: Display the main source and sub source information. Picture Mode: Display the currently used picture mode. Total Hours: Display the laser diode hours. Laser Power: Display the value set in Constant Power mode. ...
- Page 70 User Settings 3D Sync Invert Use this option to enable/disable the 3D sync invert function. Compatible 3D source, 3D content and Optical 3D glasses are required for 3D Off: Choose “Off” for default frame contents. viewing. On: Choose “On” to invert left and right frame contents. “3D Sync Invert”...
- Page 71 User Settings Top and Bottom: Use this mode for “Top and Bottom” format 3D content. Frame Sequential: Use this mode for “Frame Sequential” format 3D content. 3D Sync Use this option to select the appropriate 3D function. DLP Link: Choose “DLP-Link” to use optimized settings for ...
-
Page 72: Lan Control
LAN Control Controlling this Device with Web Browser You can control this device from a PC using a web browser. Connecting to the device 1. Confi rmation of the device's IP address Select “Settings” → “Network” → “IP Settings” in the on screen display menu, and verify the IP address. -
Page 73: Using The Web Interface
LAN Control Using the web interface Web user interface provides an alternative way to control the device. There are four menus in the web system. 1. Main: Use this menu to set the input sources for the device. English English... - Page 74 LAN Control 2. Network Setting: Use this menu to confi gure the network settings. English...
- Page 75 LAN Control 3. Confi gurations: Use this menu perform the basic device confi guration. English English...
- Page 76 LAN Control 4. Information: Use this menu view the device information. English...
-
Page 77: Control The Projector Via The Projector Management Utility
LAN Control Control the Projector via the Projector Management Utility Projector Management Utility conforms to the PJLink class 1 standards, and is compatible with all class 1 commands. A maximum of 100 projectors connected to the network can be This software ... -
Page 78: Installing Projector Management Utility
LAN Control Installing Projector Management Utility Projector Management Utility is included on the supplied CD-ROM. Log in to the computer with administrator privileges to install To uninstall or uninstall utilities. Projector Management 1. Close all applications. Utility, use the 2. - Page 79 LAN Control -Click [Auto Search] button. -List of projectors which support PJLink are displayed in the window. Projector name is displayed as “********” until authorization if password is enable. English English...
- Page 80 LAN Control -Select the desired projector and click [Register] button. Password authorization is required if password of the projector is set to enable. -Click [OK] button to return to the original screen. 2. Directly specifi es the IP address and registers the projector. -Enter IP address of the desired projector and click [Confi...
-
Page 81: Control The Projector With The Projector Management Utility
LAN Control Control the projector with the projector Management Utility Click [Remote Control] tab and select the desired projector in the list. You can control the selected projector by clicking control buttons in the bottom of the window. [Power] button Turn "On/Off"... - Page 82 LAN Control [Mute] button Turn "On/Off " the muting of the projectors or groups selected from the Projector (/Group) List. The projector only supports Video & Audio mute. [Detail Information] button Show detail information of the selected projector. English...
-
Page 83: Troubleshooting
Troubleshooting Troubleshooting If you experience trouble with the projector, refer to the following information. If the problem persists, please contact your local dealer or service center. Problem: No image appears on screen Ensure all the cables and power connections are correctly and ... - Page 84 Troubleshooting Problem: The screen of the Notebook computer is not displaying a presentation If you are using a notebook: Some notebooks may automatically deactivate their own screens when a second display device is in use. The method to reactivate the notebook screen depends on the manufacurer.
- Page 85 Troubleshooting Problem: Image is tilted Adjust the projector keystone by pressing the “Keystone H” and “Keystone V” buttons on the remote control. Or, select “Screen > Keystone” from the OSD menu to make the adjustment. Problem: Image is reversed Adjust the projection direction to correct it.
- Page 86 Troubleshooting Indicator lighting message Check the LED indicator to identify the device status. See below table for the defi nition of the LED lighting. Steady light => Flashing => Light LED Status LED AV Mute LED STATUS (Green) (Orange) (Red) (Green) (Orange) (Red)
-
Page 87: Appendices
Appendices List of Compatible Signals Signal Frame rate HDMI Resolution HDBaseT Type (Hz) 640x350 √ √ √ √ 640x400 √ √ √ √ 640x480 √ √ √ √ 640x480 √ √ √ √ 640x480 √ √ √ √ 640x480 √ √... - Page 88 Appendices Signal Frame rate HDMI Resolution HDBaseT Type (Hz) 1152x864 √ √ √ √ 1152x864 √ √ √ √ 1152x864 √ √ √ √ 1152x864 √ √ √ √ 1224x768 √ √ √ √ 1224x768 √ √ √ √ 1224x768 √...
- Page 89 Appendices Signal Frame rate HDMI Resolution HDBaseT Type (Hz) 1600x900 √ √ √ √ 1600x1200 √ √ √ √ 1600x1200 √ √ √ √ 1680x1050 √ √ √ √ 1680x1050 √ √ √ √ 1680x1050 √ 1704x960 √ √ √ √...
-
Page 90: Pip/Pbp Compatibility
Appendices Signal Frame rate HDMI Resolution HDBaseT Type (Hz) Frame Packing √ √ √ 1080p Frame Packing √ √ √ 720p Frame Packing √ √ √ 720p Side by Side √ √ √ 1080i Mandatory Side by Side √ √ √... -
Page 91: Specifi Cations
Appendices Specifi cations List of general specifi cations. Item WUXGA (PJ WUL6281) DLP chip 0.67” DMD WUXGA Native resolution WUXGA (1920x1200) Support resolution Up to WUXGA@60Hz (Reduced Blanking) & 2128x1200@60Hz Lens type and throw ratio: • Standard lens: A3 1.22-1.53 Projection lens •... -
Page 92: Cabinet Dimensions
Appendices Cabinet Dimensions Unit: mm Screw type: M6 x 4, Maximum screw length: 10mm English... -
Page 93: Trademarks
Appendices Trademarks • DLP is trademarks or registered trademark of Texas Instruments. • Microsoft, Windows, Windows Vista, Internet Explorer and PowerPoint are either a registered trademark or trademark of Microsoft Corporation in the United States and/or other countries. • HDMI, the HDMI Logo and High-Defi nition Multimedia Interface are trademarks or registered trademarks of HDMI Licensing LLC.
Need help?
Do you have a question about the PJ WUL6281 and is the answer not in the manual?
Questions and answers