Table of Contents
Advertisement
Quick Links
Advertisement
Table of Contents

Related Manuals for Ricoh PJ WXC4660


Summary of Contents for Ricoh PJ WXC4660
- Page 1 LAN Control...
-
Page 3: Table Of Contents
Table of Contents Table of Contents Default settings .........48 ..........1 Audio ............52 Usage Notice ............2 Options ............53 Precautions ............2 USB Memory ..........56 REMOTE CONTROL BATTERY ....9 Memory Viewer ........50 Safety Labels of This Machine .....10 Viewing via USB Memory ....58 Power Switch Symbols .........11 Viewing via USB Display ....59 Regulation &... -
Page 4: Usage Notice
Usage Notice Precautions Follow all warnings, precautions and maintenance as recommended in this user’s guide to maximize the life of your unit. ■ Indicates a potentially hazardous situation which, if Indicates a potentially hazardous situation which, if Warning- instructions are not followed, could result in death or instructions are not followed, could result in death or serious injury. - Page 5 Usage Notice least once a year and check for the following: ■ There are burn marks on the plug. ■ The prongs on the plug are deformed. If any of the above conditions exist, do not use the plug and consult your dealer or service representative.
- Page 6 Usage Notice or electric shock. ■ Warning- Never operate this unit on AC power during a thunderstorm. If you see lightning or hear thunder, never touch the unit, cables and/or peripherals. An electric surge caused by the storm, may result in an electrical shock or damage to the unit.
- Page 7 Usage Notice f) For sales or service representatives: - Use brackets that are strong enough to support the projector. RICOH PJ WXC4660/ WUC4650 Series weights less than 11kg. - The projector must be installed in a location that is sturdy enough to support the full weight of the projector and brackets.
- Page 8 Failing to take these precautions could result in fi re or electric shock. ■ Caution- Do not use attachments not recommended by RICOH. Use of an incompatible attachments could cause hazards or damage to the product. ■ Caution-...
- Page 9 Usage Notice the product to qualifi ed service personnel if you encounter any of the following conditions: a) The power supply cord or plug is damaged. b) Liquid has been spilled, or objects have fallen into the product. c) The product has been exposed to rain or water. d) The product does not operate normally when following the operating instructions.
- Page 10 Usage Notice burn or fi re. The refl ected light may make the lens hot and cause a product failure. To temporarily suspend projection, select the mute function. To suspend longer, turn off the product. ■ Caution- Be sure to reserve proper space at the top, sides, and rear of the shell for ventilation and projector cooling.
-
Page 11: Remote Control Battery
Usage Notice REMOTE CONTROL BATTERY Warning • Never throw batteries into a fi re. Using the batteries improperly may cause them to explode or leak and may result in serious injury. If battery-leaking fl uid contacts skin, wash the fl uid off immediately with clean water and consult a doctor. If the fl... -
Page 12: Safety Labels Of This Machine
No retire ningún tornillo. No bloquee ni tape las salidas de ventilación. ● 20 Triton Street, London, NW13BF, U.K. Não remova quaisquer parafusos. Não obstrua ou tape as saídas de ventilação. For Asia Pacific: ● Imported by Ricoh Adis Pacific Subsideiary Or ● 不要拆除任何螺丝 。 不要堵塞或覆盖通风孔。 Ricoh Asia Pacific Authorised Partner ●... -
Page 13: Power Switch Symbols
Usage Notice Power Switch Symbols The meaning of the symbols for the switches on this machine as follows: : On/Standby(Off) English English... -
Page 14: Regulation & Safety Notices
MODEL NAME: RICOH PJ WXC4660 RICOH PJ WUC4650 TRADE NAME: PROJECTOR MODEL NAME: RICOH PJ WXC4660/ WUC4650 Tested To Comply With FCC Standards FOR HOME OR OFFICE USE This device complies with Part 15 of the FCC Rules. Operation is subject to the following two conditions: 1. - Page 15 Caution: Changes or modifi cations not expressly approved by the party responsible for compliance could void the user’s authority to operate the equipment. RESPONSIBLE PARTY: Ricoh USA Inc. 70 Valley Stream Parkway Malvern, Pennsylvania 19355 Telephone number: 610-296-8000 Notice: Shielded cables...
- Page 16 Low Voltage Directive 2014/35/EU Notice: Users in EU countries CE Marking Traceability Information (For EU Countries Only) Manufacturer: Ricoh Co., Ltd. 3-6 Nakamagome 1-chome, Ohta-ku, Tokyo. 143-8555, Japan Importer: Ricoh Europe PLC 20 Triton Street, London. NW1 3BF, United Kingdom...
- Page 17 Usage Notice The symbol indicates that the product must not be treated as municipal waste. It must be disposed of separately via the appropriate return and collection systems available. By following these instructions you ensure that this product is treated correctly and help to reduce potential impacts on the environment and human health, which could otherwise result from inappropriate handling.
- Page 18 Usage Notice Notice: Users in the EU Note for the Battery and/or Accumulator Symbol In accordance with the Battery Directive 2006/66/EC Article 20 Information for end-users Annex II, the above symbol is printed on batteries and accumulators. This symbol means that in the European Union, used batteries and accumulators should be disposed of separately from your household waste.
-
Page 19: Gpl/Lgpl Software License
Usage Notice Other Information Copyrights to Images When projecting images using the projector, be careful not to infringe the copyright of protected materials. The following are examples that may infringe the copyright of protected materials. • Broadcasting images or movies for commercial purposes •... -
Page 20: Introduction
Introduction Package Overview The projector is provided with the following accessories. Make sure that everything is included in the package. If anything is missing, contact your dealer immediately. Input Auto Mute Menu Picture Enter Computer Freeze Video Aspect Due to the Keystone difference in Volume... -
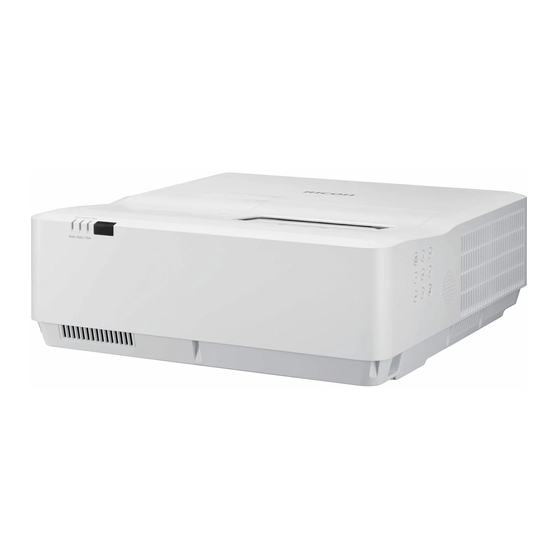
Page 21: Product Overview
Introduction Product Overview Ventilation(outlet) Speaker(inside) Projection Window Ventilation(inlet) (Lens inside) 10. Remote Receiver (rear) Zoom Lever 11. Connection Ports Focus Ring 12. Adjustable feet Lens Shift Screw 13. Air Filter Indicator 14. AC In Socket Remote Receiver (front) Anti-theft lock hole Control Panel (Kensington™... -
Page 22: Connection Portsl
Introduction Connection Ports 1. Video In terminal 9. Audio 1 In (R/L) terminal 2. Computer1 In terminal 10. PC-Control terminal 3. Computer2 In terminal 11. Audio2 In terminal 4. LAN terminal 12. Monitor Out (Comp.1) 5. HDMI1 In terminal terminal 6. -
Page 23: Control Panel And Indicators
Introduction Control Panel and Indicators Menu Enter Power Status Filter Input Mute 7 8 9 Refer to the “Power On/Off the Power Projector” section. (See pages 30~31) Four to select items or Directional Se- make adjustments to your selection. lect Keys Input Select the input source. -
Page 24: Remote Control
Introduction Remote Control Input Auto Mute Menu Picture Enter Computer Freeze Video Aspect Keystone Volume Magnify Status Press “Input” to choose your desired Input input source . Automatically synchronize the Auto set projector to the input source. Momentarily turn off/on the audio AV Mute and video. - Page 25 Introduction Press “Computer” to choose Computer1 Computer in and Computer2 In terminal. Press “USB” to choose Memory Viewer and USB Display source. Press “YPBPR” to choose Y/Pb/Pr YPBPR source. Volume +/- Increase or decrease speaker volume. Zoom in the projector display. Magnify +/- Display the projector status.
-
Page 26: Installation Of Remote Control Batteries
Introduction Installation of Remote Control Batteries Push the clip Install new batteries (AAA/ Close the battery to release the R03 or LR03). Ensure that you cover and press it battery cover. have the batteries’ polarity down until it clicks into place. Do not (+/–) aligned correctly mix different types of batteries or new and... -
Page 27: Effective Range Of The Remote Control
Introduction Remote Control Operating Range Point the remote control at the remote control sensing windows (front and rear) on the projector. When the remote control is pointed at the signal receiver on the projector, the effective range of the remote control is about 8 meters (24 feet) from the receiver. -
Page 28: Installing The Projectorl
Introduction Installing the Projector When you select a position for the projector, consider the size and shape of your screen, the location of your power outlets, and the distance between the projector and the rest of your equipment. Follow these general guidelines: ... -
Page 29: Basic Operations
Basic Operations Connecting a Computer (Connect to Computer/Notebook) Powered Monitor When Audio Out is Speaker connected, the built-in speaker doesn’t produce sound. To ensure the projector works well with your computer, please make sure the Audio timing of the display HDMI Audio cable... -
Page 30: Connecting A Video Device (Video)
Basic Operations Connecting a Video Device (Video) Powered Speaker Audio Audio Audio cable cable cable When Audio Out is connected, the built-in speaker doesn’t produce sound. English... -
Page 31: Connecting A Usb Device And Usb Display [Usb (Pc) And Usb]
Basic Operations Connecting a USB Device and USB Display [USB (PC) and USB] A-B cable memory device English English... -
Page 32: Powering On/Off The Projector
Basic Operations Powering On/Off the Projector Powering on the Projector 1 Ensure that the power cord and signal cable are securely connected. The Power indicator will turn red. Make sure that the power plug is fully inserted into both the projector AC inlet and the wall outlet. -
Page 33: Turn Off The Projector
Basic Operations Turn off the projector 1. Press the button on the side control panel or the button on the remote control. The following dialog box will pop Notify Power off? When the power indicator fl ashes red, the light source is cooling 2. -
Page 34: Input Source Signal Selection
Basic Operations Input Source Signal Selection Basic Operations Press the Input button on the remote control or the control panel on the side and choose Computer 1, Computer 2, Y/Pb/Pr, Video, HDMI1, HDMI2/MHL, Memory Viewer, Network, or USB Display as the input source. Menu operation 1) Press the Input button on the remote control to enter the input... - Page 35 Basic Operations Network When the input source comes from the Net- work to the LAN, choose "Network". "USB Display", To use display via LAN, see P62 for instruc- "Memory Viewer" tion. and "Network" do not support automatic search. USB Display When the ...
-
Page 36: Adjust The Projected Image
Basic Operations Adjust the projected image Adjust the position of the projected image 1. Place the projector so that it is perpendicular to the screen. 2. Using the adjustable feet, you can adjust the projection angle to 1.6 degrees. 3. Rotate the adjustable feet and tilt the projector to an appropriate height; 4. -
Page 37: Adjust The Focal Length Of The Projector
Basic Operations Adjust the Projector focus 1) Open the zoom cover and rotate the zoom lever to zoom in or out. ● Rotate right: zoom in the image. ● Rotate left: zoom out the image. 2) Open the Focus/Lens Shift cover and rotate the focus ring to adjust the focal length of the image. -
Page 38: Adjust The Screen Size
Basic Operations Adjust the screen size Projection size (diagonal): - RICOH PJ WXC4660(WXGA) : 70" to 130" - RICOH PJ WUC4650( WUXGA) : 70" to 130" Projection distance A Top of the projector ~ bottom of the screen Bottom of... - Page 39 Basic Operations WXGA (RICOH PJ WXC4660) / WUXGA (RICOH PJ WUC4650) Projection Projection Projector top Projector bottom Projection screen distance (A) distance (B) ~ screen bottom ~ screen bottom Diagonal Height Width Wide Tele Wide Tele Diagonal (mm) (mm) (mm)
-
Page 40: User Settings
User Settings On Screen Display (OSD) The Projector has a multilingual On Screen Display that allows you to make image adjustments and change a variety of settings How to operate the OSD To open the OSD, press “Menu” on the Control Panel or Remote Control. -
Page 41: Image Adjustment
User Settings Image adjustment Picture Mode There are factory presets optimized for various types of images. The available options: Bright: Mode for emphasizing brightness. Standard: Mode for optimizing the balance between brightness and color reproduction. Vivid: Mode for emphasizing color. ... - Page 42 User Settings Contrast The contrast controls the degree of difference between the lightest and darkest parts of the picture. Adjusting the contrast changes the amount of black and white in the image. Press the key to decrease the contrast. Press the key to increase the contrast.
- Page 43 User Settings Advanced Adjust the white balance of the image. R-level: press the button to decrease the red level. Press the button to increase the red level. G-level: press the button to decrease the green level. Press the button to increase the green level.
-
Page 44: Display Setting
User Settings Display Setting Aspect Use this function to choose your desired aspect ratio. Auto: Automatically selects the appropriate display format. 4:3: Displays 4:3 aspect ratio. 16:9: Displays 16:9 aspect ratio. 16:10: Displays 16:10 aspect ratio. Phase Eliminate fl... - Page 45 User Settings Press the key to move the image left. “H. Position” and “V. Position” functions Press the key to move the image right. are only supported under Computer1 and V. Position (Vertical Position) Computer2 Signal Shift the projected image position vertically. source.
- Page 46 Curved Screen function is not ● Press the key: indent the vertical line leftward/rightward. supported for RICOH PJ WUC4650. ● Press the key: stretch the horizontal line upward/downward. ● Press the key: indent the horizontal line upward/downward.
- Page 47 User Settings ● Press the key: correct the horizontal line on the left, and leave the center area unchanged while expanding the top and bottom. ● Press the key: correct the horizontal lines on both sides, and keep the center area and area above unchanged while expanding the lower corners.
- Page 48 “USB Display”, this function is invalid. User logo is not Startup Screen: Use this function to choose your desired startup applied to the RICOH screen. PJ WUC4650. - Logo: Display logo on the start-up screen. - User: Customized start-up screen.
- Page 49 User Settings RGB input range: Adjust the RGB aberration range in the HDMI input source. (Only for HDMI or HDMI2 (MHL) signal)) - Auto: Automatically detect RGB range. - Full: Select this mode when computer signal or full range signal from AV equipment is input.
-
Page 50: Default Settings
User Settings Default settings Language This function is used for multi-language switch. Enter "Default settings" OSD > "Language", press "ENTER" to enter the sub- menu, and press the key to select the language. Press "ENTER" again for confi rmation. Auto Power Off (min) Set the time interval of screen countdown. - Page 51 User Settings become no signal and set time has elapsed. In this mode, the power indicator light become twinkling green and the Light turn On again when input signal is detected or the power key is pressed. Network Confi gure the network settings. DHCP: Select “On”...
- Page 52 User Settings Security Confi gure the security settings. Key Lock: This function disables keys on the control panel or remote control to avoid undesired operation. ● Off: The key on the control panel or remote control is operable ● Key: The key on the control panel is not operable. ●...
- Page 53 User Settings Reset all Return the adjustments and settings to the factory default values. (not including the language and Security setting) Choose “Select” to return the display parameters on all menus except Language to the factory default settings English English...
-
Page 54: Audio
User Settings Audio Mute Disable audio temporarily. “Mute” function affects both internal and external speaker Select "Off" to output audio. volume. Select "On" to disable audio. Volume Adjust the volume Press the button to turn down the volume. ... -
Page 55: Options
User Settings Options Auto Source When this function is turned “On”, the projector will search for other signals if the current input signal is lost. When this function is turned “Off”, it will only search a specifi ed connection terminal. Input Source Use this option to enable/disable input sources. - Page 56 User Settings Filter Settings Use this option to view the fi lter status and confi gure the fi lter settings. Press the ► key to enter the sub menu and confi gure the desired settings. Filter Hours Used: Displays the use duration of the fi lter. ...
- Page 57 User Settings Power Settings Use this option to confi gure the power settings. Press the ► key to enter the sub menu and confi gure the desired settings. If changes are made, they will take effect the next time the projector is powered on.
-
Page 58: Usb Memory
User Settings USB Memory Slideshow If you want to project a slide show of images, the display effects for switching slides can be customized. “USB memory” Display Interval function is available If you want to project a slide show of images, you can specify the when [Memory Viewer] slide switching interval. - Page 59 User Settings 0 Degree: Invalid option. 90 Degree: Rotates the image 90 Degree to the left. 180 Degree: Rotates the image 180 Degree. 270 Degree: Rotates the image 270 Degree to the left. Repeat You can specify whether to repeat display slides. Off: Returns to the thumbnail display after the last fi...
-
Page 60: Memory Viewer
User Settings Viewing via USB Memory When a USB memory device is inserted into the projector, the Memory Viewer function enables the projector to project imag- es stored in the USB memory device. Content Supported by Memory Viewer Extension Format Description Maximum image resolution: Baseline encoded, 24-bit... -
Page 61: Viewing Via Usb Display
User Settings 6. Press the button to switch to next image, and press the button to return to the previous image. 7. Press the <Enter> button. ● The screen returns to the thumbnail display. Slideshow If [Slideshow] in [Memory Viewer] is specified as default settings menu, a slide show automatically starts with all images in a same di- rectly. - Page 62 User Settings Viewing via USB Display When a Computer is connected using USB cable(A-B), the USB Display function enables the projector to project same images diplayed in the computer. Supported Operating system Windows Vista (32-bit), Windows 7 (32-bit, 64-bit ), Operating System Windows 8 (32-bit, 64-bit) Intel Core 2 Duo 2.0 GHz or other faster compatible...
- Page 63 User Settings 4. In the task bar of the computer, click the driver icon select one option from the pop-up menu. Specifi es whether to output audio fi les [Active audio] / [Disable audio] from the computer. Switches between playing and pausing [Play video] / [Pause video] images Specifies whether to output images...
-
Page 64: Viewing Via Lan (Pwpresenter)
User Settings Viewing via LAN (pwPresenter) When a Computer is connected using via LAN, the Network Display function enables the projector to project same images diplayed in the computer. Supported Operating system Windows Vista (32-bit version), Windows 7 (32-bit and 64- Operating System bit versions), Windows 8 (32-bit and 64-bit versions) Intel Core 2 Duo 2.0 GHz or other faster compatible... - Page 65 The resolution of the computer screen will be switched to WXGA (1280x800). The projector will be found as name “RICOH PJ-xxxx”. “xxxx” is last 4 digits of the projector’s MAC address. ② Starting/pausing capture Starts or pauses capturing the selected picture.
- Page 66 User Settings ④ Setting parameters Basic Setting: Specifi es the language, capture region size, and so on. Advanced Setting: Specifi es the image quality, network port, and so on. Basic Setting Advanced Setting Global Setting: Specifi es remote control, audio capture, screen ...
- Page 67 User Settings ⑤ Projector Network Management Specifi es the network user name and password for pwPresenter. Multicast Setting: Specifi es the sound volume, bandwidth, capture rate, and so on. ⑥ Disconnecting a connection from the projector English English...
-
Page 68: Network Control
LAN Control Controlling this Device with Web Browser You can control this device from a PC by using a web browser. Connecting to the device 1. Confi rmation of the IP address of the device Select the “Default Settings” → “Network” in the menu of this device, and verify the IP address. - Page 69 LAN Control Access from the Web Browser Login Open the network control page. Enter the password in [Password] fi eld, and click [Login]. * Factory defaults are as follows: User Name: admin (with administrator privileges.); Password: admin. Login by clicking the [Login] button. When you log in, a navigation bar for setting the projector will be displayed on the left side of the home screen.
- Page 70 LAN Control General Setup You can change the password for the projector. And you can control the Power and Input Source of the projector. Enter Old password: Enter the existing password. Enter New password: Enter a new password. ...
- Page 71 LAN Control Image Setup Aspect: Switches the aspect ratio of the projected image. Phase: Adjusts the phase of the projected image. H Position: Adjusts the horizontal position of the projected image. V Position: Adjusts the vertical position of the projected image. ...
- Page 72 LAN Control Network Setup LAN Setup: If you want to enable the DHCP, select [Obtain the IP address automatically]. IPV6 cannot be used IP address: If no DHCP is used, enter the IP address. in this device. Subnet: If no DHCP is used, enter the subnet. ...
-
Page 73: Control The Projector Via The Projector Management Utility
LAN Control Control the Projector via the Projector Management Utility Projector Management Utility conforms to the PJLink class 1 standards, and is compatible with all class 1 commands. A maximum of 100 projectors connected to the network can be managed using one computer. Projector Management Utility operating environment is described below. -
Page 74: Installing Projector Management Utility72
LAN Control Installing Projector Management Utility Projector Management Utility is included on the supplied CD-ROM. Log in to the computer with administrator privileges to install or uninstall utilities. 1. Close all applications. 2. Insert the CD-ROM in the CD-ROM drive of your computer, and then click [X] to close the user’s manual window. - Page 75 LAN Control -Click [Auto Search] button. -List of projectors which support PJLink are displayed in the window. Projector name is displayed as “********” until authorization if password is enable. English English...
- Page 76 LAN Control -Select the desired projector and click [Register] button. Password authorization is required if password of the projector is set to enable. -Click [OK] button to return to the original screen. 2. Directly specifi es the IP address and registers the projector. -Enter IP address of the desired projector and click [Confi...
-
Page 77: Control The Projector With The Projector Management Utility
LAN Control Control the projector with the projector Management Utility Click [Remote Control] tab and select the desired projector in the list. You can control the selected projector by clicking control buttons in the bottom of the window. [Power] button Turn "On/Off"... - Page 78 LAN Control [Mute] button Turn "On/Off " the muting of the projectors or groups selected from the Projector (/Group) List. The projector only supports Video & Audio mute. [Detail Information] button Show detail information of the selected projector. English...
-
Page 79: Troubleshooting
Troubleshooting If you experience trouble with the projector, refer to the following information. If the problem persists, please contact your local dealer or service center. ● Ensure that the projector is correctly connected to the peripheral device. ● Ensure that all devices are connected to an AC power socket and the power supply is connected. - Page 80 Troubleshooting For example, if the projector is moved from a cool environment to a warmer environment, there might be condensation on the projection lens or projection window. If this happens, wait until the condensation disappears before turning on the projector. Problem: Image is not bright enough Check whether the contrast or brightness is appropriate.
- Page 81 Troubleshooting Press the [Mute] to check whether the muting function is enabled. Check whether the audio cable is properly connected to the audio input source. If a cable is connected to the <Audio Out> terminal, the built-in speaker of the projector is unavailable.
-
Page 82: Cleaning&Replacing The Filter
Warning: For 3. Re-install the new fi lter. Ensure that it is fully inserted into the projector. continued safety replace with RICOH Reset the Filter timer PJ Replacement Air To reset the fi lter timer, see the P54 instruction after cleaning or replacing the Filter Type 8. -
Page 83: Appendices
Appendices List of Compatible Signals A. RGB Signal (1) Computer Input V frequency H frequency Clock Mode Resolution Note (Hz) (kHz) (MHz) 640 x 480 31.5 25.2 640 x 480 35.0 26.8 640 x 480 37.9 31.5 640 x 480 37.5 31.5 640 x 480... - Page 84 Appendices 576p 720x576 31.3 27.0 1280x720 45.0 74.25 720p 1280x720 37.5 74.25 1920x1080 33.8 74.25 1080i 1920x1080 28.1 74.25 1920x1080 23.98/24 74.25 1080p 1920x1080 67.5 148.5 1920x1080 56.3 148.5 B. HDMI Input (1) Computer input signal V frequency H frequency Clock Mode Resolution...
- Page 85 Appendices (2) Extended Wide Timing 1280x720 44.8 74.2 1280x800 49.6 83.5 WXGA 1366x768 47.7 84.8 1440x900 59.9 106.5 WSXGA+ 1680x1050 65.3 146.3 (3) YPbPrInput 480i 1440x480 59.94 15.7 576i 1440x576 15.6 480p 720x480 59.94 31.5 576p 720x576 31.3 1280x720 74.25 720p 1280x720 37.5...
-
Page 86: Confi Gurations Of Terminalsl
Appendices Confi gurations of Terminalsl MONITIOR OUT terminal RGB (D-sub 15) 1 Red (Input/output) 9 ----- 2 Green (Input/output) 10 Grounding (fi eld synchronizing) 3 Blue (Input/output) 11 Grounding 4 ----- 12 DDC data Horizontal synchronizing 5 Grounding (line synchronizing) (compound sync.) input/output Vertial synchronizing input/ 6 Grounding (red) -
Page 87: Specifi Cations
• Designs and specifi cations are subject to change without notice. • This model may not be compatible with features and/or specifi cations that may be added in the future. ■ Separately sold product RICOH PJ Replacement Air Filter Type8 English English... -
Page 88: External Dimensions
Appendices External Dimensions Tapped holes used for ceiling installation. Screw: M4 Depth: 10.0mm Unit: mm Ceiling nut: 4-M4X10mm English... -
Page 89: Trademarks
Appendices Trademarks •• Microsoft, Windows, Windows Vista, Internet Explorer and PowerPoint are either a registered trademark or trademark of Microsoft Corporation in the United States and/or other countries. • HDMI, the HDMI Logo and High-Defi nition Multimedia Interface are trademarks or registered trademarks of HDMI Licensing LLC.
Need help?
Do you have a question about the PJ WXC4660 and is the answer not in the manual?
Questions and answers