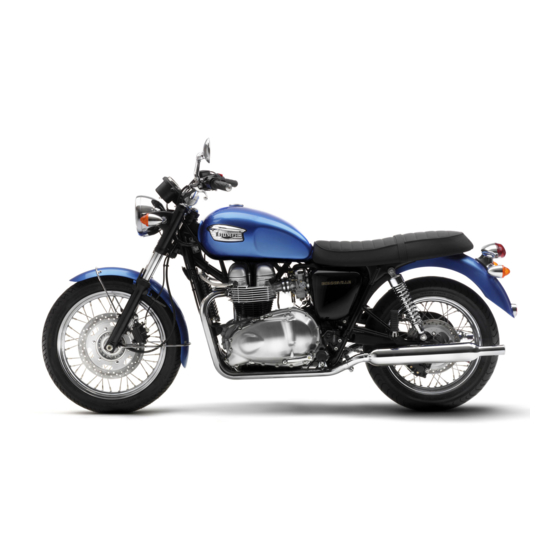
Triumph Bonneville T100 Series Owner's Handbook Manual

Triumph Bonneville T100 Series Owner's Handbook Manual

Hide thumbs Also See for Bonneville T100 Series:
Table of Contents

Advertisement

Owner's Handbook
Bonneville T100 (all models), Bonneville T120
(all models), Speed Twin, Street Scrambler,
Street Twin and Thruxton RS
This handbook contains information on the Triumph Bonneville T100 (all models),
Bonneville T120
(all
models),
Speed Twin,
Street Scrambler,
Street Twin
and
Thruxton RS motorcycles. Always store this Owner's Handbook with the motorcycle
and refer to it for information whenever necessary.
The information contained in this publication is based on the latest information
available at the time of printing. Triumph reserves the right to make changes at any
time without prior notice, or obligation.
Not to be reproduced wholly or in part without the written permission of Triumph
Motorcycles Limited.
© Copyright 08.2019 Triumph Motorcycles Limited, Hinckley, Leicestershire, England.
Publication part number 3855663-EN issue 1
1

Advertisement

Table of Contents
loading
Need help?

Need help?

Do you have a question about the Bonneville T100 Series and is the answer not in the manual?

Questions and answers

Subscribe to Our Youtube Channel

Summary of Contents for Triumph Bonneville T100 Series

  • Page 1 The information contained in this publication is based on the latest information available at the time of printing. Triumph reserves the right to make changes at any time without prior notice, or obligation.
  • Page 2: Table Of Contents

    Table of Contents This handbook contains a number of different sections. The table of contents below will help you find the beginning of each section where, in the case of the major sections, a further table of contents will help you find the specific subject required. Foreword Safety First Warning Label Locations...
  • Page 3: Foreword

    Triumph motorcycle correctly. locate your nearest authorised Triumph dealer, visit the Triumph web site at www. triumph. co. uk or telephone authorised distributor your country. Their address is given in the service record book that accompanies this handbook.
  • Page 4 • Removal puncturing muffler, baffles, header pipes or any other component which conducts Thank you for choosing a Triumph exhaust gases. motorcycle. This motorcycle • Removal of, or puncturing of any product of Triumph's use of proven part of the intake system.
  • Page 5 Our relationship with you does not end training to ensure safe operation of this with the purchase of your Triumph. Your motorcycle. feedback on the buying and ownership This Owner's Handbook is available from...
  • Page 6 Foreword This page intentionally left blank...
  • Page 7: Safety First

    Safety First Safety First The Motorcycle Warning All Models Except Street Scrambler This motorcycle is not designed to tow a trailer or be fitted with a sidecar. Warning Fitting a sidecar and/or a trailer may result in loss of control and an This motorcycle is designed for on- accident.
  • Page 8 Safety First Fuel and Exhaust Fumes Helmet and Clothing Warning PETROL IS HIGHLY FLAMMABLE: Always turn off the engine when refuelling. Warning Do not refuel or open the fuel filler cap while smoking or in the vicinity of any When riding the motorcycle, both open (naked) flame.
  • Page 9 Safety First Parking Warning Warning A helmet is one of the most important pieces of riding gear as it offers Always switch off the engine and protection against head injuries. You remove ignition before and your passenger's helmet should leaving the motorcycle unattended. carefully chosen should...
  • Page 10 Triumph the correct or safe operation of this motorcycle are those which carry Triumph motorcycle. official Triumph approval and are fitted Remember that continued operation of to the motorcycle by an authorised an incorrectly performing motorcycle dealer.
  • Page 11 Safety First Riding Warning Warning This Triumph motorcycle should be operated within the legal speed limits Never ride motorcycle when for the particular road travelled. fatigued or under the influence of Operating a motorcycle at high speeds alcohol or other drugs.
  • Page 12 Safety First Handlebars and Footrests Warning Warning The bank angle indicators must not be used as a guide to how far the The rider must maintain control of the motorcycle may be safely banked. motorcycle by keeping hands on the This depends many...
  • Page 13 Foreword This page intentionally left blank...
  • Page 14: Warning Label Locations

    Warning Label Locations Warning Label Locations The labels detailed on this and the following pages draw your attention to important safety information in this handbook. Before riding, make sure that all riders have understood and complied with all the information to which these labels relate. MAX LOAD 3 kg (6.6 lbs) R.P.M.
  • Page 15 Warning Label Locations Warning Label Locations (continued) Caution All warning labels and decals, with the exception of the Running-in label, are fitted to the motorcycle using a strong adhesive. In some cases, labels are installed prior to an application of paint lacquer. Therefore, any attempt to remove the warning labels will cause damage to the paintwork or bodywork.
  • Page 16: Parts Identification

    Parts Identification Parts Identification Bonneville T100 (all models) and Bonneville T120 (all models) (Bonneville T120 shown) Front direction indicator Rear brake caliper 10. Coolant expansion tank Headlight Clutch lever Coolant expansion tank cap Battery (under seat) 12. Side stand Owner’s Handbook (under seat) or 13.
  • Page 17 Parts Identification Parts Identification - Continued Bonneville T100 (all models) and Bonneville T120 (all models) (Bonneville T120 shown) Fuel tank Rear brake pedal Coolant pressure cap (under fuel tank) 10. Rear brake fluid reservoir (behind side panel) Fuel filler cap Adjustment tool (behind side panel) Front brake fluid reservoir 12.
  • Page 18 Parts Identification Parts Identification Street Scrambler Front direction indicator 10. Rear brake caliper Headlight Coolant expansion tank Clutch lever 12. Coolant expansion tank cap Adjustment tool (behind side panel) 13. Side stand Battery (under seat) 14. Gear change pedal Owner’s Handbook (under seat) 15.
  • Page 19 Parts Identification Parts Identification - Continued Street Scrambler Fuel tank Oil level sight glass Coolant pressure cap (under fuel tank) Rear brake pedal Fuel filler cap 10. Rear brake fluid reservoir (behind side panel) Front brake fluid reservoir Drive chain Front brake lever 12.
  • Page 20 Parts Identification Parts Identification Speed Twin Front direction indicator Rear brake caliper Headlight Side stand Clutch lever 10. Gear change pedal Battery (under seat) Horn Rear direction indicator 12. Radiator Brake/rear light 13. Front brake caliper Rear brake disc 14. Front brake disc...
  • Page 21 Parts Identification Parts Identification - Continued Speed Twin Fuel tank 10. Coolant expansion tank cap Coolant pressure cap (under fuel tank) Rear brake pedal Fuel filler cap 12. Rear brake fluid reservoir (behind side panel) Front brake fluid reservoir 13. Adjustment tool (behind side panel) Front brake lever 14.
  • Page 22 Parts Identification Parts Identification Street Twin Front direction indicator 10. Coolant expansion tank Headlight Coolant expansion tank cap Clutch lever 12. Side stand Battery (under seat) 13. Gear change pedal Owner’s Handbook (under seat) 14. Horn Brake/rear light 15. Radiator Rear direction indicator 16.
  • Page 23 Parts Identification Parts Identification - Continued Street Twin Fuel tank Rear brake pedal Coolant pressure cap (under fuel tank) 10. Rear brake fluid reservoir (behind side panel) Fuel filler cap Adjustment tool (behind side panel) Front brake fluid reservoir 12. Drive chain Front brake lever 13.
  • Page 24 Parts Identification Parts Identification Thruxton RS Front direction indicator Rear brake caliper Headlight 10. Side stand Clutch lever Gear change pedal Battery (under seat) 12. Horn Owner’s Handbook (under seat) 13. Radiator Brake/rear light 14. Front brake caliper Rear direction indicator 15.
  • Page 25 Parts Identification Parts Identification - Continued Thruxton RS Fuel tank 10. Coolant expansion tank cap Coolant pressure cap (under fuel tank) Rear brake pedal Fuel filler cap 12. Rear brake fluid reservoir (behind side panel) Front brake fluid reservoir 13. Adjustment tool (behind side panel) Front brake lever 14.
  • Page 26 Parts Identification Rider View Parts Identification Bonneville T100 (all models), Bonneville T120 (all models), Speed Twin and Thruxton RS Clutch lever 10. Front brake fluid reservoir Headlight dip switch Front brake lever 12. Engine start/stop switch SCROLL button Daytime Running Lights (DRL) switch 13.
  • Page 27 Parts Identification Rider View Parts Identification Street Scrambler and Street Twin (Street Twin shown) Clutch lever Engine start/stop switch Headlight dip switch 10. Hazard button SCROLL button MODE button Speedometer 12. Daytime Running Lights (DRL) switch (if fitted) Warning lights 13.
  • Page 28: Serial Numbers

    Serial Numbers Serial Numbers Vehicle Identification Number (VIN) Engine Serial Number The vehicle identification number is The engine serial number is stamped on stamped into the steering head area of the upper engine crankcase, towards the frame. It is also shown on a label the rear, and is visible from the right located next to it.
  • Page 29: General Information

    General Information General Information Table of Contents Instrument Panel Layout Warning Lights Engine Management System Malfunction Indicator Light (MIL) Low Oil Pressure Warning Light High Coolant Temperature Warning Light Engine Immobiliser/Alarm Indicator Light Anti-lock Braking System (ABS) Warning Light Traction Control (TC) Indicator Light Traction Control (TC) Disabled Warning Light Direction Indicators High Beam...
  • Page 30 General Information Tyre Pressure Monitoring System (TPMS) (if fitted) Tyre Pressure Sensor Serial Number System Display Sensor Batteries Tyre Pressures Replacement Tyres Ignition Switch/Steering Lock Engine Immobiliser Ignition Key Right Handlebar Switches STOP Position RUN Position START Position MODE Button (if fitted) Hazard Warning Lights Left Handlebar Switches SCROLL Button...
  • Page 31 General Information Seats Seat Care Seat Lock Seat Removal and Installation Street Scrambler Seat Removal Street Scrambler Seat Installation Luggage Rack Universal Serial Bus (USB) Socket Running-In Daily Safety Checks...
  • Page 32: Instrument Panel Layout

    General Information Instrument Panel Layout Street Scrambler and Street Twin (Street Twin shown) 18 17 16 15 14 13 Speedometer 10. Tyre pressure warning light (if Tyre Pressure Monitoring System (TPMS) is Traction Control (TC) disabled warning fitted) light Right hand direction indicator light Traction Control (TC) indicator light 12.
  • Page 33 General Information Instrument Panel Layout Bonneville T100 (all models), Bonneville T120 (all models), Speed Twin and Thruxton RS Traction Control (TC) indicator light 12. Tachometer High coolant temperature warning light 13. Right hand direction indicator light Anti-lock Brake System (ABS) warning 14.
  • Page 34: Warning Lights

    Warning Lights Note If the MIL flashes when the ignition is switched ON contact an authorised Engine Management System Triumph dealer as soon as possible to Malfunction Indicator Light (MIL) have the situation rectified. In these Malfunction Indicator circumstances the engine will not start.
  • Page 35: High Coolant Temperature Warning Light

    With engine running, investigation. Contact an authorised if the engine coolant temp- Triumph dealer as soon as possible to erature becomes dangerously have the fault checked and rectified. high, high coolant temperature warning light will illuminate. With Alarm Fitted...
  • Page 36: Traction Control (Tc) Indicator Light

    6 mph Contact an authorised Triumph dealer (10 km/h) when it will go off. as soon as possible to have the fault The warning light will not illuminate checked. again until the engine is restarted...
  • Page 37: Traction Control (Tc) Disabled Warning Light

    General Information Traction Control (TC) Disabled Warning Warning Light Do not ride for longer than necessary The TC disabled warning light in poor ambient light conditions with should not illuminate unless the Daytime Running Lights (DRL) in traction control is switched use.
  • Page 38: Low Fuel Indicator Light

    The general warning symbol will flash engine management fault has occurred and the ABS and/or MIL warning lights are illuminated. Contact an authorised Triumph dealer as soon as possible to have the fault checked and rectified.
  • Page 39: Instruments

    General Information Instruments Gear Position Display Street Scrambler and Street Twin Speedometer and Odometer Only The speedometer indicates the road speed of the motorcycle. The odometer shows the total distance that the motorcycle has travelled. Tachometer Caution Never allow engine speed to enter the red zone as severe engine damage may result.
  • Page 40: Fuel Gauge

    General Information Fuel Gauge The fuel gauge indicates the amount of fuel in the tank. With the ignition Street Scrambler and Street Twin switched on, the number of bars shown Only in the display indicates the level of fuel. When the fuel tank is full all eight bars are displayed and when empty, no bars are displayed.
  • Page 41: Range To Empty

    General Information Range to Empty Note After refuelling, the fuel gauge and Street Scrambler and Street Twin range empty information will Only updated only while riding motorcycle. Depending on the riding style, updating could take up to five minutes. Range to empty indicator Estimated distance remaining All Other Models Range to empty indicator...
  • Page 42: Average Fuel Consumption

    General Information Average Fuel Consumption Note After refuelling, average Street Scrambler and Street Twin consumption information will be updated Only only while riding motorcycle. Depending on the riding style, updating could take up to five minutes. Trip Meter Warning Do not attempt to switch between the odometer and trip meter display modes or reset the trip meter with the motorcycle in motion as this may lead...
  • Page 43: Clock

    General Information Clock To switch between trip meters, press and release the SCROLL button, located To access the clock, press and release on the left hand handlebar switch the SCROLL button, located on the left housing, until the required trip meter is hand handlebar switch housing, until shown.
  • Page 44: Riding Modes

    General Information Riding Modes To reset the hour display: • Make sure the hour display is still Note flashing then press and release Riding modes available the SCROLL button to change the models except Bonneville T100 setting. Each individual button press Bonneville T100 Bud Ekins.
  • Page 45 General Information Street Scrambler Only Speed Twin Riding Mode Description Street Scrambler Standard throttle response. Riding Mode Description ROAD Optimal traction control setting Standard throttle response. for road use. ROAD Optimal traction control setting Reduced throttle response when for road use. compared to the ROAD setting, for wet or slippery conditions.
  • Page 46: Selecting A Riding Mode - With The Motorcycle Stationary

    General Information Selecting a Riding Mode – when If OFF ROAD mode is selected, it is shown in the main display. Riding the Motorcycle Warning The selection of riding modes whilst the motorcycle is in motion requires the rider to allow the motorcycle to coast (motorcycle moving,...
  • Page 47 General Information In the event of an incomplete riding Warning mode change: • Safely bring the motorcycle to a After selecting a riding mode, operate stop. the motorcycle in an area free from traffic to gain familiarity with the new •...
  • Page 48: Traction Control (Tc)

    General Information Traction Control (TC) Traction Control Settings Warning Warning Do not attempt to adjust the traction Traction control is not a substitute for control settings while the motorcycle riding appropriately for the prevailing is in motion as this may lead to loss of road and weather conditions.
  • Page 49: To Disable The Traction Control

    General Information To Disable the Traction Control • Press and hold the SCROLL button for more than one second to change between traction control on and Warning traction control off. After riding off-road with traction control disabled, always make sure that the traction control is enabled when returning to ride on public roads.
  • Page 50: Abs Disable And Enable - Street Scrambler Models Only

    General Information ABS Disable and Enable - To disable the ABS: Street Scrambler Models Only • Make sure motorcycle stationary and in neutral. Turn the ignition to the ON position and put Warning the engine start/stop switch in the RUN position. Do not attempt to adjust the ABS settings while the motorcycle is in •...
  • Page 51: Tyre Pressure Monitoring System (Tpms) (If Fitted)

    Triumph incorrect tyre pressures leading to dealer records the serial numbers of the loss of motorcycle control and an front and rear tyre pressure sensors in accident.
  • Page 52: System Display

    TPMS warning light will be on and the TPMS symbol will flash continuously. Contact your TPMS warning light authorised Triumph dealer to have the TPMS symbol sensor replaced and the new serial Tyre pressure number recorded in the spaces provided Front and rear tyre indicators on page 51.
  • Page 53: Tyre Pressures

    The cold inflation pressures specified by Triumph take account of this. Only adjust tyre pressures when the tyres are cold using an accurate tyre pressure gauge (see page 135).
  • Page 54: Engine Immobiliser

    General Information Switch Operation Caution This is a four position, key operated switch. The key can be removed from Additional keys, key rings/chains or the switch only when it is in the OFF, items attached to the ignition key may LOCK or P (PARK) position.
  • Page 55: Right Handlebar Switches

    Always get replacement keys from your authorised Triumph dealer. Replacement keys must be 'paired' with the motorcycle’s immobiliser by your authorised Triumph dealer. Engine start/stop switch STOP position RUN position START position Hazard warning light switch Bonneville T100 (all models) and...
  • Page 56: Stop Position

    General Information STOP Position MODE Button (if fitted) The STOP position is for emergency use. MODE button allows throttle If an emergency arises which requires response adjustment. Press and release the engine to be stopped, move the the MODE button to select one of the engine start/stop switch to the STOP different rider modes available (see position.
  • Page 57: Left Handlebar Switches

    General Information Left Handlebar Switches Direction Indicator Switch When the direction indicator switch is pushed to the left or right, the corresponding direction indicators will flash on and off. indicators cancelled manually. To manually turn off the indicators, press release indicator switch in the central position.
  • Page 58: High Beam Light

    General Information Heated Grips (if fitted) High Beam Light When the high beam button is heated grips work when pressed the high beam will be ignition is switched on. However, it is switched on. Each press of recommended that they are only used the button will swap between when the engine is running to avoid dip and high beam.
  • Page 59: Throttle Control

    If ‘HgrOFF’ remains shown in the display There are no user adjustments for the screen, then contact an authorised throttle control. Triumph dealer have fault If there is a malfunction with the checked and rectified. throttle...
  • Page 60: Clutch Lever Adjusters

    General Information Clutch Lever Adjusters For all of the conditions mentioned contact an authorised Triumph dealer as soon as possible to have the fault Warning checked and rectified. Do not attempt to adjust the levers with the motorcycle in motion as this may lead to loss of motorcycle control and an accident.
  • Page 61: Brake Lever Adjusters

    General Information Brake Lever Adjusters To adjust the clutch lever: • Push clutch lever forward and turn the adjusting screw in Warning to increase the distance or out Do not attempt to adjust the levers to shorten the distance from the with the motorcycle in motion as this handlebar.
  • Page 62 General Information Speed Twin and Thruxton RS Only All Other Models Brake lever Brake lever adjuster wheel Adjusting screw Arrow mark To adjust the brake lever: To adjust the brake lever: • Push brake lever forward • Push the brake lever forward and and turn the adjusting screw in turn the adjuster wheel to align to increase the distance or out...
  • Page 63: Fuel

    Always Always make sure you have adequate refer to your authorised Triumph dealer. fuel for your journey. Note The use of leaded fuel is illegal in some countries, states or territories.
  • Page 64: Fuel Tank Cap

    General Information Refuelling Fuel Tank Cap Warning To help reduce hazards associated with refuelling, always observe the following fuel safety instructions: - Petrol (fuel) is highly flammable and can be explosive under certain conditions. When refuelling, turn the ignition switch to the OFF position. - Do not smoke.
  • Page 65: Filling The Fuel Tank

    General Information Filling the Fuel Tank Fill the fuel tank slowly to help prevent spillage. Do not fill the tank to a level above the bottom of the filler neck. Warning This will make sure there is enough air Overfilling the tank can lead to fuel space to allow for fuel expansion if the spillage.
  • Page 66: Side Stand

    General Information Side Stand The motorcycle is equipped with a side stand on which it can be parked. When using the side stand, always turn the Warning handlebars fully to the left and leave the motorcycle in first gear. The motorcycle is fitted with an interlock system to prevent it from Whenever the side stand is used, before being ridden with the side stand in the...
  • Page 67: Centre Stand (If Fitted)

    General Information Centre Stand (if fitted) Side Panels All Models except Street Scrambler Caution Do not use body panels or the seat as a handhold when placing the motorcycle on the centre stand as this will cause damage. citf Side panel (right hand shown) Grommets The right side panel can be removed to gain access to the adjustment tool and...
  • Page 68 General Information Street Scrambler Right Hand Side Panel The right hand side panel can be Left Hand Side Panel removed to gain access to the rear The left hand side panel can be removed brake fluid reservoir. to gain access to the adjustment tool. Side panel (right hand shown) Side panel (left hand shown) Upper grommets...
  • Page 69: Tool Kit And Owner's Handbook

    General Information Tool Kit and Owner’s To refit the right hand side panel: Handbook • Position the side panel on to the lower grommet. Tool Kit • Make sure that the slot in the panel is fully engaged with the lower The tool kit consists of an adjustment grommet.
  • Page 70: Helmet Hook (If Fitted)

    General Information Helmet Hook (if fitted) Owner’s Handbook Bonneville T100 (all models), Warning Bonneville T120, Bonneville T120 Bud Ekins, Never ride motorcycle with Bonneville T120 Diamond and helmet(s) secured to the helmet hook Thruxton RS as this may cause the motorcycle to become unstable leading to loss of The Owner’s Handbook is located under control and an accident.
  • Page 71: Seats

    General Information Seats Thruxton RS Only Seat Care Caution To prevent damage to the seats or seat covers, care must be taken not to drop the seats. Do not lean the seats against the motorcycle or any surface which may damage the seats or seat covers.
  • Page 72: Seat Lock

    General Information Seat Lock Seat Removal and Installation Warning Warning To prevent detachment of the seat To prevent detachment of the seat during riding, after fitting always during riding, after fitting always grasp the seat and pull firmly upwards. grasp the seat and pull firmly upwards. If the seat is not correctly secured in If the seat is not correctly secured in the lock, it will detach from the lock.
  • Page 73: Street Scrambler Seat Removal

    General Information Street Scrambler Seat Removal Rider’s Seat Removal To remove the rider’s seat: Note • Remove the passenger seat if fitted. If a passenger seat is fitted, it must be removed before removing the rider’s • Insert the ignition key into the seat seat.
  • Page 74 General Information Passenger Seat Installation • Secure the seat with its fixing and tighten to 3 Nm. To install the passenger seat: • Make sure that the rider’s seat is correctly fitted. • Align the front locating lugs on the passenger seat to their locating slots on the luggage rack subframe.
  • Page 75: Luggage Rack

    General Information Luggage Rack • Gently push luggage rack forward until the locating lugs are Street Scrambler Only secure. Note If a luggage rack is fitted, the rider’s seat can be removed without removing the luggage rack. Removal Luggage rack subframe Locating lugs Locating lug slots Locating screw position...
  • Page 76: Universal Serial Bus (Usb) Socket

    General Information Universal Serial Bus (USB) Caution Socket Make sure that all electronic devices and cables are safely secured under Warning the seat when riding. The USB socket is not waterproof Make sure there is sufficient space unless the waterproof cap is installed. surrounding any electronic devices for Do not connect electronic devices the seat to close without causing any...
  • Page 77: Running-In

    General Information Running-In Both during and after running-in has been completed: • Do not overrev the engine when cold; R.P.M. • Do not let the engine labour. Always Running-in is the name given to the downshift before the engine begins process that occurs during the first to 'struggle';...
  • Page 78: Daily Safety Checks

    Maintenance and Adjustment section or see your Front Forks: Smooth action. No fork oil authorised Triumph dealer for the action leakage (see page 129). required to return the motorcycle to a Throttle: Make sure that the throttle safe operating condition.
  • Page 79: How To Ride The Motorcycle

    How to Ride the Motorcycle How to Ride the Motorcycle Table of Contents How to Ride the Motorcycle Stopping the Engine Starting the Engine Moving Off Changing Gears Braking Anti-lock Braking System (ABS) Parking Considerations for High Speed Operation...
  • Page 80: How To Ride The Motorcycle

    How to Ride the Motorcycle How to Ride the Motorcycle cixa STOP position ON position RUN position Neutral indicator light (Street Scrambler and Street Twin) START position Neutral indicator light (all other models) Ignition switch...
  • Page 81: Stopping The Engine

    How to Ride the Motorcycle Stopping the Engine Starting the Engine Caution Warning engine should normally Never start the engine or run the stopped by turning the ignition switch engine in a confined area. to the OFF position. Exhaust fumes are poisonous and can engine stop switch...
  • Page 82: Moving Off

    How to Ride the Motorcycle Moving Off Caution Continued To move the motorcycle: Running the engine with low oil • Pull in the clutch lever and select pressure will cause severe engine first gear. damage. • Open the throttle a little and let out the clutch lever slowly.
  • Page 83: Changing Gears

    How to Ride the Motorcycle Changing Gears To change gear: • Close the throttle while pulling in the clutch lever. Warning • Change into the next higher or Take care to avoid opening the throttle lower gear. too far or too fast in any of the lower •...
  • Page 84: Braking

    Riders should practice emergency braking in a traffic-free area. Triumph strongly recommends that all riders take a course of instruction, which includes advice on safe brake operation. Incorrect brake technique could result in loss of control and an accident.
  • Page 85 How to Ride the Motorcycle Warning Warning your safety, always exercise Riding with your foot on the brake extreme caution when braking, pedal or your hands on the brake lever accelerating turning may actuate the brake light, giving a incautious action can cause loss of false indication to other road users.
  • Page 86: Anti-Lock Braking System (Abs)

    ABS warning illuminated. In the event of a fault, light will flash on and off. The contact an authorised Triumph dealer light will continue to flash after engine as soon as possible to have the fault start-up...
  • Page 87: Parking

    How to Ride the Motorcycle Parking The warning light will not illuminate again until the engine is restarted unless there is a fault, or the ABS is Warning disabled by the rider (Street Scrambler only). Do not park on a soft or steeply inclined surface.
  • Page 88 How to Ride the Motorcycle • Do not park on a lateral (sideways) Warning incline of greater than 6° and never park facing downhill. The engine and exhaust system will be • Make sure that the side stand is hot after riding. fully retracted before riding off.
  • Page 89: Considerations For High Speed Operation

    Warning from those you are familiar with at legal road speeds. This Triumph motorcycle should be operated within the legal speed limits Do not attempt high speed operation for the particular road travelled. unless you have received sufficient...
  • Page 90 How to Ride the Motorcycle Engine Oil Luggage Check that the engine oil level is correct. Make sure that any luggage containers Make sure that the correct grade and are closed, locked and securely fitted to type of oil is used when topping up. the motorcycle.
  • Page 91: Accessories, Loading And Passengers

    Accessories, Loading and Passengers Accessories, Loading and Passengers The addition of accessories and carriage Warning Continued of additional weight can affect the motorcycle's handling characteristics Failure allow changes causing changes stability motorcycle stability may lead to loss necessitating a reduction in speed. The of motorcycle control and an accident.
  • Page 92 Accessories, Loading and Passengers Warning Warning Do not install accessories or carry Incorrect loading may result in an luggage that impairs the control of the unsafe riding condition leading to an motorcycle. accident. Make sure that have Always make sure that any loads adversely affected lighting...
  • Page 93 Accessories, Loading and Passengers Warning Warning If the passenger seat or luggage Never attempt to store any items rack (if fitted) is used to carry small between the frame and the fuel tank. objects, they must not exceed a total This can restrict the steering and will maximum weight of: cause loss of control leading to an...
  • Page 94 Accessories, Loading and Passengers Warning Warning Do not carry a passenger unless he carry animals your or she is tall enough to reach the motorcycle. footrests provided. An animal could make sudden and A passenger who is not tall enough unpredictable movements that could to reach the footrests will be unable lead to loss of motorcycle control and...
  • Page 95: Maintenance And Adjustment

    Maintenance and Adjustment Maintenance and Adjustment Table of Contents Scheduled Maintenance Scheduled Maintenance Table Engine Oil Engine Oil Level Inspection Engine Oil and Oil Filter Change Disposal of Used Engine Oil and Oil Filters Engine Oil Specification and Grade Cooling System Coolant Level Inspection Coolant Level Adjustment Coolant Change...
  • Page 96 Maintenance and Adjustment Front Suspension Front Suspension Settings - Thruxton RS Front Suspension Preload Adjustment - Thruxton RS Only Front Suspension Rebound and Compression Damping Adjustment - Thruxton RS Only Front Fork Inspection Rear Suspension Rear Suspension Settings Rear Suspension Preload Adjustment Rear Suspension Rebound Damping Adjustment - Thruxton RS Only Rear Suspension Compression Damping Adjustment - Thruxton RS Only Bank Angle Indicators...
  • Page 97: Scheduled Maintenance

    All maintenance is vitally important Scheduled maintenance may be carried and must not be neglected. Incorrect out by your authorised Triumph dealer maintenance or adjustment may cause in three ways; annual maintenance, one or more parts of the motorcycle...
  • Page 98 ABS and/or MIL warning lights resulting from incorrect maintenance or are illuminated. Contact an authorised improper adjustment. Triumph dealer as soon as possible to have the fault checked and rectified.
  • Page 99: Scheduled Maintenance Table

    • • Autoscan - Carry out a full Autoscan using the • • • • • Triumph Diagnostic Tool (print a customer copy) Air cleaner - renew • • • Fuel filter - renew • • Throttle bodies - balance - 1200 cc engines only •...
  • Page 100 All lights, instruments and electrical systems • • • • • - check General Instruments and engine ECM - check for latest calibration download using the Triumph • • • • • diagnostic tool Fasteners - inspect visually for security •...
  • Page 101: Engine Oil

    Maintenance and Adjustment Engine Oil Warning If the engine has recently been running, the exhaust system will be hot. Before working on or near the exhaust system, allow sufficient time for the Warning exhaust system to cool as touching any part of a hot exhaust system Motorcycle operation with insufficient, could cause burn injuries.
  • Page 102: Engine Oil And Oil Filter Change

    Maintenance and Adjustment Engine Oil and Oil Filter Change To inspect the engine oil level: • Start the engine and run at idle for Warning approximately five minutes. Stop the engine and wait for at least three Prolonged or repeated contact with minutes to allow the engine oil to engine oil can lead to skin dryness, settle.
  • Page 103 • Unscrew and remove the engine oil filter using the Triumph service tool • Make sure that the low oil pressure T3880313. Dispose of the old filter in warning light extinguishes shortly an environmentally friendly way.
  • Page 104: Disposal Of Used Engine Oil And Oil Filters

    If in doubt, contact your local authority. Make sure that no foreign matter enters the crankcase during an engine oil change or top up. Engine Oil Specification and Grade Triumph's high performance fuel injected engines designed...
  • Page 105: Cooling System

    Maintenance and Adjustment Cooling System Note HD4X Hybrid OAT coolant, as supplied by Triumph, is premixed and does not need to be diluted prior to filling or topping up the cooling system. To protect the cooling system from corrosion, the use of corrosion inhibitor chemicals in the coolant is essential.
  • Page 106 Maintenance and Adjustment Speed Twin and Thruxton RS To inspect the coolant level: • Position the motorcycle on level ground and in an upright position. The expansion tank can be viewed from the left hand side of the motorcycle, towards the rear of the engine.
  • Page 107: Coolant Level Adjustment

    However, It is recommended that the coolant the coolant must then be drained and is changed by an authorised Triumph replenished with HD4X Hybrid OAT dealer in accordance with scheduled coolant as soon as possible.
  • Page 108: Throttle Control

    To avoid continued use of a sticking or resulting in engine damage. damaged throttle control, always have it checked by your authorised Triumph dealer. Check the radiator hoses for cracks or deterioration, and tension clips for tightness in accordance with scheduled maintenance requirements.
  • Page 109: Clutch

    • If there is an incorrect amount of free play, Triumph recommends that you have your authorised Triumph dealer investigate. • Check that there is 1 - 2 mm of...
  • Page 110: Clutch Adjustment

    Maintenance and Adjustment Clutch Adjustment If correct adjustment cannot be made using the lever adjuster, use the cable To adjust the clutch: adjuster at the lower end of the cable. • Turn the adjuster sleeve until the • Loosen the adjuster lock nut. correct amount of clutch lever free •...
  • Page 111: Drive Chain

    If the chain is badly worn or incorrectly adjusted (either too loose or too tight) the chain could jump off the sprockets or break. Therefore, always replace worn or damaged chains using genuine Triumph parts supplied by an authorised Triumph dealer.
  • Page 112: Drive Chain Free Movement Inspection

    Maintenance and Adjustment Drive Chain Free Movement Drive Chain Free Movement Inspection Adjustment The vertical movement of the drive Warning chain must be in the range 20 - 30 mm. Before starting work, make sure motorcycle stabilised adequately supported. This will help prevent it from falling and causing personal injury and/or damage to the motorcycle.
  • Page 113: Drive Chain And Sprocket Wear Inspection

    Triumph dealer. • Repeat the drive chain adjustment Use a genuine Triumph supplied drive check. Readjust if necessary. chain as specified in the Triumph Parts Catalogue. Warning The use of non-approved drive chains Operation of the motorcycle with...
  • Page 114 If there is any irregularity, have the from pin centre of the 1st pin to the drive chain and/or the sprockets pin centre of the 21st pin. Since the replaced by an authorised Triumph drive chain may wear unevenly, take dealer. measurements in several places.
  • Page 115: Brakes

    Maintenance and Adjustment Brakes Bonneville T100 (all models) and Bonneville T120 (all models) Warning If the lining thickness of any brake pad (front or rear brakes) is less than Brake pads must always be replaced 1.5 mm (0.06 in), that is, if the brake pad as a wheel set.
  • Page 116: Breaking-In New Brake Pads And Discs

    Replacing individual pads will reduce your authorised Triumph dealer must braking efficiency and may cause an rectify the fault before riding. accident. Riding with defective brakes may lead After replacement brake pads have...
  • Page 117: Disc Brake Fluid

    Contact Because of this, always replace brake an authorised Triumph dealer as soon fluid in accordance with scheduled as possible to have the fault checked maintenance requirements. and rectified.
  • Page 118: Front Brake Fluid Level Inspection And Adjustment

    • Fit the diaphragm seal into the Triumph dealer for advice before riding. reservoir cap and make sure that Riding with depleted brake fluid levels, the holes for the fixings in the or with a brake fluid leak is dangerous...
  • Page 119: Front Brake Fluid Level Inspection And Adjustment

    If there has been an appreciable drop in the level of the fluid in either fluid reservoir, consult your authorised Triumph dealer for advice before riding. Riding with depleted brake fluid levels, or with a brake fluid leak is dangerous will cause reduced...
  • Page 120 Maintenance and Adjustment To adjust the front brake fluid level: • Hold assembly together and position the reservoir cap, • Release the reservoir cap retaining diaphragm seal and reservoir cap screws and remove the reservoir retaining screws onto the reservoir. cap and the diaphragm seal.
  • Page 121: Front Brake Fluid Level Inspection And Adjustment

    • Fit the diaphragm seal into the Triumph dealer for advice before riding. reservoir cap and make sure that Riding with depleted brake fluid levels, the holes for the fixings in the or with a brake fluid leak is dangerous...
  • Page 122: Rear Brake Fluid Level Inspection And Adjustment

    Triumph dealer for advice before riding. • Fill the reservoir to the UPPER level Riding with depleted brake fluid levels, line using new DOT 4 brake fluid or with a brake fluid leak is dangerous from a sealed container.
  • Page 123: Brake Light Switches

    • Remove the right hand side panel as or the rear brake pedal is pressed, described for the Street Scrambler have your authorised Triumph dealer on page 68. investigate and rectify the fault. • The brake fluid level in the rear reservoir must be kept between the upper and lower level lines.
  • Page 124: Mirrors

    Maintenance and Adjustment Mirrors Models with Bar End Mirrors Warning Warning Incorrect adjustment of the bar end Operation of the motorcycle with mirrors may cause the mirror arm incorrectly adjusted mirrors to contact the fuel tank, brake or dangerous. clutch levers or other parts of the Operation of the motorcycle with motorcycle.
  • Page 125: Steering/Wheel Bearings

    Maintenance and Adjustment Steering/Wheel Bearings The bar end mirrors will be set by your authorised Triumph dealer and will not normally require any adjustment. Should Caution adjustment be necessary, do not rotate the mirror beyond 75°, measured from prevent risk...
  • Page 126: Steering Inspection

    Maintenance and Adjustment Steering Inspection • If any free play can be detected in the steering (headstock) bearings, ask your authorised Triumph dealer Warning to inspect and rectify any faults Riding the motorcycle with incorrectly before riding. adjusted defective steering •...
  • Page 127: Front Suspension

    • If any free play can be detected, ask resulting in loss of motorcycle control your authorised Triumph dealer to and an accident. inspect and rectify any faults before riding. •...
  • Page 128: Front Suspension Settings - Thruxton Rs

    Maintenance and Adjustment Front Suspension Settings - Front Suspension Preload Thruxton RS Adjustment - Thruxton RS Only The motorcycle is delivered from the The preload adjuster is located at the factory with all the suspension settings bottom of the front suspension unit. set at the Standard setting, as shown in the relevant suspension tables.
  • Page 129: Front Suspension Rebound And Compression Damping Adjustment

    Maintenance and Adjustment Front Suspension Rebound and Front Fork Inspection Compression Damping Adjustment - Warning Thruxton RS Only The rebound and compression damping Riding the motorcycle with defective adjusters are located at the top of each or damaged suspension is dangerous fork.
  • Page 130: Rear Suspension

    Triumph dealer. The Thruxton RS suspension has three different rear adjustment settings; spring preload, rebound damping and compression damping.
  • Page 131: Rear Suspension Settings

    Maintenance and Adjustment Rear Suspension Settings Rear Suspension Preload Adjustment The details shown in the tables are only a guide. Setting requirements may vary Warning for rider and passenger weight and personal preferences. Make sure that the adjusters are All Models except Thruxton RS set to the same setting on both rear suspension units.
  • Page 132: Rear Suspension Rebound Damping Adjustment - Thruxton Rs Only

    Maintenance and Adjustment Rear Suspension Rebound Damping • Turn the adjuster ring clockwise to increase spring preload, and Adjustment - Thruxton RS Only anticlockwise to decrease spring rebound damping adjuster preload. When delivered from the located at the bottom of the rear factory, the preload adjuster will be suspension unit.
  • Page 133: Rear Suspension Compression Damping Adjustment - Thruxton Rs Only

    Maintenance and Adjustment Bank Angle Indicators Rear Suspension Compression Damping Adjustment - Thruxton RS Only Warning compression damping adjuster Use of a motorcycle with bank angle is located at the top of the rear indicators worn beyond the maximum suspension unit. limit will allow the motorcycle to be banked to an unsafe angle.
  • Page 134: Tyres

    Maintenance and Adjustment Tyres Warning Continued Use of an inner tube with a tyre marked 'TUBELESS', and NOT marked as suitable for use with an inner tube, or use of an inner tube on an This motorcycle is equipped with spoked alloy wheel marked 'SUITABLE FOR wheels which require a tyre suitable for TUBELESS TYRES' will cause deflation...
  • Page 135: Tyre Inflation Pressures

    The cold inflation pressures Caution specified by Triumph take account of An adhesive label is fitted to the wheel this. rim to indicate the position of the tyre...
  • Page 136: Tyre Wear

    Triumph dealer, or Check rims dents on the Internet at www. triumph. co. uk. deformation. Operation with damaged Always have tyres and inner tubes defective wheels tyres...
  • Page 137 When replacement tyres or inner tubes Warning Continued are required, consult your authorised Triumph dealer who will arrange for the Use of an inner tube with a tyre tyres and inner tubes to be selected, marked 'TUBELESS', and NOT marked...
  • Page 138 Accurate wheel balance is necessary as after striking the kerb, ask your safe, stable handling authorised Triumph dealer to inspect motorcycle. Do not remove or change the tyre both internally and externally. any wheel balance weights. Incorrect wheel balance may cause instability...
  • Page 139: Battery

    Maintenance and Adjustment Battery Warning Warning battery contains harmful materials. Always keep children away The battery contains sulphuric acid from the battery at all times. (battery acid). Contact with skin or eyes may cause severe burns. Wear Battery Removal protective clothing and a face shield. If battery acid gets on your skin, flush Warning with water immediately.
  • Page 140: Battery Disposal

    Maintenance and Adjustment To remove the battery: • Remove the battery strap and the USB port socket. • Remove the seat (see page 72). • Take the battery out of the case. • Disconnect battery leads, negative (black) lead first. Battery Disposal •...
  • Page 141: Battery Discharge

    Maintenance and Adjustment Battery Discharge Allowing a battery to discharge or leaving it discharged for even a short period of time causes sulphation of Caution the lead plates. Sulphation is a normal part of the chemical reaction inside The charge level in the battery must be maintained to maximise battery life.
  • Page 142: Battery Installation

    (beyond two weeks) the battery should • Reconnect the battery, positive lead be removed from the motorcycle and (identified with red tape) first. kept charged using a Triumph approved maintenance charger. • Tighten the battery terminals to 4.5 Nm. Similarly, should the battery charge fall to a level where it will not start the •...
  • Page 143: Fuses

    Maintenance and Adjustment Fuses Speed Twin and Thruxton RS To install the battery: Warning • Place the battery in the battery case. Always replace blown fuses with new • Secure with the battery strap and ones of the correct rating (as specified make sure the USB port socket is on the fuse box cover) and never use a refitted.
  • Page 144: Headlights

    Maintenance and Adjustment Headlights The fuse box is located underneath the seat. To allow access to the fuse box, the seat must be removed (see page 72). Warning Adjust road speed to suit the visibility and weather conditions in which the motorcycle is being operated.
  • Page 145: Headlight/Position Light Bulb Replacement

    Triumph supplied Damage caused by overheating is headlight bulb as specified in the considered manufacturing Triumph Parts Catalogue. defect and will not be covered under warranty. Always have replacement headlight bulbs installed authorised If the headlight must be covered Triumph dealer.
  • Page 146 Maintenance and Adjustment Bonneville T100, Bonneville T120 (all models), Bonneville T100 Bud Ekins, Speed Twin and Thruxton RS Street Scrambler and Street Twin Wire retainer Headlight bulb Wire retainer Headlight bulb To remove the headlight and position Position bulb light bulb: To remove the headlight and position •...
  • Page 147: Headlight Adjustment

    Maintenance and Adjustment Rear Lights Headlight Adjustment The LED rear light units are sealed, maintenance free LED units. The rear light units must be replaced in the event of the failure of the rear lights. Multifunctional Rear Lights (if fitted) Bonneville T120 Ace and Speed Twin The multifunctional rear light units operate as the rear position light, brake...
  • Page 148: Direction Indicator Lights

    Maintenance and Adjustment Direction Indicator Lights Bonneville T100, Bonneville T120, Bonneville T120 Ace and The motorcycle is fitted with either LED Thruxton RS Direction Indicator or bulb direction indicator lights. Bulb Replacement LED Direction Indicator Lights The LED direction indicator light units are sealed, maintenance free LED units.
  • Page 149: License Plate Light

    Maintenance and Adjustment License Plate Light • Detach the bulb retainer from the lens unit. Bonneville T100 (all models), Bonneville T120 (all models), Speed Twin and Thruxton RS The license plate light unit is a sealed, maintenance free LED unit. The license plate light unit must be replaced in the event of the failure of the license plate light.
  • Page 150 Maintenance and Adjustment This page intentionally left blank...
  • Page 151: Cleaning And Storage

    Cleaning and Storage Cleaning and Storage Table of Contents Cleaning Preparation for Washing Where to be Careful Washing After Washing Care of Gloss Paintwork Care of Matt Paintwork Aluminium Items - not Lacquered or Painted Cleaning of Chrome and Stainless Steel Items Black Chrome Cleaning of the Exhaust System Seat Care...
  • Page 152: Cleaning

    Cleaning and Storage Cleaning Preparation for Washing Frequent, regular cleaning Before washing, precautions must be essential part of the maintenance of taken to keep water off the following your motorcycle. If regularly cleaned, places. the appearance will be preserved for Rear opening of the exhausts: Cover many years.
  • Page 153: Where To Be Careful

    Cleaning and Storage Where to be Careful Washing wash motorcycle, Caution following: • Prepare a mixture of cold water and Do not spray any water at all near the mild automotive cleaner. Do not use air intake duct. a highly alkaline soap as commonly The air intake duct is normally located found at commercial car washes under the rider’s seat, under the fuel...
  • Page 154: After Washing

    Cleaning and Storage After Washing Care of Gloss Paintwork Gloss paintwork should be washed Warning and dried as described above, then protected using high quality Never wax or lubricate the brake discs. automotive polish. Always follow the Always clean the brake disc with a manufacturer’s instructions and repeat proprietary brand of oil-free brake disc regularly to maintain your motorcycle’s...
  • Page 155: Cleaning Of Chrome And Stainless Steel Items

    Cleaning and Storage Cleaning of Chrome and Black Chrome Stainless Steel Items Items such as headlight bowls and mirrors on some models must be All chrome and stainless steel parts correctly cleaned to preserve their of your motorcycle must be cleaned appearance.
  • Page 156: Cleaning Of The Exhaust System

    Cleaning and Storage Cleaning of the Exhaust Protecting System Caution All parts of the exhaust system of your motorcycle must be cleaned regularly to products containing avoid a deterioration of its appearance. silicone will cause discolouration of the These instructions can be applied to chrome and stainless steel parts and chrome, brushed stainless steel and must not be used.
  • Page 157: Seat Care

    Cleaning and Storage Seat Care Windscreen Cleaning (if fitted) Caution Use of chemicals or high pressure spray washers is not recommended for cleaning the seat. Using chemicals or high pressure Warning spray washers may damage the seat Never attempt to clean the windscreen cover.
  • Page 158: Care Of Leather Products

    The Triumph leather product is a natural product and lack of care can result in damage and permanent wear. Follow these simple instructions to prolong the life of the leather product: •...
  • Page 159: Storage

    Cleaning and Storage Storage • If exposure to salt is unavoidable, clean leather product Preparation for Storage immediately after each exposure using a damp cloth then leave the To prepare the motorcycle for storage, leather product to dry naturally at do the following: room temperature.
  • Page 160 (noting that HD4X Hybrid pressure light goes out. coolant, as supplied by Triumph, is • Replace the spark plugs, tightening pre-mixed and requires no dilution) to 12 Nm, and start the engine. and distilled water solution (see page 105).
  • Page 161 Specifications - Bonneville T100 and Bonneville T120 Dimensions, Weights and Performance A list of model specific dimensions, weights and performance figures is available from your authorised Triumph dealer, or on the Internet at www. triumph. co. uk. Payload Bonneville T100...
  • Page 162 Approved Tyres A list of approved tyres specific to these models is available from your authorised Triumph dealer, or on the Internet at www. triumph. co. uk.
  • Page 163 Specifications - Bonneville T100 and Bonneville T120 Tyres Bonneville T100 Bonneville T120 Tyre Sizes: Front 100/90-18 100/90-18 Rear 150/70 R17 150/70 R17 Tyre Pressures (Cold): Front 2.2 bar (32 lbs/in 2.2 bar (32 lbs/in Rear 2.5 bar (36 lbs/in 2.5 bar (36 lbs/in Electrical Equipment Bonneville T100 Bonneville T120...
  • Page 164 Fluids and Lubricants Bearings and Pivots Grease to NLGI 2 specification Brake Fluid DOT 4 brake fluid Triumph HD4X Hybrid OAT coolant (pre- Coolant mixed) Drive Chain Chain spray suitable for XW-ring chains Semi or fully synthetic 10W/40 or 10W/50...
  • Page 165: Specifications - Bonneville T120 Ace And Diamond

    Specifications - Bonneville T120 Ace and Diamond Dimensions, Weights and Performance A list of model specific dimensions, weights and performance figures is available from your authorised Triumph dealer, or on the Internet at www. triumph. co. uk. Payload Bonneville T120 Ace...
  • Page 166 Approved Tyres A list of approved tyres specific to these models is available from your authorised Triumph dealer, or on the Internet at www. triumph. co. uk.
  • Page 167 Specifications - Bonneville T120 Ace and Diamond Tyres Bonneville T120 Ace Bonneville T120 Diamond Tyre Sizes: Front 100/90-18 100/90-18 Rear 150/70 R17 150/70 R17 Tyre Pressures (Cold): Front 2.2 bar (32 lbs/in 2.2 bar (32 lbs/in Rear 2.5 bar (36 lbs/in 2.5 bar (36 lbs/in Electrical Equipment Bonneville T120 Ace...
  • Page 168 Fluids and Lubricants Bearings and Pivots Grease to NLGI 2 specification Brake Fluid DOT 4 brake fluid Triumph HD4X Hybrid OAT coolant (pre- Coolant mixed) Drive Chain Chain spray suitable for XW-ring chains Semi or fully synthetic 10W/40 or 10W/50...
  • Page 169: Specifications - Bonneville Bud Ekins

    Specifications - Bonneville Bud Ekins Dimensions, Weights and Performance A list of model specific dimensions, weights and performance figures is available from your authorised Triumph dealer, or on the Internet at www. triumph. co. uk. Payload Bonneville T100 Bud Ekins...
  • Page 170 Approved Tyres A list of approved tyres specific to these models is available from your authorised Triumph dealer, or on the Internet at www. triumph. co. uk.
  • Page 171 Specifications - Bonneville Bud Ekins Tyres Bonneville T100 Bud Ekins Bonneville T120 Bud Ekins Tyre Sizes: Front 100/90-18 100/90-18 Rear 150/70 R17 150/70 R17 Tyre Pressures (Cold): Front 2.2 bar (32 lbs/in 2.2 bar (32 lbs/in Rear 2.5 bar (36 lbs/in 2.5 bar (36 lbs/in Electrical Equipment Bonneville T100 Bud Ekins...
  • Page 172 Fluids and Lubricants Bearings and Pivots Grease to NLGI 2 specification Brake Fluid DOT 4 brake fluid Triumph HD4X Hybrid OAT coolant (pre- Coolant mixed) Drive Chain Chain spray suitable for XW-ring chains Semi or fully synthetic 10W/40 or 10W/50...
  • Page 173: Specifications - Street Scrambler

    Specifications - Street Scrambler Specifications - Street Scrambler Dimensions, Weights and Performance A list of model specific dimensions, weights and performance figures is available from your authorised Triumph dealer, or on the Internet at www. triumph. co. uk. Payload Street Scrambler Maximum Payload...
  • Page 174 Approved Tyres A list of approved tyres specific to these models is available from your authorised Triumph dealer, or on the Internet at www. triumph. co. uk. Tyres Street Scrambler Tyre Sizes:...
  • Page 175 Specifications - Street Scrambler Tyres Street Scrambler Tyre Pressures (Cold): Front 2.1 bar (30 lbs/in Rear 2.5 bar (36 lbs/in Electrical Equipment Street Scrambler Battery Type YTX12-BS Battery Rating 12 Volt, 10 Ah 25 Amps at 1,000 rpm Alternator 46.5 Amps at 3,000 rpm Headlight 12 Volt, 60/55 Watt, H4 halogen Tail/Brake Light...
  • Page 176 Fluids and Lubricants Bearings and Pivots Grease to NLGI 2 specification Brake Fluid DOT 4 brake fluid Triumph HD4X Hybrid OAT coolant (pre- Coolant mixed) Drive Chain Chain spray suitable for XW-ring chains Semi or fully synthetic 10W/40 or 10W/50...
  • Page 177: Specifications - Speed Twin

    Specifications - Speed Twin Specifications - Speed Twin Dimensions, Weights and Performance A list of model specific dimensions, weights and performance figures is available from your authorised Triumph dealer, or on the Internet at www. triumph. co. uk. Payload Speed Twin Maximum Payload...
  • Page 178 Approved Tyres A list of approved tyres specific to these models is available from your authorised Triumph dealer, or on the Internet at www. triumph. co. uk.
  • Page 179 Specifications - Speed Twin Tyres Speed Twin Tyre Sizes: Front 120/70 R17 Rear 160/60 R17 Tyre Pressures (Cold): Front 2.5 bar (36 lbs/in Rear 2.9 bar (42 lbs/in Electrical Equipment Speed Twin Battery Type YTZ10S Battery Rating 12 Volt, 8.6 Ah 25 Amps at 1,000 rpm Alternator 46.5 Amps at 3,000 rpm...
  • Page 180 Fluids and Lubricants Bearings and Pivots Grease to NLGI 2 specification Brake Fluid DOT 4 brake fluid Triumph HD4X Hybrid OAT coolant (pre- Coolant mixed) Drive Chain Chain spray suitable for XW-ring chains Semi or fully synthetic 10W/40 or 10W/50...
  • Page 181: Specifications - Street Twin

    Specifications - Street Twin Specifications - Street Twin Dimensions, Weights and Performance A list of model specific dimensions, weights and performance figures is available from your authorised Triumph dealer, or on the Internet at www. triumph. co. uk. Payload Street Twin Maximum Payload...
  • Page 182 Approved Tyres A list of approved tyres specific to these models is available from your authorised Triumph dealer, or on the Internet at www. triumph. co. uk. Tyres Street Twin Tyre Sizes:...
  • Page 183 Specifications - Street Twin Tyres Street Twin Tyre Pressures (Cold): Front 2.2 bar (32 lbs/in Rear 2.5 bar (36 lbs/in Electrical Equipment Street Twin Battery Type YTX12-BS Battery Rating 12 Volt, 10 Ah 25 Amps at 1,000 rpm Alternator 46.5 Amps at 3,000 rpm Headlight 12 Volt, 60/55 Watt, H4 halogen Tail/Brake Light...
  • Page 184 Fluids and Lubricants Bearings and Pivots Grease to NLGI 2 specification Brake Fluid DOT 4 brake fluid Triumph HD4X Hybrid OAT coolant (pre- Coolant mixed) Drive Chain Chain spray suitable for XW-ring chains Semi or fully synthetic 10W/40 or 10W/50...
  • Page 185: Specifications - Thruxton Rs

    Specifications - Thruxton RS Specifications - Thruxton RS Dimensions, Weights and Performance A list of model specific dimensions, weights and performance figures is available from your authorised Triumph dealer, or on the Internet at www. triumph. co. uk. Payload Thruxton RS Maximum Payload...
  • Page 186 Approved Tyres A list of approved tyres specific to these models is available from your authorised Triumph dealer, or on the Internet at www. triumph. co. uk.
  • Page 187 Specifications - Thruxton RS Tyres Thruxton RS Tyre Sizes: Front 120/70 ZR17 Rear 160/60 ZR17 Tyre Pressures (Cold): Front 2.5 bar (36 lbs/in Rear 2.5 bar (36 lbs/in Electrical Equipment Thruxton RS Battery Type YTZ10S Battery Rating 12 Volt, 8.6 Ah 22 Amps at 1,000 rpm Alternator 32 Amps at 3,000 rpm...
  • Page 188 Fluids and Lubricants Bearings and Pivots Grease to NLGI 2 specification Brake Fluid DOT 4 brake fluid Triumph HD4X Hybrid OAT coolant (pre- Coolant mixed) Drive Chain Chain spray suitable for XW-ring chains Semi or fully synthetic 10W/40 or 10W/50...
  • Page 189: Index

    Index Index Matt Paintwork Preparation for Washing Accessories Protecting Anti-lock Braking System (ABS) Seat Care Disable Washing Enable Washing the Exhaust Indicator Light Where to be Careful Windscreen Clock Bank Angle Indicators Adjustment Battery Clutch Charging Adjustment Discharge Inspection Disposal Clutch Lever Installation 142, 143...
  • Page 190 Index Engine Headlights Moving Off Adjustment Serial Number Bulb Replacement Specifications 161, 165, 169, 173, 177, 181, 185 Heated Grips Starting the Engine Helmet Hook Stopping the Engine High Beam Engine Immobiliser / Indicator Light Indicator Light Engine Oil High Speed Operation Disposal of Oil and Filters Level Inspection Ignition...
  • Page 191 Index MODE Button 56, 57 Specifications Multifunctional Rear Lights Bonneville T100 Bonneville T100 Bud Ekins Bonneville T120 Owner's Handbook Bonneville T120 Ace Bonneville T120 Bud Ekins Bonneville T120 Diamond Parking Speed Twin Parts Identification 16, 18, 20, 22, 24 Street Scrambler Rider View 26, 27 Street Twin...
  • Page 192 Index Transmission Specifications 162, 166, 170, 174, 178, 182, 186 Warnings Tyre Pressure Monitoring System (TPMS) Maintenance Replacement Tyres Noise Control System Sensor Serial Number Owner’s Handbook Tyre Pressures 53, 135 Warning Label Locations 14, 15 Tyres Warning Labels Minimum Tread Depth Warning Lights Replacement 53, 136...
  • Page 193: Approval Information

    The table below shows the frequencies and power levels for the radio equipment devices in compliance with the EU Directive 2014/53/EU. The table shows all radio equipment devices used across the Triumph range of motorcycles. Only certain radio equipment devices in the table are applicable to specific motorcycles.
  • Page 194 Approval Information Radio Equipment Maximum Transmit Frequency Range Manufacturer Device Power Level Receive Bands: 433.92 MHz, 134.2 kHz Category-2 Receiver Chassis Control Unit 287 nW ERP Transmit Bands: 134.2 kHz Class 1 Transmitter Fixed Inductive Loop Coil Antenna Receive Bands: 433.92 MHz, 134.2 kHz Category-2 Receiver...
  • Page 195 Transmit Bands: Triumph Protect+ None Receive Bands: Accessory Alarm None System Remote/ 00 mW ERP Key Fob - Triumph Transmit Bands: Protect+ 000.00 MHz Representative within the European Union Address Triumph Motocicletas Espana S.L. C/Cabo Rufino Lazaro 14 - E...
  • Page 196 With reference to the Pneumatic Tyres and Tubes for Automotive Vehicles (Quality Control) Order, 2009, Cl. No. 3 (c), it is declared by M/s. Triumph Motorcycles Ltd. that the tyres fitted on this motorcycle meet the requirements of IS 15627: 2005 and...

Table of Contents

Save PDF