Table of Contents
Advertisement
Quick Links
®
NETWORK SERVICES
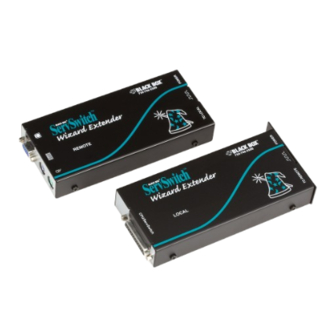
ServSwitch Wizard Extenders
CUSTOMER
Order toll-free in the U.S. 24 hours, 7 A.M. Monday to midnight Friday: 877-877-BBOX
SUPPORT
FREE technical support, 24 hours a day, 7 days a week: Call 724-746-5500 or fax 724-746-0746
INFORMA-
Mail order: Black Box Corporation, 1000 Park Drive, Lawrence, PA 15055-1018
Web site: www.blackbox.com • E-mail: info@blackbox.com
®
March 2005
ACU5112A
ACU5110A
ACU5010A-R2
Advertisement
Table of Contents

Related Manuals for Black Box ServSwitch Wizard Extender ACU5010A-R2


Summary of Contents for Black Box ServSwitch Wizard Extender ACU5010A-R2
- Page 1 Order toll-free in the U.S. 24 hours, 7 A.M. Monday to midnight Friday: 877-877-BBOX SUPPORT FREE technical support, 24 hours a day, 7 days a week: Call 724-746-5500 or fax 724-746-0746 INFORMA- Mail order: Black Box Corporation, 1000 Park Drive, Lawrence, PA 15055-1018 Web site: www.blackbox.com • E-mail: info@blackbox.com...
-
Page 2: Table Of Contents
Contents ® Welcome Special configuration Introduction .................2 Configuration ................11 Supplied items ................3 What are hotkeys? ............11 Entering, using and exiting configuration mode...11 Installation and operation Password setting ..............12 Password override..............12 Installation ...................4 Hot plugging and mouse restoration ........13 Stage A - Configuration switch settings ........4 Which restore setting do I use?........13 LOCAL module switches.............4 Microsoft and Logitech -specific mouse settings ....13... -
Page 3: Introduction
Welcome ® Introduction Thank you for choosing one of the Black Box Wizard Extender products. These This table indicates the functional differences between the three variants within compact modules allow you to place the controlling keyboard, video monitor, the Wizard Extender range: mouse and a serial device up to 300 metres from a computer system. -
Page 4: Supplied Items
Supplied items ® Optional power supply connection Connection from Switch bank to computer RS232 determine certain serial port modes and functions Connection to REMOTE module Power Multi-cable for keyboard, and signal video, mouse and activity (ACU5112A only) audio indicator connections between computer and LOCAL module LOCAL module... -
Page 5: Installation And Operation
Installation and operation ® Installation LOCAL module switches (continued) The installation of the Wizard Extender set is straightforward and can best be LOCAL Switch 1 achieved in most cases by following these stages for each module: OFF: Normal operation. • Stage A Check or set the configuration switch settings ON: (Before power is applied) Places the LOCAL module into flash upgrade •... -
Page 6: Remote Module Switches
® REMOTE module switches REMOTE module switches (continued) REMOTE Switch 1 Determines configuration of hotkeys in conjunction OFF: Normal operation. with switch 3 ON: (Before power is applied) Places the REMOTE module into flash upgrade Reserved for mode so that the internal software can be changed. Please see the ‘Flash future use upgrade’... -
Page 7: Stage B - Mounting A Module - Desk Or Rack
® Stage B - Mounting a module – desk or rack Installation Advice • For correct operation, the local and remote units must have ground The Wizard Extender modules can be situated on a desk (or floor) or connections. At the computer end, ensure that the computer or KVM switch alternatively, for larger installations, mounted within optional rack mount chassis that the LOCAL module is connected to has a ground connection. -
Page 8: Stage C - Connections
® Stage C - Connections The naming of the LOCAL and REMOTE modules relate to their proximity to the Serial cable connection computer system. Hence, the LOCAL module connects directly to the system, The Wizard Extender modules offer the option to attach an RS232 serial device while the REMOTE is at the other end of the twisted pair cable and attaches to (such as a touch screen input) via the remote link. -
Page 9: Connections At The Remote Module
® Connections at the REMOTE module Keyboard, video and mouse connections Twisted pair, power and serial connections The connections to the keyboard, video monitor and mouse are all made to the 1 Insert the connector sockets at one end of the REMOTE module. from the twisted pair cable link into the 1 Attach the lead from... - Page 10 ® Audio connections (ACU5112A only) On the ACU5112A REMOTE module, audio connections are available at the two Note: When the ACU5112A REMOTE 3.5” jack sockets mounted on the side (same side as the switch bank). Note: module is rack mounted, the audio connections must be made after the The microphone input (labelled ) has a dual function whereby it can either...
-
Page 11: Operation
Operation ® Locking and unlocking the system Power and activity indicators In situations where the computer system (and the LOCAL module) can be On the front panel of both modules are small recessed indicators which locked away the Wizard Extender modules offer a viable security system to deter provide confirmation of power and unauthorized use. -
Page 12: Special Configuration
Special configuration ® Configuration Entering, using and exiting configuration mode You can alter the way that the Wizard Extender modules operate to suit your To enter and use configuration mode: requirements. This is done using the Configuration mode and you can affect the 1 Simultaneously press the currently configured following settings: hotkeys (by default,... -
Page 13: Password Setting
® Password setting Password override Password protection allows you restrict access to the system only to authorized This mode allows you to override the password that has been set at the REMOTE personnel. A password first needs to be set and then, using the keyboard module and place it into configuration mode so that a new one may be set. -
Page 14: Hot Plugging And Mouse Restoration
® Hot plugging and mouse restoration To restore mouse operation when hot plugging: It is strongly recommended that you switch off the computer system before attempting to connect it via the Wizard Extender modules. However, if this is not 1 Carefully connect the Wizard Extender modules to the system and its keyboard, mouse, monitor, audio and serial device. -
Page 15: Image Controls - Sharpness And Brightness
® Image controls - sharpness and brightness To use the image controls The Wizard Extender modules incorporate special controls to compensate for losses incurred within long cable links. Using these controls you can adjust the 1 Simultaneously, press the hotkeys (by default, ) along with to enter configuration mode. -
Page 16: Skew Adjustment (Acu5110A And Acu5112A Only)
® Skew adjustment (ACU5110A and ACU5112A only) The twisted pair cabling supported by the Wizard Extender set (category 5, or 4 As appropriate, press either the R, G or B keyboard keys to select the higher) consists of four pairs of cables. Three of these pairs are used by the appropriate color channel. -
Page 17: Miscellaneous Settings
® Miscellaneous settings The following are configuration settings within the modules that are not covered in other sections of this guide. These can be achieved once within configuration mode by pressing the indicated keys: Report Wizard Extender firmware version - Before initiating this command, ensure that the system is running an application that can display typed keys as screen characters - e.g. -
Page 18: Flash Upgrade
2 Right mouse click on the ‘31⁄2 Floppy (A:)’ icon and select ‘Format’. 1 Contact Black Box technical support (see front cover) for details about how 3 Select the ‘Full format’ option and ensure that the ‘Copy system files’ box is to locate and download the appropriate upgrade file. -
Page 19: Stage E - Return All Connections To Their Usual States
® Stage C - Reconfigure the LOCAL connections and begin Stage D - Reconfigure the REMOTE connections and begin 1 On the computer from which you will run the upgrade, ensure that its BIOS 1 Disconnect all cables from the REMOTE module and take it to the computer. settings will allow it to boot from the floppy diskette drive, rather than 2 Use a ‘KVM switch-type’... -
Page 20: Further Information
Further information ® Troubleshooting If you experience problems when installing or using the Wizard Extender The keyboard indicators are flashing between the Caps Lock and the modules, please check through this section for a possible solution. If your Num Lock/Scroll Lock and the computer does not respond to any key- board or mouse inputs. - Page 21 Other products in the Wizard range Safety information ® The following related Wizard items are available: • For use in dry, oil free indoor environments only. • Wizard Extender ACU5013A • Do not use to link between buildings. Allows one system to be controlled from two locations or permits a second •...
-
Page 22: Radio Frequency Energy
Radio Frequency Energy ® A Category 5 (or better) twisted pair cable must be used to connect the Wizard units in order to maintain compliance with radio frequency energy emission regulations and ensure a suitably high level of immunity to electromagnetic disturbances. -
Page 23: Certification Notice For Equipment Used In Canada
Certification notice for equipment used in ® Canada The Canadian Department of Communications label identifies certified equipment. This certification means that the equipment meets certain telecommunications-network protective, operation, and safety requirements. The Department does not guarantee the equipment will operate to the user’s satisfaction. -
Page 24: Normas Oficiales Mexicanas (Nom) Statement
Normas Oficiales Mexicanas (NOM) electrical ® safety statement Instrucciones de seguridad 1 Todas las instrucciones de seguridad y operación deberán ser leídas antes de 15 En caso de existir, una antena externa deberá ser localizada lejos de las que el aparato eléctrico sea operado. lineas de energia. -
Page 25: Blackbox Subsidiary Contact Details
BlackBox subsidiary contact details ® Country Web Site/Email Phone United States www.blackbox.com 724-746-5500 724-746-0746 United Kingdom www.blackbox.co.uk +44 118 965 6000 +44 118 965 6001 techhelp@blackbox.co.uk Austria www.black-box.at +43 1 256 98 56 +43 1 256 98 56 support@black-box.at Belgium www.blackbox.be +32 2 725 85 50 +32 2 725 92 12... - Page 26 ® © 2005 Black Box Corporation All trademarks are acknowledged. Black Box Corporation, Black Box Network Services (UK) Ltd, 1000 Park Drive, 464 Basingstoke Road, Lawrence, Reading, Berkshire, RG2 0BG, PA 15055-1018, United Kingdom United States of America Tel: +44 (0)118 965 5100...
- Page 27 ® ® NETWORK SERVICES © Copyright 2005. Black Box Corporation. All rights reserved. 1000 Park Drive • Lawrence, PA 15055-1018 • 724-746-5500 • Fax 724-746-0746...
Need help?
Do you have a question about the ServSwitch Wizard Extender ACU5010A-R2 and is the answer not in the manual?
Questions and answers