
Related Manuals for Cosmetal AVANT 23 WG


Summary of Contents for Cosmetal AVANT 23 WG
- Page 1 Installazione, uso e manutenzione Installation, use and maintenance handbook Installation, Gebrauch und Wartung Installation, usage et entretien Instalación, uso y mantenimiento AVANT 23 WG UV AVANT 23 WG COD: 5561260 Rev.1:0905...
-
Page 2: Prima Di Usare L'apparecchio
MARCATURA DELL’APPARECCHIO APPLIANCE DATA PLATE GERÄTEKENNZEICHNUNG Modell Model Modello Speisespannung Supply voltage Tensione di alimentazione Quantity of cooling gas Kühlgasmenge Quantità di gas refrigerante Class Klasse Classe Gesamtaufnahme Total absorption Assorbimento totale Frequency Frequenz Frequenza Serial number Matrikelnummer Numero di matricola Konstruktionsjahr- Monat Construction month-year Anno-mese di costruzione... -
Page 3: Before Using The Appliance
BEFORE USING THE APPLIANCE • Make sure that installation and electrical wiring are carried out by a qualified WARNINGS technician according to the manufacturer’s instructions and to the local In order to use your appliance to its best, we advise reading these norms in force. - Page 4 GF0312-030 DISIMBALLO • Ponete l’apparecchio nel punto d’installazione (cap. 4- INSTALLAZIONE). • Tagliate le reggette R e sfilate il cartone C e il sacco in plastica esterno S. • Eliminate subito i sacchi in plastica S i quali possono rappresentare pericolo per i bambini. •...
-
Page 5: Removal Of Packaging
REMOVAL OF PACKAGING • Place the appliance in its installation site (chap. 4 - INSTALLATION). • Cut straps R and remove the box C and plastic bag S. • Immediately destroy the plastic bags S as they could be dangerous for children. •... -
Page 6: Descrizione Dell'apparecchio
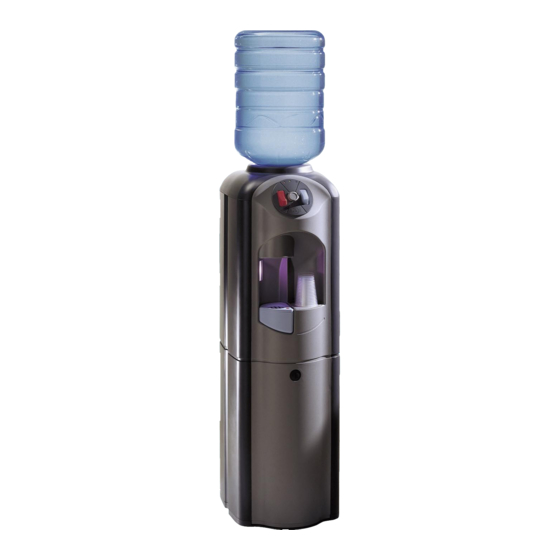
COS2301-F408 AV0305-F02 COS2301-F407 COS2301-F409 DESCRIZIONE DELL’APPARECCHIO AVANT è stato studiato per offrire la massima igiene e semplicità di manu- Durante l’erogazione l’acqua viene protetta dai batteri tramite l’emissione tenzione. di raggi UV (sistema brevettato) Portabicchieri Fornisce acqua fredda e gassata in grande quantità. Gasatura regolabile. Sistema Ricavato all’interno della struttura e offre maggiore protezione contro di gasatura silenzioso e di tipo professionale. -
Page 7: Description Of The Appliance
DESCRIPTION OF THE APPLIANCE AVANT has been designed to offer maximum hygiene and easy maintenance. of UV rays emission (patented system). Paper cup holder placed inside the structure to have a higher protection It supply large quantities of cold and carbonated water. Adjustable water carbonation. against dust and extraneous bodies. - Page 8 Avant 23 WG UV Avant 23 WG Produzione acqua Lt/h Water production Trinkwasserproduktion Production d’eau Producción de agua usg/h Temp. uscita acqua °C 8 ÷ 12 AVANT 23 WG Water outlet temperature Temperatur des gespendeten Wassers Temperature sortie de l’eau Dimensioni Temp.
-
Page 9: Installation
INSTALLATION Place the appliance in the desired point of installation, away from heat sources and protected from direct sunrays. POSITIONING THE UNIT • When handling and moving the cooler, use the handle recessed into the cross support on the back of the unit. •... -
Page 10: Collegamento Elettrico
COS2301-030 COS2301-F418 COS2301-F414 AV0305-F04 CARICAMENTO DEL BOCCIONE • Inserire delicatamente il boccione rovesciato nel refrigeratore e spingere fino all’apertura del tappo. L’acqua inizierà a defluire nel serbatoio del refrigeratore (fig. 5). Il boccione deve essere asciutto poiché potrebbe scivolare. Il boccione pieno d’acqua è pesante. COLLEGAMENTO ELETTRICO Il collegamento alla rete elettrica avviene collegando la spina ad una presa di rete (fig.6). -
Page 11: Conexión Eléctrica
LOADING THE BOTTLE • Carefully insert the bottle (turned upside-down) into the cooler and push until the cap opens. The water will then begin to flow into the cooler tank (fig. 5). The bottle must be dry, otherwise it could slip. When the bottle is full, it is quite heavy. - Page 12 RI0103_18_1 RI0103_18_2 COS2301-F424 Per le bombole del tipo RICARICABILE (B-RIC) procedere come segue: COLLEGAMENTO DELLA BOMBOLA DEL ATTENZIONE! La bombola Ricaricabile è fornita vuota. Provvedere GAS CO2 (ANIDRIDE CARBONICA) ad effettuare la carica del gas dal più vicino rivenditore autorizzato •...
- Page 13 CONNECTING THE CO2 GAS CYLINDER With rechargeable cylinders (B-RIC), proceed as follows: (CARBON DIOXIDE) NOTICE! Rechargeable cylinders are empty when supplied. Have the cylinder filled with gas by the nearest authorized distributor. Ask only • Open the door (fig. 8) in order to access the compartment for the CO2 cylinder. for CO2 (carbon dioxide) for “food products.”...
-
Page 14: Consigli Di Utilizzo
CONSIGLI DI UTILIZZO PER GARANTIRE IL BUON FUNZIONAMENTO NEL TEMPO DELLA POMPA E’ NECESSARIO CHE LA MACCHINA FUNZIONI SEMPRE CON PRESENZA D’ACQUA NEL SERBATOIO DI RAFFREDDAMENTO. LA QUALITÀ DELLA GASATURA DIPENDE ANCHE DALLA TEMPERATURA DELL’ACQUA. PERTANTO ALL’INSTALLAZIONE È NECESSARIO ATTENDERE CHE IL REFRI- GERATORE ABBIA RAFFREDDATO SUFFICENTEMENTE L’ACQUA. -
Page 15: Advice On Use
ADVICE ON USE IN ORDER TO GUARANTEE THAT THE PUMP FUNCTIONS PROPERLY FOR AN EXTENDED PERIOD OF TIME, THE UNIT MUST ALWAYS BE OPERATED WITH WATER IN THE COOLING TANK. THE QUALITY OF THE GAS-WATER MIXTURE ALSO DEPENDS UPON THE TEMPERATURE OF THE WATER. THEREFORE, WHEN THE UNIT IS INSTALLED, WAIT UNTIL THE WATER HAS BEEN COOLED SUFFICIENTLY. - Page 16 COS2301-F422 COS2301-F426 AV0305-F05 AV0305-F06 COS2301-F429 COS2301-F431 COS2301-F432 COS2301-F433 IGIENIZZAZIONE L’igienizzazione deve essere eseguita periodicamente oppure dopo un periodo di PER RIMUOVERE IL SERBATOIO inattività. a Scollegare il cavo di alimentazione dalla presa di corrente. b Togliere il boccione dell’acqua. Questa operazione deve essere compiuta da personale qualificato. c Vuotare il serbatoio agendo sui comandi di erogazione.
- Page 17 HYGIENIC CLEANING The hygienic cleaning must be performed periodically or after a period of inactivity TO REMOVE RESERVOIR a Unplug the cooler from the mains electricity supply. This operation should be performed by a qualified technician. b Remove the water container. c Empty the tank by means of the supply controls.
- Page 18 COS2301-F436 COS2301-F433 COS2301-F435 COS2301-F437 COS2301-F429 COS2301-F431 PER RIMUOVERE I TUBI PER RIMONTARE IL SERBATOIO SANIFICATO E I NUOVI TUBI q Indossare guanti monouso. o Sbloccare il meccanismo K e ruotarlo in avanti (fig. 20). r Spingere il serbatoio verso il basso fino a farlo appoggiare sul materiale p Scollegare i tubi dal lato D ed F1 (fig.
- Page 19 HOW TO REMOVE THE TUBES HOW TO ASSEMBLE AGAIN THE SANITIZED TANK AND THE NEW TUBES q Wearing disposable gloves. o Unblock the component K and rotate it ahead (fig. 20). r Push the reservoir down wards until it leans on the insulation material (fig. p Disconnect the tubes from the side D and F1 (fig.
- Page 20 COS2301-F439 COS2301-F424 AV0305-F07 COS2301-F440 COS2301-F442 COS2301-F441 COS2301-F448 COS2301-F449 COS2301-F450 PER RIMUOVERE I FIANCHI ESTERNI SOSTITUZIONE LAMPADA UV La lampada deve essere sostituita ogni 6000 ore (circa 8 Prima di rimuovere i fianchi esterni è necessario aver compiuto le fasi da “a” fino a “g” descritte nel paragrafo 5.1. mesi) di funzionamento Questa operazione deve essere compiuta da personale qualificato w Smontare lo sportello frontale (fig.
- Page 21 HOW TO REMOVE THE EXTERNAL SIDES HOW TO REPLACE THE UV LAMP The lamp must be replaced every 6000 hours of working Before removing the external side it is necessary to have performed the steps (about 8 months) from “a” to “g” described in paragraph 5.1. This operation should be performed by a qualified technician.ato w disassemble the front door (fig.
Need help?
Do you have a question about the AVANT 23 WG and is the answer not in the manual?
Questions and answers