
Related Manuals for Aqua Lung FIRST STAGE


Summary of Contents for Aqua Lung FIRST STAGE
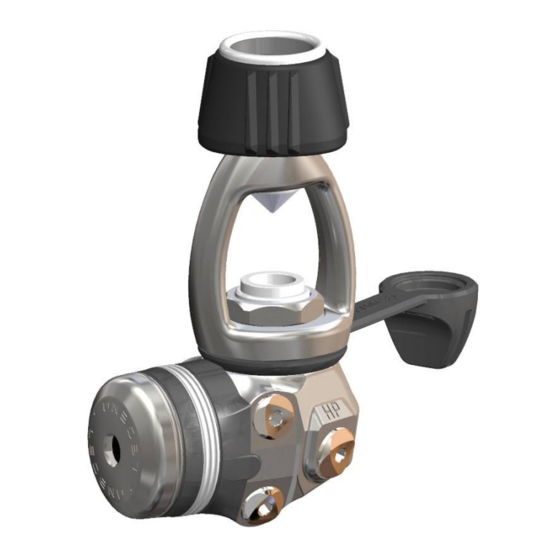
- Page 1 Service manual First stage Legend SERVICE MANUAL FIRST STAGE LEGEND LEGEND LX LEGEND LUX Service Manual 1st stage Legend Rev. 12/2011...
- Page 2 Table 2. List of tools and service kits ……....…..............19 Table 3. Recommended cleaners and lubricants.........…......20 Procedure A. Cleaning and lubricating..................21 Table 4. Torque settings......………………..............22 Table 5. Checking specifications...…...............…......22 Exploded view of Legend First Stage..................24 Revision Description 12/2011 Update of all the exploded views Service Manual 1st stage Legend Rev.
- Page 3 This manual is the property of Aqualung France. Any copying, photocopying, reproduction, translation, electronic distribution (email, Internet...), even partial, and in whatever format, is expressly forbidden without the written consent of Aqualung France. ©2011 Aqua Lung France. INTRODUCTION This manual gives the instructions and the recommendations for the disassembly, the cleaning, the checking, the reassembly and the adjustment of an Aqualung regulator.
- Page 4 Service manual First stage Legend GENERAL INSTRUCTIONS In order to carry out the procedures described in this manual correctly it is important that you follow the steps in the exact order indicated. Read the manual through completely so that you become familiar with all the procedures, the special tools and the replacement parts, before starting to disassemble the product.
- Page 5 Service manual First stage Legend Unscrew the hoses from the first stage using the DISASSEMBLY PROCEDURE appropriate spanner. Screw the HP and MP plugs into the open ports but leave one HP and one MP port free. Note: Before commencing disassembly, consult the exploded view to check the reference numbers of all parts requiring replacement.
- Page 6 Service manual First stage Legend Turn the regulator over and allow the pin (A02002) to fall out into your hand. Use an 8mm Allen key to unscrew the adjusting screw (127566). Remove the washer (127568) and then the spring (122244).
- Page 7 Service manual First stage Legend Remove the o-ring (213714) from the plug (129604 / the regulator is an yoke version, go to step 11. If it is a DIN 129709 / 129746). Remove the o-ring (124612) and th version, go to step 12.
- Page 8 Service manual First stage Legend Put the seat (129212 / 129719) on the yoke, Remove the yoke screw and separate the parts. thread the screw (129618 / 129721) on the yo and put this assembly on a valve fitted with an insert.
- Page 9 Service manual First stage Legend a. Clamp the tool into a c. Remove the DIN screw vice so that the DIN (129213), the handwhee (129619 / 129722) and connection is upward the cap (129608). Remove the dust cap (129608). Take a Din / Yoke...
- Page 10 Service manual First stage Legend Remove the o-ring (124709) from the groove of the RE-ASSEMBLY PROCEDURE shutter crown (12920 3 / 129706 / 129616). Remove the o-ring (124709). Fit new lubricated O-rings (124703) to all the plugs (129612 / 12707). Fit new lubricated O-rings (124701) to all the plugs (129613 / 129708).
- Page 11 Service manual First stage Legend Position the anti extrusion washer (119129) in the plug (129604 / 129709 / 129746) with its concave side facing out. Lubricate the new washer (124612) well and fit it into the plug, against the washer Turn the regulator over so that the MP side faces you.
- Page 12 Service manual First stage Legend If the regulator is an yoke version, go to step 14. If it is a DIN version, go to step 15. 12. Assembling the yoke: Fit a new o-ring (124703) in the groove of the shutter crown (129614 / 129704 / 129205).
- Page 13 Service manual First stage Legend .Install the dust cap between the yoke and the shutter crown, then tighten the yoke screw so that Fit the yoke ACD cap (129607) between the Body the spring is compressed and the yoke (124611 / 129713 / 124610) and...
- Page 14 Service manual First stage Legend 3. DIN connection assembly procedure : Fit a new lubricated O-ring (473057) inside the groove of the shutter crown (129203 / 129706 / 129616). Fit a new UN-lubricated O- ring (124709) inside the external groove of the crown.
- Page 15 HP leak. Connect the first stage to a cylinder charged to 200bar. Slowly open the cylinder valve to put the regulator under pressure.
- Page 16 Service manual First stage Legend FINAL ASSEMBLY Slide the protector (129609) around the Dry chamber by ensuring the 2 notches of the protector corresponds with the notches of the body. Then slide the ring (129623 / 129702 / 129717) and the Washer (129611).
- Page 17 Slowly open the cylinder valve to put the regulator under pressure. Immerse the first stage completely in water to check that there are no leaks. Note: Do not mistake any bubbles which are trapped in the regulator with a leak.
- Page 18 Manuel d'entretien premier étage Legend Table 1. Troubleshooting Guide SYMPTOME CAUSE POSSIBLE TRAITEMENT 1. The HP seat (124624) is worn or 1. Replace the HP seat damaged 2. Le crown (127585) is damaged. 2. Replace the crown 3. The O-ring (124612) is worn or 3.
- Page 19 Service Manual 1st stage Legend Table 2. List of Tools and Service Kits DESCRIPTION APPLICATION PART 116222 IP gauge 0/16B Checking the IP 111610 506001 O-ring Tool Place and remove O-rings 116236 Crown/lever adjustment tool Remove / assembly of the crown 109436 116230 Axis...
- Page 20 Service manual First stage Legend Table 3. Recommended cleaners and lubricants LUBRICANT / CLEANER APPLICATION SOURCE Christolube MCG 111 All O-rings Aqualung, ref. 480025 Attention: Silicone parts do not require lubrication. Do not grease them. Greasing silicone parts can change their molecular construction and cause premature degradation of the material.
- Page 21 Service Manual 1st stage Legend Procedure A Cleaning and Lubricating (All Aqualung Regulators) Cleaning brass and stainless steel parts. Pre-clean by soaking in NETALU diluted to 25%. Cleaning in an ultra-sonic bath filled with a mixture of washing-up liquid + hot water. If some resistant deposits remain then fill the ultrasonic bath with white vinegar and repeat.
- Page 22 Service manual First stage Legend Table 4. Torque values N° REFERENCE DESCRIPTION COUPLE 129604 / 129709 / 129746 Counter balance plug 0.5 m.kg. 129602 Dry Chamber 2.5 m.Kg 129603 / 129701 / 129744 Dry Chamber Plug 0.4 m.Kg 129212 / 129719 Yoke retainer 2.5 m.Kg...
- Page 23 Service Manual 1st stage Legend Maintenance Notes. Service Manual 1st stage Legend Rev. 12/2011...
- Page 24 Service manual First stage Legend Exploded view Legend ACD Service Manual 1st stage Legend Rev. 12/2011...
- Page 25 Service Manual 1st stage Legend Exploded view Legend ACD DIN Service Manual 1st stage Legend Rev. 12/2011...
- Page 26 Service manual First stage Legend Exploded view Legend LX ACD Service Manual 1st stage Legend Rev. 12/2011...
- Page 27 Service Manual 1st stage Legend Exploded view Legend LX ACD DIN Service Manual 1st stage Legend Rev. 12/2011...
- Page 28 Service manual First stage Legend Exploded view Legend ACD Supreme Service Manual 1st stage Legend Rev. 12/2011...
- Page 29 Service Manual 1st stage Legend Exploded view Legend ACD Supreme DIN Service Manual 1st stage Legend Rev. 12/2011...
- Page 30 Service manual First stage Legend Legend LX ACD Supreme Service Manual 1st stage Legend Rev. 12/2011...
- Page 31 Service Manual 1st stage Legend Legend LX ACD Supreme DIN Service Manual 1st stage Legend Rev. 12/2011...
- Page 32 Service manual First stage Legend Legend LUX ACD – LUX ACD Suprême Service Manual 1st stage Legend Rev. 12/2011...
- Page 33 Service Manual 1st stage Legend Legend LUX ACD DIN – LUX ACD DIN Supreme Service Manual 1st stage Legend Rev. 12/2011...
- Page 34 Service manual First stage Legend Legend Supreme NITROX / O2 Service Manual 1st stage Legend Rev. 12/2011...
- Page 35 Service Manual 1st stage Legend 1ere Avenue – 14 rue – BP 148 06513 CARROS cedex – France 00.33.(0)4.92.08.28.88 FAX 00.33.(0)4.92.08.28.99 Service Manual 1st stage Legend Rev. 12/2011...
Need help?
Do you have a question about the FIRST STAGE and is the answer not in the manual?
Questions and answers