Table of Contents
Advertisement
Advertisement
Table of Contents

Related Manuals for Aqua Lung S.E.A. LV-2


Summary of Contents for Aqua Lung S.E.A. LV-2
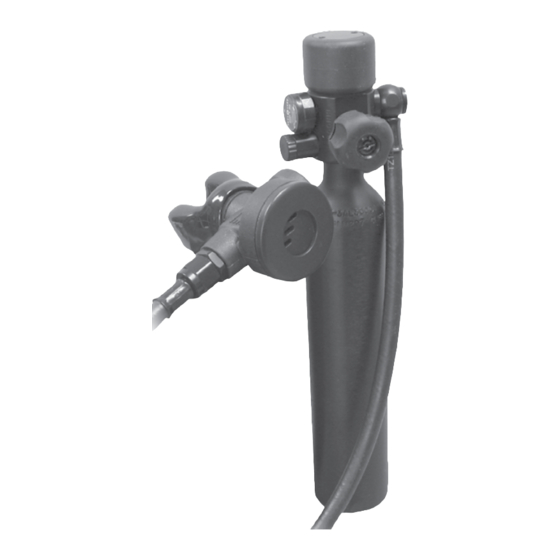
- Page 1 S.E.a. (Survival Egress air) lV-2 TEchnical Manual REV 01/10...
-
Page 2: Copyright Notice
This manual is copyrighted, all rights reserved. It may not, in whole or in part, be copied, photocopied, reproduced, translated or reduced to any electronic medium or machine- readable format without prior consent in writing from Aqua Lung America. It may not be distributed through the internet or computer bulletin board systems without prior consent in writing from Aqua Lung America. -
Page 3: Table Of Contents
conTEnTS Copyright Notice ...........................2 Change Record ..............................4 General Guidelines ..........................5 General Conventions ..........................5 Initial Inspection Procedure ........................6 External Inspection ..........................6 Immersion/Leak Test ........................6 Medium Pressure (Over-Bottom) Test .....................6 DISASSEMBLY PROCEDURE ......................7 First Stage Disassembly ........................7 Second Stage Disassembly ......................10 REASSEMBLY PROCEDURE ......................12 First Stage Reassembly .........................12 First Stage Testing .........................15 Filling Procedures ..........................15... -
Page 4: Change Record
SEa lV2 Technical Maintenance Manual changE REcoRD change no. Date Title or Description change made by 001-11 10/6/11 p. 25-28 Table 3: list of Tools and Service Kits updated... -
Page 5: General Guidelines
This manual provides factory prescribed procedures for the correct Unless otherwise instructed, the following terminology and techniques service and repair of the Aqua Lung SEA LV-2. It is not intended to be are assumed: used as an instructional manual for untrained personnel. -
Page 6: Initial Inspection Procedure
SEa lV2 Technical Maintenance Manual initial inspection procedure Medium (over-Bottom) pressure Test External Inspection 1. With the valve closed, purge the second stage to depres- surize the system. While securely holding the second 1. When possible, inspect the filter of the fill adapter for stage inlet fitting (51) with a thin 3/4"... -
Page 7: Disassembly Procedure
DiSaSSEMBly pRocEDuRE 4. Using a 3/16" hex key, unscrew the swivel port plug (1) from the first stage body. Separate the hose (4) and spacer (5) from the fitting. Remove the o-rings (2 & 3) from the noTE: Before performing any disassembly, refer swivel port plug. - Page 8 SEa lV2 Technical Maintenance Manual 8. Remove the backup ring (15), o-ring (16), spacer (17) and 12. If the SEA LV-2 is equipped with a dial-type pressure washer (18) from the stem. (note: It is possible that some indicator (27), remove the gauge using a 7/8" wrench. or all of these parts are in the bonnet.) Discard the backup ring, o-ring and washer.
- Page 9 c. Turn the indicator body upside down to remove the 17. Remove and discard the fill adapter port o-ring (22). washer (27d) and o-ring (27c). Discard the o-ring. If they do not exit the body freely, use the o-ring removal tool (p/n 944022) to extract these parts. 18.
-
Page 10: Second Stage Disassembly
SEa lV2 Technical Maintenance Manual 21. Remove the o-rings (31 & 33) from the piston and dis- Second Stage Disassembly card. Insert the pin of the seat extraction tool (p/n 109437) 1. Using small wire cutters, carefully snip the plastic mouth- piece clamp (55) and remove the mouthpiece (66) from the box bottom (63). - Page 11 5. Gently grasp the lever and remove the entire valve 8. Remove the exhaust valve (64) by grasping the flap of the assembly (44-51) from the box bottom (63). It may be valve and pulling straight outward. Discard exhaust valve. necessary to push in on the valve assembly through the inlet hole into the box bottom (63).
-
Page 12: Reassembly Procedure
SEa lV2 Technical Maintenance Manual REaSSEMBly pRocEDuRE 4. Place the spring (35) into the body. Press the piston into the cap (30) so that the piston head is seated flat against the cap. Lightly lubricate the male threads on the body. First Stage Reassembly CAUTION: Before proceeding, visually inspect the... - Page 13 8. Thread the fill adapter port into the lower of the two HP c. Using a 1/8" hex key socket, tighten the retaining ports. Attach a 9/16" socket to a torque wrench and tighten screw by turning it clockwise until it stops. Install a the fill adapter port (23) to 90±3 in/lbs.
- Page 14 SEa lV2 Technical Maintenance Manual 12. Install new, lubricated o-rings (2) into the grooves 15. Install lubricated back-up ring (15). located on either side of the center hole of the swivel port plug (1). Install a new, lubricated o-ring (3) on the threaded end of the swivel port plug.
-
Page 15: First Stage Testing
First Stage Testing 20. When the indicator ring bottoms out, turn it slightly counterclockwise so the corners of the square shaft of the stem point towards the centers of the square cut outs of the NOTE: indicator ring. Turn an additional 90° counterclockwise. Initial first stage testing is done WITHOUT anything attached to the end of the hose. - Page 16 SEa lV2 Technical Maintenance Manual 7. Support the cylinder with one hand, and slowly turn the 3. Mate the threaded nozzle of the fill adapter into the open supply cylinder valve handwheel counterclockwise to open fill port, and turn clockwise by hand until snug. DO NOT and begin filling.
- Page 17 5. While holding the first stage and fill adapter secure, turn Filling the SEA with compressor fill adapter the SEA valve handwheel counterclockwise until it is com- pletely open. When the handwheel is in the open position, NOTE: the Compressor Fill Adapter (P/n 1006-56) the red indicator ring is not visible.
-
Page 18: Second Stage Reassembly
4500 mushroom plug pops through the hole and keeps the valve psi. The MRS III is designed to fill up to two (2) Aqua Lung SEA securely in place. Examine the flap of the exhaust valve... - Page 19 8. Place the "feet" of the lever (45) into the groove on the NOTE: If the poppet bearing does not stay in place, face of the valve body (47) such that the lever is pointing put a small amount of Christo-Lube ®...
- Page 20 SEa lV2 Technical Maintenance Manual 12. Using a 1/4" nut driver, tighten the locknut until air starts 16. Place the diaphragm (43) over the lever, making sure the to leak. As soon as a leak is detected, loosen the locknut perimeter of the diaphragm is seated below the threads and until the leak stops, then continue to loosen for another 1/4 against the box bottom (63).
-
Page 21: Final Testing
Final TESTing Final aSSEMBly Subjective Test 1. Once completely dry, install cap protector (29). 1. Slowly open the SEA LV-2 First Stage valve to pressurize the system. 2. Press the purge cover a few times to ensure there is a strong purge. -
Page 22: Initial Pre-Issue Procedures For The Sea Mk/Lv2/Hesp
SEa lV2 Technical Maintenance Manual iniTial pRE-iSSuE pRocEDuRE FoR ThE Connect the Charging system to the SEA unit and re- charge to 3000 psi. SEa MK/lV2/hESp 10. Secure the Air supply and remove the SEA from the charging connector. Upon initial receipt of the SEA MK/LV2/HESP (here after referred to as SEA) from the OEM or storage and prior to 11. - Page 23 Table 1: Troubleshooting guide First Stage/Valve assembly SyMpToM poSSiBlE cauSE TREaTMEnT 1. The valve seat (20) is worn or damaged. 1. Replace valve seat System will not remain depressurized after valve is shut and second stage is purged. 2. The valve seating surface is damaged. 2.
- Page 24 6. Disassemble and replace o-ring NOTE: this is a partial list of possible problems and recommended treatments. For more information contact Aqua Lung technical Service Department for assistance with problems not described here. CAUTION: Recommended treatments which require disassembly of the regu- lator must be performed during a complete overhaul, according to the pre- scribed procedures for scheduled, annual service.
-
Page 25: Table 3: List Of Tools And Service Kits
Table 3: list of Tools and Service Kits paRT # DEScRipTion applicaTion Tool Pouch 108361 Tool holder SEA MK / LV2 Test Gauge 111610 Checking medium pressure 0-400 psi Soft Case, 108362 IP test gauge IP Test Gauge SCUBA Fill 108325 IP testing and filling Adapter... - Page 26 SEa lV2 Technical Maintenance Manual Table 3: list of Tools and Service Kits (continued) paRT # DEScRipTion applicaTion 820466 Christo-Lube MCG III Lubrication 2 oz. tube Hex Bit Tool (1/8”) 9-aM11708 Pin-type pressure indicator (27a) and LP swivel port plug (1) 9-46661 Hex Bit Tool (3/16”) Diagonal Pliers...
- Page 27 Table 3: list of Tools and Service Kits (continued) paRT # DEScRipTion applicaTion 9-44572 3/8” & 7/16” Wrench 9-44385 1/2” Wrench MRS III 9-44592 5/8” & 9/16” Wrench 12’ Adjustable 9-44605 MRS III Wrench Medium Blade 947448 Modified Handwheel retainer nut (7) Screwdriver 1/4”...
- Page 28 SEa lV2 Technical Maintenance Manual Table 3: list of Tools and Service Kits (continued) paRT # DEScRipTion applicaTion 820467 Christo-Lube MCG III Lubrication 16 oz. tube HABD/SEA 100398 SEA cylinder removal and installation for use w/ existing vice Vise Jaw Inserts HABD/SEA 100397 Table Mount...
-
Page 29: Table 4: Torque Specifications
Purge Flow IP 135±20 psi 5.0 SCFM flow rate (minimum) Table 6: Recommended cleaners and lubricants luBRicanT/clEanER applicaTion SouRcE Aqua Lung, PN 820466, or Lubrication Technologies christo-lube Mcg 111 All o-rings 310 Morton Street Jackson, OH 45640 (800) 477-8704 CAUTION: Silicone rubber requires no lubrication or preservative treatment. -
Page 30: Procedure A: Cleaning And Lubricating
SEa lV2 Technical Maintenance Manual procedure a: cleaning and lubricating cleaning Brass parts 1. Preclean in warm, soapy water* using a nylon bristle tooth brush. 2. Thoroughly clean parts in an ultrasonic cleaner filled with soapy water. If there are stubborn deposits, household white distilled vinegar (acetic acid) in an ultrasonic cleaner will work well. -
Page 31: First Stage With Cylinder Assembly, Exploded View
S.E.a. First Stage with cylinder assembly 38a, 38b, 38c 60 ± 5 in. lbs. (6.8 ± .5 nm) Wrench 90 ± 3 in. lbs. Tight (10.2 ± .3 nm) 45 ± 2 in. lbs. 90 ± 3 in. lbs. (5.0 ± .5 nm) (10.2 ±... -
Page 32: Second Stage, Exploded View
SEa lV2 Technical Maintenance Manual lV-2 Second Stage 45 ± 3 in. lbs. (5.0 ± .3 nm) 50 ± 3 in. lbs. (5.6 ± .3 nm) Key # part # Description Key # part # Description ..108402 LV2 Second Stage Assy., Complete 49 ..104127 Spring ..108344... -
Page 33: Maintenance Notes
Maintenance notes... - Page 34 S.E.a. lV2 2340 Cousteau Court • Vista, CA 92081 Phone: (760) 597-5000 • Fax: (760) 597-4900 www.aqualung.com/militaryandprofessional ©2010Aqua Lung International P/N 108448 REV 01/10...
Need help?
Do you have a question about the S.E.A. LV-2 and is the answer not in the manual?
Questions and answers