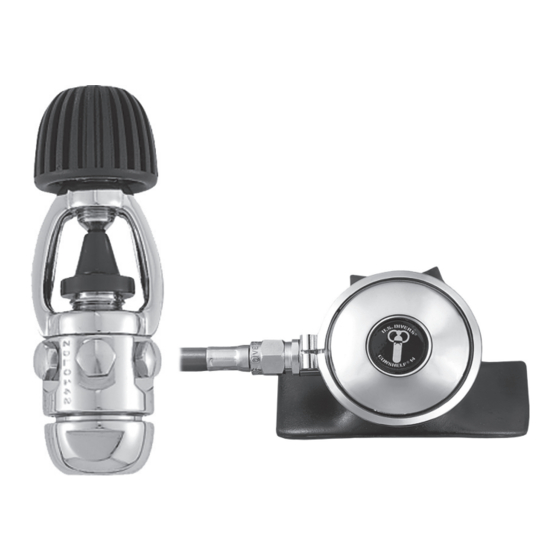
Aqua Lung CONSHELF XIV Technical Maintenance Manual
First and second stage
Hide thumbs
Also See for CONSHELF XIV:
- User manual (20 pages) ,
- Technical manual (36 pages) ,
- User manual (18 pages)

Subscribe to Our Youtube Channel
Related Manuals for Aqua Lung CONSHELF XIV


Summary of Contents for Aqua Lung CONSHELF XIV
- Page 1 Authorized Technician TECHNICAL MAINTENANCE MANUAL CONSHELF XIV First and Second Stage Copyright ©2004 Aqua Lung America, Inc. Rev. 7/2004...
-
Page 2: Table Of Contents
Conshelf XIV Service Manual Contents COPYRIGHT NOTICE...............................3 INTRODUCTION ...............................3 WARNINGS, CAUTIONS, & NOTES.........................3 SCHEDULED SERVICE............................3 GENERAL GUIDELINES ............................3 GENERAL CONVENTIONS............................4 DISASSEMBLY PROCEDURES..........................4 FIRST-STAGE DISASSEMBLY................................4 SECOND-STAGE DISASSEMBLY ................................ 5 AUTHORIZED REGULATOR REASSEMBLY ......................6 First Stage Resassembly ..................................6 SECOND STAGE REASSEMBLY ................................. 8 AUTHORIZED REGULATOR ADJUSTMENT AND TESTING .................9... -
Page 3: Copyright Notice
Checking for stable intermediate pressure that is within readable form without prior consent in writing from Aqua Lung the acceptable range. America. It may not be distributed through the internet or com-... -
Page 4: General Conventions
Conshelf XIV Service Manual FIRST-STAGE DISASSEMBLY Do not attempt to reuse mandatory replacement parts under any circumstances, regardless of the amount of Using a ⁹⁄₁₆-inch open-end wrench, turn the wrench coun- use the product has received since it was manufactured terclockwise and remove the intermediate-pressure hose or last serviced. -
Page 5: Second-Stage Disassembly
7B. Conshelf Supreme: Using the slotted tool (PN 081247) retaining ring (Item 5) from the groove on high-pressure place the tool in the two slots of the secondary diaphragm inlet boss of the first-stage body. Then, turning the yoke retaining ring (Item 34), turn the tool counterclockwise counterclockwise, unscrew and remove it from the first and remove the retainer. -
Page 6: Authorized Regulator Reassembly
Conshelf XIV Service Manual CAUTION: The disc and retainer assembly First Stage Resassembly (Item 13 and 14) is under spring tension. Screw an empty CO cartridge into a low-pressure port Care should be taken when removing these on the first-stage body (Item 16). Mount the first-stage parts. - Page 7 CAUTION: Use care when inserting the pin 7A. Standard Conshelf (Non-Supreme Model) into the first-stage body; do not allow the pin Insert the mainspring (Item 29) into the spring retainer, to contact the machined seating orifice of the ensuring that the mainspring is centered over the spring pad, and then place the washer (Item 30) on top of the first-stage body.
-
Page 8: Second Stage Reassembly
Conshelf XIV Service Manual Note: If you are working on a Conshelf 14 Supreme 25a. 2nd stage without port plug: While holding the locknut with the ¹⁄₄-inch box end 300 Bar DIN first stage, perform the resassembly wrench, reinsert the disc and retainer wrench over the instructions in Appendix A on page 13. -
Page 9: Authorized Regulator Adjustment And Testing
b. 2nd stage with port plug: Second-stage with port plug only: Insert the ¹⁄₄" nut driver portion of the Lever Height Ad- Install a new O-ring (item 17) onto the second-stage justment Tool (LHAT) through the open port and hold the port plug (18). -
Page 10: First-Stage Adjustment And Testing
Conshelf XIV Service Manual FIRST-STAGE ADJUSTMENT AND TESTING setting, refer to the Troubleshooting Table 1on page 14 for corrective guidelines and specific procedures. NOTE: In conjunction with this subsection, the techni- After stabilizing the intermediate-pressure repeat Steps cian should refer to Table 5 - Test Bench Specifica- 2 through 5 at 3000 psig, service pressure. -
Page 11: Second-Stage Adjustment And Testing
SECOND-STAGE ADJUSTMENT AND to drop below the intermediate pressure “lock up”, the Magnehelic gauge should indicate an opening effort of TESTING +0.6” of H O to 1.5” of H O. If the opening effort is not within this range, refer to the Troubleshooting Table 2 on page 15 for corrective guidelines and specific proce- SECOND-STAGE AIR FLOW TEST dures. -
Page 12: Subjective Breathing Testing
Conshelf XIV Service Manual Observe any bubbles streaming from the submerged Thread the intermediate test pressure gauge (P/N regulator over a one-minute period. This recommended 111610) onto the free end of the intermediate-pressure time is necessary due to the lower bubble formation that hose. -
Page 13: Second-Stage Adjustment And Testing
APPENDIX A SECOND-STAGE ADJUSTMENT AND TESTING DIN DISASSEMBLY AND Before final reassembly of the second-stage regulator and after preliminary adjustment of the lever, the following pro- REASSEMBLY PROCEDURES cedures are recommended. The first is a general purge flow test; the second provides an approximate performance evalu- ation of opening effort. - Page 14 Conshelf XIV Service Manual Table 1 - First-Stage Troubleshooting Guide SYMPTOM POSSIBLE CAUSE TREATMENT 1. HP Seat (5) is worn or damaged 1. Replace HP seat 2. Machine seat orifice damaged. 2. Replace body (16) High pressure creep 3. O-ring (4) damaged or worn.
- Page 15 Table 2 - Second-Stage Troubleshooting Guide SYMPTOM POSSIBLE CAUSE TREATMENT 1. Purge button (2) jammed open 1. Remove purge button 2. Turn locknut counterclockwise to 2. Lever (20) set to high adjust lever downward Free Flow 3. Lever (20) bent 3.
- Page 16 Conshelf XIV Service Manual Table 3 - Recommended Tool List PART NO. DESCRIPTION APPLICATION 111610 I.P. test gauge Intermediate pressure testing 944022 O-ring tool, set O-ring removal and installation 111100 Reversible snap ring pliers Circlip removal 101684 Lever Height Adjustment Tool (LHAT)
- Page 17 LUBRICANT / CLEANER APPLICATION SOURCE Christo-Lube ® MCG-111 All O-rings seals Aqua Lung, PN 820466, or Lubrication Technologies 310 Morton Street Jackson, OH 45640 (800) 477-8704 CAUTION: Silicone rubber requires no lubrication or preservative treatment. DO NOT apply grease or spray to silicone rubber parts. Doing so may cause a chemical break- down and premature deterioration of the material.
- Page 18 Conshelf XIV Service Manual Table 4 - Torque Specifications DESCRIPTION (KEY NUMBER) TORQUE Spring retainer (28) 25±2 foot-pounds Second-stage Inlet Fitting (11) 55±5 inch-pounds Hose fittings (26) 40 inch-pounds Port plugs (19, 23, 24, 22) 15 inch-pounds DIN adapter body (41) 20±2 foot-pounds...
-
Page 19: Procedure A - Cleaning And Lubrication
Procedure A Cleaning & Lubrication (All Aqua Lung Regulators) Brass and Stainless Steel Parts Preclean in warm, soapy water* using a nylon bristle tooth brush. Thoroughly clean parts in an ultrasonic cleaner filled with soapy water. If there are stubborn deposits, houshold white distilled vinegar (acetic acid) in an ultrasonic cleaner will work well. -
Page 20: Second-Stage Exploded Parts Drawing
Key # Part # Description 18 ---- 102004 Plug ------ 108530 Conshelf XIV 2nd Stage w/o hose ------ 108538 Conshelf XIV Supreme 2nd Stage w/o hose 19 ---- 845022 Washer ------ 900007 Overhaul Parts Kit ------ 107607 Washer (Cold Water) -
Page 21: First-Stage Exploded Parts Drawing
Silicone Fluid 18 ---- 101727 Pin Support 19 ---- 820011 O-ring, ³⁄₈” port 20 ---- 910912 Port Plug, LP, Conshelf XIV DIN Adapter, 300 Bar ------ 104304 Port Plug, LP, Conshelf 20, 21, 22 21 ---- 957004 O-ring, 7/16” HP Port... - Page 22 2340 Cousteau Court, Vista, California 92081 www.aqualung.com Rev. 7/2004...
Need help?
Do you have a question about the CONSHELF XIV and is the answer not in the manual?
Questions and answers