Table of Contents
Advertisement
Quick Links
Advertisement
Table of Contents

Related Manuals for Aqua Lung Airsource


Summary of Contents for Aqua Lung Airsource
- Page 1 Airsource Owner's Manual...
- Page 2 Aqua Lung International. It may not be distributed through the internet or computer bulletin board systems without prior consent in writing from Aqua Lung International.
-
Page 3: Table Of Contents
WhAT Is The AIrsOurce? ........ - Page 4 Aqua Lung retailer. ® WARNING: Improper use of this Airsource could result in serious injury or death. dO NOT attempt to use this regu- lator until you have completely read, understood, and fol- lowed all instructions and safety precautions in this owner’s manual.
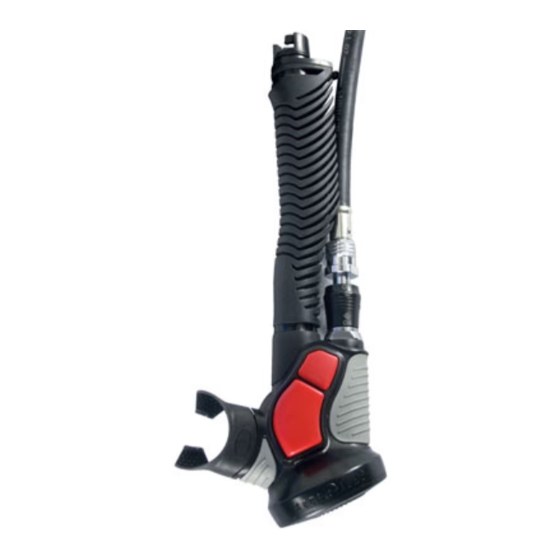
- Page 5 Airsource Owner's Manual relief valve upper hose guide corrugated hose Medium Pressure (MP) hose Trim grip™ Middle hose guides cut-off valve Power inflation button Oral inflation/deflation Mouthpiece button Purge valve...
-
Page 6: Introduction
Do not use an Airsource that shows visual signs of damage to the second stage or its associated hose. If the second stage regulator presents an uncomfortable resistance to breathing, or floods after clearing underwater, do not continue to dive until the problem is resolved. -
Page 7: Installation
If it is not possible to return to your authorized dealer, you may install the Airsource onto your BC and attach the MP inflator hose to your first stage by carefully following the steps in the following proce- dure. - Page 8 2. While holding the molded hose steady just below the Trim Grip™ (Figure 3a), grasp and turn the Trim grip™ 1/4 turn counterclockwise (figure 3b). Next, pull down on the molded hose to disengage the lower assembly (figure 3c). Figure 3a Figure 3b Figure 3c 3.
- Page 9 Airsource Owner's Manual 7. hold the lower molded hose and Trim grip steady, engage the Airsource lower assembly by lining up the upper and lower connection points (figure 6a) and carefully turning clockwise 1/4 turn (figure 6b) until it snaps into place (figure 6c).
-
Page 10: Inflation
INFLATION Operation of the Cut-off valve The cut-off valve is a feature unique to the Airsource, which allows the air supply to be turned off or on by pushing the device up or down. When the cut-off valve is pushed down (figure 8a), air is supplied to the hose. To stop the supply of air, simply push the cut-off valve in an upward direction (see figure 8b). - Page 11 Airsource Owner's Manual NOTe: Whenever inflating or deflating your BC, be sure to make small but frequent adjustments. Larger adjustments make the maintenance of neutral buoyancy difficult. CAUTION: If when pressing the red inflation button there is no airflow, confirm the Cut-off valve is in the air on (down) position.
-
Page 12: Deflation
Continuing the dive under these circumstances could re- sult in serious injury or death. WARNING: The Airsource does NOT come equipped with an Over pressure valve. It must be rigged to a BC that features an Over pressure valve. If you have questions regarding the fea- tures of your BC, ask your local authorized Aqua Lung dealer. -
Page 13: Oral Deflation
BC by utilizing the oral inflation valve. 1. Move into an upright position so that you can hold the Airsource above the 2. With the Airsource in the left hand, raise the assembly to a position nearest the surface of the water. -
Page 14: Inflation
Deflation The Trim Grip™ (Figure 13) is exclusively designed to allow deflation of the bc through the relief valve while breathing from the Airsource. The Trim grip incorporates dual activating cables for the relief valve. This, combined with the angled mouthpiece, allows you to pull downward on the Trim grip hose without removing the Airsource from your mouth. -
Page 15: Predive Inspection Procedures
1. visually inspect the Airsource and the attached hoses for signs of deteriora- tion or damage. If such signs are present, do not dive with the equipment. -
Page 16: Care And Maintenance
° fresh water is useful for rinsing all of your diving equipment. 2. If warm water soaking is unavailable, rinse the Airsource in tap water. If no air pressure is supplied to the Airsource, dO NOT depReSS The pURGe BUTTON! Pressing the purge button can cause water and mineral deposits to reenter the unit, which can accelerate deterioration over time. -
Page 17: Scheduled Maintenance & Service
Airsource Owner's Manual 4. Store the Airsource in a clean equipment box or sealed plastic bag in a cool, dry, dark place. NOTe: Do not use any cleaning solvents for soaking or rinsing. Do not attempt to lubricate or preserve any part of the regulator with aerosol cleaners or silicone spray. -
Page 18: Warranty Information
Limited Lifetime Warranty Aqua Lung warrants to the original purchaser that the product will remain free from defects in material and workmanship throughout its useful life; provided that it receives normal use, proper care, and prescribed dealer service subject to those restrictions stated below. -
Page 19: Annual Service & Inspection Record
Airsource Owner's Manual ANNUAL SeRvICe & INSpeCTION ReCORd serial no.: Purchase Date: store name: Tech date dealer Name City, State Initials... - Page 20 Airsource Owner's Manual 2340 cousteau court, vista, cA 92081 (760) 597.5000 www.aqualung.com ©2007 Aqua Lung America Literature Pn 18557 rev. 10/2007...
Need help?
Do you have a question about the Airsource and is the answer not in the manual?
Questions and answers
Is the airsource compatible with Zeagle Covert XT?