Advertisement
Quick Links
Montage- und Bedienungsanleitung
Assembly and operating instructions
Notice de montage et d'emploi
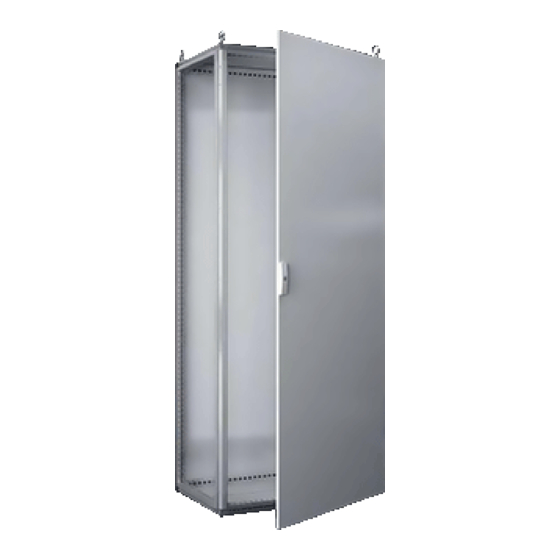
Anreihschränke TS 8-SV
Baying enclosures TS 8-SV
Armoires juxtaposables TS 8-SV
SV 9666.915
SV 9670.106
SV 9666.925
SV 9670.107
SV 9666.955
SV 9670.108
SV 9666.965
SV 9670.127
SV 9670.005
SV 9670.206
SV 9670.006
SV 9670.208
SV 9670.025
SV 9670.226
SV 9670.406
SV 9670.408
SV 9670.426
SV 9670.628
SV 9670.428
SV 9670.806
SV 9670.606
SV 9670.808
SV 9670.608
SV 9670.826
SV 9670.626
SV 9670.828
Advertisement

Related Manuals for Rittal TS 8-SV


Summary of Contents for Rittal TS 8-SV
- Page 1 Anreihschränke TS 8-SV Baying enclosures TS 8-SV Armoires juxtaposables TS 8-SV SV 9666.915 SV 9670.106 SV 9670.406 SV 9666.925 SV 9670.107 SV 9670.408 SV 9666.955 SV 9670.108 SV 9670.426 SV 9670.628 SV 9666.965 SV 9670.127 SV 9670.428 SV 9670.806 SV 9670.005 SV 9670.206...
- Page 2 10. Stockage 14. Kundendienstadressen 11. Caractéristiques techniques / Indices de protection / Dissipation thermique par surface 44 – 46 12. Pièces de rechange 13. Garantie 14. Coordonnées des services après-vente TS 8-SV Montageanleitung/TS 8-SV assembly instructions/Notice de montage TS 8-SV...
- Page 3 Inhaltsverzeichnis Contents Sommaire 4 – 12 / 41 – 47 13 – 14 19-21 22-23 35-38 180° 32-34 TS 8-SV Montageanleitung/TS 8-SV assembly instructions/Notice de montage TS 8-SV...
- Page 4 à l’armoire d’être homologuée pour aktuelle Übersicht finden Sie beim Produkt auf www.rittal.com. divers marchés et domaines d’application. Un www.rittal.de. état actualisé est disponible sur le site internet www.rittal.fr. TS 8-SV Montageanleitung/TS 8-SV assembly instructions/Notice de montage TS 8-SV...
- Page 5 During the development of the TS 8-SV baying enclosure, as part of the design study, a risk evaluation according to DIN EN ISO 12100 was conducted to evaluate and prevent safety-critical items. Because a few residual risks cannot be precluded, the following notes must be observed. The enclosure must be secured against tilting during transport, assembly and configuration.
-
Page 6: Меры Безопасности
La dezvoltarea sistemului de dulapuri alaturabile TS 8-SV au fost evaluate și prevenite punctele critice din punct de vedere al siguranței, încă din faza de proiectare, prin intermediul unei evaluări a riscurilor, conform DIN EN ISO 12100. Deoarece nu pot fi excluse unele riscuri reziduale, trebuie respectate următoarele instrucțiuni. - Page 7 Durante a fase de projeto do armário modular TS 8-SV, foi realizada uma avaliação dos riscos segundo a norma DIN EN ISO 12100 para analisar e evitar aspetos críticos para a segurança. Como não é possível descartar alguns riscos residuais, é necessário seguir as instruções abaixo. Fixar os armários durante o transporte, a montagem e a configuração para que não possam cair.
- Page 8 3.1 Utilisation correcte de l’armoire Ces produits Rittal sont des armoires vides prévues pour recevoir des disjoncteurs basse tension de max. 1000 V AC ou 1500 V DC et des composants de contrôle et de régulation. Pour des applications spécifiques ou pour une implantation en extérieur, en cas de doute, faites vérifier leur adéquation par Rittal.
- Page 9 1000 V AC ou 1500 V DC e para tecnologia de medição, controle e comando instalada em espaços internos. Para requi- sitos especiais ou montagem em áreas externas, em caso de dúvida a Rittal deve confirmar a respectiva adequação. É imprescindível manter os limites da capacidade de carga especificados no manual de instruções.
- Page 10 7 1 armoire juxtaposable SV Please check the scope of delivery for com- 7 2 plaques (avant / arrière) pleteness. 7 1 sachet d'accessoires Vérifier l'intégralité de la livraison dès la récep- tion. TS 8-SV Montageanleitung/TS 8-SV assembly instructions/Notice de montage TS 8-SV...
- Page 11 M6x12 Stopfen Dach und Boden A6,4 y6,1 A8,4 M6 mit Unterlegscheibe Hygieneschlüssel Schrankschlüssel A6,4 Erdungsaufkleber Stopfen Rückwand M6 mit Unterlegscheibe M6x12 Stopfen Dach und Boden Schrankschlüssel y6,1 Stopfen Rückwand Hygieneschlüssel TS 8-SV Montageanleitung/TS 8-SV assembly instructions/Notice de montage TS 8-SV...
- Page 12 7 Évitez les ouvertures non nécessaires sur gebrachte und abgedichtete Öffnung kann l’armoire électrique. Toute ouverture qui zu einer Reduzierung der Schutzart führen. n’est pas soigneusement étanchéifée peut réduire l’indice de protection. TS 8-SV Montageanleitung/TS 8-SV assembly instructions/Notice de montage TS 8-SV...
- Page 13 4. Assembly and siting 4. Montage et implantation 4.2 Tür demontieren 4.2 Removing the door 4.2 Démontage de la porte M6 x 12 = 6 Nm M6 x 12 = 6 Nm TS 8-SV Montageanleitung/TS 8-SV assembly instructions/Notice de montage TS 8-SV...
- Page 14 4. Montage und Aufstellung 4. Assembly and siting 4. Montage et implantation 4.3 Türanschlagwechsel 4.3 Switching the door hinges 4.3 Inversion du sens d’ouverture M5 x 8 = 2 Nm TS 8-SV Montageanleitung/TS 8-SV assembly instructions/Notice de montage TS 8-SV...
- Page 15 4. Montage und Aufstellung 4. Assembly and siting 4. Montage et implantation 4.4 Türrohrrahmen demontieren 4.4 Removing the tubular door frame 4.4 Démontage du cadre de porte tubulaire = 5 Nm TS 8-SV Montageanleitung/TS 8-SV assembly instructions/Notice de montage TS 8-SV...
- Page 16 Partial door height H mm Position cross member H1 mm Hauteur de porte partielle H mm Position traverse de séparation H1 mm 1000 1000 1600 1600 1800 1800 2000 2000 TS 8-SV Montageanleitung/TS 8-SV assembly instructions/Notice de montage TS 8-SV...
- Page 17 = 5 Nm = 5 Nm Für Schrankbreite mm Höhe mm Best.-Nr. Model No. For enclosure width mm Height mm Pour largeur d’armoire mm Hauteur mm Référence 9672.354 9672.356 9672.358 TS 8-SV Montageanleitung/TS 8-SV assembly instructions/Notice de montage TS 8-SV...
- Page 18 = 5 Nm 9672.314 9672.324 9672.316 2x (M5 x 10) 9672.326 9672.318 9672.328 2x (5.5 x 13) = 5 Nm = 5 Nm 4x (M6 x 15) = 5 Nm TS 8-SV Montageanleitung/TS 8-SV assembly instructions/Notice de montage TS 8-SV...
- Page 19 2x (5,5 x 13) = 5 Nm 2x (5,5 x 13) Hinweis/Note/Remarque Positionsmaße, siehe Seite 20/21 Position details, see page 20/21 Cotes de position, voir page 20/21 = 5 Nm TS 8-SV Montageanleitung/TS 8-SV assembly instructions/Notice de montage TS 8-SV...
- Page 20 9672.160 9672.180 1000 – – – 1600 – 9672.156 9672.176 9672.196 1075 1075 1550 1800 – 9672.158 9672.178 9672.198 1200 1225 1750 2000 – 9672.150 9672.170 9672.190 1350 1350 1950 TS 8-SV Montageanleitung/TS 8-SV assembly instructions/Notice de montage TS 8-SV...
- Page 21 – 9672.140 9672.160 9672.180 – – 1600 – 9672.156 9672.176 9672.196 1075 1050 1525 1800 – 9672.158 9672.178 9672.198 1200 1200 1725 2000 – 9672.150 9672.170 9672.190 1350 1325 1925 TS 8-SV Montageanleitung/TS 8-SV assembly instructions/Notice de montage TS 8-SV...
- Page 22 4. Montage et implantation 4.11 Türanschlag wechseln 4.11 Switching the door hinges 4.11 Inversion du sens d’ouverture 2x (5,5 x 13) = 5 Nm 2x (5,5 x 13) = 5 Nm TS 8-SV Montageanleitung/TS 8-SV assembly instructions/Notice de montage TS 8-SV...
- Page 23 4.12 Türanschlag wechseln – Schlossschild 4.12 Switching the door hinges – Lock cover 4.12 Inversion du sens d’ouverture – Dispositif de recouvrement de serrure 2x (M5 x 8) = 2 Nm TS 8-SV Montageanleitung/TS 8-SV assembly instructions/Notice de montage TS 8-SV...
- Page 24 Model No. Référence 7 mm 8611.100 8 mm 8611.110 6,5 mm 8611.220 8611.120 7 mm 8 mm 8611.130 7 mm 8611.140 Daimler 8611.150 3 mm 8611.160 Fiat 8611.170 CNOMO 8611.220 TS 8-SV Montageanleitung/TS 8-SV assembly instructions/Notice de montage TS 8-SV...
- Page 25 150 – 800 9671.208 TX25 4. Montage und Aufstellung 4. Assembly and siting 4. Montage et implantation 1x (M8) 4.15 Erdung 4.15 Earthing 4.15 Mise à la masse = 10 Nm TS 8-SV Montageanleitung/TS 8-SV assembly instructions/Notice de montage TS 8-SV...
- Page 26 4. Assembly and siting 4. Montage et implantation 4.16 Rückwand demontieren 4.16 Removing the rear panel 4.16 Démontage du panneau arrière M6 x 12 = 5 Nm 200/400/600/800/850 (8 x) 1000/1100/1200 (10 x) TS 8-SV Montageanleitung/TS 8-SV assembly instructions/Notice de montage TS 8-SV...
- Page 27 5,5 x 13 = 5 Nm, Alu-Zink: M = 3 Nm = 10 – 35 Nm Zusätzlich bei Breite 850/1000/1100/1200 / Additionally for width 850/1000/1100/1200 / En complément pour une largeur 850/1000/1100/1200 TS 8-SV Montageanleitung/TS 8-SV assembly instructions/Notice de montage TS 8-SV...
- Page 28 The illustrations here show three examples for the fitting of cable entry plates in place of the standard three-part gland plates of the TS 8-SV enclosure. Positioning can thus be matched to the mount- 5,5 x 13 ing plate. The symmetrical enclosure design permits the cable entry plates to be installed on either the right or left, in the same way as the gland plates –...
- Page 29 RAL 9005 Matt vernickelt 1 x 8701.180 2 x 8701.180 Matt nickel-plated Nickelé mat = 5 Nm Bei dynamischer Belastung In case of dynamic load En cas de charge dynamique TS 8-SV Montageanleitung/TS 8-SV assembly instructions/Notice de montage TS 8-SV...
- Page 30 8800.380 8612.240 2000 8800.300 8612.250 2200 8800.320 8612.260 8612.280 4193.000 Best.-Nr./Model No./ 4191.000 Référence TS/PS 4192.000 8800.370 1000 4336.000 8800.806 1200 4196.000 8800.808 4394.000 8800.330 4395.000 4183.000 4396.000 4181.000 4398.000 TS 8-SV Montageanleitung/TS 8-SV assembly instructions/Notice de montage TS 8-SV...
- Page 31 4.21 Montage des panneaux latéraux Alternative M5 x 8 M6 x 9 = 6 Nm = 5 Nm M6 x 12 = 5 Nm M6 x 9 = 5 Nm TS 8-SV Montageanleitung/TS 8-SV assembly instructions/Notice de montage TS 8-SV...
- Page 32 4. Montage und Aufstellung 4. Assembly and siting 4. Montage et implantation 4.22 Anreihung 4.22 Baying 4.22 Juxtaposition 8 x 6 x 6000 8 x 6 blau blue unten bottom bleu en-bas TS 8-SV Montageanleitung/TS 8-SV assembly instructions/Notice de montage TS 8-SV...
- Page 33 Anreihverbinder außen/Baying connector, external/Attache de juxtaposition extérieure 8800.490 Anreihbefestigung vertikal für TS/TS mit Trennwand/Baying attachment, vertical, for TS/TS with divider panel/ 8800.470 Fixation de juxtaposition verticale pour TS/TS avec cloison TS 8-SV Montageanleitung/TS 8-SV assembly instructions/Notice de montage TS 8-SV...
- Page 34 Anreihbefestigung vertikal für TS/TS/Baying attachment, vertical, for TS/TS/Fixation de juxtaposition verticale pour TS/TS 8800.670 Anreihverbinder für Montage Rücken an Rücken/Baying clamp, for back-to-back mounting/ 8800.170 Attache de juxtaposition pour armoires montées dos à dos TS 8-SV Montageanleitung/TS 8-SV assembly instructions/Notice de montage TS 8-SV...
- Page 35 – – – – – A8,4 A6,4 – – – – – A8,4 A8,4 A6,4 A 8,4 A8,4 Schrankschlüssel – – Erdungsaufkleber Schrankschlüssel Stopfen Rückwand Erdungsaufkleber TS 8-SV Montageanleitung/TS 8-SV assembly instructions/Notice de montage TS 8-SV Erdungsaufkleber M6x12 Stopfen Rückwand...
- Page 36 4. Montage et implantation 4.24 Schutzleiteranschlussstellen TS 8-SV Schaltschrank 4.24 Earthing connection points TS 8-SV enclosures 4.24 Points de raccordement de mise à la terre pour armoires électriques TS 8-SV TS 8-SV – PE/PEN Kombination TS 8-SV – PE/PEN combination TS 8-SV - Association Terre/Terre-Neutre ...
- Page 37 4. Montage et implantation 4.24 Schutzleiteranschlussstellen TS 8-SV Schaltschrank 4.24 Earthing connection points TS 8-SV enclosures 4.24 Points de raccordement de mise à la terre pour armoires électriques TS 8-SV TS 8-SV – PE/PEN Kombination TS 8-SV – PE/PEN combination TS 8-SV –...
- Page 38 4. Montage et implantation 4.24 Schutzleiteranschlussstellen TS 8-SV Schaltschrank 4.24 Earthing connection points TS 8-SV enclosures 4.24 Points de raccordement de mise à la terre pour armoires électriques TS 8-SV TS 8-SV – PE/PEN Kombination TS 8-SV – PE/PEN combination...
- Page 39 4.26 Securing of mounting plate in case of dynamic load by transport and on installation site 4.26 Fixation de la plaque de montage en cas de charge dynamique durant le transport et sur le site d’installation Transportsicherung Shipping brace Sécurité pour le transport TS 8-SV Montageanleitung/TS 8-SV assembly instructions/Notice de montage TS 8-SV...
- Page 40 Sockel-Eckstücken lastet und socle et jamais sur les plaques de socle. niemals auf den Sockelblenden. niemals auf den Sockelblenden. TS 8-SV Montageanleitung/TS 8-SV assembly instructions/Notice de montage TS 8-SV...
- Page 41 7 Überprüfen Sie nach Arbeiten am Schalt- the door is closed properly. dans l’armoire électrique. schrank, dass die Tür ordnungsgemäß 7 Après les travaux sur l’armoire électrique, verschlossen ist. vérifiez si la porte est correctement fermée. TS 8-SV Montageanleitung/TS 8-SV assembly instructions/Notice de montage TS 8-SV...
- Page 42 Fläche mit Rittal Ausbesserungs- nettoyer avec du white-spirit ; appliquer lack überlackieren (alternativ: 2K-PUR ensuite la peinture de retouche Rittal sur Acryllack). l’ensemble de la surface (ou de la peinture acrylique 2K-PUR). TS 8-SV Montageanleitung/TS 8-SV assembly instructions/Notice de montage TS 8-SV...
- Page 43 7 l’humidité relative de l’air ne dépasse pas übersteigt (bei niedrigeren Temperaturen at lower temperatures). 50% à +40°C (des taux d’humidité supéri- dürfen höhere Luftfeuchtewerte zugelassen eurs sont admissibles pour des températu- werden). res plus basses). TS 8-SV Montageanleitung/TS 8-SV assembly instructions/Notice de montage TS 8-SV...
- Page 44 IK 9 nach DIN EN 60529 und IK 10 nach DIN EN 61439 IK 9 selon la norme DIN EN 60529 et IK 10 DIN EN 61439 selon la norme DIN EN 61439 TS 8-SV Montageanleitung/TS 8-SV assembly instructions/Notice de montage TS 8-SV...
- Page 45 2000 9673.681 9672.176 1600 9673.682 9672.178 1800 9673.683 9672.180 1000 9673.684 9672.181 9673.686 9672.182 9673.688 9672.183 9673.691 9672.184 9673.692 9672.186 9673.693 9672.187 9673.694 9672.188 9672.190 2000 9672.196 1600 9672.198 1800 TS 8-SV Montageanleitung/TS 8-SV assembly instructions/Notice de montage TS 8-SV...
- Page 46 9670.206 2000 9670.208 2000 9670.226 2200 9670.406 2000 9670.408 2000 9670.426 2000 9670.428 2000 9670.606 2000 9670.608 2000 9670.626 2200 9670.628 2200 9670.806 2200 9670.808 2200 9670.826 2200 9670.828 2200 TS 8-SV Montageanleitung/TS 8-SV assembly instructions/Notice de montage TS 8-SV...
- Page 47 No. 1658, Minyi Road Urbana, OH 43078 Songjiang District Phone +1 800 477 4000, option 3 Shanghai, 201612 E-mail: service@rittal.us Phone +86 21 5115 7799-213 www.rittal-corp.com Fax +86 21 5115 7788 E-mail: service@rittal.cn TS 8-SV Montageanleitung/TS 8-SV assembly instructions/Notice de montage TS 8-SV...
- Page 48 ◾ Enclosures ◾ Power Distribution ◾ Climate Control ◾ IT Infrastructure ◾ Software & Services You can find the contact details of all Rittal companies throughout the world here. www.rittal.com/contact...
Need help?
Do you have a question about the TS 8-SV and is the answer not in the manual?
Questions and answers