
Related Manuals for Pulsar W170


Summary of Contents for Pulsar W170
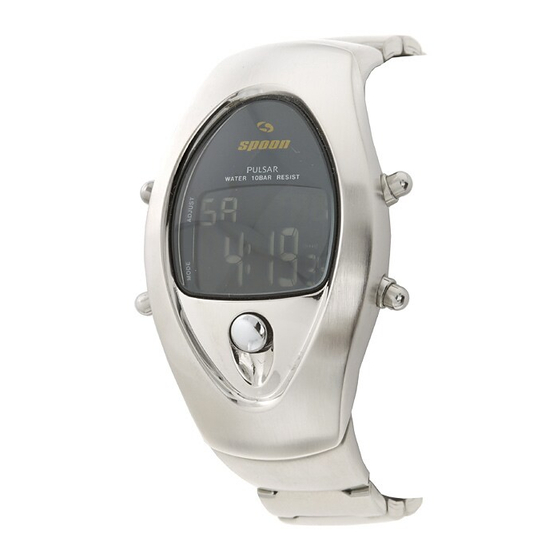
- Page 1 CAL. W170 DIGITAL QUARTZ Time/calendar 100-hour stopwatch Countdown timer Regular alarm Dual time Illuminating light (electroluminescent panel)
-
Page 2: Mode Change
MODE CHANGE With each press, the mode changes in the following order: TIME/ DUAL STOPWATCH TIMER ALARM CALENDAR TIME * The design of the liquid crystal panel differs depending on the model. -
Page 3: Time/Calendar Setting
TIME/CALENDAR MODE TIME/CALENDAR SETTING Date Press to show TIME/ CALENDAR mode. Press for 2 seconds. Select the digits to be adjusted. Set the flashing digits. Return to TIME/CALENDAR mode. - Page 4 Selection of the digits Seconds Minutes Hour Year Month Date 12-/24-hour indication SHOWING THE CALENDAR DISPLAY Year Press and hold in TIME/ CALENDAR mode. * While the button is kept pressed, the year, month and date are displayed. Date Month...
-
Page 5: Stopwatch Mode
STOPWATCH MODE The stopwatch measures up to 100 hours in 1/100 second increments for the first hour and in 1 second increments thereafter. Press to show STOPWATCH mode. Start / Stop / Restart Measure split time / Reset... - Page 6 Split time measurement • • • • START SPLIT 1 SPLIT 2 STOP RESET Measurement of two competitors START FINISH TIME OF FINISH TIME OF RESET 1ST COMPETITOR 2ND COMPETITOR (displayed in the upper row) (displayed in the lower row)
-
Page 7: Timer Mode
TIMER MODE The timer can be set up to 99 hours and 59 minutes in minute increments. After the set time is up, the timer counts up the time up to 59 minutes and 59 seconds. The remaining time is displayed in seconds. Press to show TIMER mode. -
Page 8: Timer Operation
TIMER OPERATION Start / Stop / Restart Set time Current time Reset * When the set time is up, a warning sound beeps for 20 seconds. To stop it manually, press any of the buttons. -
Page 9: Alarm Mode
ALARM MODE The alarm can be set to ring on a 24-hour basis. Press to show ALARM mode. ALARM TIME SETTING Press for 2 seconds. Set alarm time Select the digits to be adjusted (hour/minutes). Set the flashing digits. Return to ALARM mode. * The alarm mark is automatically displayed and the alarm is Current time... - Page 10 ENGAGEMENT/DISENGAGEMENT OF ALARM AND HOURLY TIME SIGNAL With each press, the engagement/ disengagement of the alarm and hourly time signal are made as follows: Alarm engaged Hourly time signal engaged Both engaged Neither engaged Hourly time Alarm mark signal mark * At the designated time, the alarm rings for 20 seconds.
-
Page 11: Dual Time Mode
DUAL TIME MODE The time of a different time zone can be displayed. Press to show DUAL TIME mode. DUAL TIME SETTING Dual time Press for 2 seconds. Select the digits to be adjusted (hour/minutes). Set the flashing digits. Return to DUAL TIME mode. Current time of your area... -
Page 12: Illuminating Light (Electroluminescent Panel)
ILLUMINATING LIGHT (Electroluminescent panel) Turn on the illuminating light. * The display panel is evenly illuminated for 4 seconds. ViViDiGi is a new type of liquid crystal panel that makes possible various colors and high contrast. Excellent light reflection and transmission make the display bright and clear. Various color options are available. -
Page 13: Notes On Using The Watch
NOTES ON USING THE WATCH TIME/CALENDAR MODE [TIME/CALENDAR SETTING] The calendar automatically adjusts for odd and even months including February of leap years from 1998 to 2048. Once the year, month and date have been set, the day of the week is automatically set. Setting the seconds: •... - Page 14 STOPWATCH MODE Restart and stop of the stopwatch can be repeated by pressing button C. Split time measurement can be repeated by pressing button D. When measuring a long period of time, press button A to return the STOPWATCH mode to the TIME/CALENDAR mode after the stopwatch starts.
- Page 15 ALARM MODE [ALARM TIME SETTING] The flashing digits move quickly if button D is kept pressed. If the watch is left untouched with the digits flashing, it will automatically return to the ALARM mode in 1 to 2 minutes. When the time function is displayed in the 24-hour indication, the alarm is also displayed in the 24-hour indication.
- Page 16 ILLUMINATING LIGHT (Electroluminescent panel) The electroluminescent panel loses its luminance as the battery voltage gets lowered. Also, its luminance level decreases gradually with use. After 120 hours of use, the level decreases by about half. When the illuminating light becomes dim, replace the battery with a new one. If the light remains dim after the battery is replaced, have the electroluminescent panel replaced with a new one by the retailer from whom the watch was purchased.
-
Page 17: Battery Change
When the battery expires, be sure to replace it as soon as possible to prevent any malfunction. We recommend that you contact an AUTHORIZED PULSAR DEALER for battery replacement. Necessary procedure after battery change After the battery is replaced with a new one or if an abnormal display (broken digits, etc.) - Page 18 WARNING Do not remove the battery from the watch. If it is necessary to take out the battery, keep it out of the reach of children. If a child swallows it, consult a doctor immediately. Never short-circuit, tamper with or heat the battery, and never expose it to fire.
-
Page 19: To Preserve The Quality Of Your Watch
WATER RESISTANCE Non-water resistant • If the watch becomes wet, have it checked by an AUTHORIZED PULSAR DEALER or SERVICE CENTER. Water resistant 5/10/15/20 bar • Do not operate the buttons when the watch is wet or in water. If used in sea water, rinse the watch in fresh water and dry it completely. - Page 20 Care should also be taken on diving into water. ** We recommend that you wear a PULSAR Diver’s Watch for scuba diving. TEMPERATURES MAGNETISM...
-
Page 21: Periodic Check
2 to 3 years. Have Years watch or hit it against hard your watch checked by an surfaces, as this may AUTHORIZED PULSAR cause damage. DEALER or SERVICE CENTER to ensure that the case, buttons, gasket and crystal seal remain intact. -
Page 22: Static Electricity
Keep the watch away read. Please contact your AUTHORIZED from close contact with objects PULSAR DEALER or SERVICE CENTER such as TV screens which emit if you wish to have a new panel fitted strong static electricity.
Need help?
Do you have a question about the W170 and is the answer not in the manual?
Questions and answers