Funn Ripper Installation And Use Manual
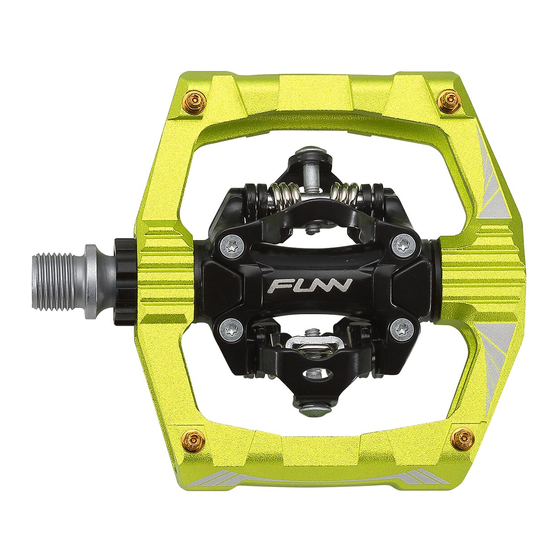
Pedals
Hide thumbs
Also See for Ripper:
- Installation and use manual (2 pages) ,
- Installation & use manual (26 pages)
Advertisement
Quick Links
ATTACH PEDALS TO CRANKS
Pedals have 9/16" x 20T threaded axles. The right pedal is installed in a clockwise
direction. The left pedal is installed in a counter-clockwise direction.
1.Lightly lubricate axle threads with grease or oil.
2.Thread axle into the crank hole with your fingers. From the other side of the crank,
insert 8 mm Allen key into the recess of the axle. Screw pedal axles onto crank
arms.
3.Tighten to 34 Nm (300 lb-in) torque and avoid excessive force.
GRIP PINS
You can remove the pins on the pedals to fine tune the grip. Damaged or worn grip
pins can be replaced using 4 mm socket wrench.
8mm Hex Key
INSTALLATION AND USE
Advertisement

Subscribe to Our Youtube Channel
Related Manuals for Funn Ripper


Summary of Contents for Funn Ripper
- Page 1 INSTALLATION AND USE 8mm Hex Key ATTACH PEDALS TO CRANKS Pedals have 9/16" x 20T threaded axles. The right pedal is installed in a clockwise direction. The left pedal is installed in a counter-clockwise direction. 1.Lightly lubricate axle threads with grease or oil. 2.Thread axle into the crank hole with your fingers.
- Page 2 SHOE/PEDAL USE The tension adjuster is located on the rear binding. To adjust binding tension, use a 3 mm Allen key to turn tension adjuster. 1.Increase tension in a clockwise direction (+) (for a more secure shoe/pedal bind, but more difficult engagement and disengagement).
- Page 3 ATTACH CLEATS TO CYCLING SHOES Left and right cleats are identical. 1.Lightly lubricate cleat bolt threads with oil. 2.Using the 4 mm Allen key to attach cleat bolts and cleat washers loosely to shoe soles. The lateral center line of the cleat should be aligned with the center of the ball of the shoe sole.
-
Page 4: Important Notes
IMPORTANT NOTES This product is warranted under normal usage against defects in workmanship and materials to the original purchaser for one year from purchase date. 1.User assumes all risk of personal injury, damage to or failure of the product when it is used in stunt or ramp jumping, acrobatics or similar activities. - Page 5 RIPPER PEDAL Bearing / Axle Replacement ( Disassembly )
- Page 6 1. Use good quality tools to avoid stripping screw sockets. 2. When servicing your pedals, work on one side at a time to prevent parts from mixing up. 3. Reverse threads are indicated by drawings from both sides of the pedal. Please pay special attention when working on these pats.
- Page 7 Unscrew side cap with 6mm hex key. 6mm Hex Key...
- Page 8 8mm Hex Key Axle Spacer Left Right Use 8mm hex key to hold the axle in place; then unscrew the hex nut by using the 8mm socket wrench. Please note the thread direction on each side of the pedal.
- Page 9 Bushing Screw Unscrew the bushing cap with the special tool included in the axle kit or Shimano TL-PD40 tool.
- Page 10 3mm Hex Key In this step we will remove the bearing from inside the pedal. First, insert the M4 screw into the pedal with the 3mm hex key, and assemble the washer and nut onto the M4 screw.
- Page 11 Bearing 3mm Hex Key Use the special tool to hold the nut in place, and tighten the M4 screw with 3mm hex key. Keep tightening the M4 screw until bearing gets pushed out.
- Page 12 Bearing 3mm Hex Key Remove the old bearing.
- Page 13 Bushing 8mm Hex Key Insert 8mm hex key to gently push out the plastic bushing.
- Page 14 Gently detach pedal body from pedal cage. Do not use excessive force and pay special attention not to damage or loose the side spring.
- Page 15 Washer B Washer A Remove old washers from pedal cage as indicated by drawing.
- Page 16 RIPPER PEDAL Bearing / Axle Replacement ( Assembly )
- Page 17 Left Right Washer A Install washer A according to each side as shown in the drawing. Make sure the slots on the washer align with slots on the pedal cage.
- Page 18 Left Right Washer B Install washer B according to each side as shown in the drawing. Make sure the slots on the washer align with slots on the pedal cage.
- Page 19 Left Right Install the pedal body by first inserting the pin on the side spring into the slot in washer A. Once the pin is in place, push the pedal body into the cage.
- Page 20 Bushing 1. Once the pedal body is inside the cage, you will notice a slot that exists in both the cage and the body. You will also see a protruding section on the side of the plastic bushing. 2. Align the slot by holding the body and cage in place, and insert the bushing, so that the protruding section slides into the slot of both the cage and the body.
- Page 21 Rock the main body and check if it rotates smoothly.
- Page 22 5-6Nm Bushing Screw Install the bushing screw with special tool.
- Page 23 5-6Nm New Bearing Push the new bearing into the pedal by tightening the side cap. Make sure the side 6mm Hex Key cap absolutely bottoms out so that the bearing gets installed correctly.
- Page 24 Unscrew side cap and check if the bearing has bottomed out in the bearing seat. If not repeat the last step until it has. New Bearing 6mm Hex Key...
- Page 25 New Dust Seal Axle Install new dust seals onto the pedal axles and lightly grease the axle.
- Page 26 8mm Hex Key Axle Spacer 8-9Nm Left Right 8-9Nm Insert the pedal axle and use 8mm hex key to hold the axle in place; then tighten the hex nut by using the 8mm socket wrench. Please note the thread direction on each side of the pedal.
- Page 27 5-6Nm Install side cap with 6mm hex key. 6mm Hex Key...
Need help?
Do you have a question about the Ripper and is the answer not in the manual?
Questions and answers